/


Latest Post

Save time on finishing the inside of your cards with this trick!


I’m excited to share these stunning snowflake cards with you today. We made them at my card clubs in December.
Living in North Dakota, we usually see a lot of snow in the winter so these cards are great for many occasions.

I used the Snowflake Kisses bundle seen here. It’s filled with wonderful greeting images and lots of snowflake dies.

My colors include Pretty Peacock with Cloud Cover and Gorgeous Grape with Fresh Freesia. I think blues & purples are perfect for snowflakes. We used a blending brush to add more color to the large snowflake die-cut.

After creating the cards above I thought I’d try combining the colors on the large die-cut.

Isn’t that pretty? I just love combining Gorgeous Grape with Pretty Peacock on the Fresh Freesia die-cut. Blending Brushes make this a breeze!

Look how we finished the inside.
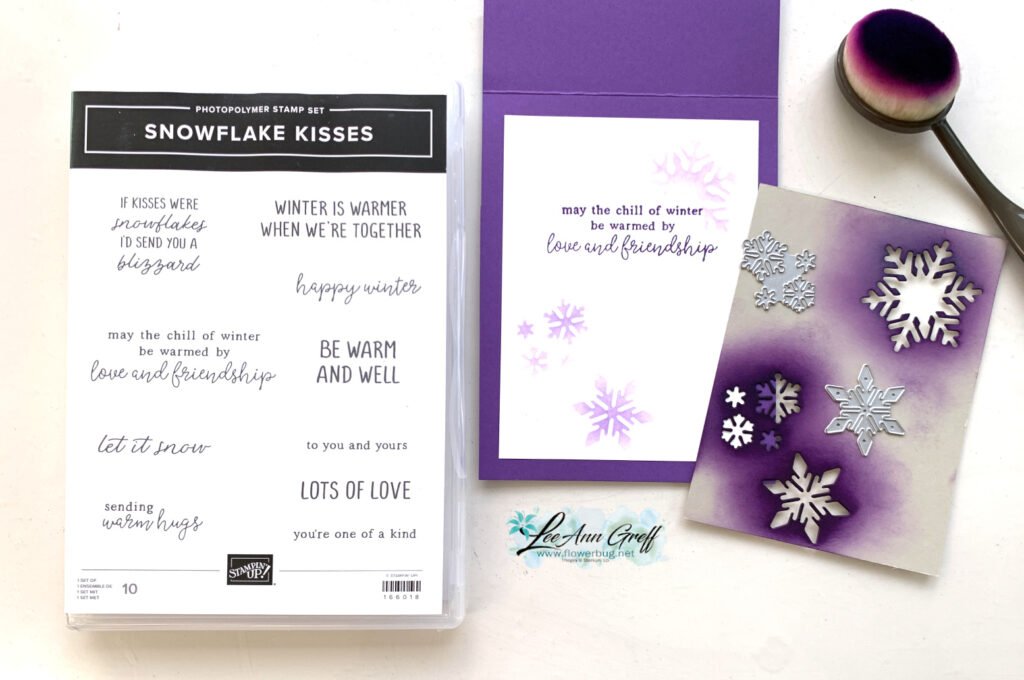
I wanted to add snowflakes to the inside of the card but didn’t want to die-cut tons of them for my club gals. So I came up with creating a snowflake stencil.
I cut multiple snowflakes from a piece of card stock and we used Blending Brushes to add pretty snowflakes to our White layer. I truly love the effect it gives.

If you’d like the free project sheet for this card click here. You can download or print it.

See how this card is made in the video below. I also shared a second Snowflake Kisses fun fold card.

*You’ll receive a PDF with multiple projects featuring this product
after the 20th of the month.
~~~

The Last Chance list has been updated!
Click here to shop.

Get a free PDF tutorial with any online order from me in December!
All Posts

  • Sand & Sea Spinner Fun-Fold card


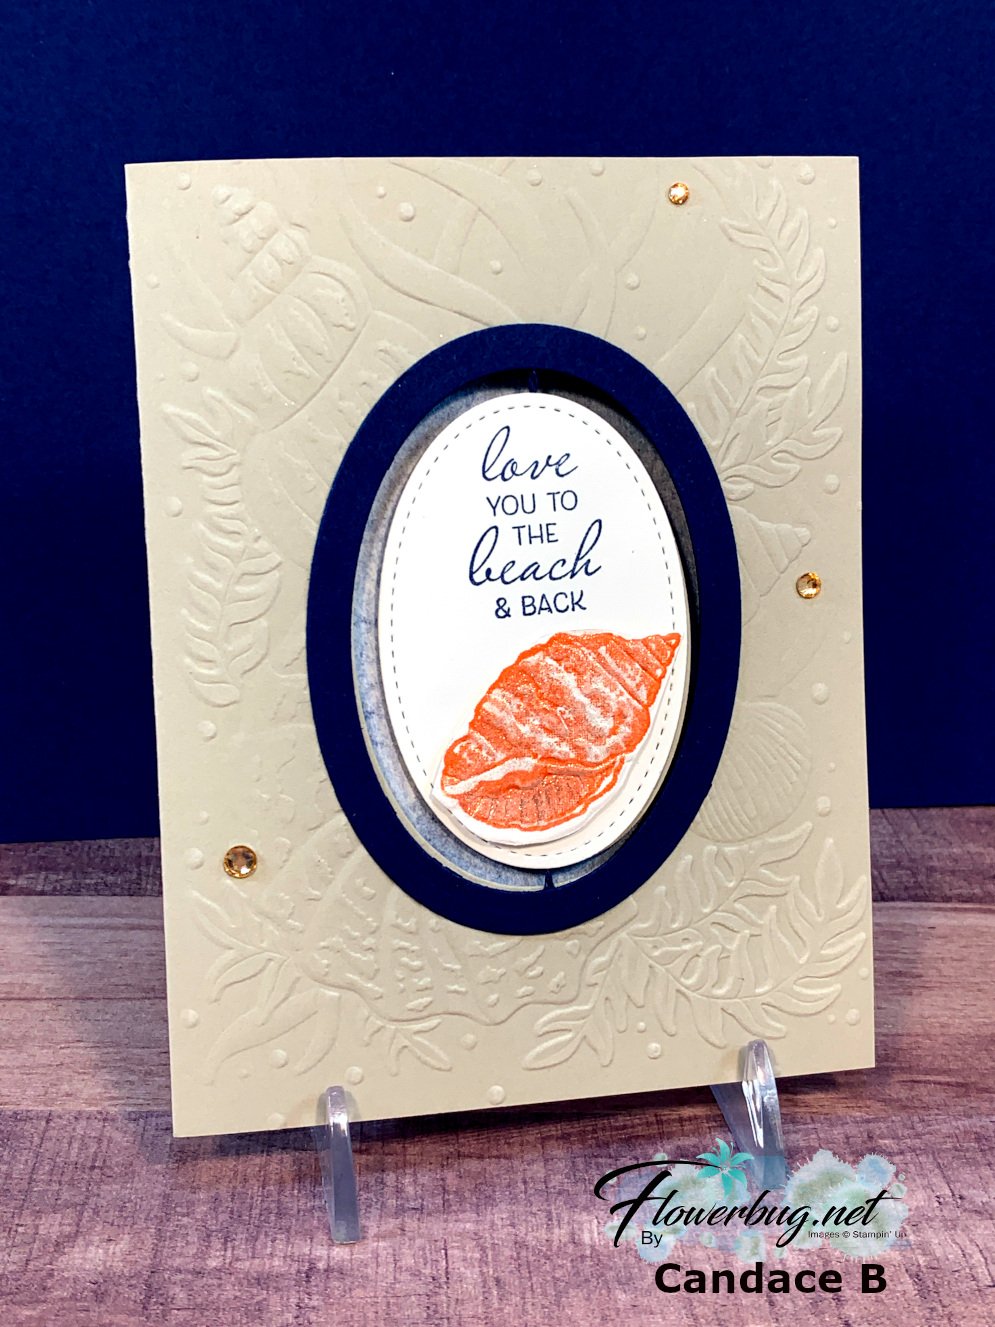
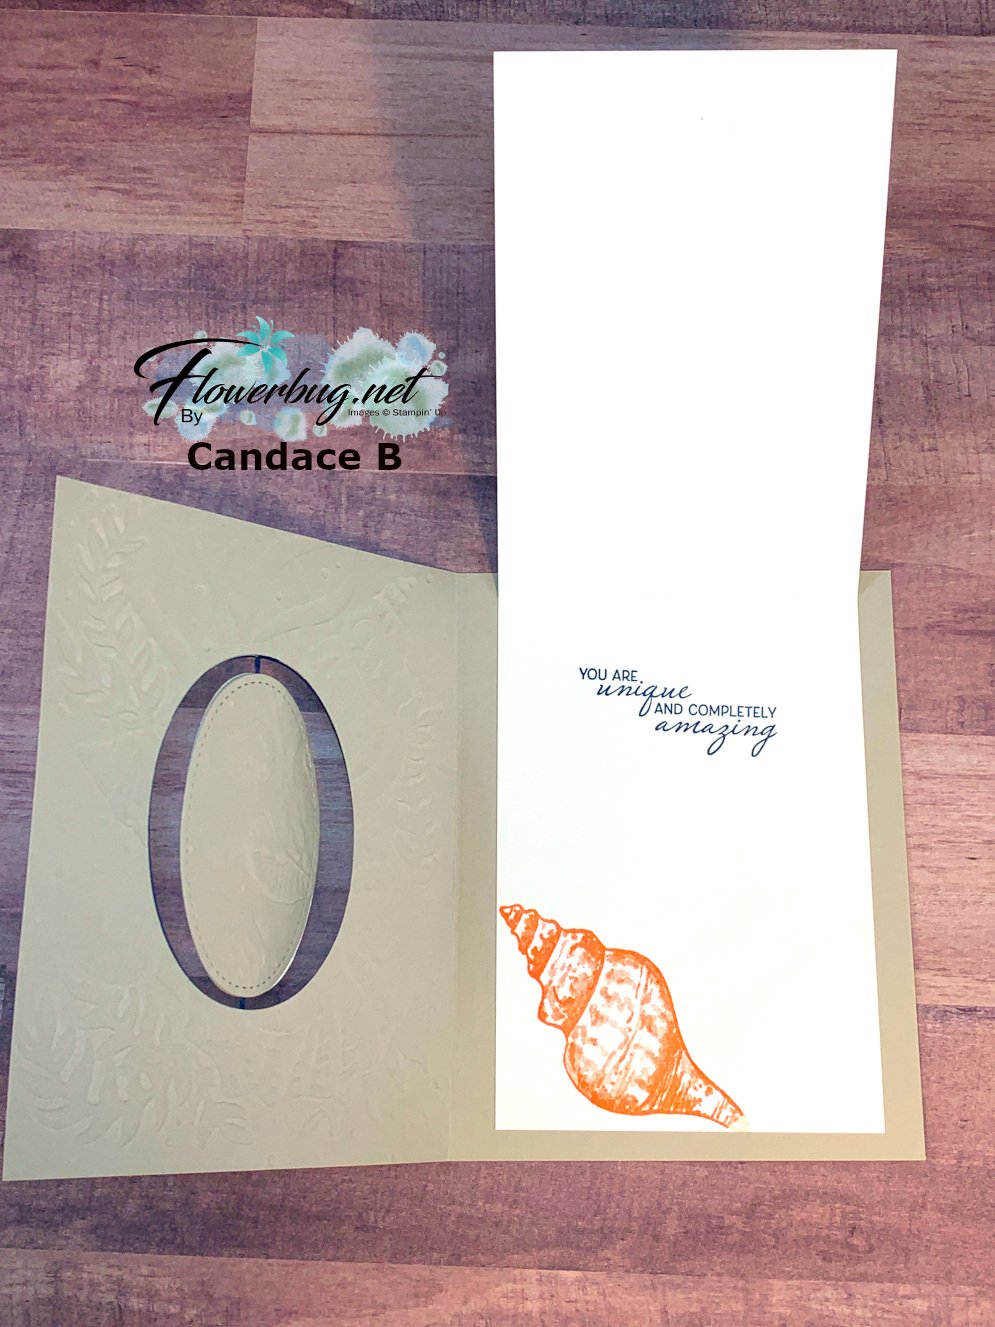
    For our Team swap this month Candace created this pretty spinner card with the Friends are Like Seashells bundle and the Seashell embossing folder.  

    This gorgeous embossing folder has been unavailable for a few weeks; but it should be back in stock on the 29th of March.

    Her colors are Sahara Sand, Navy & Calypso Coral. She used the Oval dies and the Stitched Shapes dies for her spinner.  She also added beautiful shimmer to the shell but it doesn't show up well in this photo. 

    To make a spinner card you need to adhere a length of twine between two ovals adhering the twine under another layer on the main card.  It's not hard; just a bit fiddly. 

    She went above the window card theme and added a surprise flip up layer! 
    Stop back in for more window cards all week long! 

    ~~~

    Lots of March Specials!

    Get 5 free cards with a $30 online order through March 20th!

    Current Host code is 39A9QQZP

    Order online here

    And if your order is over $50 you'll also receive a free adhesive package from me 3 sheets of Dimensionals and 1 for die-cuts!

    *If your order is over $150 do not use the code; you'll still receive the gifts! 

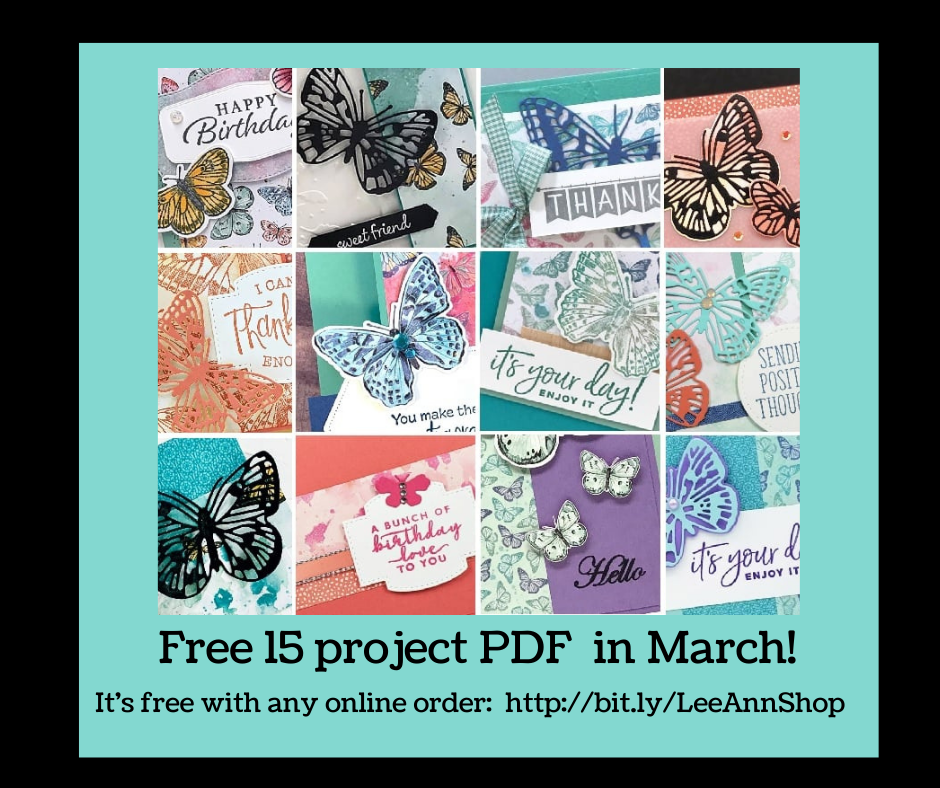
    All online orders receive a free PDF of the new Butterfly Bouquet bundle

    with 15 projects!

    Below are the Multipurpose Glue stands we're making. They're $6 each and available in my Shop here.  

    Leave a Reply

    Your email address will not be published. Required fields are marked *

  • One Day Only of FREE SHIPPING! Plus a special Hydrangea Hill Fun Fold Window card


    Tomorrow is St. Patrick's Day and both Stampin' Up! and I have an ordering special! 


    Plus I'm giving you 5 free cards with an online order over $30 through Sunday! 

    Win win; it's your lucky day!  Get your wish list together and place that order tomorrow on March 17th!  You'll get even more!  Scroll down to the bottom to see what else you'll receive! 

      Order online here. 

    ~~~

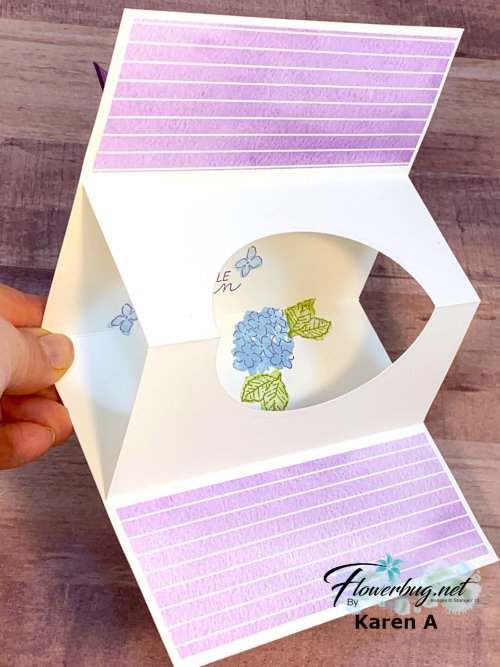
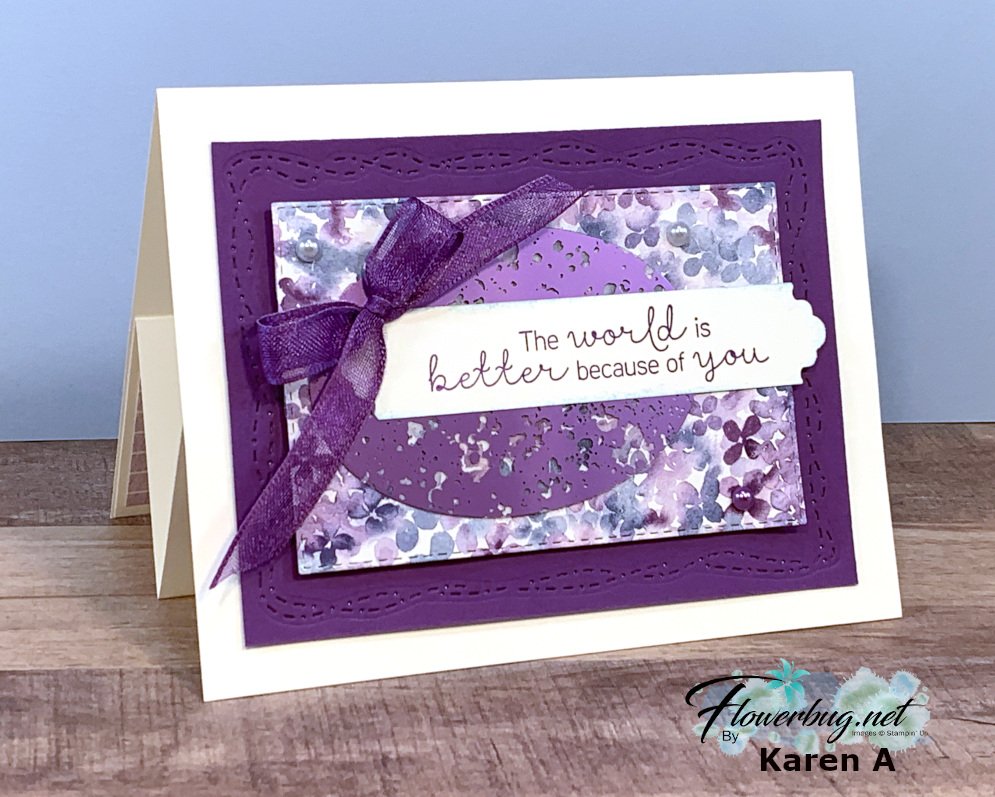
    And now I want to share Karen's amazing fun fold card featuring the Hydrangea Hill suite of products.  It's one more in a series of window cards from our Flowerbug's Team swap on Saturday. 

    Look!                                                                      

    Her colors are Gorgeous Grape & White along with the beautiful Hydrangea Hill designer paper and the Mercury Glass acetate.  See this suite of products here. 

    Other items she used here are the Stitched with Whimsy, Stitched Rectangle, Oval dies and the Lovely Labels Pick a Punch.

    She used the Hydrangea Haven stamp set to finish off the inside. Below are the measurements if you'd like to make a card like this beauty.

    Measurements:

    • White card base 5 1/2" X 8 1/2" scored at 4 1/4"
    • Inside White card stock 5 3/8" X 8 1/2". Score it at 2 1/8", 4 1/4" and 6 3/8". Die-cut a 2 1/2" X 3 1/2" oval from the center.
    • Gorgeous Grape CS 3 1/2" X 4 3/4"
    • Designer Paper front is 2 5/8" X 4" (stitched rectangle die) inside 1 7/8" X 5 1/4"
    • Oval Mercury Glass Acetate 2 1/8" X 3" 

    ~~~

    Lots of March Specials!


    Get 5 free cards with a $30 online order through March 20th!

    Current Host code is 39A9QQZP

    Order online here

    And if your order is over $50 you'll also receive a free adhesive package from me 3 sheets of Dimensionals and 1 for die-cuts!

    *If your order is over $150 do not use the code; you'll still receive the gifts! 

    All online orders receive a free PDF of the new Butterfly Bouquet bundle

    with 15 projects!

    Below are the Multipurpose Glue stands we're making. They're $6 each and available in my Shop here.  

    Leave a Reply

    Your email address will not be published. Required fields are marked *

  • A WOW fun fold card with Dragonfly Dreams!


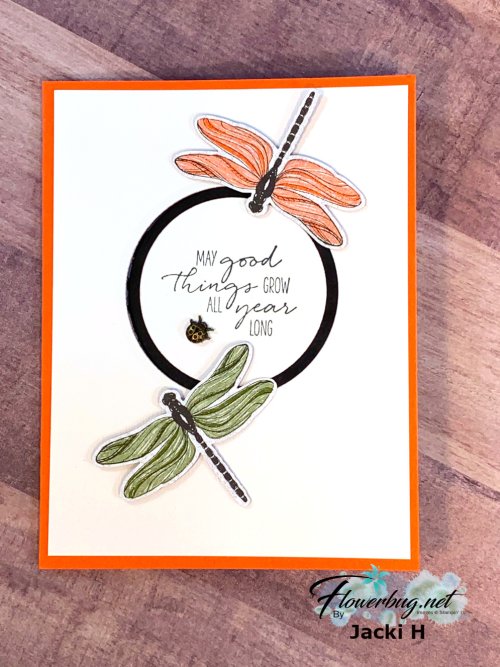
    This weekend my Flowerbug's Team held our monthly card swap & Team gathering.  Our theme was window cards and I'll be sharing them all week long!

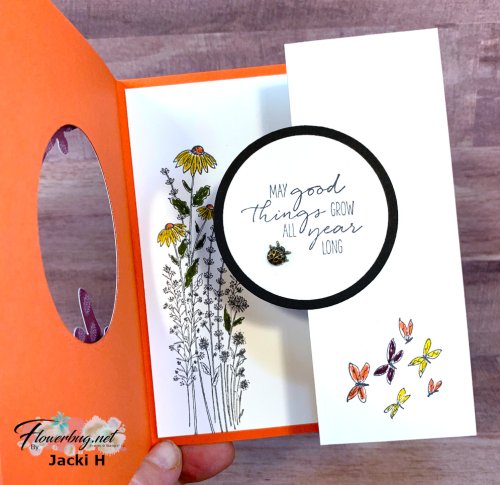
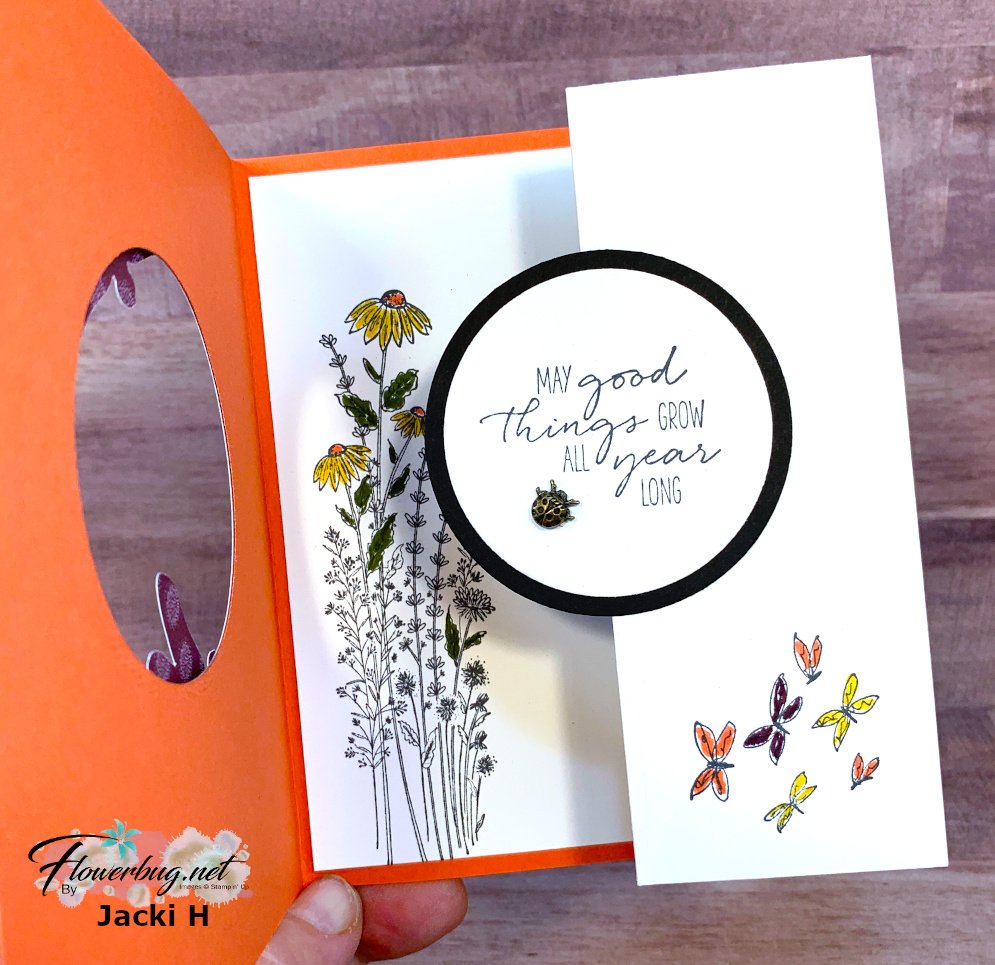
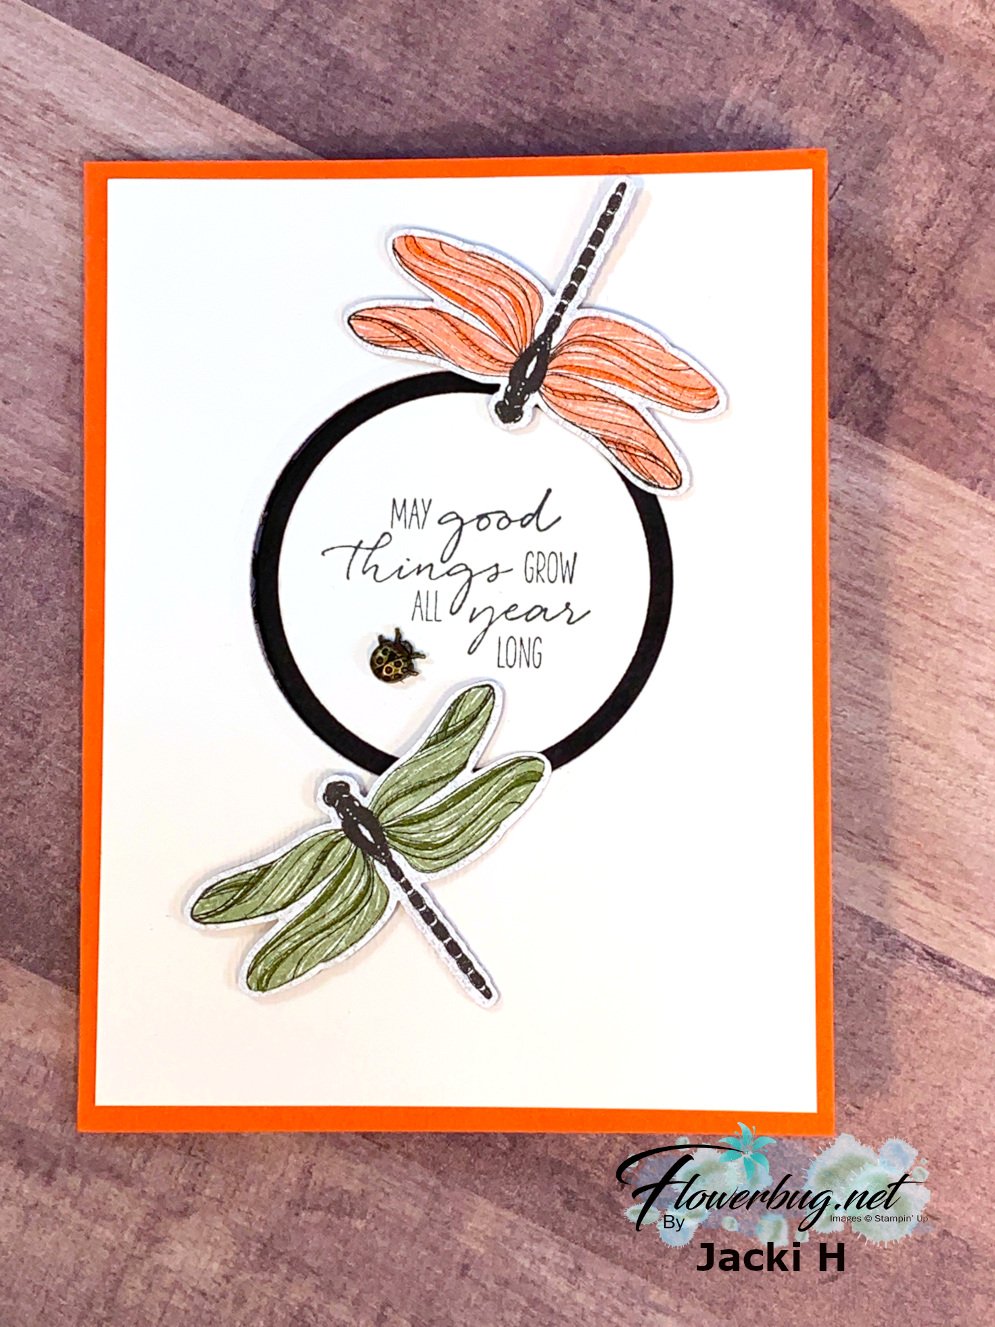
    Check out this special Z fold card Jacki made!  

    Her colors are Terracotta Tile, Black & White and the Dandy Garden Designer paper seen here.  Did you know that the Dragonfly Punch coordinates with this Designer Paper?  She punched her dragonflies directly out of the paper!  No stamping for these at all! See the Dragonfly Garden bundle here. 
    Check out the whole suite of products here. 

    This card features almost two full card bases with just a few score lines. It looks a lot harder than it is.  

    • Terracotta Tile – 5 1/2" X 8 1/2" scored at 4 1/4"
    • Whisper White – front is 4" X 5 1/4", inside fold is 5 1/4" X 8" scored on the long edge at 4" X 6". 
    • Designer paper – 1 3/4" X 5" 

    Her 'window' in the front is 2 3/8" and the black circle on the inside fold is the same.  The White greeting circle is 2 1/8".  All of these circles are cut with the Circle dies in the Annual Catalog. 

    Steps to assemble this card:

    • You'll adhere the White front to the main card base and then cut your window. 
    • Stamp on the inside White card before adhering to the inside of the main card.
    • Add the Designer paper to the inside fold.
    • Die-cut the greeting circles and adhere together. 
    • Fold the card closed and add the circle to the inside fold 'through' the front window.  Perfect placement!   

    More window cards posted tomorrow and all week long! 

    ~~~

    Current Host code is 39A9QQZP

    Order online here

    All online orders receive a free PDF of the new Butterfly Bouquet bundle

    with 15 projects!


    ~~~

    Get a free adhesive package from me with an online order over $50 using the host code above. 3 sheets of Dimensionals and 1 for die-cuts!

    *If your order is over $150 do not use the code; you'll still receive a gift! 

    Below are the Multipurpose Glue stands we're making. They're $6 each and available in my Shop here.  

    Leave a Reply

    Your email address will not be published. Required fields are marked *


Notice: LeeAnn Greff, Independent Stampin’ Up! Demonstrator, Manager. The content of this website is my sole responsibility as an independent Stampin’ Up! demonstrator and the use of, and content of, the classes, services, or products offered on this website is not endorsed by Stampin’ Up! Copyright 2025