/


Latest Post

Quick cards with just ONE sheet of the Fresh as a Daisy designer paper!


The Fresh as a Daisy designer paper seen here is filled with pretty daisy prints and soft washes of colors – many are our newest In Colors and Core colors! 

Here are the 4 cards I made from just one sheet!

This one sheet has a bunch of printed, blocked patterns ready to make fast cards with.  

One of my favorites is this one; featuring a pretty bouquet of white daisies on our new Bubble Bath pink color. 

I added a strip of White card stock below, ribbon, a greeting and a pretty foliage die-cut which are both from the Cheerful Daisies bundle. 

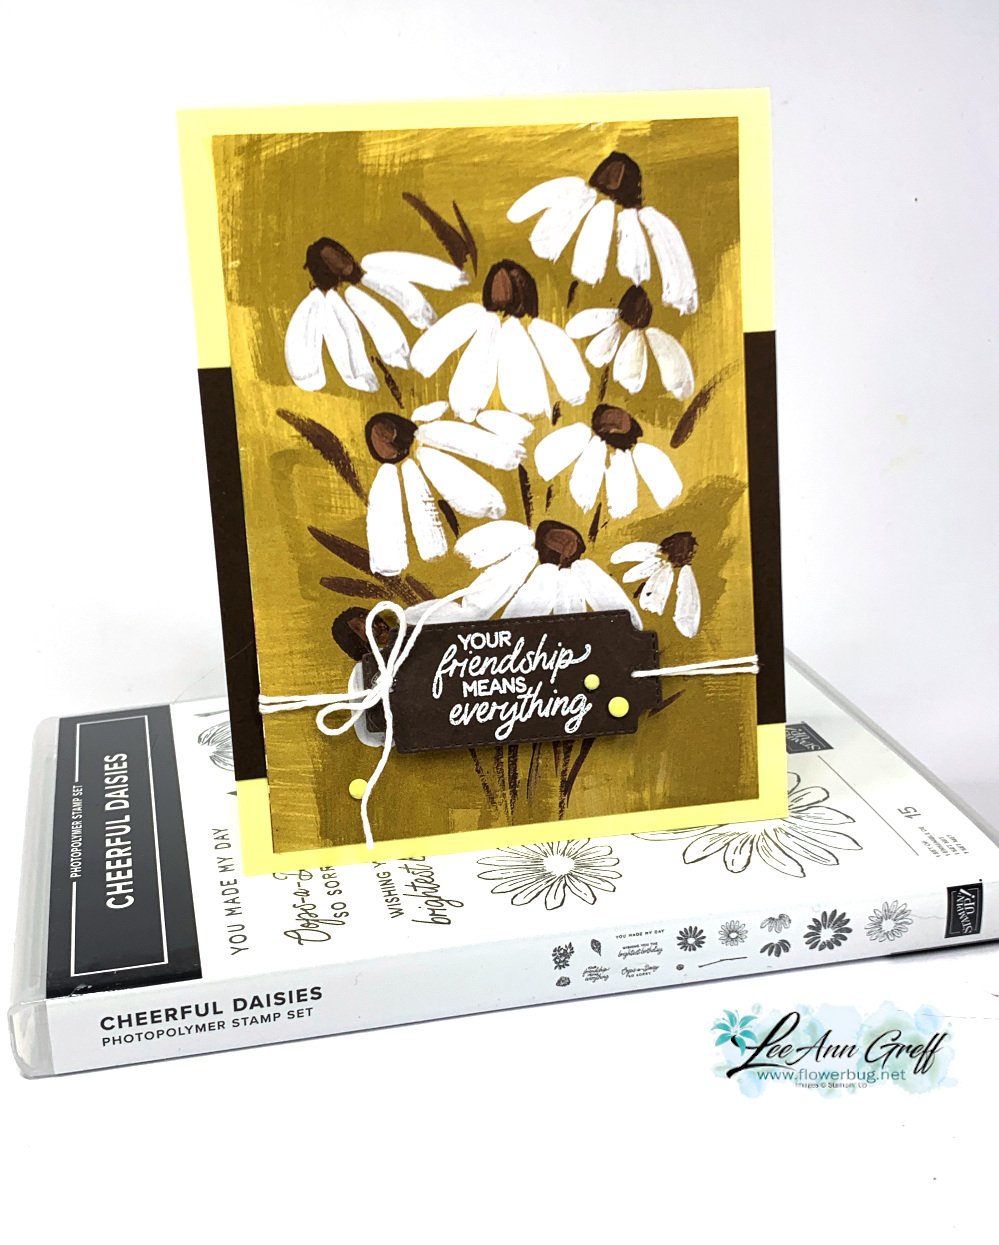
I LOVE this one!  Again, white daisies on a washed background. I paired this piece over a strip of Early Espresso cardstock on a Lemon Lolly card base.  I heat embossed the greeting in White on the die-cut in the Cheerful Daisies bundle. White twine finished it off! 

What a gorgeous scenic background this is!  I dd nothing to it but stamp the stems & leaves and added the die-cut daisies, greeting and gems.  The colors are Copper Clay with Crushed Curry. 
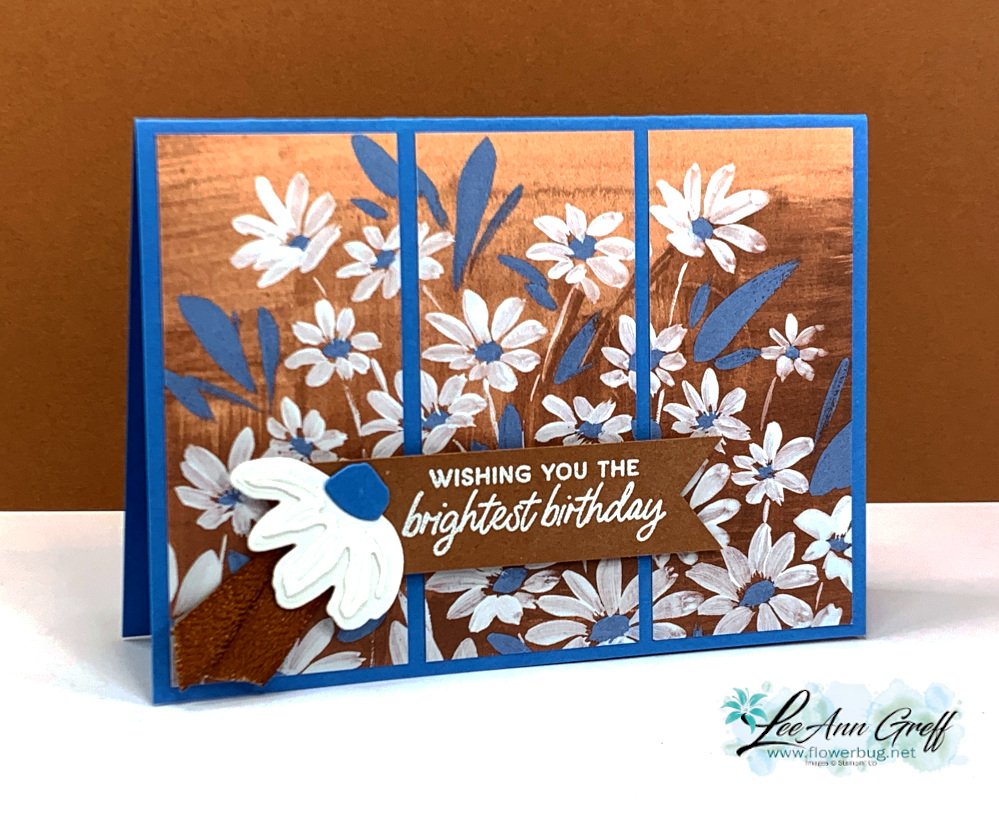
Lastly is this pretty triple-panel card in Azure Afternoon with Copper Clay.  I cut the daisy panel into three pieces measuring  1 5/8" X 4" tall. 

Again I heat embossed the greeting in White embossing powder onto a piece of Copper Clay card stock. I added a die-cut daisy to the side. 
I'm featuring this pretty paper in one of my May card kits to go. I have a limited supply of them so grab yours while you can.  See it here.  

Which one of these is your favorite?  

~~~

May Specials:

*current host codes: ZHZ6CPYU or AJVB3B3V 

Get a free updated cardstock color sampler with online orders over $55 using a host code.

Offer good through May 17th  

My new catalog designer paper share is open for a limited time. 

Get 80 sheets of 6 X 6" DSP – all from the new catalog for just $28.50 plus shipping.  Reserve your spot here. 

Earn free products with my loyalty rewards! 

Click here to download yours and earn a $50 shopping spree!
All Posts

  • Regency Park with the Baby Wipe technique!


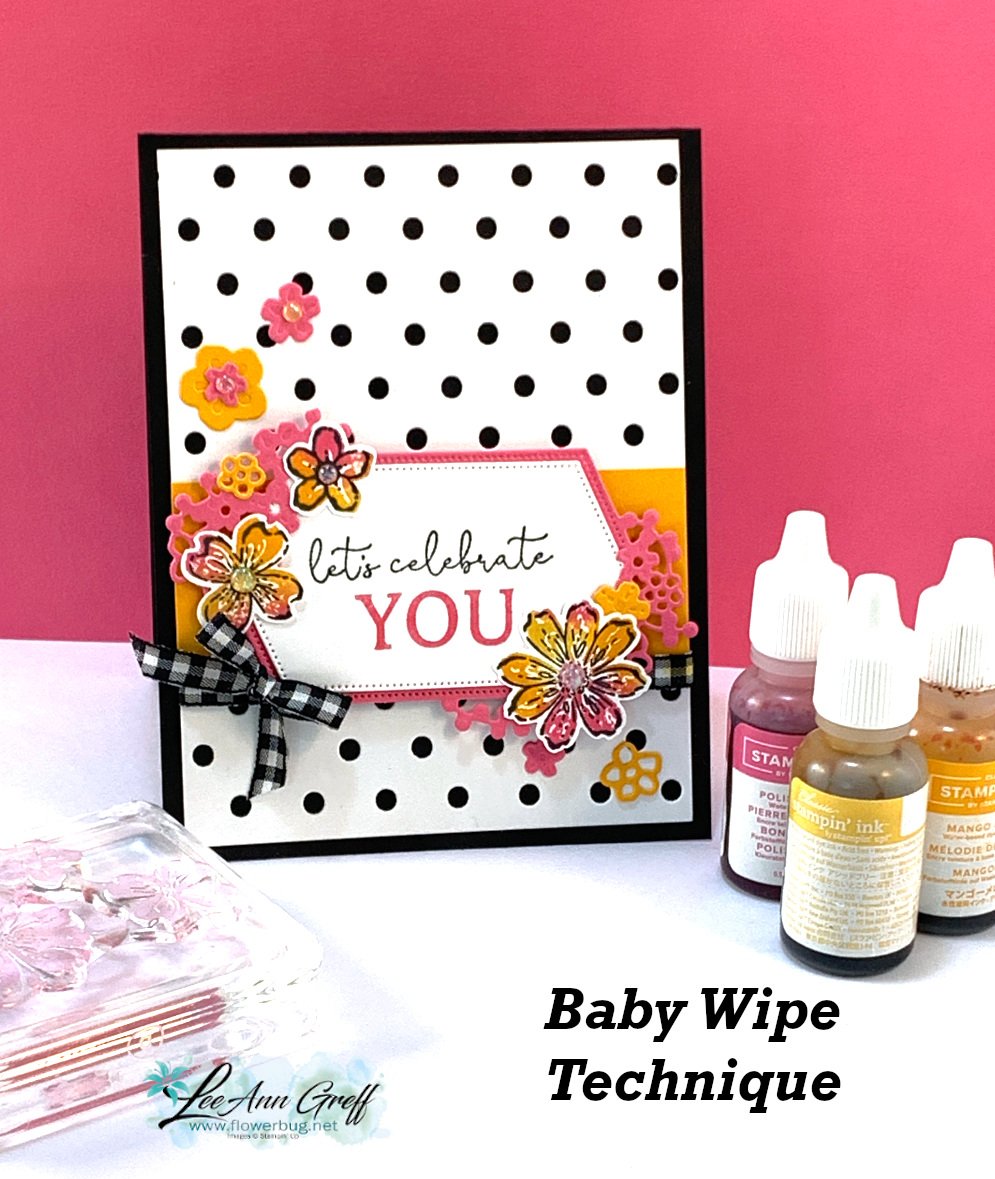
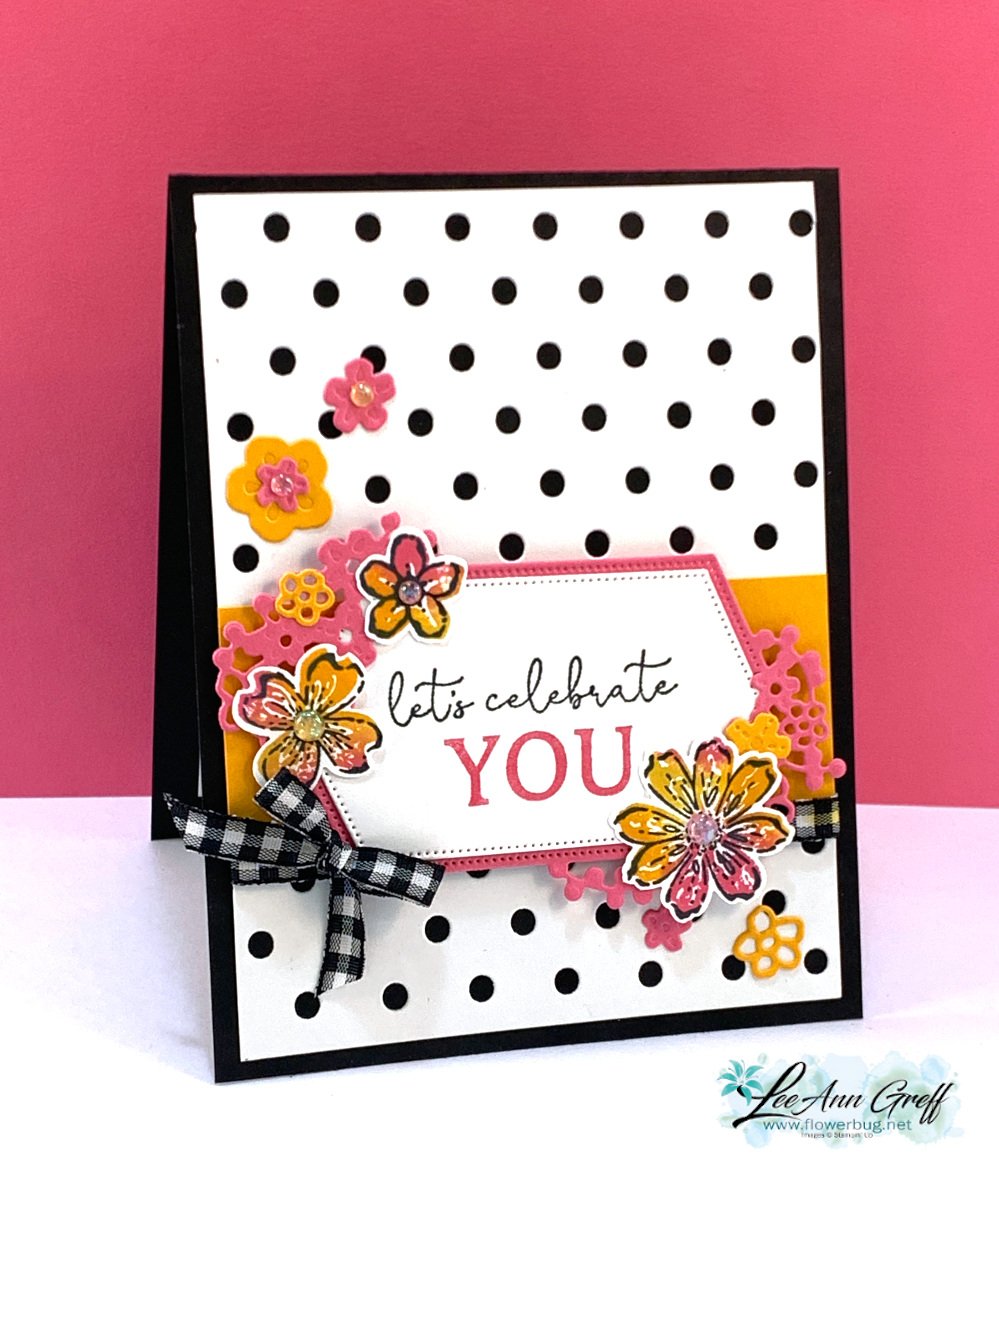
    During March our Flowerbug's Team has been focusing on using re-inkers.  I hadn't played with the 'baby wipe' technique for awhile.  I chose the Regency Park suite when creating this cute card: 

    It might not show up well here but the White greeting die-cut is 'caught' and held in place by the larger die & the outer two corners of flowers. These dies fit together perfectly!  *you can see the dies in the photo below; the bottom most label nestles into the largest one with flowers on two edges. 

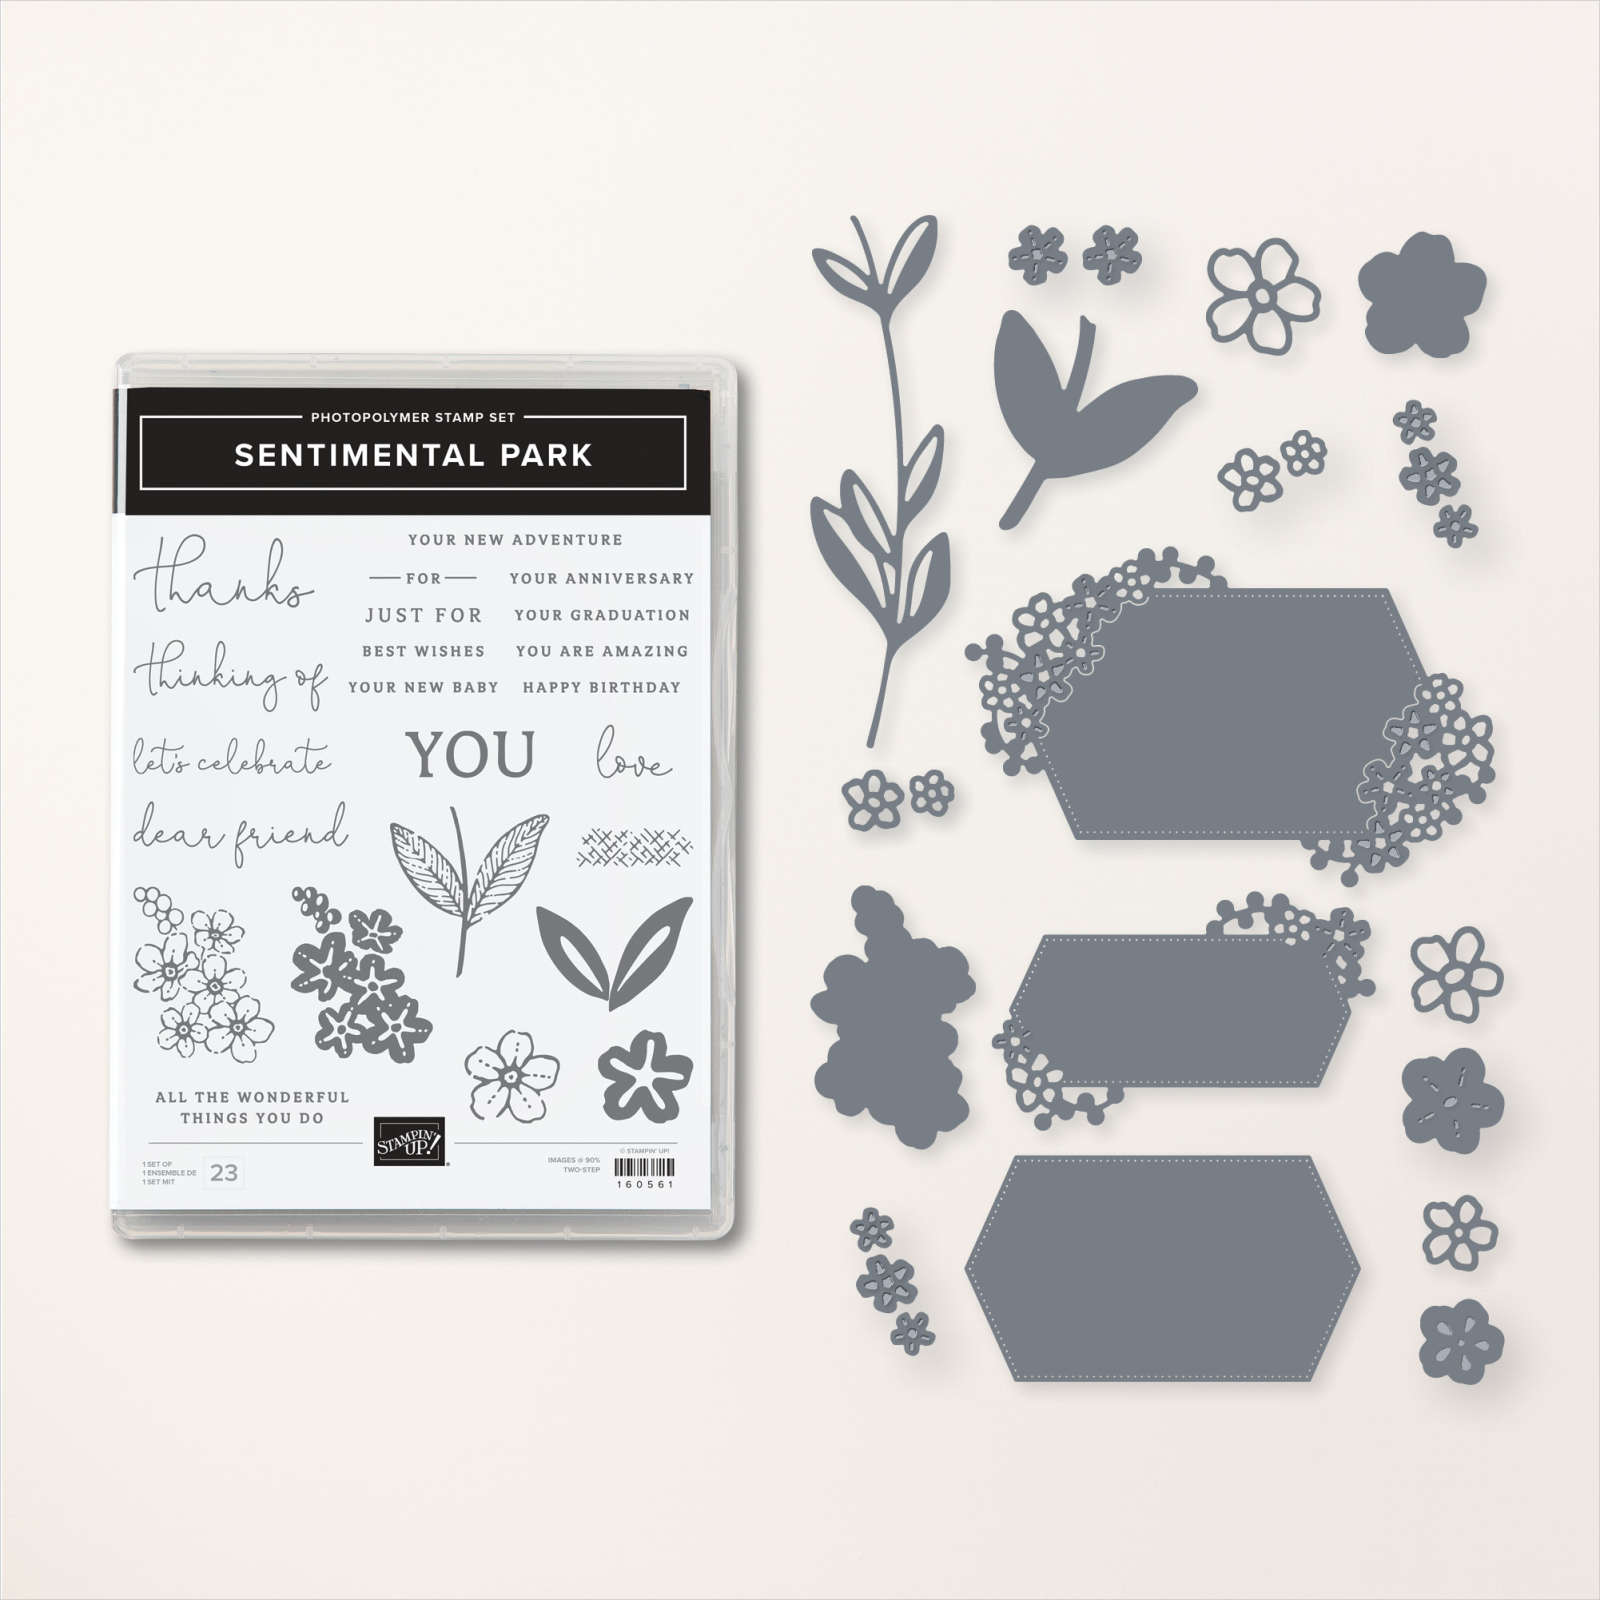
    Here's the Sentimental Park bundle as well, with the greeting & die-cuts. This bundle was one of my first purchases from the Spring catalog and I've used it a lot! 

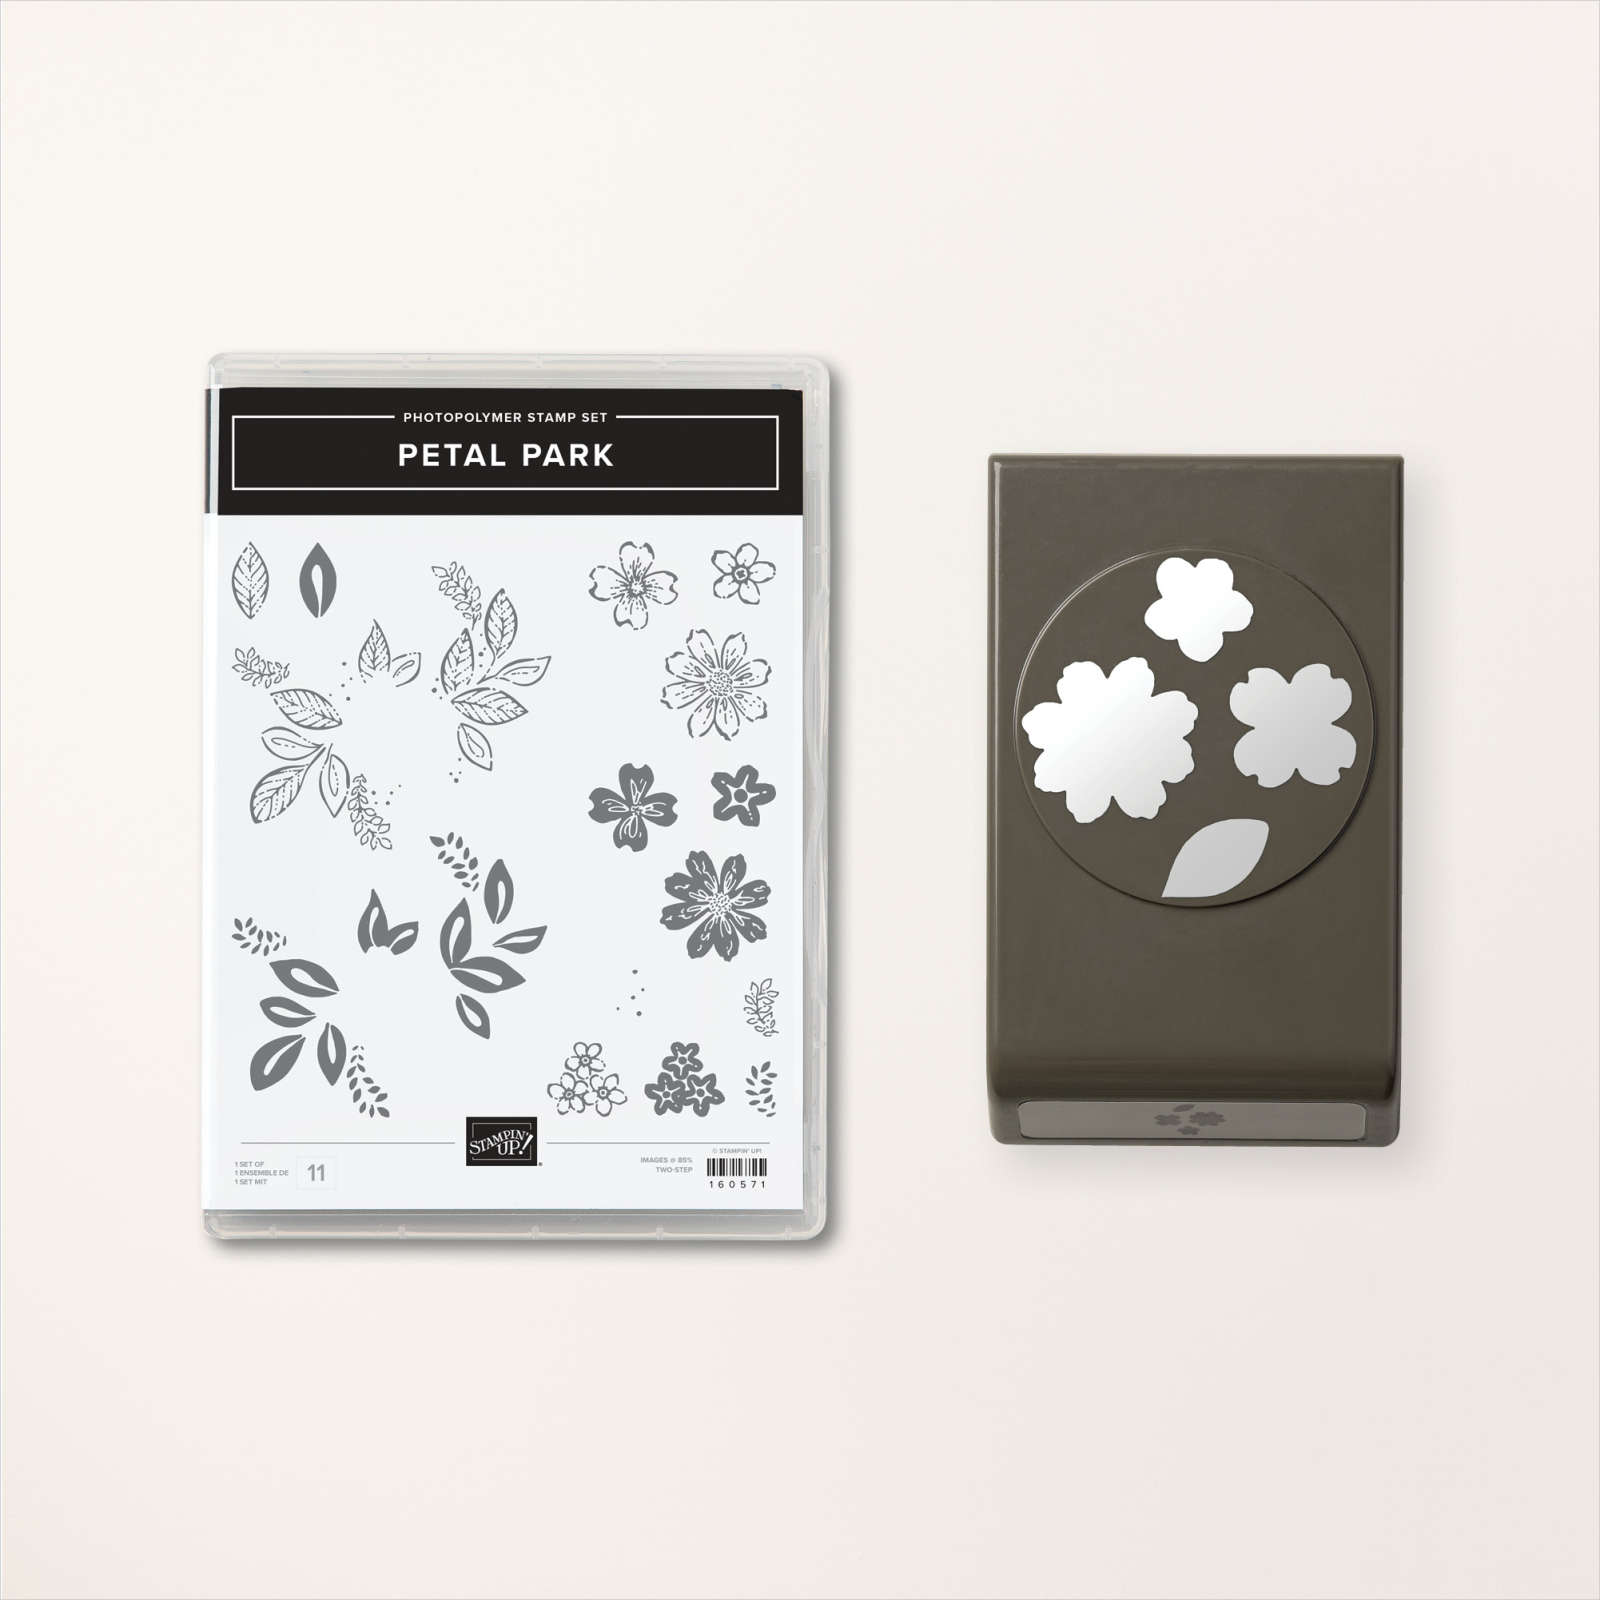
    The other bundle in this suite is the Petal Park bundle seen here. It includes the stamp set & coordinating flower punch. I used the solid flowers on the middle right for my baby wipe technique and added the outline flowers (top right) in Black. 

      I had a die-cut dotted background piece (from Dots & Spots here) among my 'extra's and thought it would work well for my background. 


    What supplies do you need for the Baby Wipe technique?  

    1. A baby wipe or two
    2. At least 2-3 colors of ink refills
    3. A stamp and card stock

    Success tips for the 'Baby Wipe' technique:

    • Choose colors that work well together.  I tend to choose 3 of my favorites like yellows with pinks, blues with greens, purples with blues etc.
    • Pick a stamp with a solid image; lots of rubber.  An outline image will not show your colors well.
    • Fold the moist baby wipe into an ink pad; I use at least 4 layers. 
    • Drop multiple drops of each color in each area. For example – 4 drops of yellow, move over a bit, 4 more drops of yellow etc.  Then fill with the second color in the same manner. Fill in any empty areas with the 3rd or last color. 
    • When inking your image stamp it in your 'baby wipe' handmade ink pad multiple times, trying to keep it in the same place as much as possible. Moving the image around too much can muddy your colors. 
    • Huff the image and stamp!  

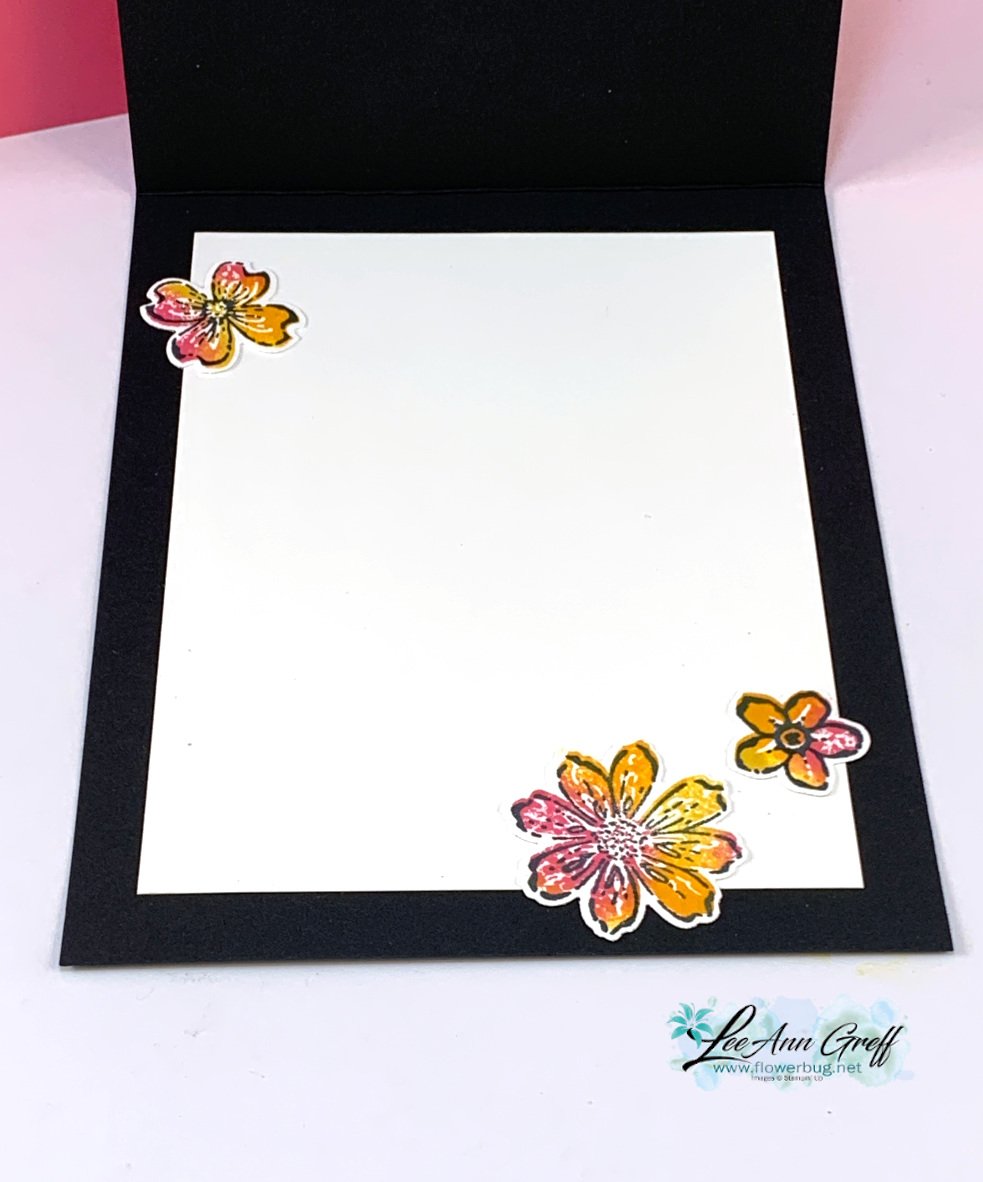
    Here's the inside of my card; I added a few more of the multi-colored punched flowers. 


    My colors include Polished Pink, Daffodil Delight and Mango Melody.  

    ~~~

    March Specials:

    See the new Online Exclusives here! 

    *current host code: BFE4C2KM or EWJYEGFV

    Get a free class kit with online orders over $55 when using the host code above!

    Earn free products with my loyalty rewards! 

    Click here to download yours and earn a $50 shopping spree!
    Leave a Reply

    Your email address will not be published. Required fields are marked *

  • Need a new Stampin’ Up! Catalog? Plus an accordion fun fold card with video & free project sheet!


    It's an exciting time for those who love Stampin' Up! products….. the new 2023-24 Annual Catalog can be seen online tomorrow (Wednesday) by current Demonstrators.  

    We get to see the newest 2023-25 In Colors, which current colors are leaving, which colors are filling in our color lines (it usually includes some returning In Colors and some brand new colors)! 


    Wednesday I'll be announcing which colors are leaving along with the retiring list of the current/retiring Annual catalog products so you stay informed.  Remember that these retiring items are while supplies last.  Do NOT WAIT to order.  I have many people who are disappointed that they missed ordering items they really, really wanted. 

    *If you do not have a current Stampin' Up! Demonstrator and want a new Annual Catalog let me know by Thursday, March 30th.  They are free to my current customers (those who've ordered from me within the past 6 months) or just $5 for me to send you one.  You can pay via PayPal or Venmo. 

    ~~~

    The last Monday of each month I have a 'Stamp with Me' Live on my Facebook page here.  A day or so before the Live I share the project we're making so those who want to stamp along with me can do so.  Others can watch and create later.  

    After the video I provide a post where everyone who makes the project can share their version.  All who do are entered in a drawing for a free prize from me.  Click here to see all of the Floating Panel cards from February's Live.  

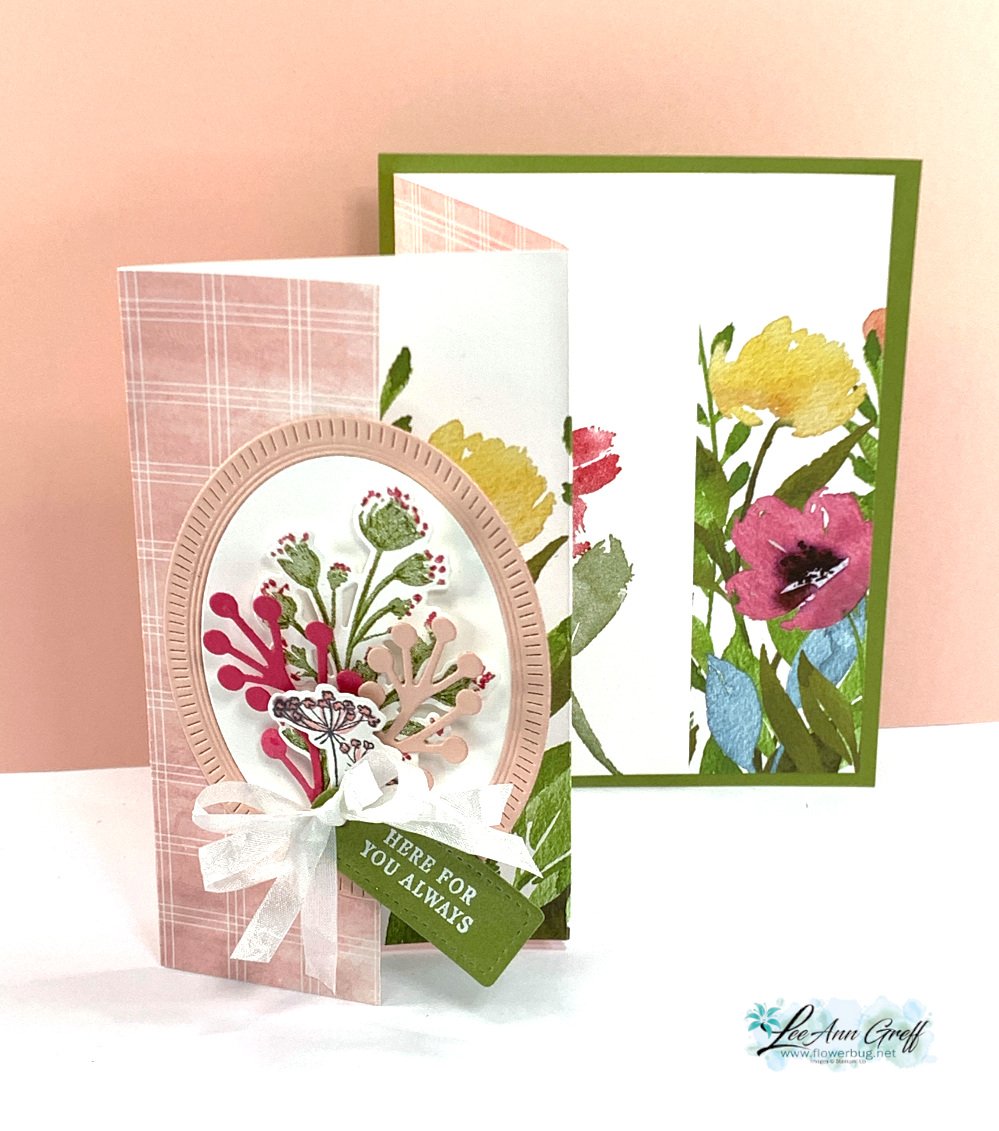
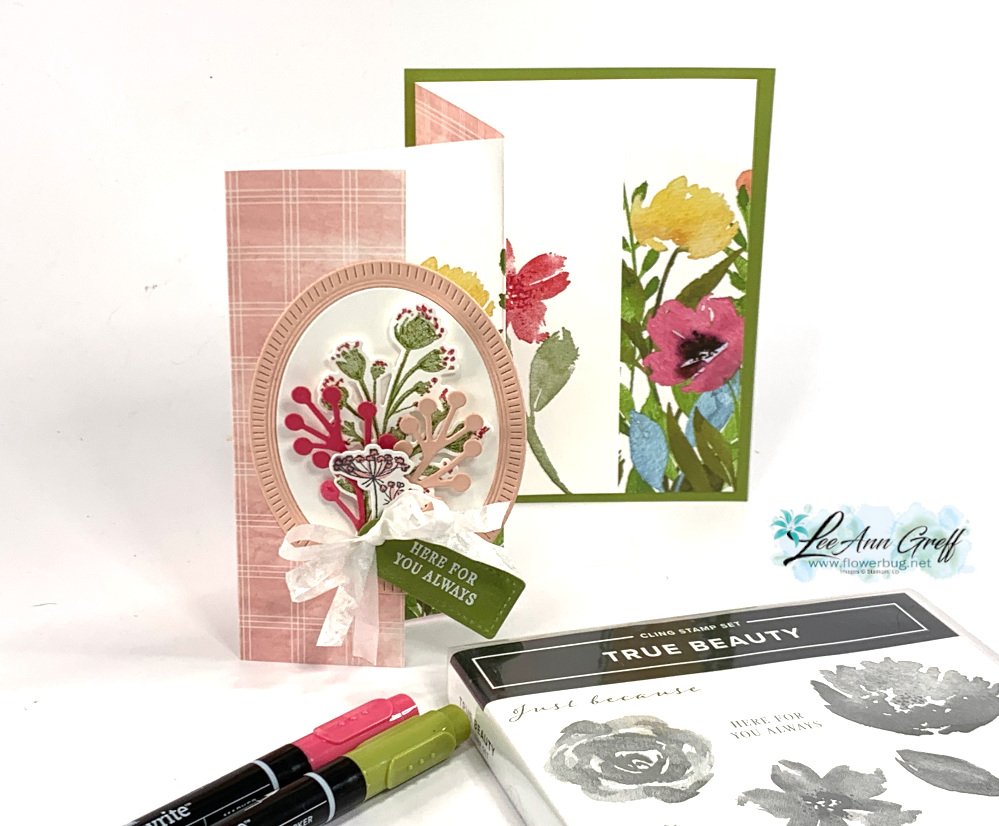
    This month I chose another fun fold card – an accordion card that really shows off both sides of your Designer Paper!  

    I used the Awash in Beauty designer paper seen here.  I also used the True Beauty bundle as well. See it here. 

    The greeting tag is a die-cut from the Tailor Made Tags seen here.  The ovals are from the Framed Florets dies seen here.  

    I created a free project sheet for this card too. Download Accordion DSP card project; March 2023

    Here are the measurements:

    • DSP 5 1/4" X 11 3/4" – score at 1 3/4", 4 3/4" and 7 3/4".  
    • Card base 4 1/4" X 5 1/2" 
    • inside stamped layer 2" X 5 1/4" 


    I added an inside White layer to stamp and sign on. I used Melon Mambo & Old Olive markers to ink the flower bud image before I stamped and die-cut it.  


    Click here or on the photo below to watch the video.  

    ~~~

    March Specials:

    See the new Online Exclusives here! 

    *current host code: BFE4C2KM or EWJYEGFV

    Get a free class kit with online orders over $55 when using the host code above!

    Earn free products with my loyalty rewards! 

    Click here to download yours and earn a $50 shopping spree!
    Leave a Reply

    Your email address will not be published. Required fields are marked *

  • Growth Takes Time with Radiating Stitches dies; & free project sheet!


    On last week's FB Live I shared three cards featuring the new Online Exclusive products. A few are already out of stock but they are ordering more. You can see them all here.  

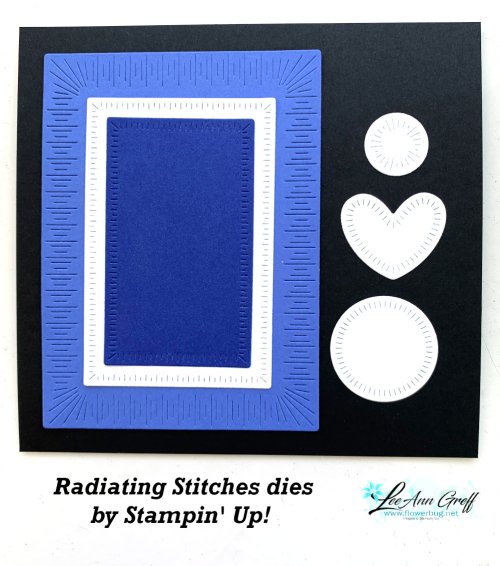
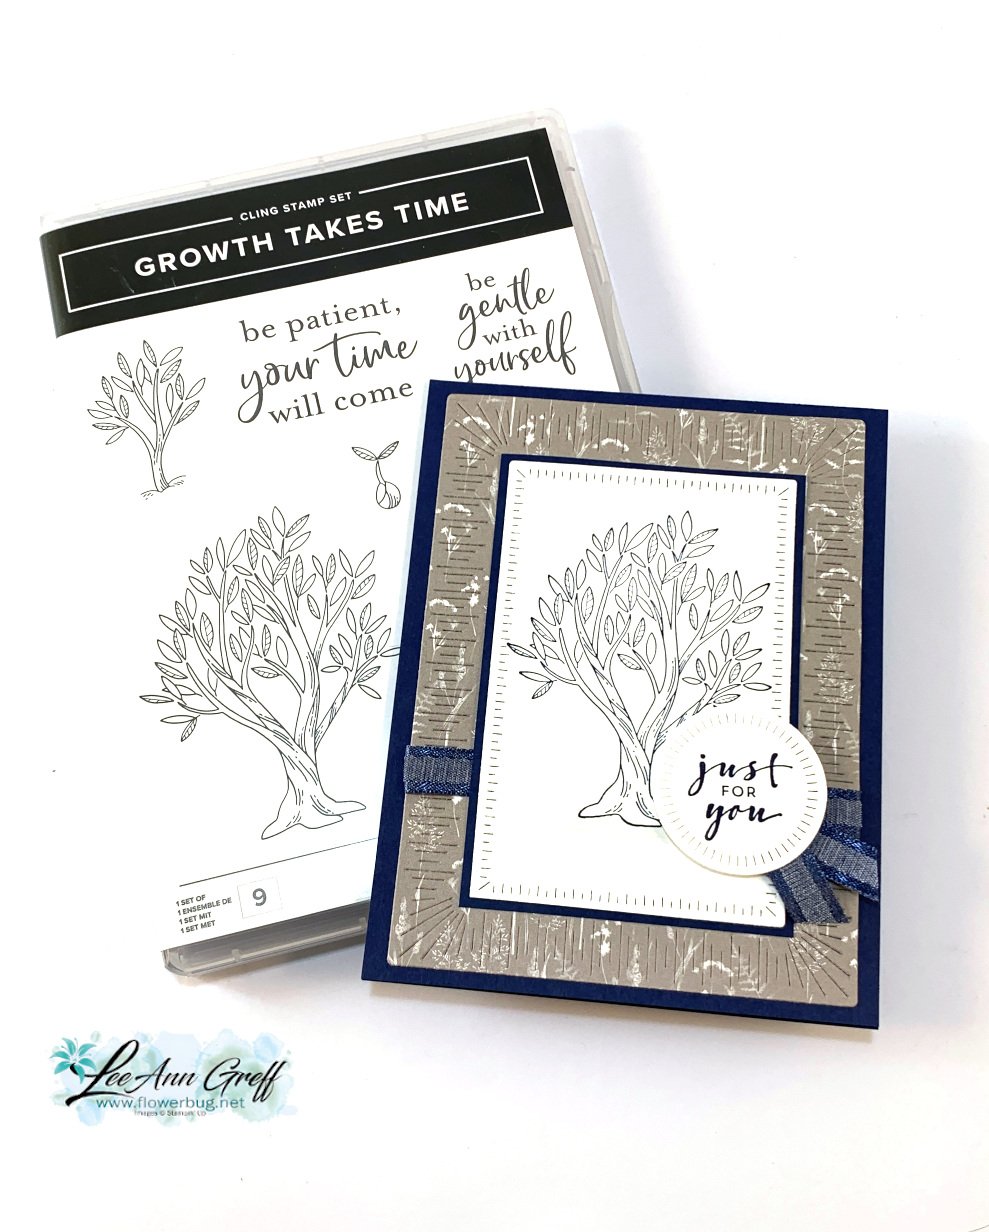
    Today's project features two of them.  Radiating Stitches dies and Growth Takes Time stamp set.  

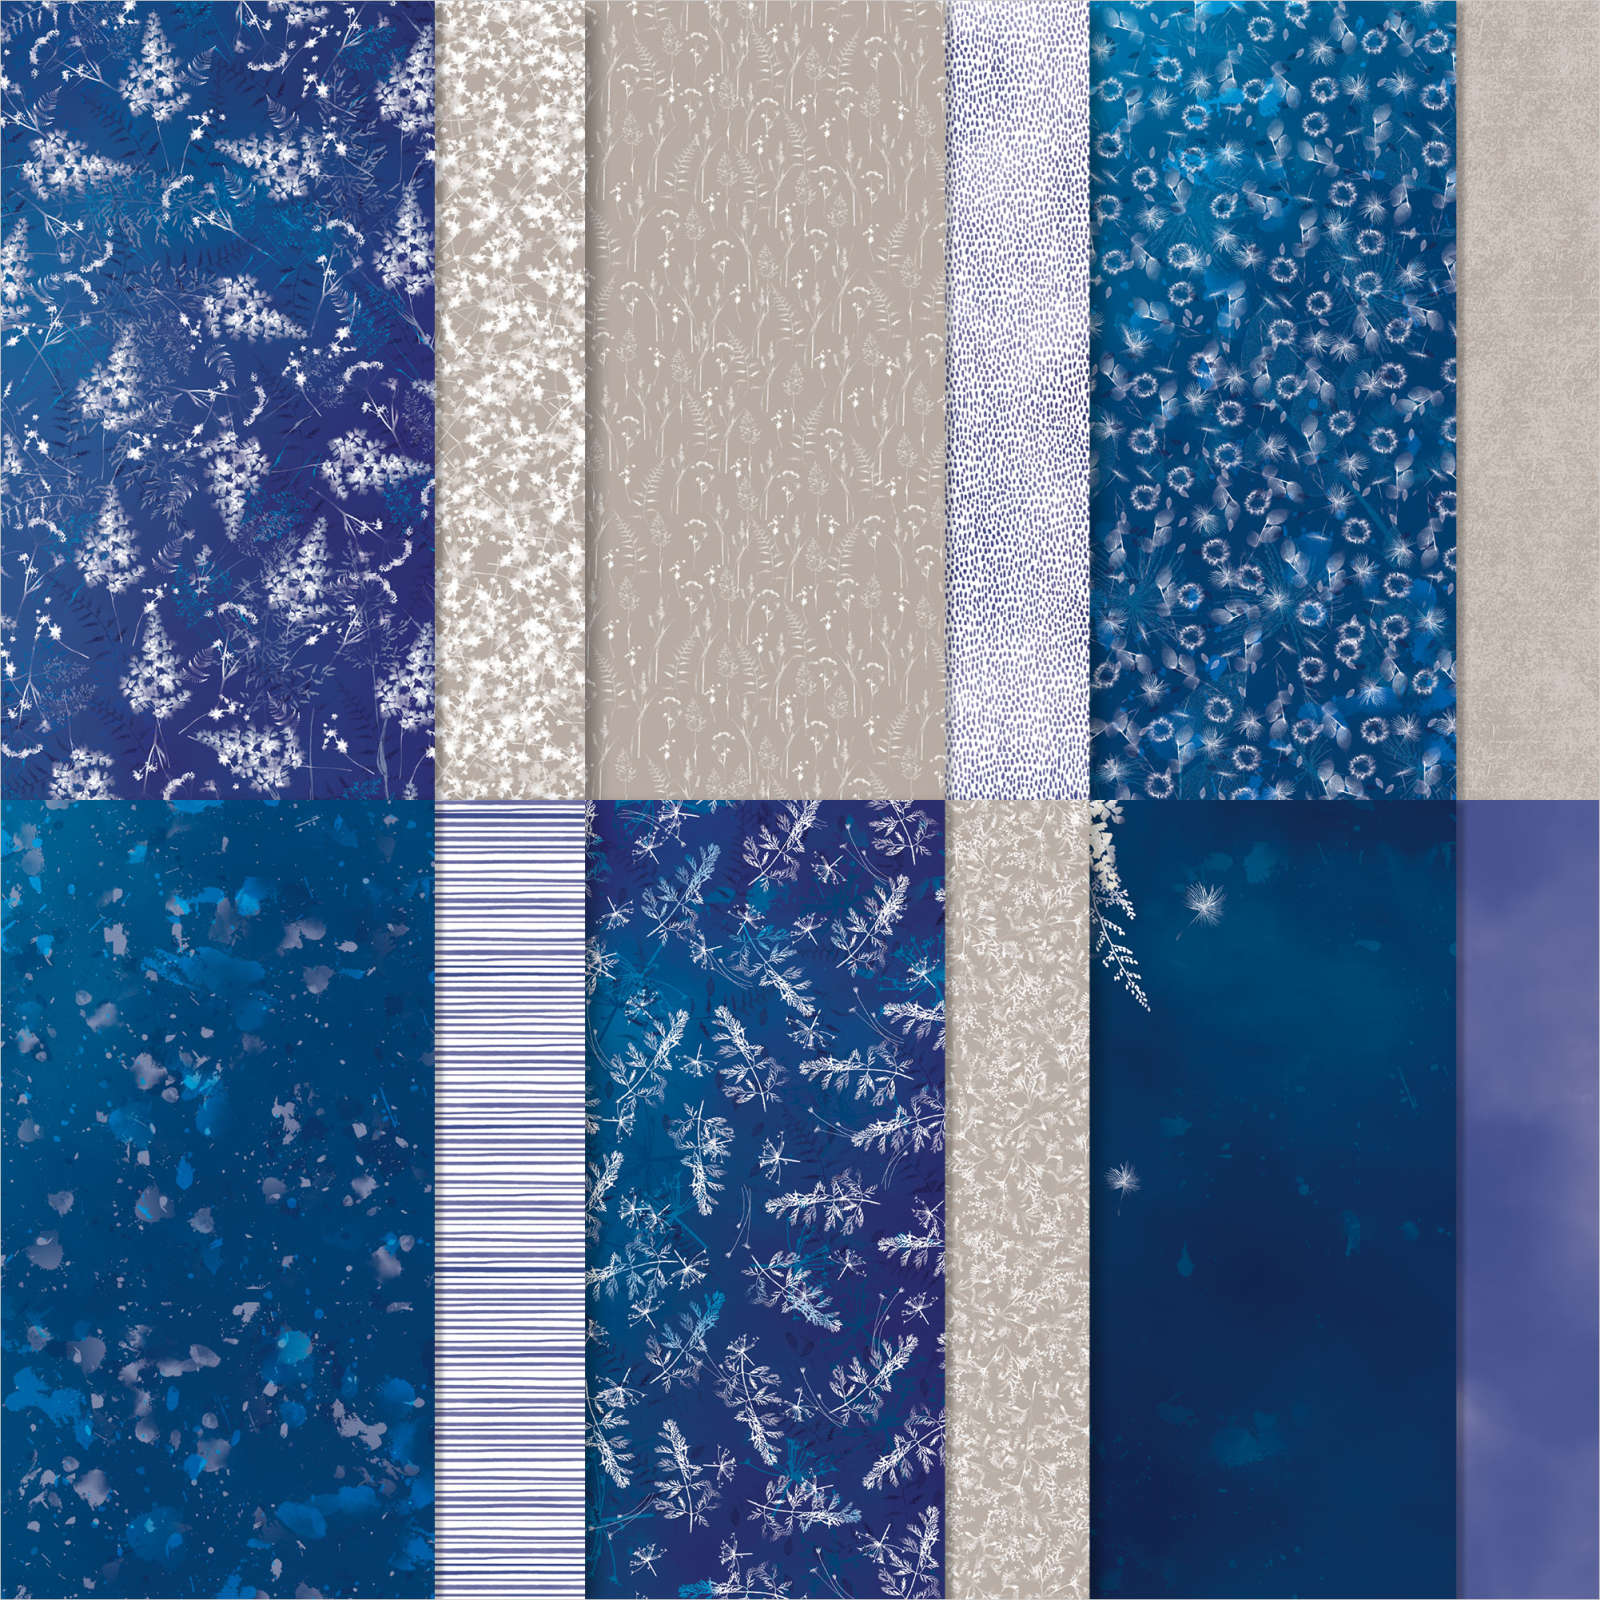
    I chose to use the Sun Prints designer paper along with a Navy, Gray Granite & White color theme.

    Heads up! The Sun Prints Designer Paper is on low inventory; I wonder if they'll run out of stock soon.  

    I stamped the tree and greeting (Charming Sentiments) using Night of Navy ink.  I did not color in the tree; sometimes it's okay to keep it simple. The ribbon here is the Navy bordered ribbon in the Spring catalog; seen here.  It's soft and easy to work with. 

    I used three of the Radiating Stitches dies on this card. See them here. 

    I love trees so it was an easy decision to purchase the Growth Takes Time stamp set.  See it here. 

    Here's a free project sheet for you with measurements and products used. Download Growth Takes Time with Sun Prints

    In the video below I demonstrate this pretty card; Click here or on the photo below to watch the video.

    ~~~

    March Specials:

    See the new Online Exclusives here! 

    *current host code: BFE4C2KM or EWJYEGFV

    Get a free class kit with online orders over $55 when using the host code above!

    Earn free products with my loyalty rewards! 

    Click here to download yours and earn a $50 shopping spree!

    Leave a Reply

    Your email address will not be published. Required fields are marked *


Notice: LeeAnn Greff, Independent Stampin’ Up! Demonstrator, Manager. The content of this website is my sole responsibility as an independent Stampin’ Up! demonstrator and the use of, and content of, the classes, services, or products offered on this website is not endorsed by Stampin’ Up! Copyright 2025