/


Latest Post

Quick All Aflutter card with the Extraordinary Washi tape


Here’s a sweet card made with both the All Aflutter bundle and the Extraordinary Washi tape:
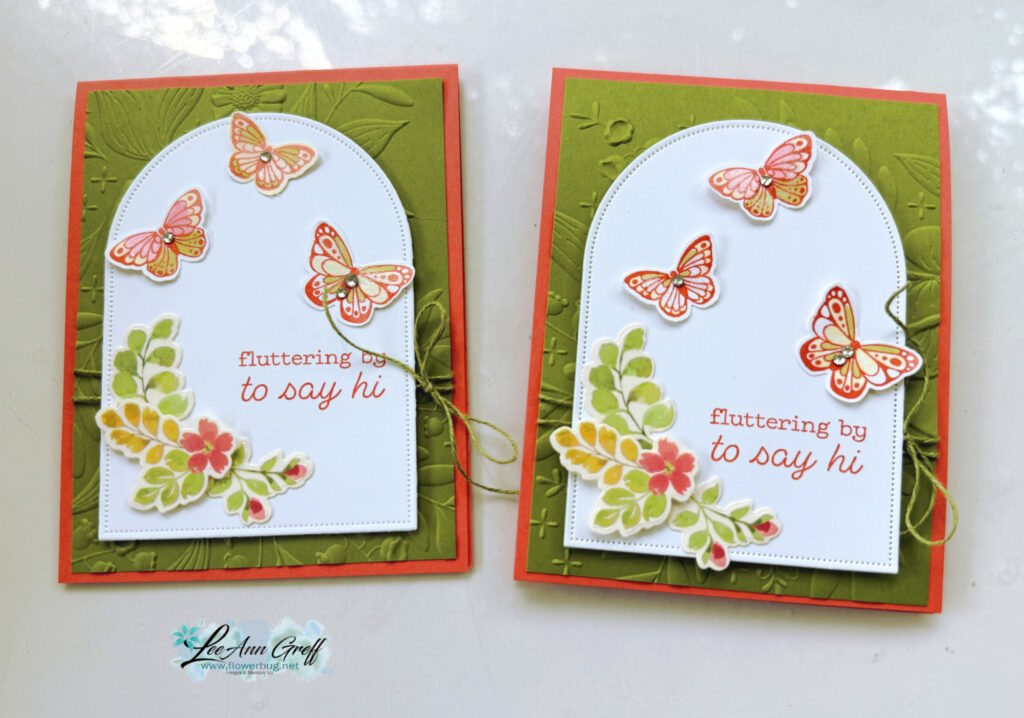
My colors include Calypso Coral, Old Olive and White. The Arches dies used in White here give a wonderful focal point to highlight the butterflies, greeting and flowers from the Washi tape. Unfortunately they are out of stock currently; but see them here and put your email in to get notified when they’re back in stock.

The background texture on the Old Olive layer is the Floral Spray 3D embossing folder. This folder is super popular and out of stock right now. Again, please add your email to be notified when it’s available.
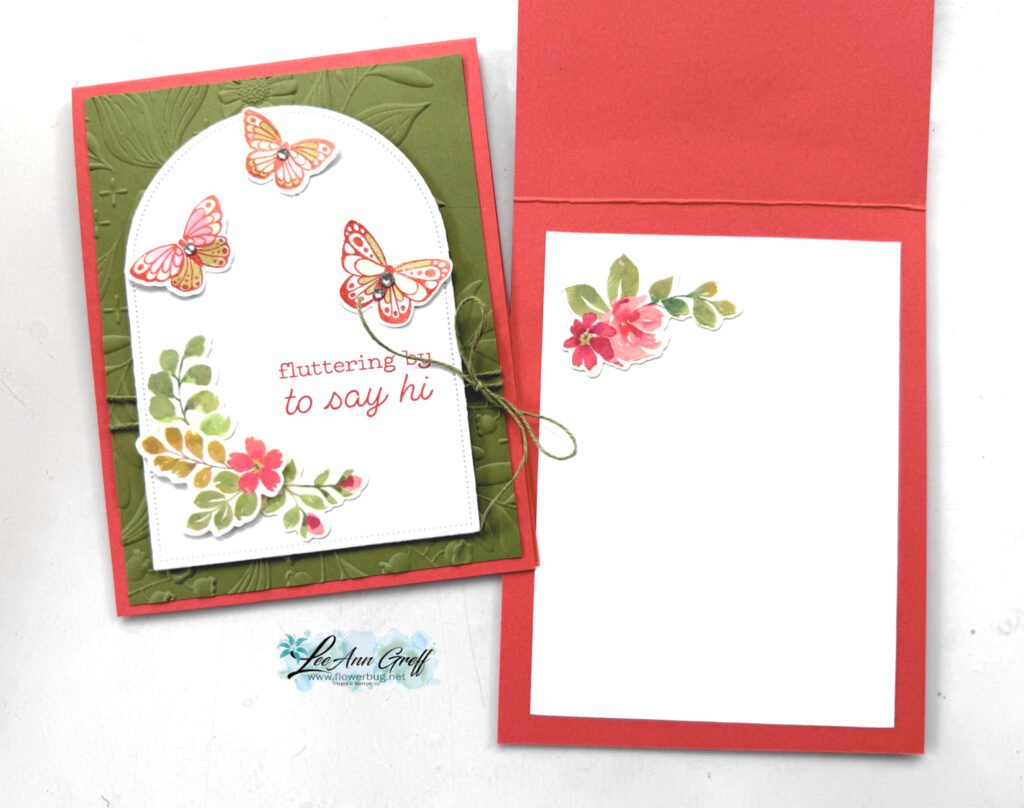
I love the Extraordinary Washi tape with coordinating die. You can cut out lots of colored flowers and leaves with ONE CUT! I save the extras to use them when I need just a little something extra. See the Washi tape here (you get 10 yards!) and the coordinating die-cut here. There’s also a bundle you can get here; it includes both the stamps and die-cut.

It’s simple to use this washi tape! Start by adhering a strip of it to white card stock (vellum or window sheet also works). Then use the die-cut to cut all of the pieces out.

I created a free project sheet for this card. Click here to download it or print it out.
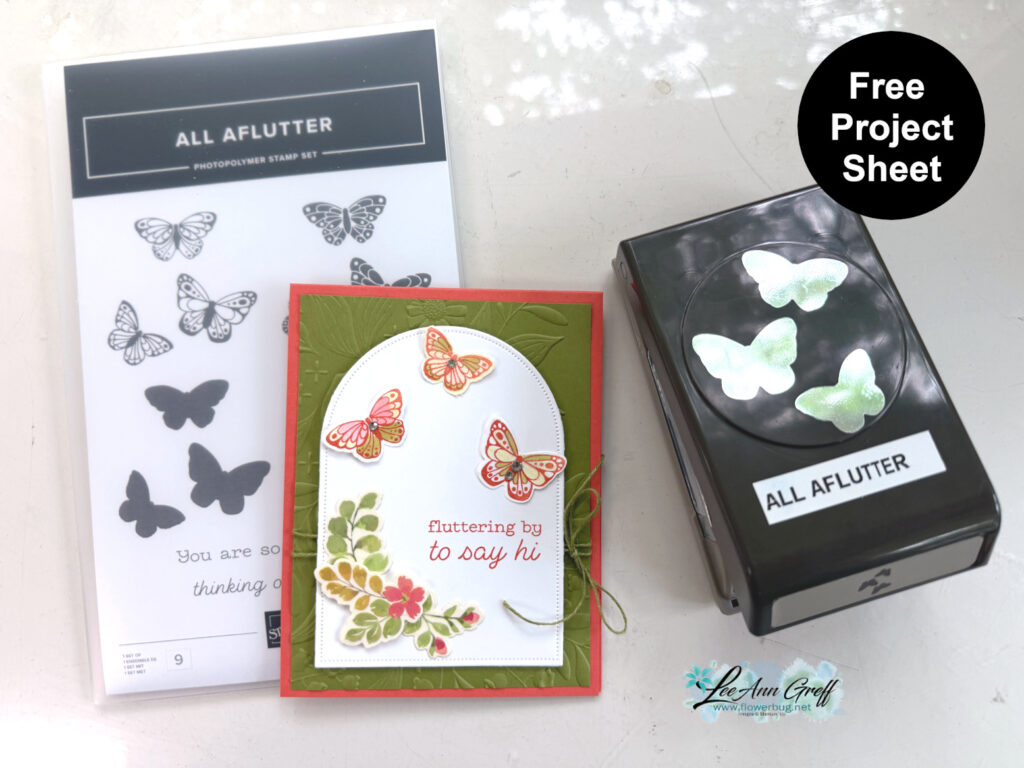
See the All Aflutter bundle here.

There’s also a video tutorial for this card and another sweet All Aflutter fun fold card. See it below.

All Posts

  • Woo hoo! You’ve been waiting for it and now it’s here!


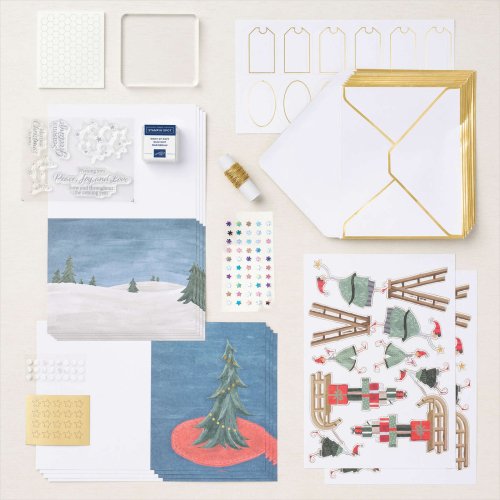
    Many people wondered when we'd be able to order these and now we can!  The adorable Christmas Whimsy card kit; an all-inclusive kit for $19.
     
     
    We caught a sneak peak of it on page 6 in the holiday catalog but you can see it here online. I love the stamp set that comes with it!
     
    This is one of our all inclusive kits featured in our Kit Collection. Everything you need comes in the box.  These kits come in two types; some with stamps, ink and a block and others with pre-printed sentiments.  
    Either is perfect for a seasoned or brand new crafter. Think of the fun you could enjoy with a friend or child.  Look at all you get in this kit! 
     
     
    Click here to see it. 
     
    And while you're considering kits tomorrow is the last day you can get the Haunts & Harvest Paper Pumpkin kit.  
     
    The Haunts & Harvest Paper Pumpkin Kit contains enough supplies to create 12 treat packages which means you get to share the a-maize-ing treats with your friends and family! I've seen a glimpse of these and they are absolutely adorable and surprisingly unique.  Don't miss out on these! 
     
    These treat package designs are perfect for Halloween party favors or place setting favors at a fall feast. They're the perfect way to tell your family and friends to eat, drink, and be scary! It is also intended as home décor with the included wheelbarrow crafting opportunity!
     
    Also, this month’s Paper Pumpkin box is designed with pre-traced lines and instructions to create a vintage-inspired wheelbarrow as a place to display your too-cute-to-spook treat packages. *Like I said, I've seen it and it is just fantastic! 


    Leave a Reply

    Your email address will not be published. Required fields are marked *

  • Harvest Meadow Fun Fold cards kit to go


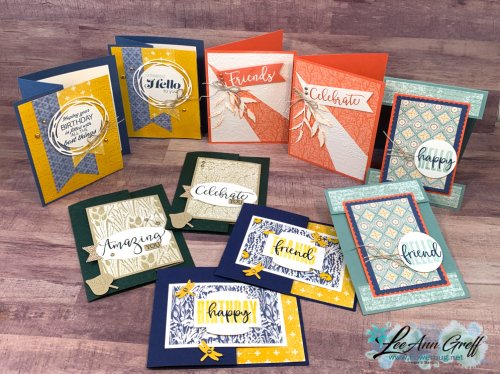
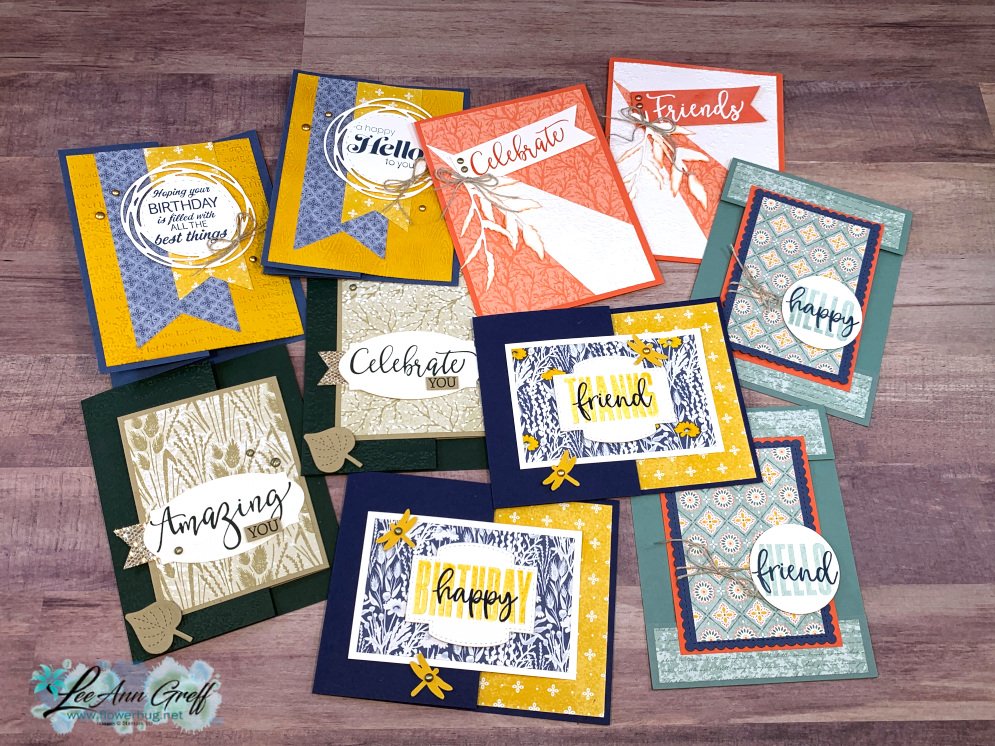
    Today I'm sharing one of my September cards kit with you. I actually have two and will share the other one tomorrow. 

    This kit includes 10 pre-cut cards (2 each of 5 cards), 1/2 pkg. Nature's Harvest designer paper (6" X 12"), Metallic adhesive gems & Linen Thread.  It's a fabulous value as the product is worth $20 (without tax & shipping) and the cost is just $28 and the tutorial is free! The PDF tutorial includes photos, step by step directions, measurements to make more and a supplies list. 

    8 of these 10 cards are fancy folds and with the tutorial you'll have measurements to make more using other products.  


    You will need your own stamps, ink, adhesive and a paper trimmer to cut your new designer paper using the measurements provided in the tutorial.  Everything else is cut & prepped for you. 

    *I make sure to use only greetings in my kits to go so you can substitute what you already own.  I used Sunny Sentiments, Biggest Wishes, Create with Friends sets here.  *Inks are Misty Moonlight, Night of Navy, Bumblebee, Calypso Coral, Soft Succulent & Versamark. 

    *Be sure to order by September 19th to get this kit!  

    This PDF tutorial will be sent to you via email immediately after payment. The kit is mailed out at the end of September, barring any back-orders. 

    Go here to order the pre-cut kit to go. $28 (See the 2nd September kit option here. Choose both kits here!)

    Click here to get the PDF tutorial. $15

    ~~~

    September Specials

    Host code: ASETFASJ or T7VSZQ64

    *click here to order

    All online orders will receive a free PDF tutorial filled with projects featuring

    the Painted Christmas Suite!

    Get a pkg. of Holiday Rhinestones with a $50 online order from me in September! 

    Order here

    BEST DEAL!

    Get a Free Bundle  from the Holiday Catalog when you choose the Starter kit!  Pick out $125 in product of your choice for just $99 and shipping is free!  

    Leave a Reply

    Your email address will not be published. Required fields are marked *

  • Poppin’ Pastels Technique with Delicate Dahlia


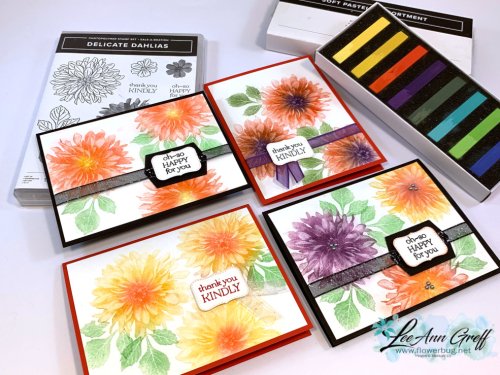
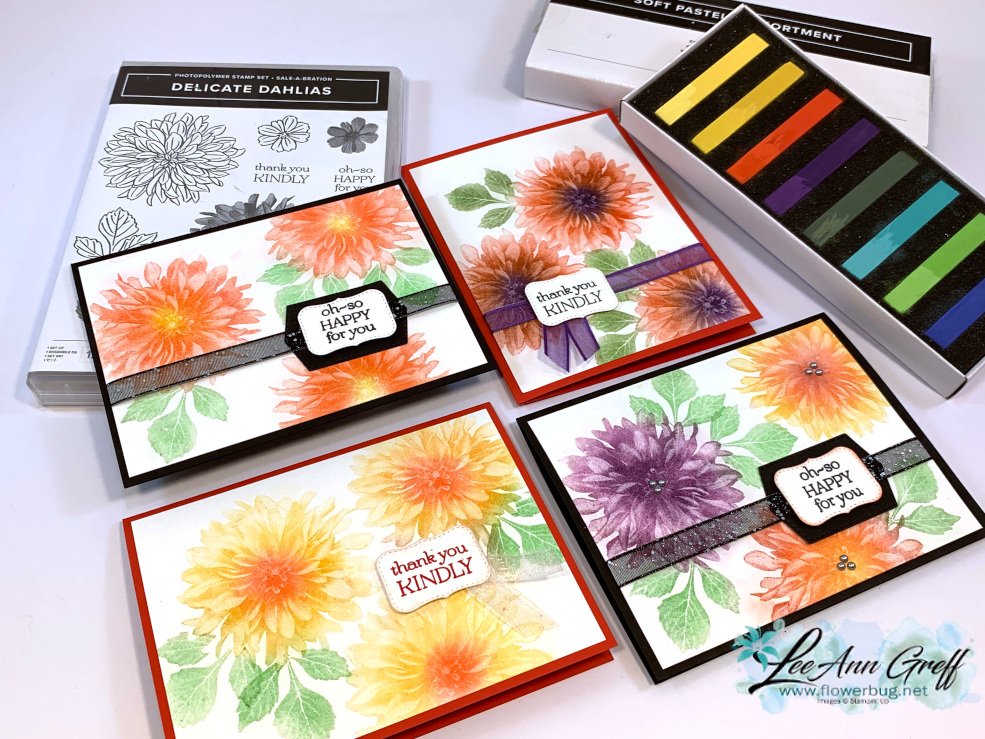
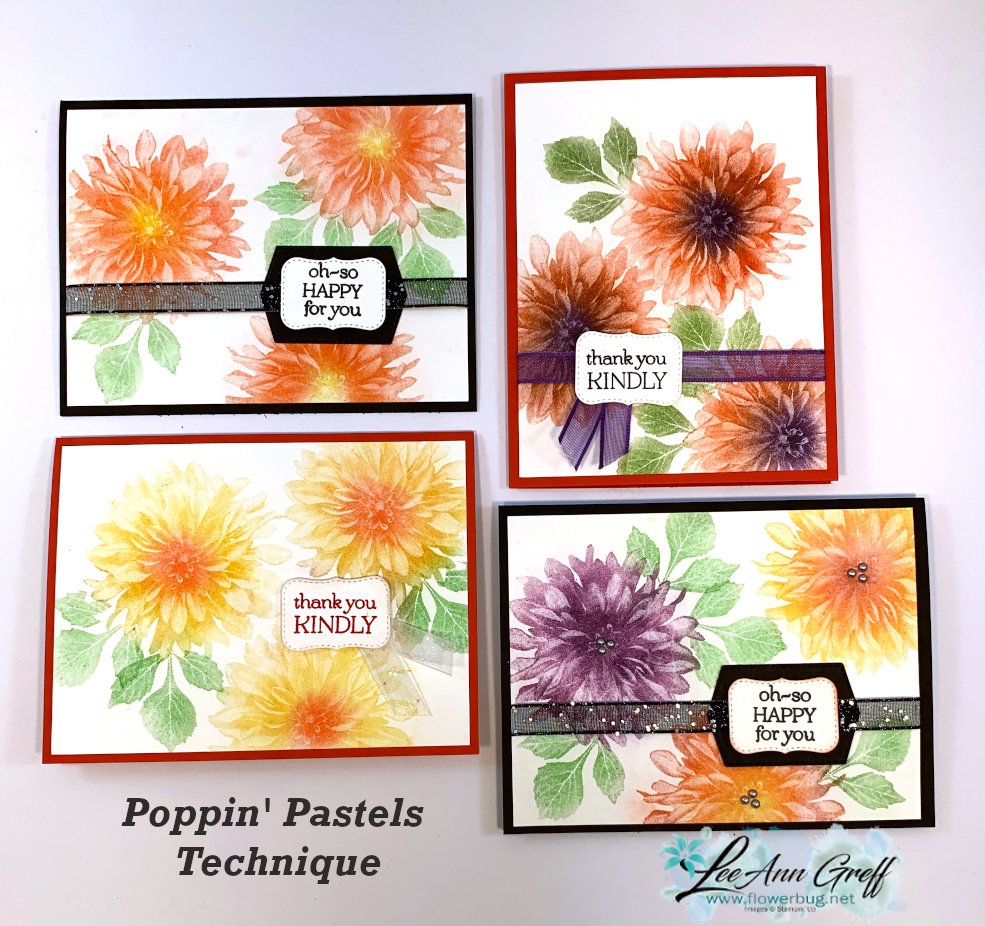
    If you've been a stamper for awhile you've likely played with chalks and the Poppin' Pastel technique.  If not, check this out!  

    You'll need just a few supplies – Chalks, Versamark ink and sponge daubers. Well, card stock too! 

    Tip – choose a solid image with a full surface.  Outline images won't work as well here. 

    Here's how it's done:

    1. Ink your image in Versamark ink and stamp on card stock. 
    2. Dab your sponge dauber in chalk (if it's firm like our new Soft Pastels you may need to scrape some off & use the dust *watch the video below).
    3. Dab over your stamped image repeatedly. Do not rub on the outer edges or it may show outside of your stamped area. 
    4. Blow or dust off excess chalk.  Done!  

    Here's the video:

    ~~~

    September Specials

    Host code: ASETFASJ or T7VSZQ64

    *click here to order

    All online orders will receive a free PDF tutorial filled with projects featuring

    the Painted Christmas Suite!

    Get a pkg. of Holiday Rhinestones with a $50 online order from me in September! 

    Order here

    BEST DEAL!

    Get a Free Bundle  from the Holiday Catalog when you choose the Starter kit!  Pick out $125 in product of your choice for just $99 and shipping is free!  


    Leave a Reply

    Your email address will not be published. Required fields are marked *


Notice: LeeAnn Greff, Independent Stampin’ Up! Demonstrator, Manager. The content of this website is my sole responsibility as an independent Stampin’ Up! demonstrator and the use of, and content of, the classes, services, or products offered on this website is not endorsed by Stampin’ Up! Copyright 2025