/


Latest Post

Regency Park with the Baby Wipe technique!


During March our Flowerbug's Team has been focusing on using re-inkers.  I hadn't played with the 'baby wipe' technique for awhile.  I chose the Regency Park suite when creating this cute card: 

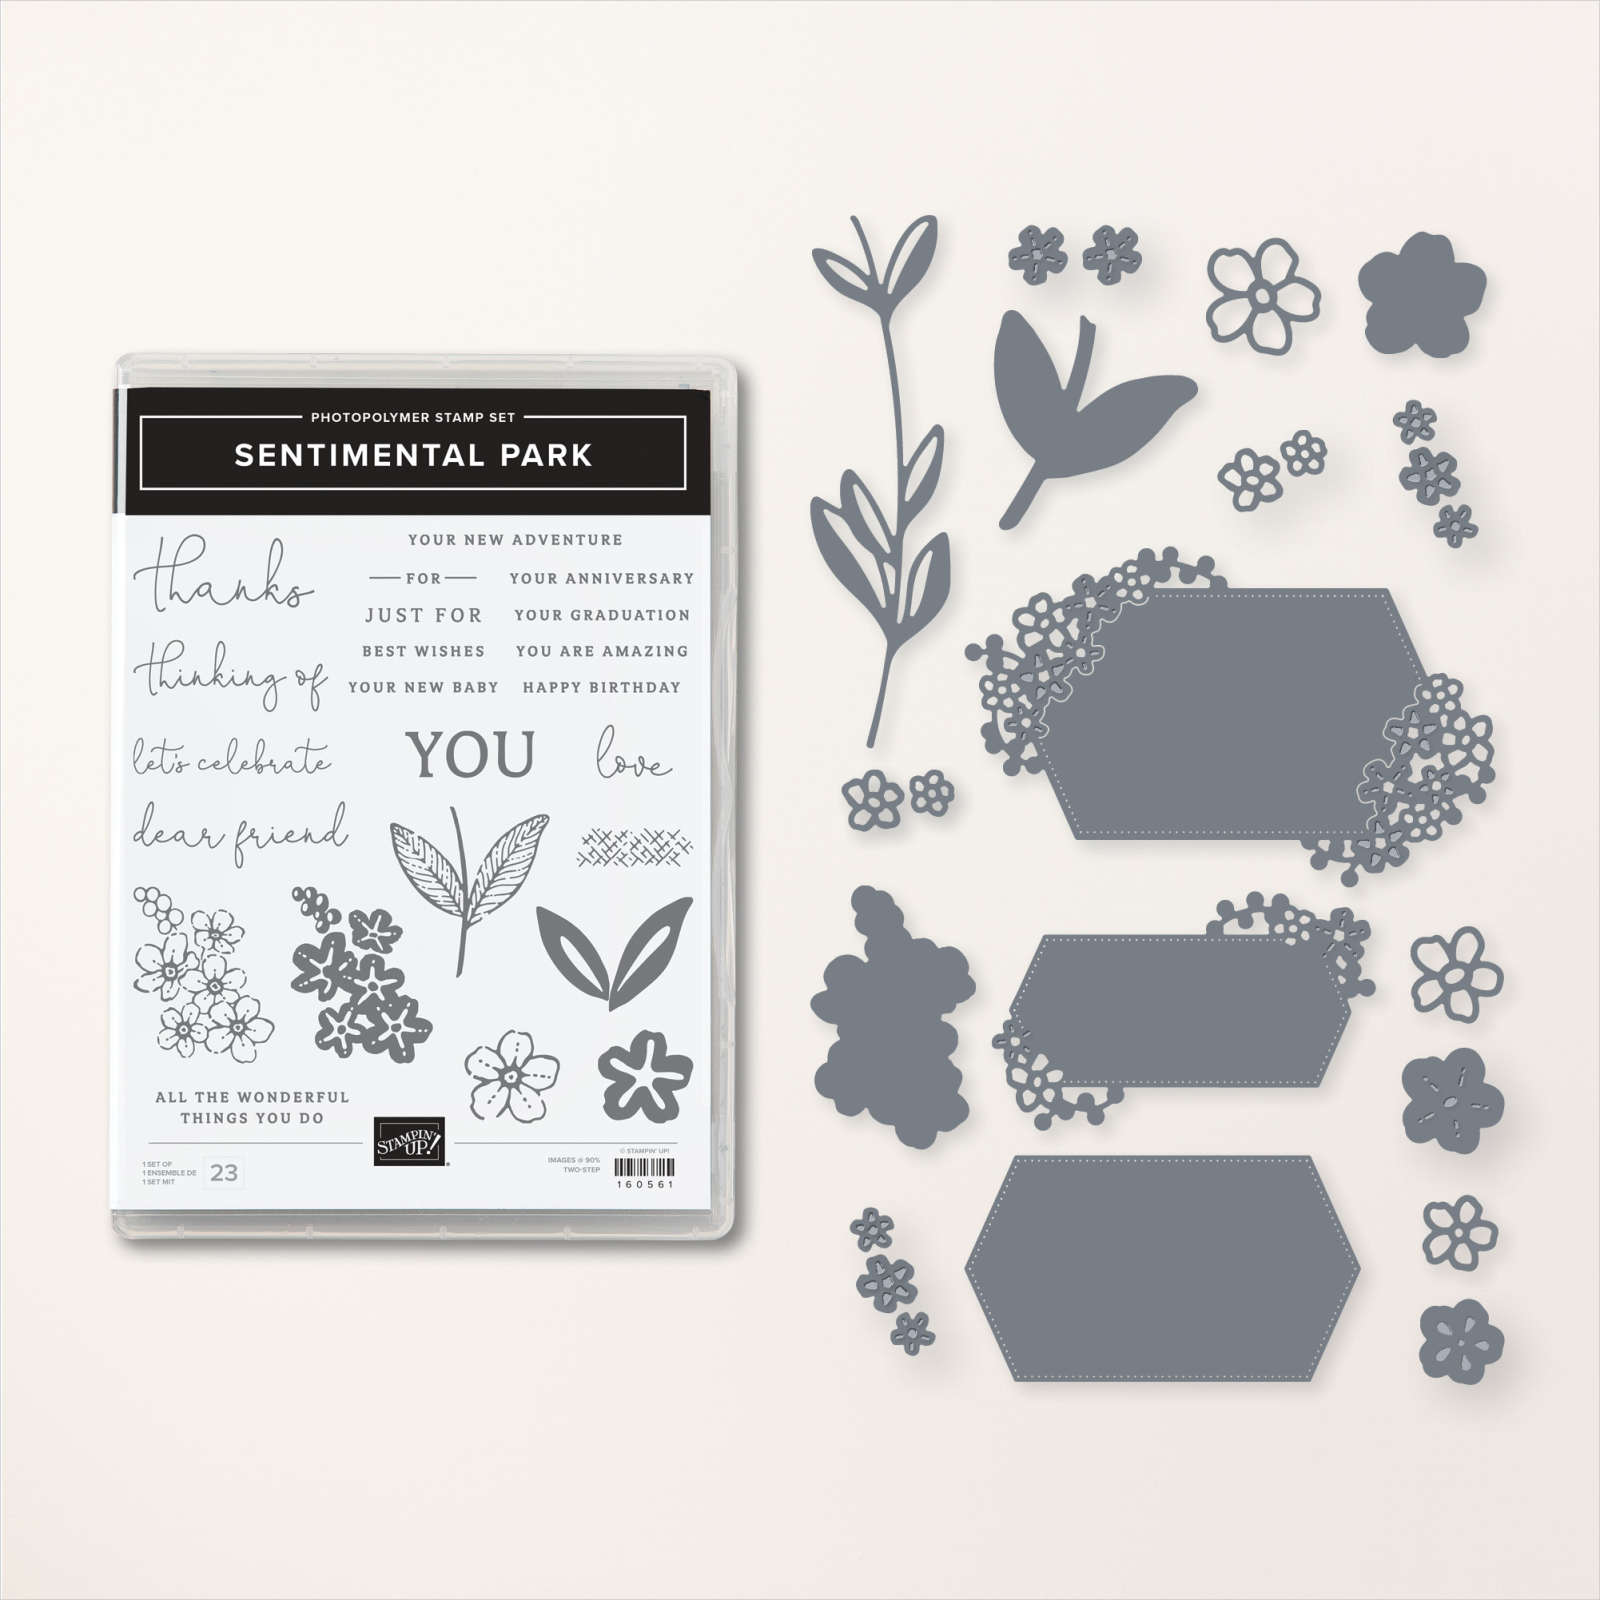
It might not show up well here but the White greeting die-cut is 'caught' and held in place by the larger die & the outer two corners of flowers. These dies fit together perfectly!  *you can see the dies in the photo below; the bottom most label nestles into the largest one with flowers on two edges. 

Here's the Sentimental Park bundle as well, with the greeting & die-cuts. This bundle was one of my first purchases from the Spring catalog and I've used it a lot! 

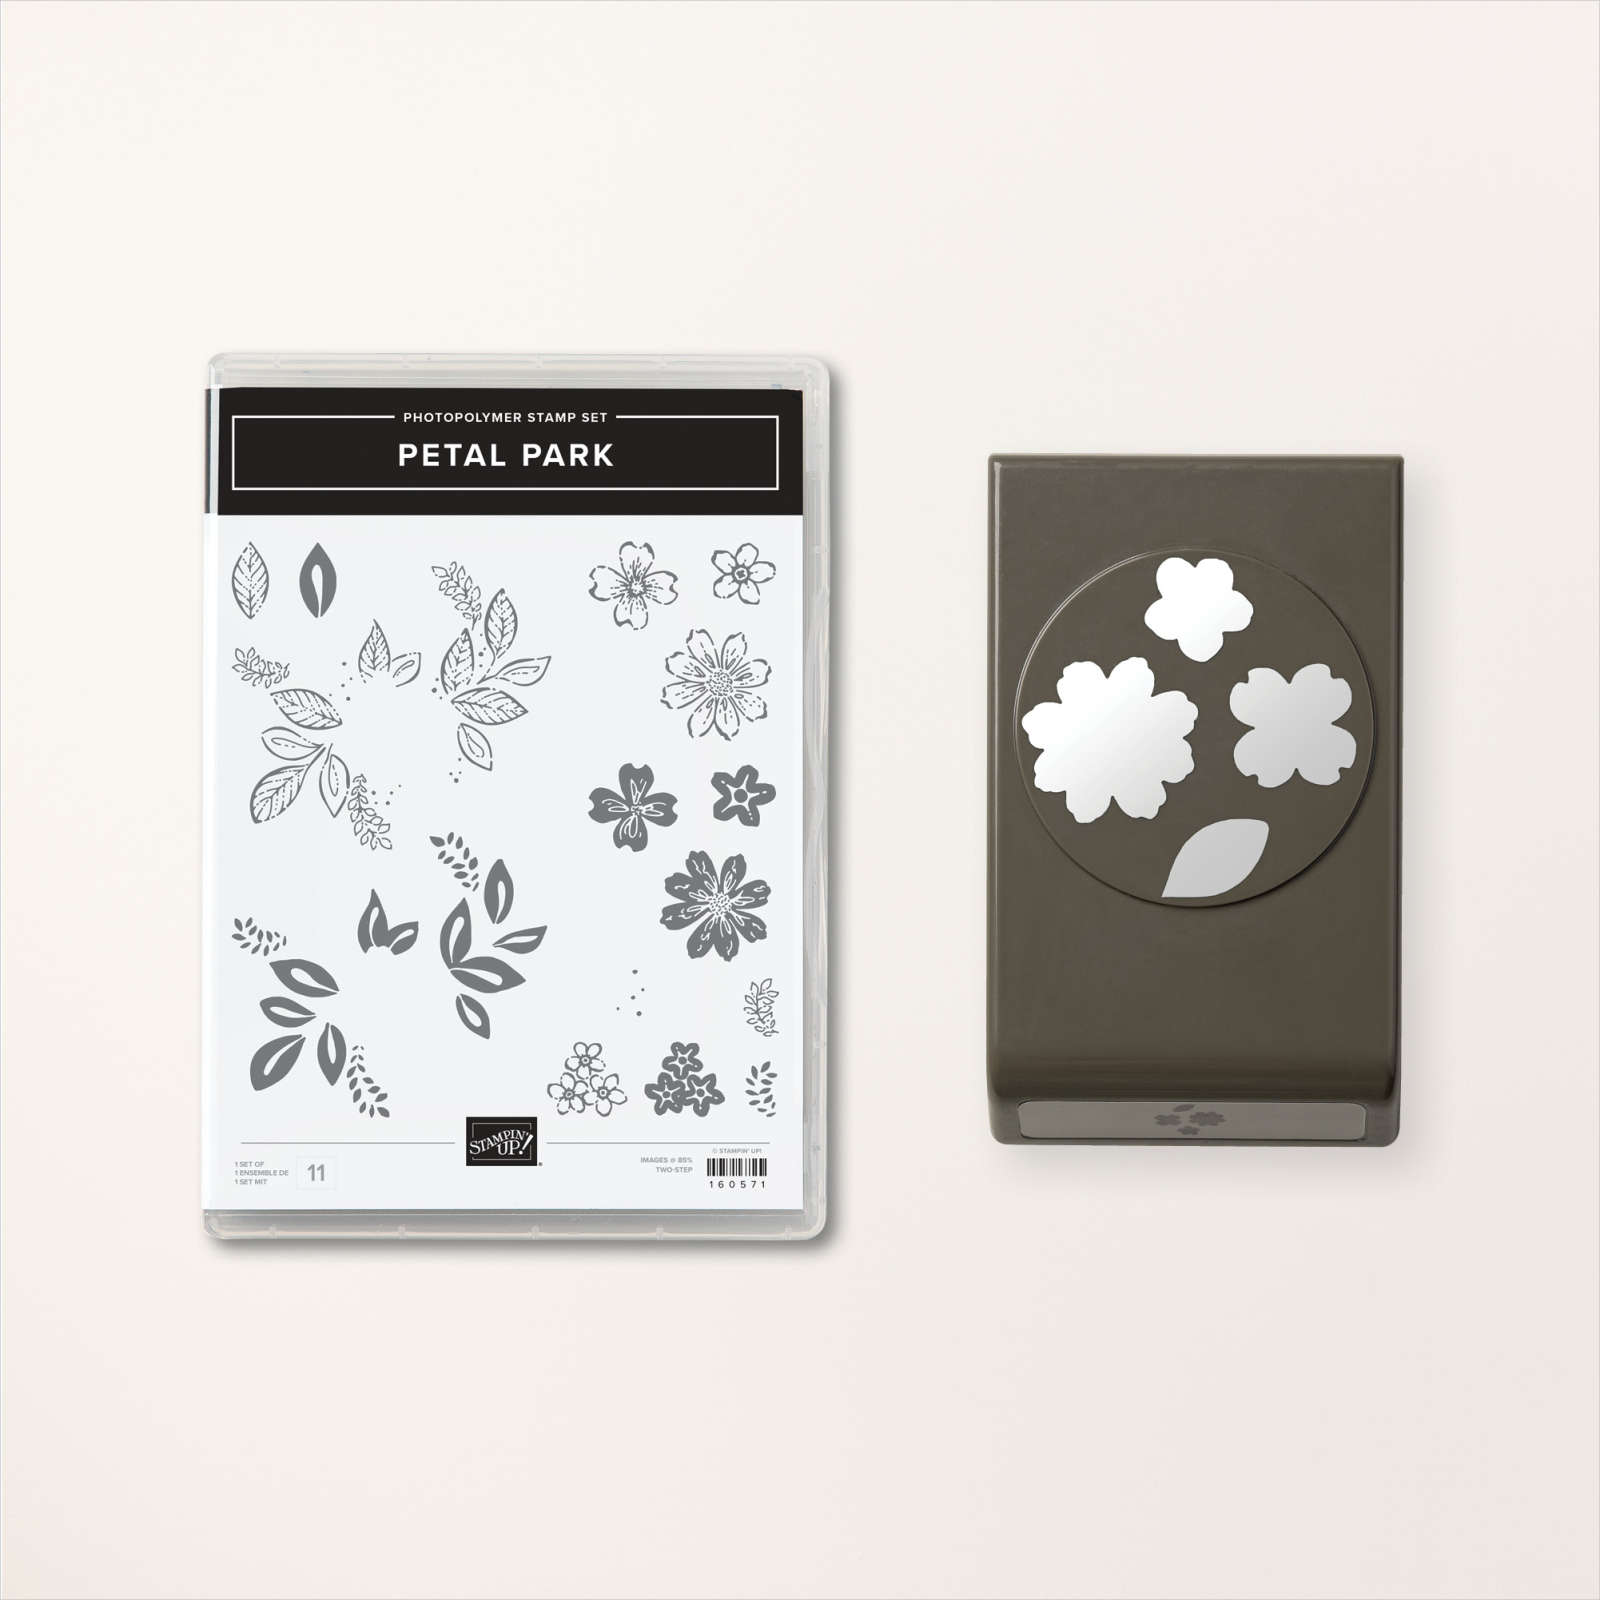
The other bundle in this suite is the Petal Park bundle seen here. It includes the stamp set & coordinating flower punch. I used the solid flowers on the middle right for my baby wipe technique and added the outline flowers (top right) in Black. 

  I had a die-cut dotted background piece (from Dots & Spots here) among my 'extra's and thought it would work well for my background. 


What supplies do you need for the Baby Wipe technique?  

  1. A baby wipe or two
  2. At least 2-3 colors of ink refills
  3. A stamp and card stock

Success tips for the 'Baby Wipe' technique:

  • Choose colors that work well together.  I tend to choose 3 of my favorites like yellows with pinks, blues with greens, purples with blues etc.
  • Pick a stamp with a solid image; lots of rubber.  An outline image will not show your colors well.
  • Fold the moist baby wipe into an ink pad; I use at least 4 layers. 
  • Drop multiple drops of each color in each area. For example – 4 drops of yellow, move over a bit, 4 more drops of yellow etc.  Then fill with the second color in the same manner. Fill in any empty areas with the 3rd or last color. 
  • When inking your image stamp it in your 'baby wipe' handmade ink pad multiple times, trying to keep it in the same place as much as possible. Moving the image around too much can muddy your colors. 
  • Huff the image and stamp!  

Here's the inside of my card; I added a few more of the multi-colored punched flowers. 


My colors include Polished Pink, Daffodil Delight and Mango Melody.  

~~~

March Specials:

See the new Online Exclusives here! 

*current host code: BFE4C2KM or EWJYEGFV

Get a free class kit with online orders over $55 when using the host code above!

Earn free products with my loyalty rewards! 

Click here to download yours and earn a $50 shopping spree!

All Posts

  • Peaceful Moments bundle and a WOW card!


    Jonna B made this gorgeous card for our last Flowerbug's Team card swap. She chose to use the Peaceful Moments bundle along with the Peaceful Poppies designer series paper.  Isn't it pretty?

    Aren't her flowers gorgeous?  The flowers and leaves are die-cut with both card stock AND the Perennial Essence vellum card stock.  You can see this pretty colored vellum here or on page 169 of your annual catalog. 

    • Her colors are Calypso Coral, Black, Granny Apple Green and Poppy Parade.
    • The White CS is embossed with the Coastal Weave embossing folder (my free product of the month for online orders over $65 – details below)
    • Clear Rhinestones for bling 
    • Ovals Collection dies for the greeting layer

    ~~~

    Today's the last day for my January Specials! 

        1. All January online orders will earn a ticket in the drawing for a free Little Ladybug stamp set!

    Order online here

    2. All online orders will receive a 10 cards pdf tutorial in an email.

    3. And if your order is over $65 you'll get a free Coastal Weave embossing folder too!

    January Host Code is GEEFZCZV

    Order online here

    Leave a Reply

    Your email address will not be published. Required fields are marked *

  • Peaceful Moments in pastel colors


    Yesterday I shared a bright and colorful card featuring the Peaceful Moments bundle.  Today I have a soft and pastel card; totally different in colors and style but using the same bundle.

    Candace B made this one for our Flowerbug's Team swap.  She chose to use Blushing Bride with Soft Sea Foam, White and Old Olive.  Just gorgeous in a totally different way. 

    • White card base is 5 1/2" X 8 1/2"
    • Blushing Bride is 5 3/8" X 4 1/8" 
    • Soft Sea Foam is 5" X 3 3/4"

    She sponged the large petals with Blushing Bride.  I just love that little bud at the top of the leaves.  It's one of the dies in the Poppy Moments set.  You can see the bundle here. 

    ~~~

    The January Specials are almost over!  

        1. All January online orders will earn a ticket in the drawing for a free Little Ladybug stamp set!

    Order online here

    2. All online orders will receive a 10 cards pdf tutorial in an email.

    3. And if your order is over $65 you'll get a free Coastal Weave embossing folder too!

    January Host Code is GEEFZCZV

    Order online here

    Leave a Reply

    Your email address will not be published. Required fields are marked *

  • Witty-Cisms Fun-Fold card


    The Witty-Cisms stamp set is a great all occasions set with fun images and cute greetings to match.  See it here. I created this cute card for a recent online card swap.

    It's a fun fold card with a double opening.  The Real Red flap is scored and the scored edge is adhered under the inside White layer.  The Granny Apple Green main card is standard size but 1" is cut off the right edge to reveal the White inside.  The new Coastal Weave embossing folder was used on the front.  This embossing folder is the one I'm giving to all online orders over $65 in January.  

    Sometimes with this type of fold I add the designer paper to the inside right edge so it shows from the front. This time I added it to the very front along with a stitched scalloped edge piece die-cut with the Stitched Be Mine dies seen here.  

    Here are the measurements:

    • Granny Apple Green main card 7 1/2" X 5 1/2" scored at 4 1/4".  
    • White inside 4" X 5 1/4"
    • Real Red 4" X 2 1/2"
    • Black 2 1/4" X 3 1/4"
    • 1" X 5 1/2" Granny Apple Green gingham DSP; *from the Brights 6 X 6" DSP pack seen here. 

    And more details: 

    • I added a butterfly die-cut from the upcoming Nature's Thoughts dies.  They'll be available in February in the Coordination Product Release.
    • I stamped the main image three times; once on the White punch and again on Real Red for the strawberry and again on scraps of Green. These are cut out and popped up on the main image.
    • White label is the new Label Me Lovely punch seen here.  I love this new punch!  A 1 3/4" circle punch fits inside it for layering. And oval shapes do as well! 

    You can find these items in my online store here. 

    ~~~

    Three January Specials just for you besides Sale-a-Braton! 

        1. All January online orders will earn a ticket in the drawing for a free Little Ladybug stamp set!

    Order online here

    2. All online orders will receive a 10 cards pdf tutorial in an email.

    3. And if your order is over $65 you'll get a free Coastal Weave embossing folder too!

    January Host Code is GEEFZCZV

    Order online here

    Leave a Reply

    Your email address will not be published. Required fields are marked *


Notice: LeeAnn Greff, Independent Stampin’ Up! Demonstrator, Manager. The content of this website is my sole responsibility as an independent Stampin’ Up! demonstrator and the use of, and content of, the classes, services, or products offered on this website is not endorsed by Stampin’ Up! Copyright 2025