/


Latest Post

Paper Tags Joseph’s Coat technique with video tutorial


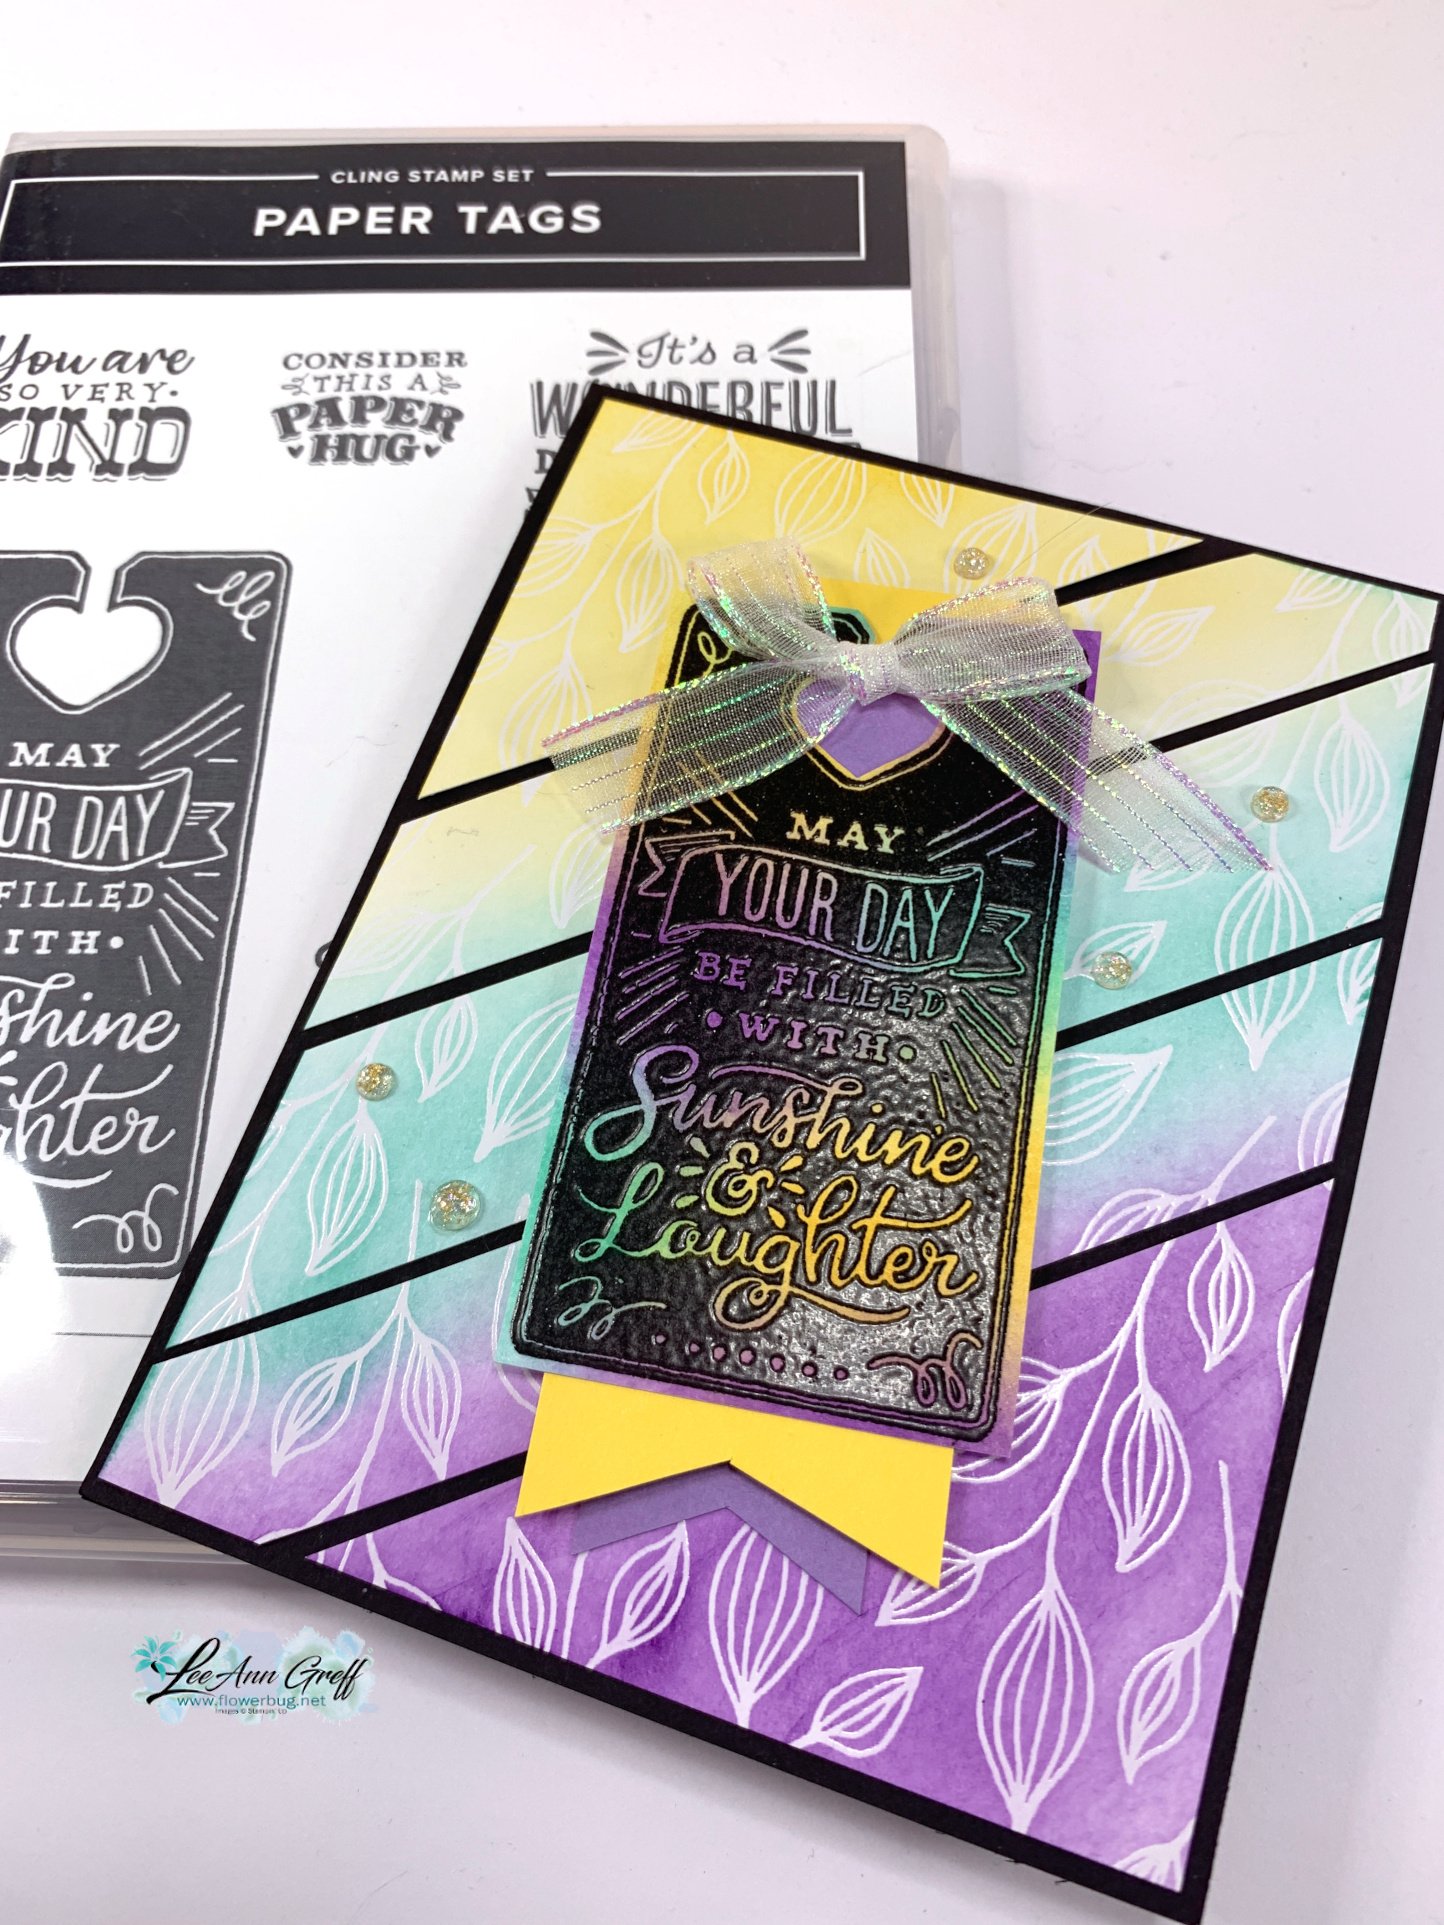
I played with the Paper Tags stamp set and the Irresistible Designs Specialty Paper for last week's video.  Here's my favorite project: 
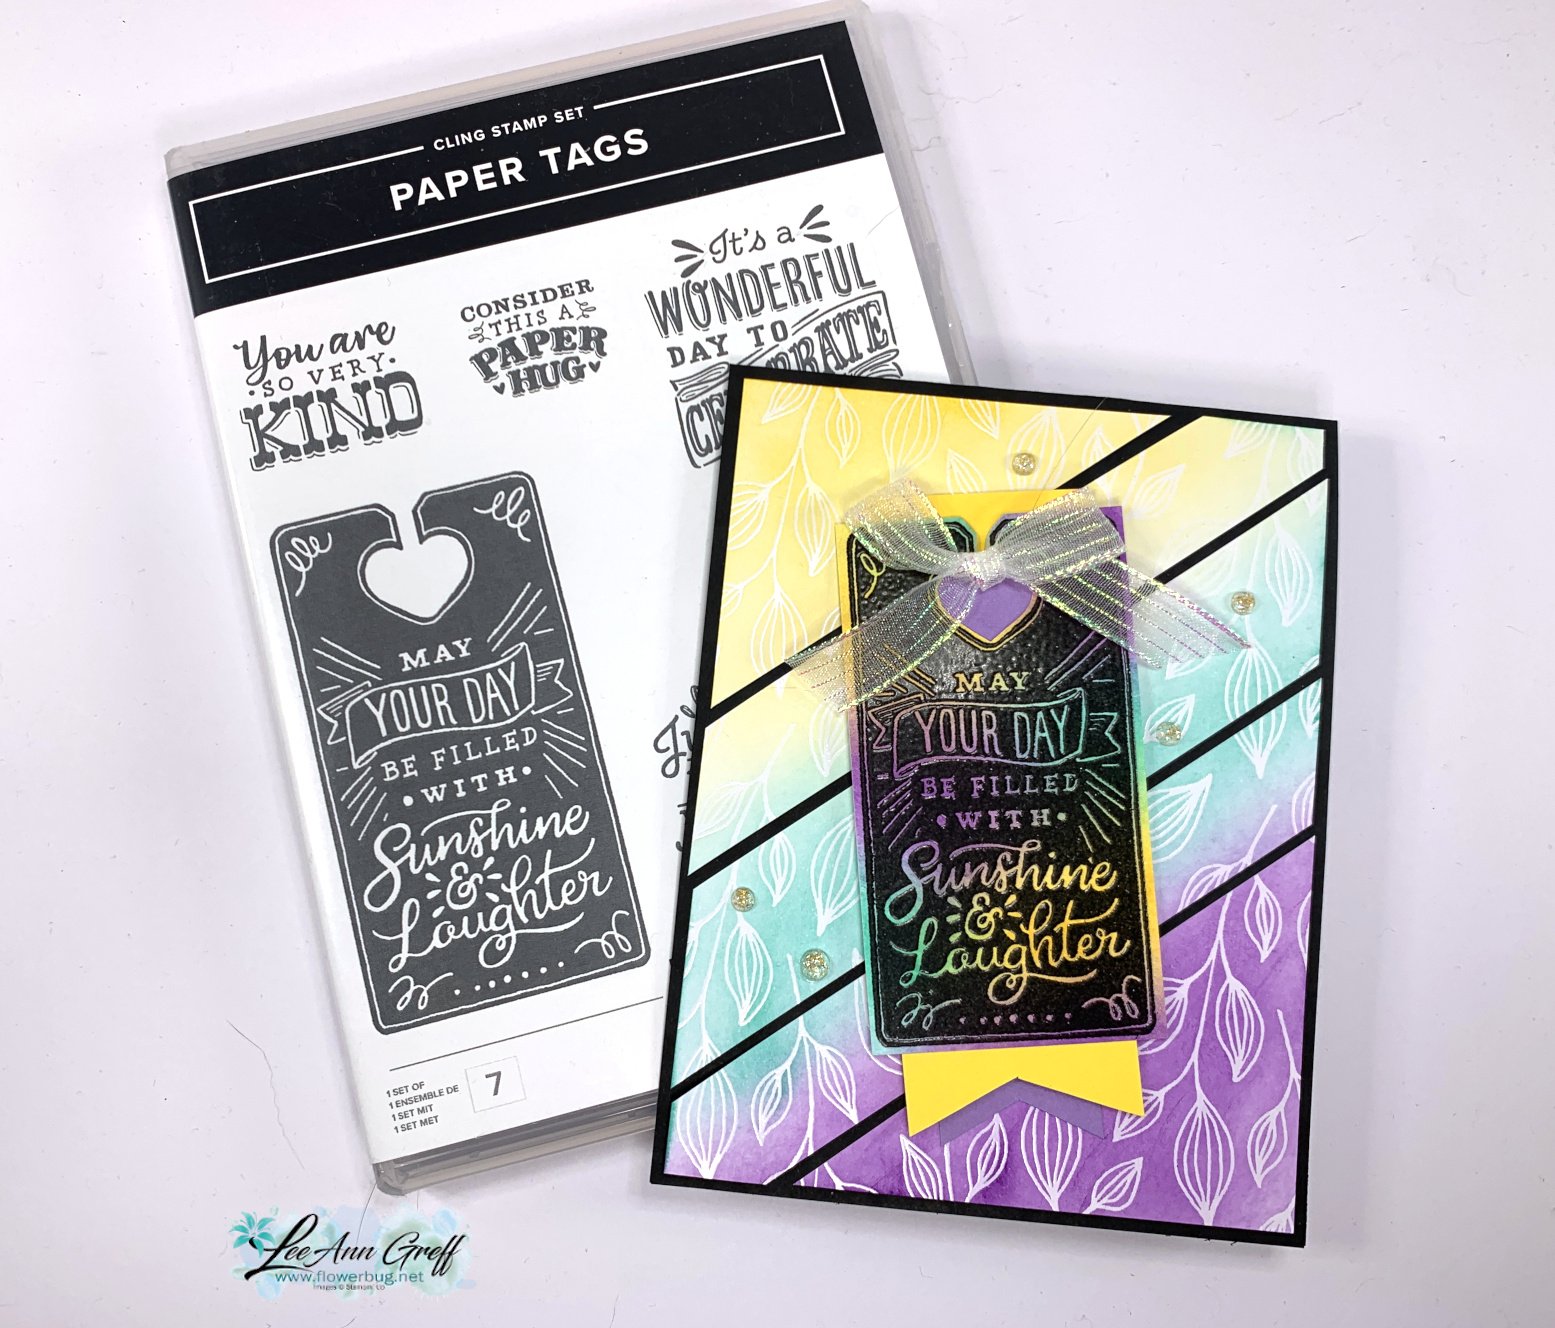
The colors include Daffodil Delight, Coastal Cabana and Gorgeous Grape in inks.  The card stock is Black, White, Daffodil and Highland Heather. 

For the colored designer paper panel I started with a piece at 4" X 5" and blended the three inks on it diagonally. This Irresistible specialty paper seen here resists the ink where they printed the resist designs. Once you add ink, it reveals their pattern.  So cool!  

After I blended the colors on I randomly cut the single panel into 5 pieces on the diagonal. I share how I did this in the video here. I adhered each panel one at a time starting in the corner. You may need to trim one of the pieces slightly to fit the card base.  


For the inside of the card I stamped the greeting and added color to it with coordinating Blends markers. 

Here's how you do the Joseph's Coat technique:

  1. Sponge or blend multiple colors onto your neutral cardstock. 
  2. Swipe the embossing buddy over this layer; tap off excess powder. 
  3. Ink the stamp image in Versamark ink; stamp onto the layer. 
  4. Immediately heat emboss with Black embossing powder. 

Once I had my tag, I trimmed it by hand (there are coordinating dies) and added a few extra pieces to lengthen the tag and add more layers. I finished it off with a bow. 
Here's the free project sheet with directions, photo, measurements and a supplies list: Download Paper Tags Joseph's Coat card

Below is the video tutorial for this card and another I shared in the video:

~~~

June Specials:

The Suite Sale is on! 

Buy one get 50% the second item – on all available suite products. 

Shop here or see products below: 

~~~

Last Chance List has been updated!  see it all here. Don't miss out on the deals!

~~~

Earn free card kits in June with online orders! Get 4 kits with a $50 order and orders over $80 receive all 6 cards. All you need are greetings, gems and adhesives to assemble. 

Order here 

~~~

Get my Celebratory Sips PDF tutorial free with any online order in June!

All Posts

  • A set of fun fold cards with NEW designer paper! Free project sheet & video too


    Yesterday I shared one of these fun fold cards and today I’ll share the other two. All feature the brand new Artisan Sketched Garden designer paper. It’s coming out on May 5th in the May-August catalog from Stampin’ Up!

    I shared the top card yesterday and today I’ll share the lower two.

    First is this SUPER easy fun fold card. It’s a great way to use your DSP up. The front layer is 3″ X 4″; perfect for 12 X 12″ DSP.

    I chose to use two of the retiring 2024-26 In Colors for this one. Summer Splash and Pretty in Pink with Black & White. This Artisan Sketched Garden DSP is all Black & White but I colored the flowers and leaves in with Blends markers. The greeting image is from the Greetings for all Ephemera pack seen here. It’s one of my very favorite greeting packs and it’s carrying over too! The Black punched piece is from the Heartfelt Hexagon punch. Sadly it just retired and is not out of stock.

    The inside White layer hides the end of the scored Pink flap. It’s a really neat and simple fun fold card. Click here to access the free project sheet.

    And here is the last card in this trio of fun fold cards featuring the new Artistic Sketched Garden DSP. It’s another side flap card:

    My colors include Lemon Lime Twist, Blueberry Bushel with White. The scored side flap flips to the right and has the diagonal squares with the greetings attached. The greeting is part of the Greetings for All Ephemera pack again; added to the Labeled with Love punched piece. This is retiring now and available here while supplies last.

    Here’s how it opens:

    Click here to download the free project sheet for all 3 cards. Below is the video tutorial for all THREE cards!

    April Specials:

    Check out the Last Chance list here; these items go fast!

    Product of the Month is the Eyelet Blooms dies

    *Get a free 12 project tutorial when you redeem this POM from me!

    ~~~

    Free PDF tutorial featuring the Delicate Whispers suite!

    Leave a Reply

    Your email address will not be published. Required fields are marked *

  • Artistic Sketched Garden fun fold card with free project sheet & video


    I shared this neat accordion card on last week’s video. Most Tuesdays at 11 am CT I post a Live video on my FB page here. Then the following week I share the free project sheet for it here on my blog. Be sure to follow me here by subscribing to my blog on the right side, my YouTube Channel or my FB page. Don’t miss a thing!

    I featured the Artistic Sketched Garden designer paper here; it’s new and will be available in the upcoming 2026 May – August Stampin’ Up! catalog. Each sheet is a black & white combination of florals or prints.

    I paired it with Melon Mambo and Black here. The vase of flowers is fussy cut from a sheet of the DSP. I used the Perennial Postage dies to cut a piece of In Color DSP as a background. That simple strip of Black CS really sets of the colors here.

    You can’t tell what type of fun fold it is in the photo above. But look at this one:

    It’s so cool and gives you plenty of places to add designer paper. Here’s the free project sheet for all three cards. Click here to download or print it.

    In the video below you’ll see how I made this card and two more easy fun folds. Please subscribe to my YouTube channel here.

    April Specials:

    Check out the Last Chance list here; these items go fast!

    Product of the Month is the Eyelet Blooms dies

    *Get a free 12 project tutorial when you redeem this POM from me!

    ~~~

    Free PDF tutorial featuring the Delicate Whispers suite!

    Leave a Reply

    Your email address will not be published. Required fields are marked *

  • A new catalog sneak peek!


    I’ve joined a ton of swaps to get lots of samples for my upcoming New Catalog Open House party on May 2nd. If you’re local stop in between 11:30-1:30 pm that day at my home studio.

    Here’s one of the swaps I made:

    It is made with the Opulent Oasis bundle. This bundle will be available to order on May 5th.

    My colors include Pool Party, Petal Pink and the new Crisp Cantaloupe (card base). I love the colors together! Can you tell there’s a hint of White on some of the raised texture? I rubbed my Craft White ink pad over the surface afterwards.

    Notice that big textured floral element – that is made with something brand new, called Impressions dies.

    Here’s how you use them: I used the die first to cut out the flower like usual. It did not have the deep impression in it with the first cut. Then I put in in the Cut & Emboss machine again with the same die but this time added the new Impressions mat. This floppy, stretchy mat pushes the card stock into the die and gives that deep texture. So cool! I’ve heard you can use other ‘non-impression’ dies with this mat too!

    There are a few new & exciting impression dies coming out in the new catalog on May 5th.

    I hope you’re getting excited about all of the new products that are coming to you in this fabulous new catalog. I know you’ll love it.

    April Specials:

    Check out the Last Chance list here; these items go fast!

    Product of the Month is the Eyelet Blooms dies

    *Get a free 12 project tutorial when you redeem this POM from me!

    ~~~

    Free PDF tutorial featuring the Delicate Whispers suite!

    Leave a Reply

    Your email address will not be published. Required fields are marked *


Notice: LeeAnn Greff, Independent Stampin’ Up! Demonstrator, Manager. The content of this website is my sole responsibility as an independent Stampin’ Up! demonstrator and the use of, and content of, the classes, services, or products offered on this website is not endorsed by Stampin’ Up! Copyright 2025