She cut the treat box dies into separate pieces (Garden Green & Vanilla) for her card front. It also opens up to reveal a gift card holder inside. Lots of texture with the Winter Snow embossing folder too!
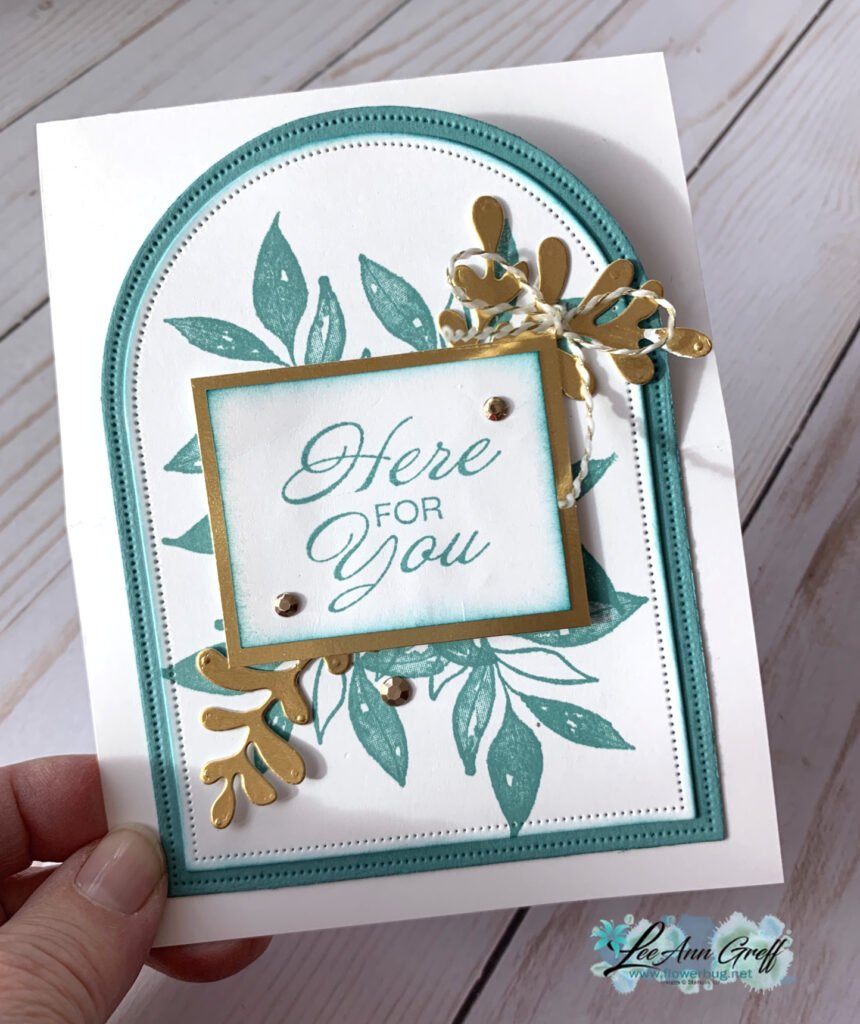
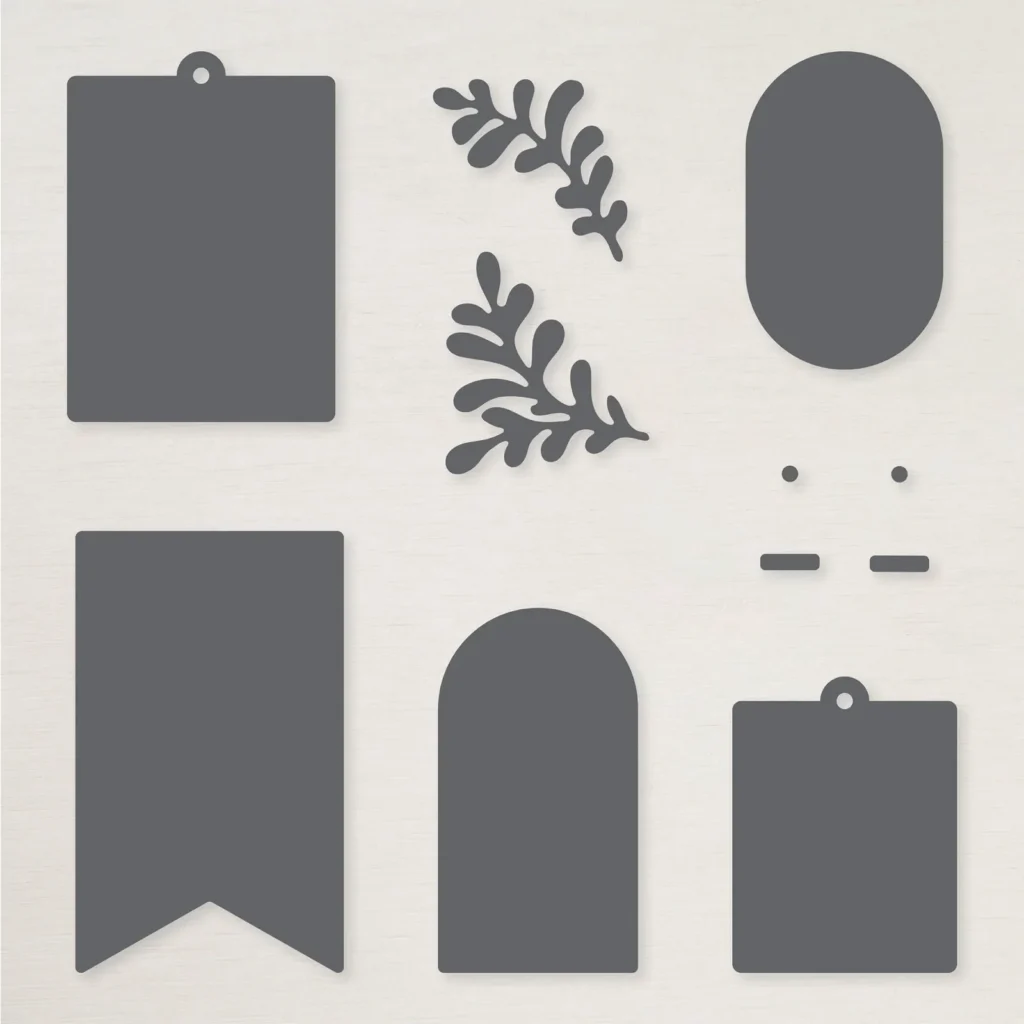
My colors include Lost Lagoon, White & Gold foil. The other products include Creative Haven dies (new), Everyday Arches dies, Gold & Black twine & the Textured Notes stamp set (leaves). Here are the Creative Haven dies:
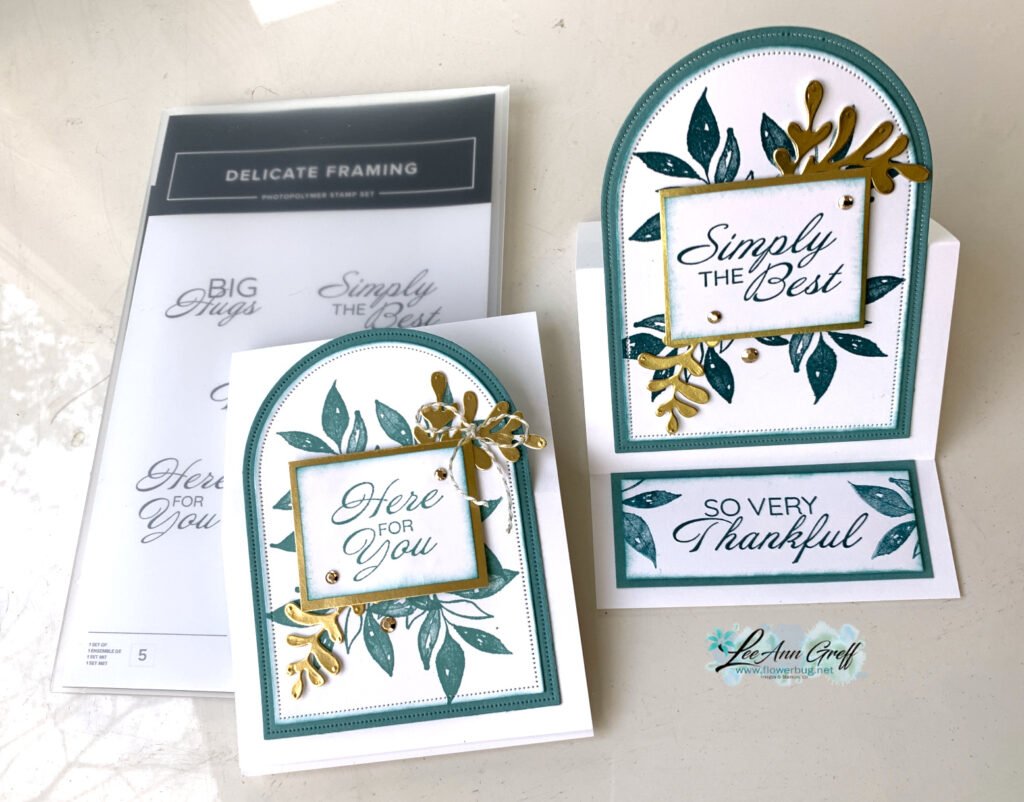
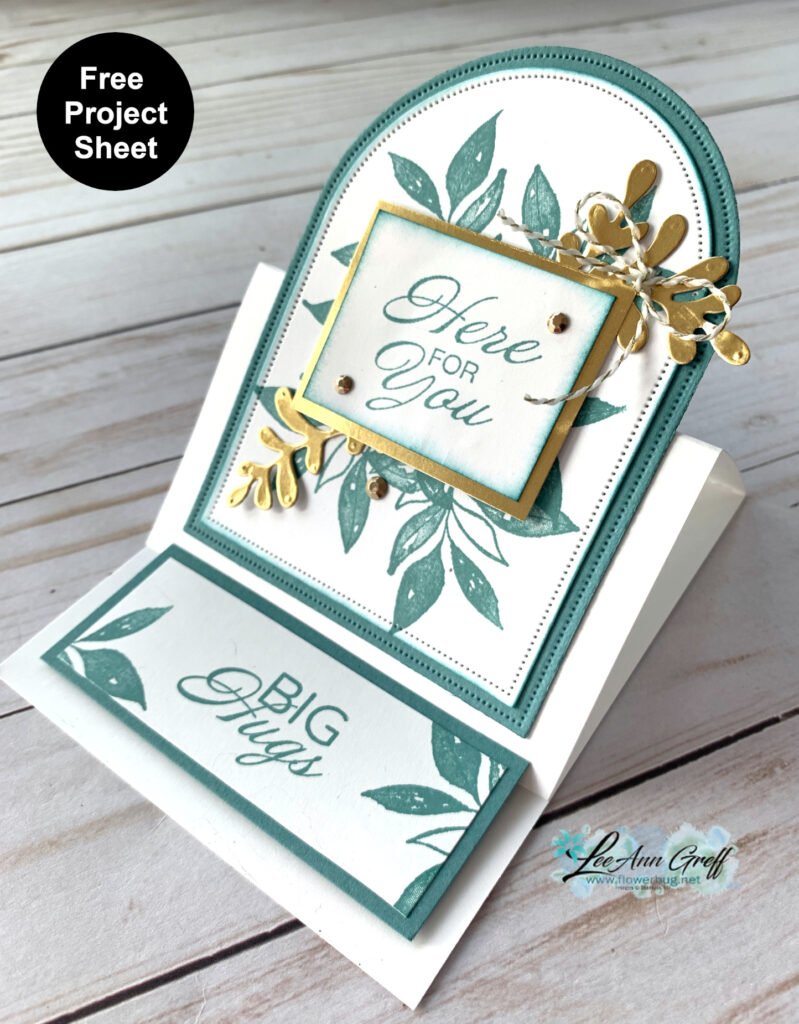
Aren’t the greetings wonderful? See the Delicate Framing set here. As you can see, it’s an easel card which is quite simple to make. Add a second score line in the middle of your card base front and add something to the inside to hold it up.
You can print or download the free project sheet here. *I recommend saving them to a file for easy access.
This kit to go includes a share of the festive designer paper, the ribbon, the peppermint gems, the ephemera greetings, the PDF tutorial and video too. Plus the pre-cut 10 cards that are all fun folds. All for $30 plus shipping. It’s a fabulous deal!
Don’t wait long; I have just a few left.Go here to get yours. *You will need to cut your new designer paper for the cards but my directions make that simple.
~~~
The other kit I created this month is also easy but does require stamped greetings. But there is very little prep & just a little trimming of the card bases to create these beautiful wintery cards:
These cards could be winter or holiday; it’s your choice when you stamp the greetings.
This kit originated from a former Paper Pumpkin kit but I jazzed up the cards and added more to create 12 gorgeous cards. This kit includes 12 envelopes and a share of Peppermint gems plus the PDF tutorial. I have a few left so grab yours soon. This kit is $29 and you can see it here.
**Remember to check out all of my kits to go and tutorials here at my shop; choosing more than one will save on shipping.
~~~
~~~
November Specials
New Online products are available on November 4th. See them here.
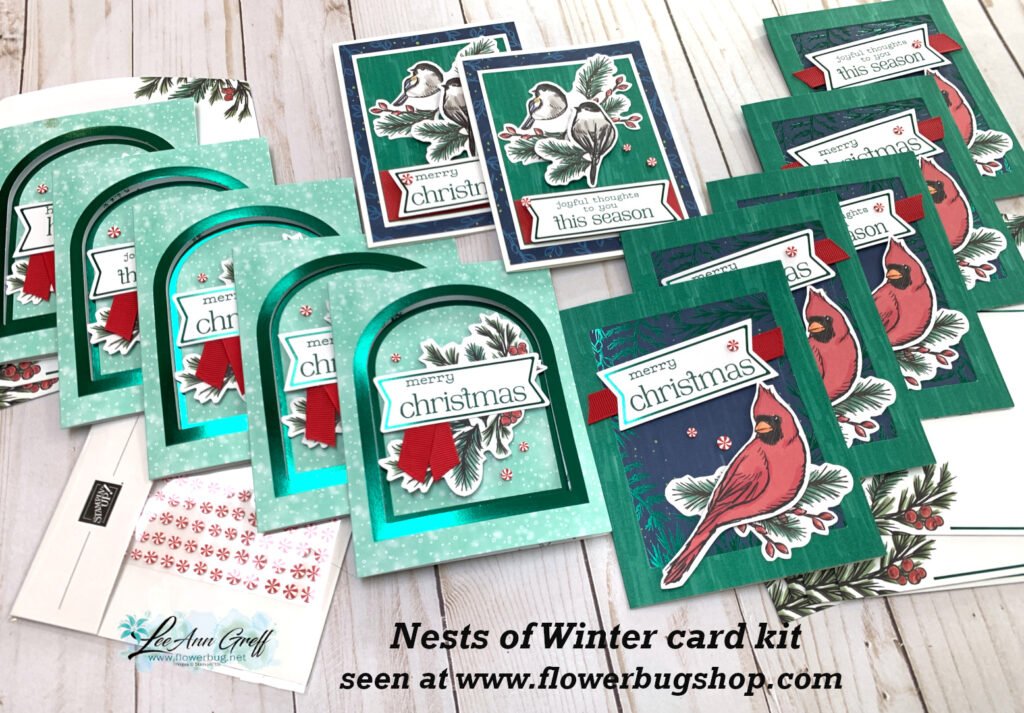
Striking Nests of Winter card kit to go; reserve yours ASAP
Today I’m sharing my second card kit to go for November. It is a former paper pumpkin kit called the Nests of Winter; but I jazzed them up a bit plus added more.
This pretty kit includes lots of foil accents and a wintery bird theme. I added Christmas greetings but they could easily be winter themed all occasion cards too. This kit includes 12 cards with envelopes and a share of Peppermint gems plus the PDF tutorial. It includes so much product you could make even more cards with just a few card bases.
This card kit will go out in mid to late November, before Thanksgiving, giving you plenty of time to get them out for Christmas if needed. The PDF will be sent to you via email immediately after payment. *You will need greetings, ink and a paper trimmer to complete them.
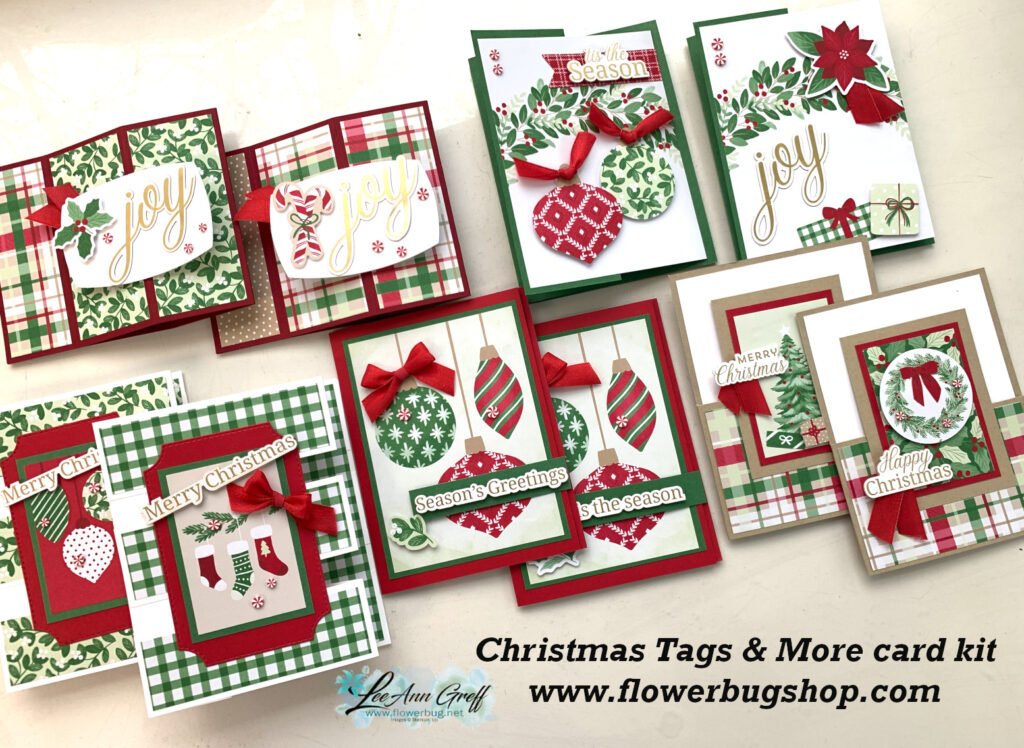
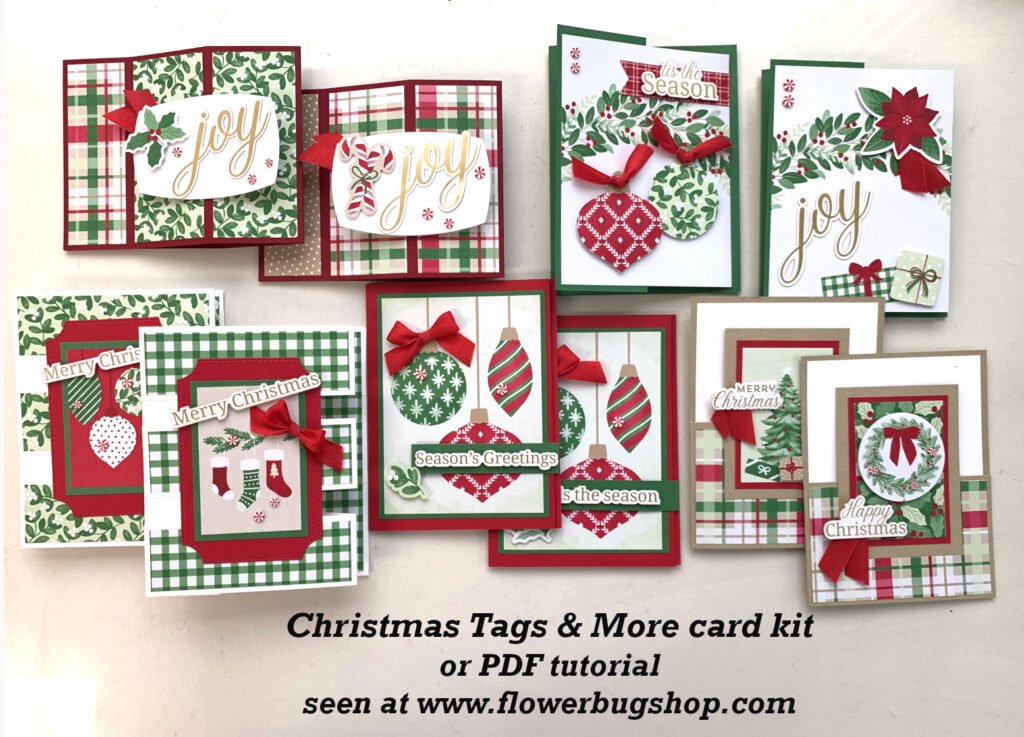
Grab this Quick & Easy Christmas fun fold card kit to go; while supplies last!
I was torn whether I wanted to do another set of Christmas cards for my November monthly kits. But I had to feature the fun Christmas Tags & More DSP so I went with it.
They’re so bright & colorful in traditional colors of red & green. These cards are all fun fold layouts too but you’ll get the link to my exclusive video with purchase of the kit or tutorial. I didn’t do any stamping on these cards. I used our Christmas Greetings for You Mix & Match ephemera instead. It’s filled with tons of Gold foil pre-cut greetings! *It’s currently unavailable but I ordered before they ran out. (same with the DSP)
This kit includes a half package of the designer paper and ephemera. Plus shares of the ribbon and Peppermint gems too! All with 10 pre-cut cards for just $31. The only thing you have to cut is your new designer paper; but with the tutorial that’s easy. You can see this kit here.
If you’d rather get the PDF tutorial seen hereyou can choose it for $16 instead. But you won’t get any of the lovely products…..
Notice: LeeAnn Greff, Independent Stampin’ Up! Demonstrator, Manager. The content of this website is my sole responsibility as an independent Stampin’ Up! demonstrator and the use of, and content of, the classes, services, or products offered on this website is not endorsed by Stampin’ Up! Copyright 2025


Leave a Reply