/


Latest Post

NEW Designer Papers in the Online Store; get them now while supplies last


There are 5 brand new 12 X 12" papers in the Online Exclusives! 

These are while supplies last so if you love one or more do not wait and miss out! 

My top favorite is the Delightful Florals – it coordinates with the Translucent Florals bundle in the Holiday catalog seen here. 

See it here in my store.  I love it so much I ordered a bunch for an October card kit to go; I couldn't take the chance it would sell out.  $12.50

Colors include Berry Burst, Blackberry Bliss, Bubble Bath, Calypso Coral, Fresh Freesia, Lemon Lolly, Parakeet Party, Pool Party, Pretty Peacock

Next is my second favorite Tartan Foil.  It's shiny on both sides and has soft plaid designs. I shared a few fun fold cards in last week's Live here.  $10

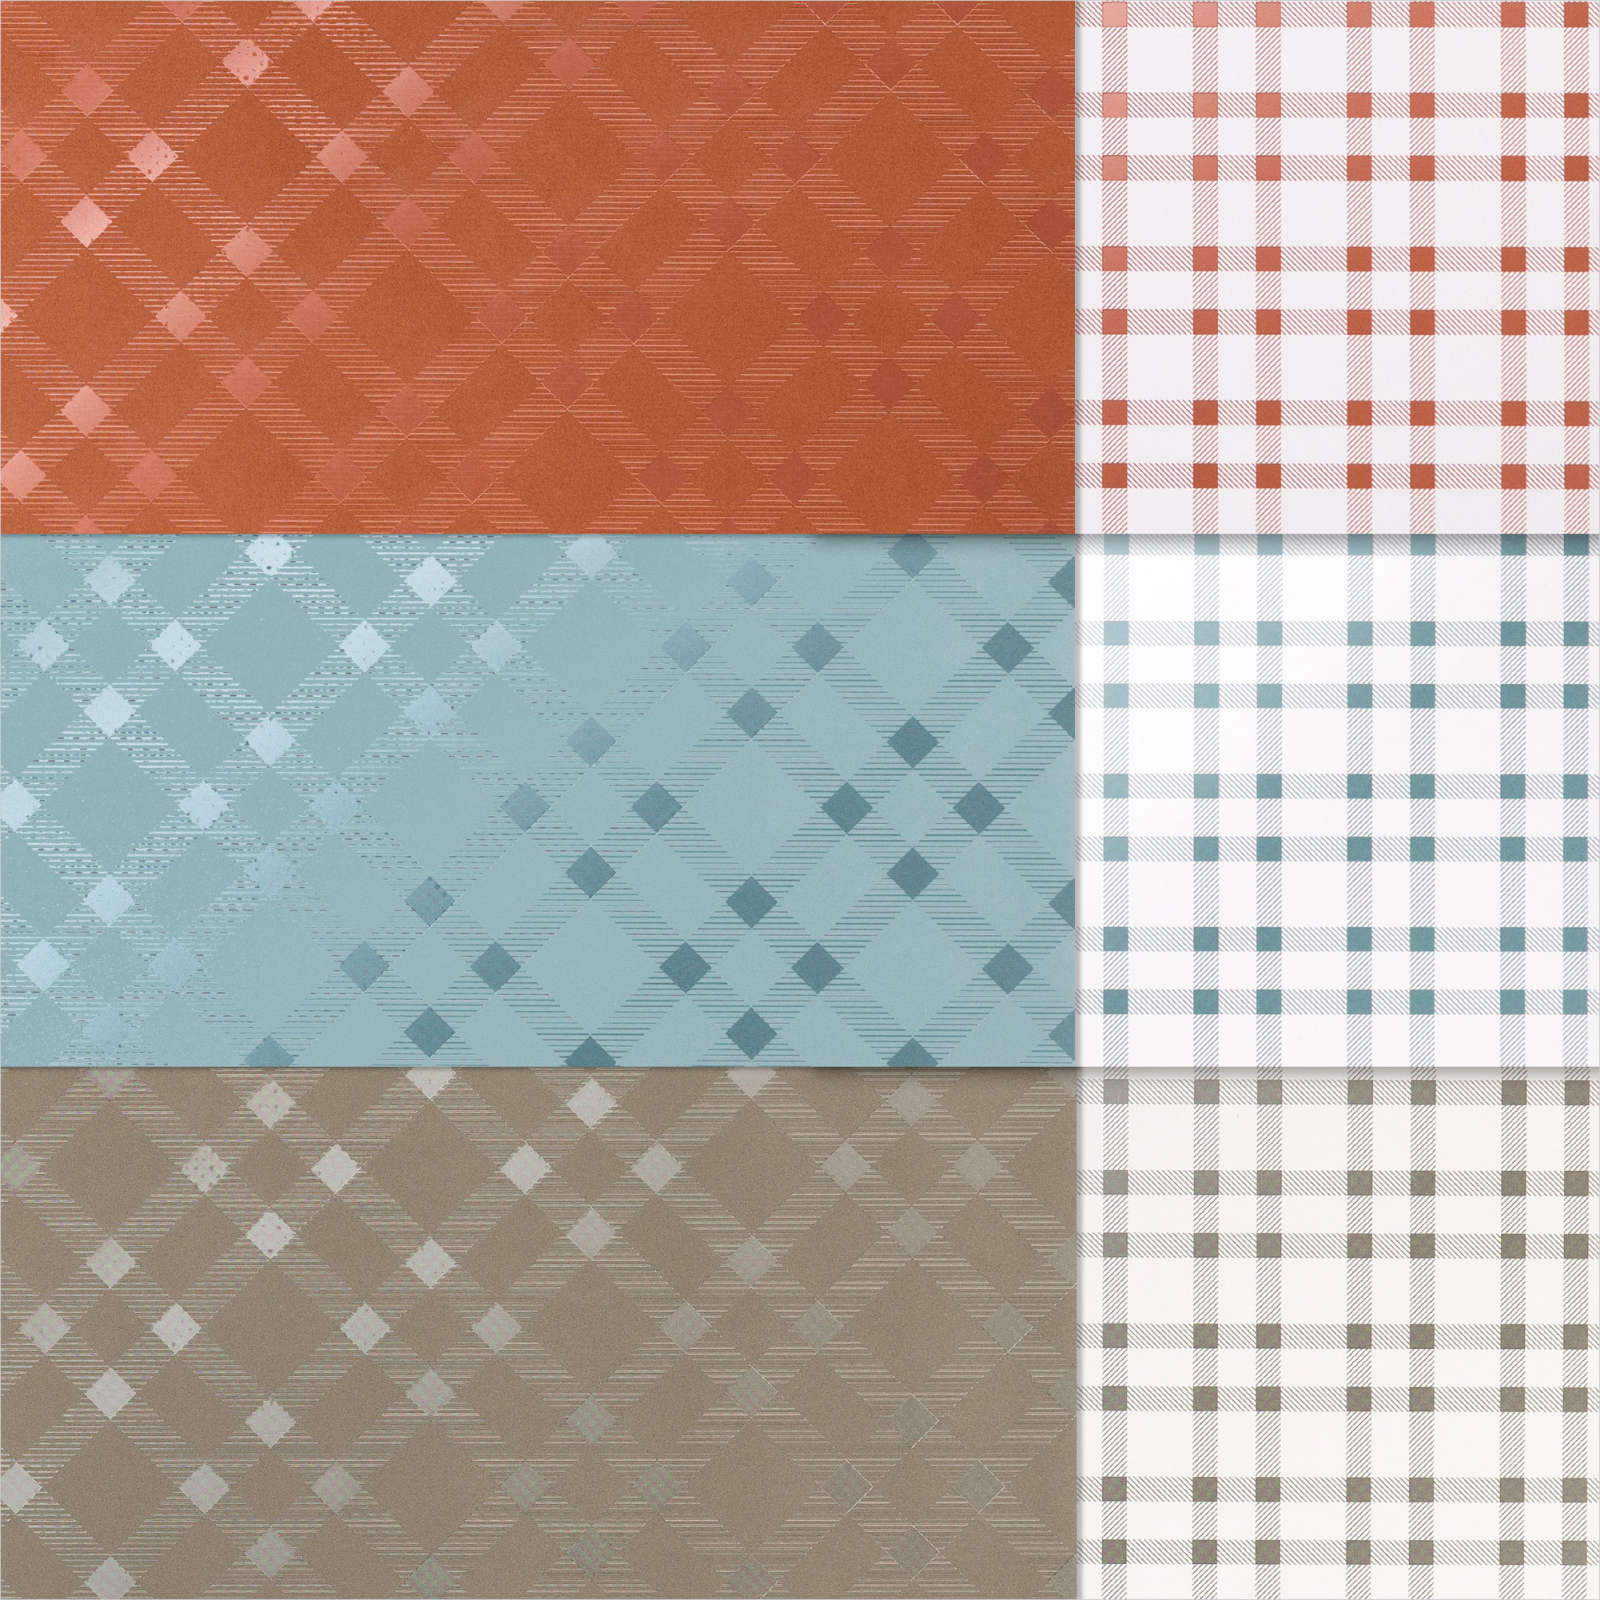
Colors include Copper Clay, Lost Lagoon, Pebbled Path and White.  See it here in my store.  

Next is the Shining Christmas specialty paper.  Every sheet has one side that's foil. 

The colors include Mossy Meadow, Cherry Cobbler and White.  See it here.  It's $15.

Next up – Silver & Gold Glimmer paper that's adhesive-backed!  WOW; this will be fabulous for our die-cuts!  I'm quite excited about it.  

The package includes two sheets of 12 X 12" adhesive-backed glimmer paper for $7.  See it here.

Lastly is the Traditions of St. Nick designer paper – lovely designs for those vintage lovers.

12 double sided designs in Cajun Craze, Cherry Cobbler, Copper Clay, Early Espresso, Mossy Meadow, Pebbled Path, Real Red, Wild Wheat.  $12.50 See it here online. 

If you're grabbing some of these papers consider adding to your order to get one of my Mystery Boxes!  They're loaded with Stampin' Up! retired products valued between $180-$200! 

They're while supplies last & free to anyone who places a $100 order using either host code – 3QBXJJ4U or MYF6MXAG  You just pay the $14 shipping fee and it's all yours! 

~~~

September Specials: 

 *current host code: Z9BRPPWA or MYF6MXAG

Reserve your Holiday catalog designer paper share:

$37 with shipping to you; message me here

(There may be a delay due to a few papers being unavailable for a bit)

*Get a free 6 card kit with orders over $55 (Includes card bases, coordinating envelopes, Memories & More cards, gems & more) 

~~~

NEW Designer papers released September 6th!  While supplies last!

All Posts

  • All Around Wreath for Christmas


    Have you noticed the All Around Wreath bundle in the annual catalog? Click here; it's quite the gem!  So many occasions are covered in the greetings and die-cuts.  

    Marilyn made this pretty Christmas themed wreath for our Team Christmas card swap. 

    She chose to use two shades of green here; Mossy Meadow with Pear Pizzazz along with a few touches of Gold.  The pears are heat embossed in Gold powder as well as the shimmery thread.  

    Other details:

    • The greeting is die-cut with the Hippo & Friends dies seen here
    • The Vanilla layer is textured with the Pinewood Planks embossing folder
    • She used the same wreath die-cut but in two colors, separating them slightly on the card. 

    ~~~

    November Specials!

    Current Host code is GRC9VVUU


    All online orders receive my FREE Curvy Celebrations 22 project PDF Tutorial! 


    Leave a Reply

    Your email address will not be published. Required fields are marked *

  • Retro style circles layout; super easy! Catch the Live video tonight!


    Tonight at 7:30 pm Central Time I'm sharing how to make these retro style circle cards on Facebook Live.  Click here to join me.   You can also see this video below!

    Basically you need three sizes of circle dies or punches for the start of this layout.  Cut them in half and layer together with the edges meeting on one side. Adhere and add a long greeting between the two. 

    Watch how on my FB Live replay!

    Measurements:

    • 5 1/2" X 8 1/2" card base
    • 3 1/2" X 4 3/4" Whisper White; the greeting strip is about 5" long and either 1/2" or 3/4" wide depending on your greeting image.
    • 1" X 5 1/2" horizontal strip
    • Circles from the Stitched Shapes dies are the largest three circles. 

    You'll want ink, stamps and embellishments that coordinate with your Designer Paper.  Remember you could use card stock instead of DSP. 


    Products used:

    • Designer papers – Heartwarming Hugs, new Classic Christmas & Snowflake Splendor
    • Stamps – Tree Angle, Snowflake Wishes & Curvy Christmas
    • Colors – Real Red & Olive, Seaside Spray & Night of Navy, Sahara Sand & Cherry Cobbler  
    • Other: Stitched Shapes dies, Curvy Dies & Pick a Banner punch

    ~~~

    November Specials!

    Current Host code is GRC9VVUU


    All online orders receive my FREE Curvy Celebrations 22 project PDF Tutorial! 

    Leave a Reply

    Your email address will not be published. Required fields are marked *

  • Curvy Christmas & the Postage Punch


    Check out this easy card using the new Curvy Christmas stamp set and the Postage Punch!  

    It's super simple! Here's how I made it:

    1. Stamp the curvy trees image on the White CS using Shaded Spruce ink.  Color the trees with a Light Shaded Spruce Blends marker.  Add a tiny star using Cherry Cobbler ink on one tree. Adhere it to the Cherry Cobbler layer and to the main card.
    2. Punch out three pieces of Classic Christmas designer paper with the Postage Punch seen here.  Adhere to the White CS. 
    3. Stamp the greeting in Cherry Cobbler ink on a 1/2" strip of White CS.  Punch the ends with the Banners Pick a Punch. Add it to the card with mini dimensionals. 
    4. Finish with a few Holiday rhinestones. 

    You can see this stamp set here; it's only available through January 4th.  And the Classic Christmas Designer Paper is here while supplies last. 

    Remember that everyone who orders any of these products or places an online order with me in November will receive a free 22 project PDF tutorial featuring the Curvy Celebration products! 


    ~~~

    November Specials!

    Current Host code is GRC9VVUU


    All online orders receive my FREE Curvy Celebrations 22 project PDF Tutorial! 

    Leave a Reply

    Your email address will not be published. Required fields are marked *


Notice: LeeAnn Greff, Independent Stampin’ Up! Demonstrator, Manager. The content of this website is my sole responsibility as an independent Stampin’ Up! demonstrator and the use of, and content of, the classes, services, or products offered on this website is not endorsed by Stampin’ Up! Copyright 2025