/
Latest Post
Never Miss a Post
All Posts
-
Last of the Team Holiday card swaps
Free Shipping is here!
Get your shipping free when your order is over $75! Click here to shop
Plus get $10 in product credits from me with a $75 order. That means you’ll earn at least $17.50 in product credits!
~~~
Today I have the last set of swaps my Flowerbug’s created for our Christmas card swaps this month. They’re super talented!
First is a beautiful card made by Tracey who used a variety of designer paper blocks & strips to create a focal point for her greeting.
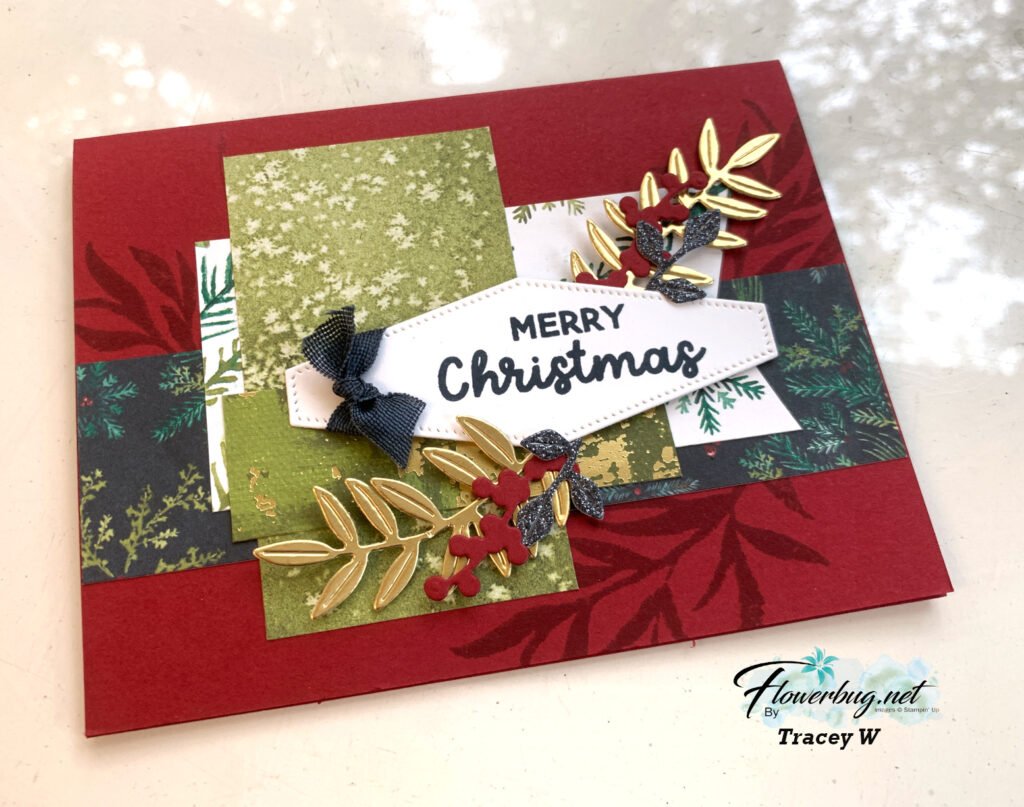
Her designer paper is from the Online Exclusive pack called Elegant Pine Snowflakes. You can see it here. The leaf & berry die-cuts are from the Label Me Grateful dies seen here. One of my favorites!
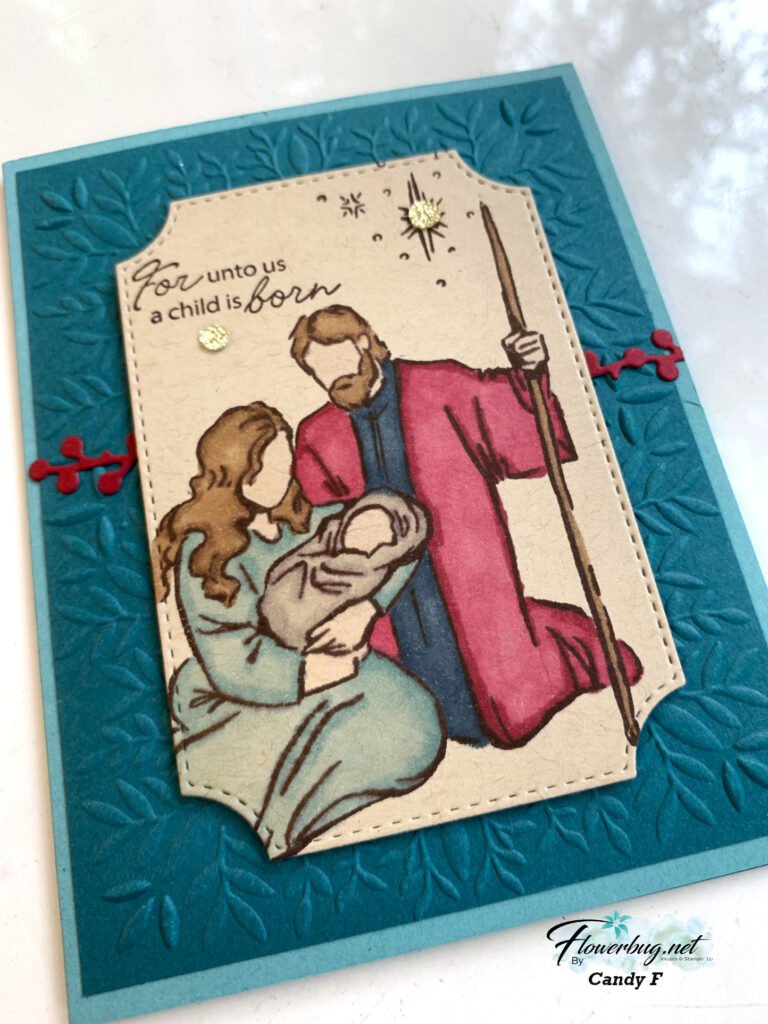
Look at this gorgeous nativity scene Candy made for her swap! She used the A Child is Born set seen here.

She used blends markers to color the scene on Crumb Cake card stock. The die-cut is from the Branching Out dies, the embossing folder is the Peaceful Greenery folder. Just stunning! Just look at her beautiful coloring.
And lastly today is a pretty card made by Gwen who featured the incredible Traditions of Christmas suite seen here.
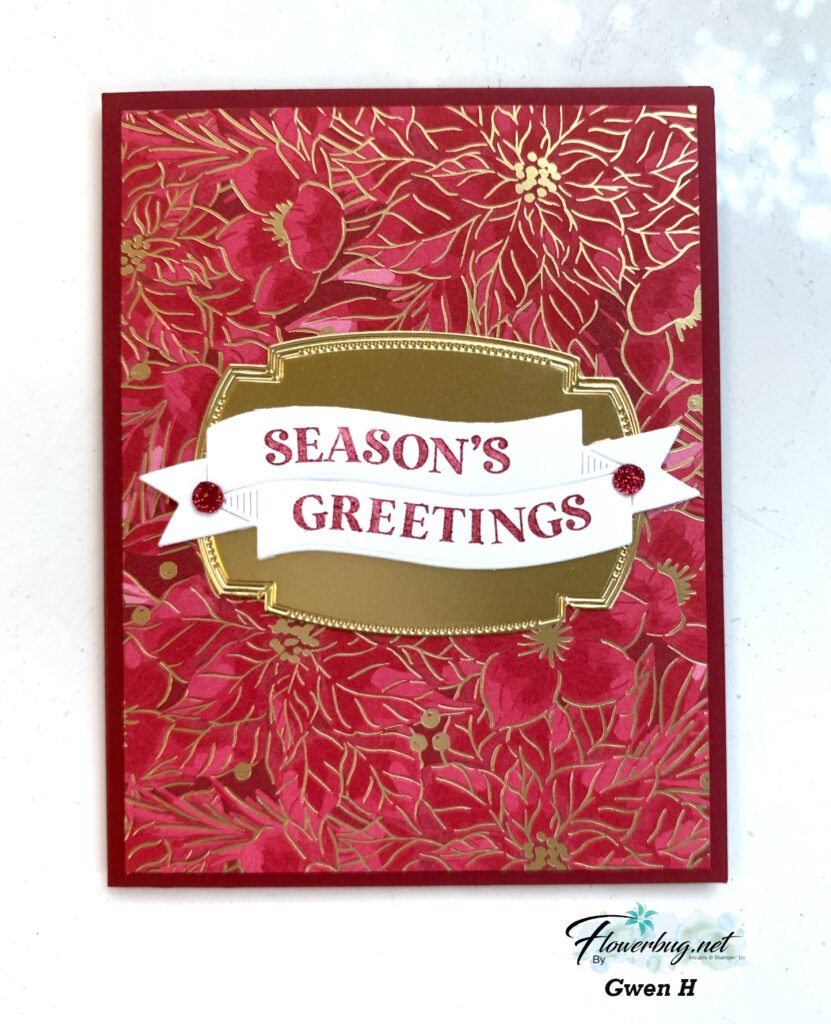
This beautiful designer paper is currently unavailable until November. The stunning greeting & die set called Traditional Labels is a classic. See it here.
Reasons to ShopwithLeeAnn.com
- Get a free PDF project tutorial with any online order! (changes monthly)
- An order of $55 or more earns you a free 3 card stamping kit with pre-cut layers; ready to stamp & assemble
- Earn 10% host rewards on each order you place (over $20). Redeem on a future order.
- Join my Flowerbug’s Team and get $90 in free product of your choice in October! Details here.
- Be a Paper Pumpkin subscriber and enjoy the free bonus project PDF tutorial every month. Subscribe here. Refills here.

~~~
October Specials
3 new kits and a Starter Kit special! See the kits here.

And get the Starter kit here. *Choose your deal – $35 or $99 plus $90 in free products including free shipping, free Paper Pumpkin kit & free catalogs/business supplies!
~~~
All online orders from me will receive a beautiful PDF of projects featuring the Modern Christmas suite.

-
Unique Peaceful Garden Angled cut fold with free project sheet & video
Free Shipping starts today!
For 3 days you get your shipping free when your order is over $75!
……..
Here’s the last card I shared on last week’s video. I love this unique fold!
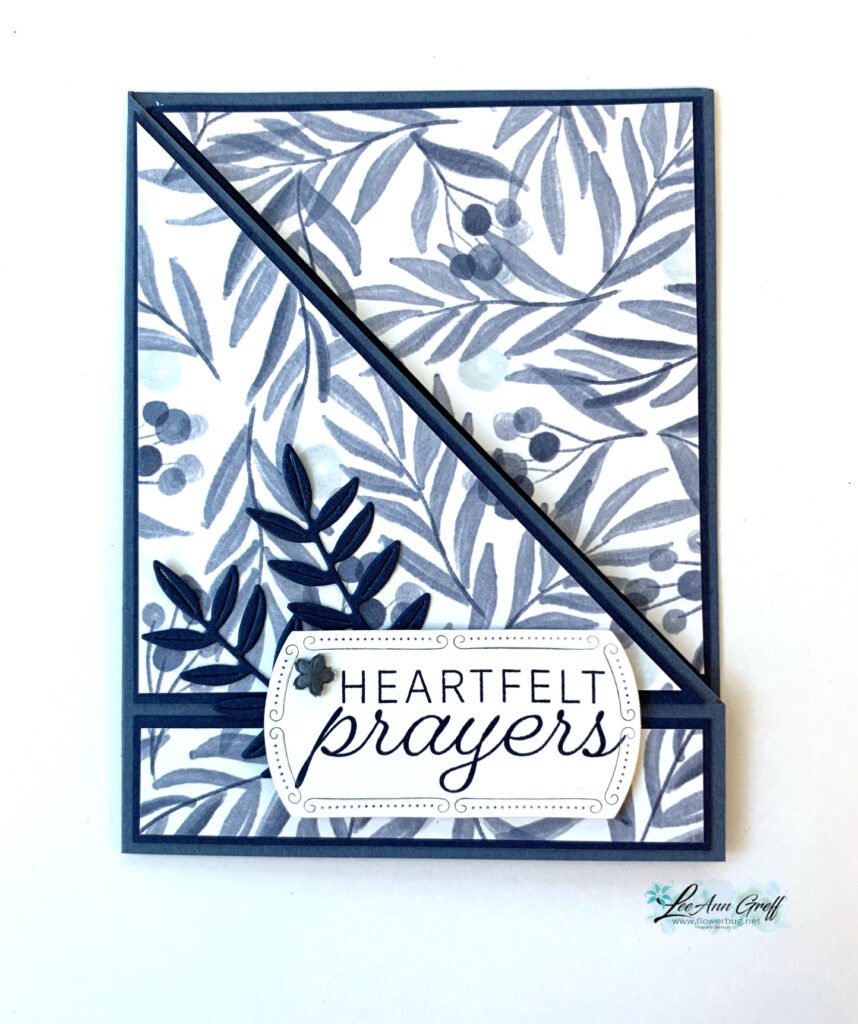
The designer paper is from the Peaceful Garden DSP. The greeting is from the Peace on Earth stamp set and the dies are the Traditional Label and Label Me Grateful (leaves). The colors include Misty Moonlight, Night of Navy & White.
Here’s how it opens:
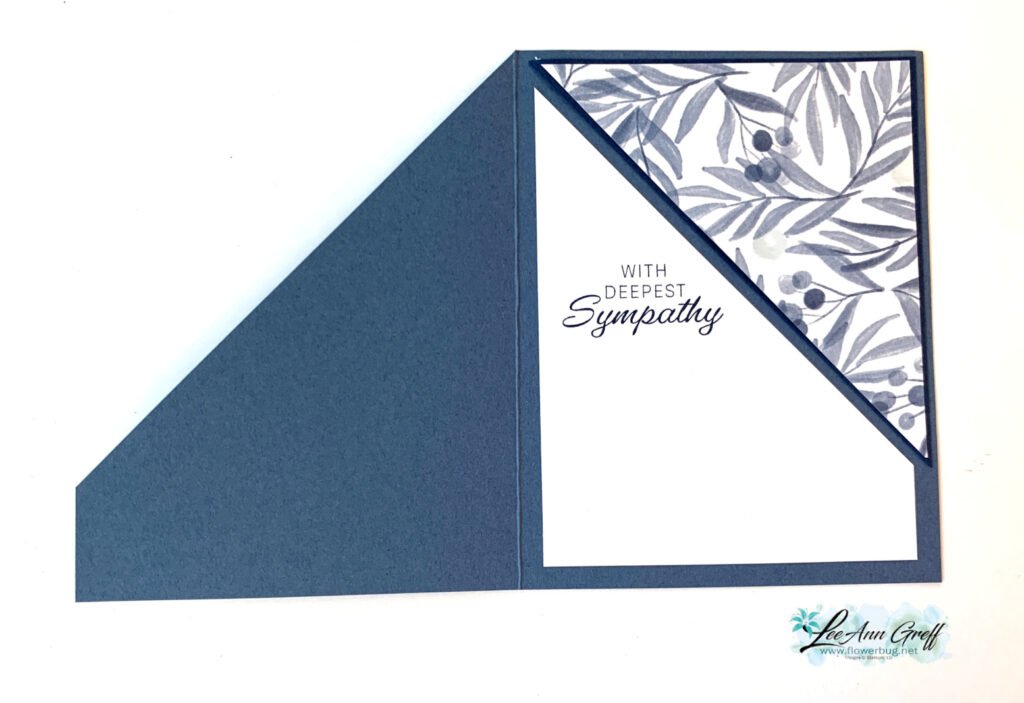
Isn’t that cool? It’s a little challenging to get the angles and layers cut evenly but I share tips on that in the video below.
I created a free project sheet for this card. Click on this link to print or download it. Remember that you can access tons of free project sheets on the link/button at the top of my blog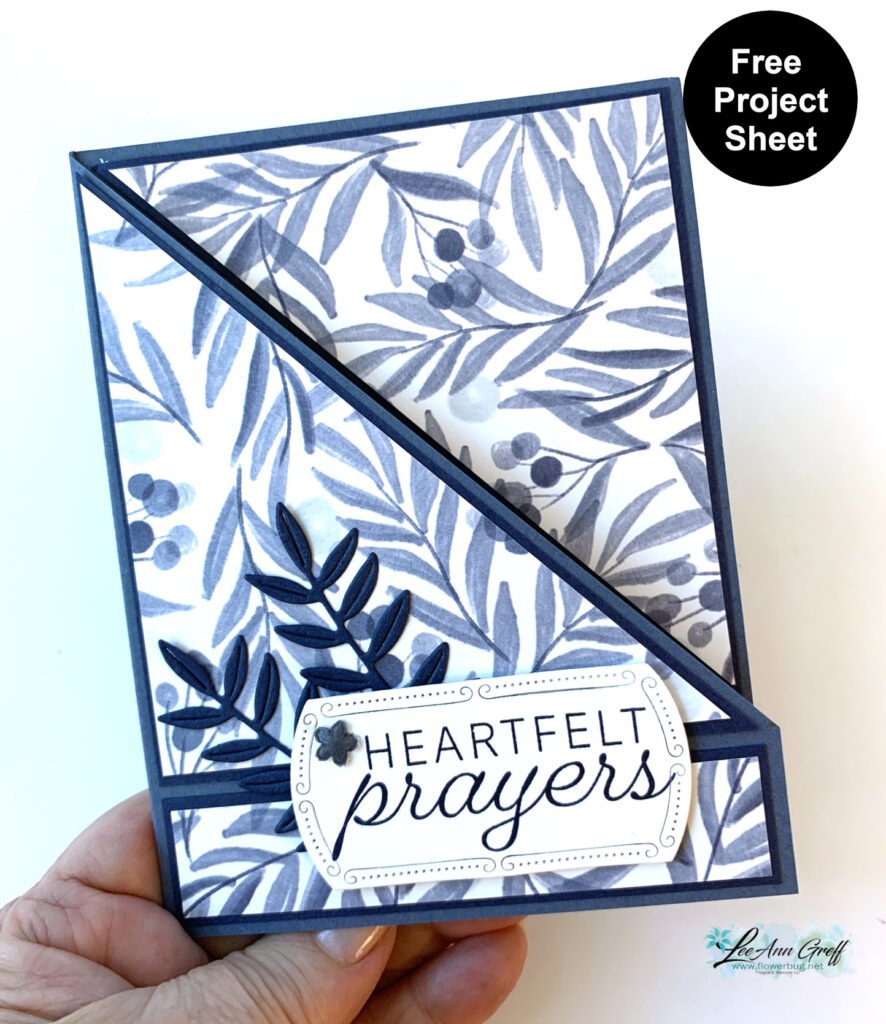
Below is the video tutorial for this card and two more fun fold cards featuring this Peaceful Garden suite. Be sure to follow me on my YouTube channel here!
Reasons to ShopwithLeeAnn.com
- Get a free PDF project tutorial with any online order! (changes monthly)
- An order of $55 or more earns you a free 3 card stamping kit with pre-cut layers; ready to stamp & assemble
- Earn 10% host rewards on each order you place (over $20). Redeem on a future order.
- Join my Flowerbug’s Team and get $90 in free product of your choice in October! Details here.
- Be a Paper Pumpkin subscriber and enjoy the free bonus project PDF tutorial every month. Subscribe here. Refills here.
~~~
October Specials
3 new kits and a Starter Kit special! See the kits here.
And get the Starter kit here. *Choose your deal – $35 or $99 plus $90 in free products including free shipping, free Paper Pumpkin kit & free catalogs/business supplies!
~~~
All online orders from me will receive a beautiful PDF of projects featuring the Modern Christmas suite.
Leave a Reply
-
Peace on Earth easel card with free project sheet & video tutorial
Here’s one more pretty card I made on last week’s video. I featured the Peaceful Garden suite seen here.
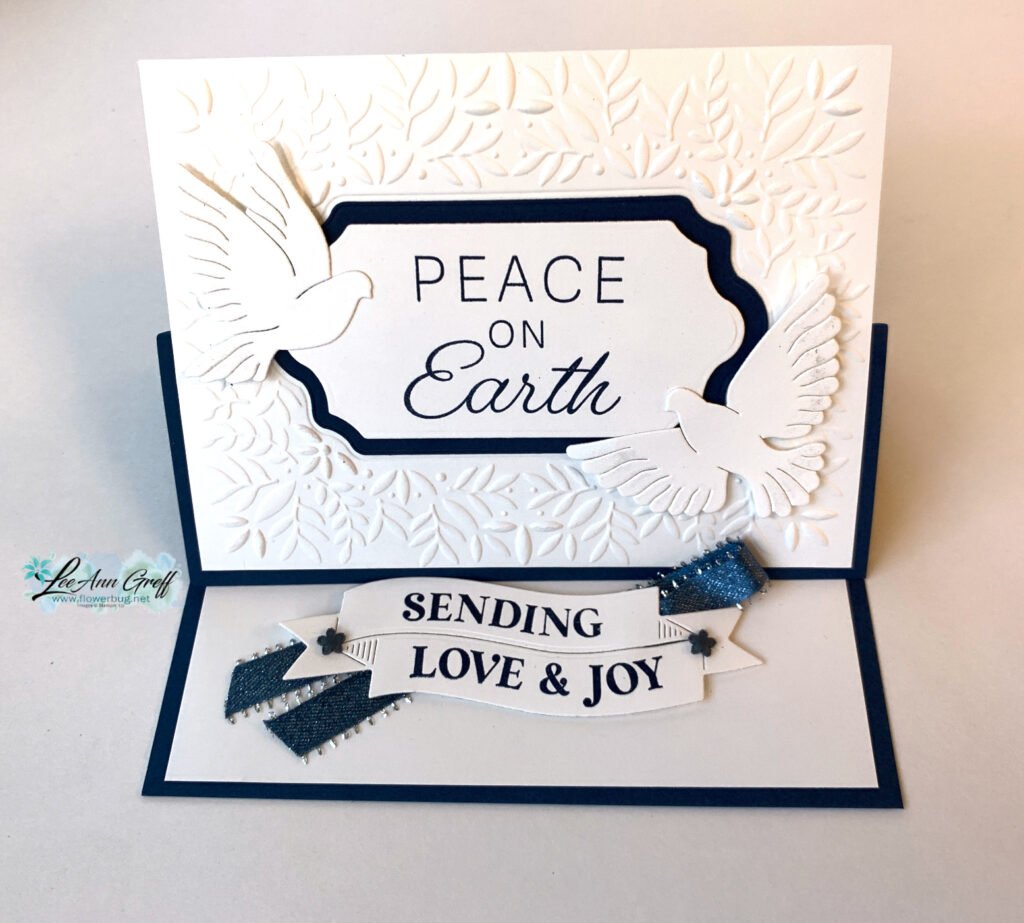
My colors are Night of Navy with White. The beautiful Peace on Earth bundle and Peaceful Greenery embossing folder are the stars here. I also added Wink of Stella to the dove’s wings.
I created a free project sheet with measurements & directions. Click here to access it.
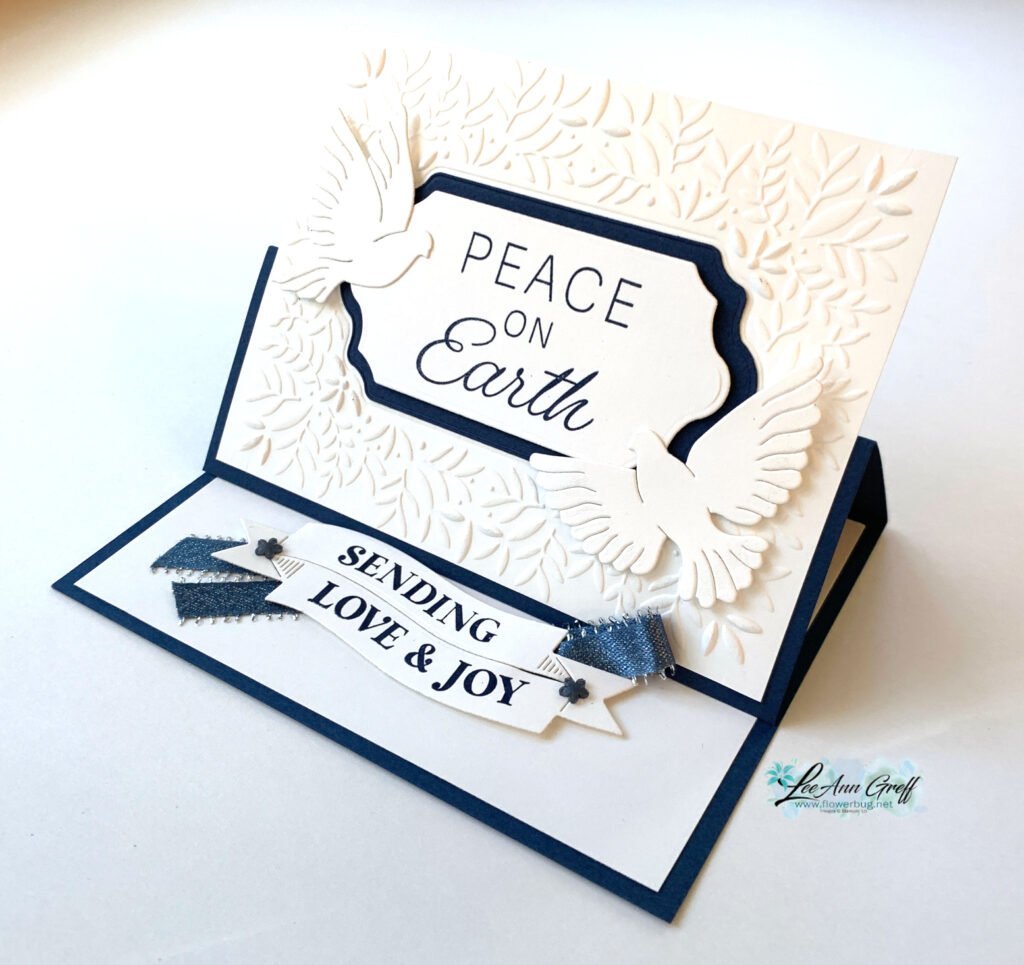
The easel stands up on the inside greeting layers. The stamp & dies are part of the Traditional Labels bundle seen here. I think this is a must have if you make your own Christmas cards. Inside, I adhered the greeting die-cut to a fold of Misty Moonlight silver-edges ribbon with Stampin’ Dimensionals.
Below is the video for this card and two more featuring this Peaceful Garden suite.
Reasons to ShopwithLeeAnn.com
- Get a free PDF project tutorial with any online order! (changes monthly)
- An order of $55 or more earns you a free 3 card stamping kit with pre-cut layers; ready to stamp & assemble
- Earn 10% host rewards on each order you place (over $20). Redeem on a future order.
- Join my Flowerbug’s Team and get $90 in free product of your choice in October! Details here.
- Be a Paper Pumpkin subscriber and enjoy the free bonus project PDF tutorial every month. Subscribe here. Refills here.
~~~
October Specials
3 new kits and a Starter Kit special! See the kits here.
And get the Starter kit here. *Choose your deal – $35 or $99 plus $90 in free products including free shipping, free Paper Pumpkin kit & free catalogs/business supplies!
~~~
All online orders from me will receive a beautiful PDF of projects featuring the Modern Christmas suite.
Leave a Reply


- 2025 Annual Catalog (47)
- Blends Markers (63)
- Card Club Projects (114)
- Card Ideas (1,394)
- Card Sketches & Color Combos (23)
- Designer Paper ideas (449)
- Die-Cut projects (375)
- Facebook Live (506)
- free project sheet (221)
- Fun Folds (548)
- Gifts & 3-d projects (97)
- Holiday projects (214)
- Kits to Go (279)
- Online Exclusives (218)
- Paper Pumpkin (53)
- Scrapbooking (13)
- Spring Catalog (136)
- Stampin' Up! Specials (509)
- Summer catalog (5)
- Swaps (275)
- Tools & Techniques (365)
- Tutorials (523)
- Uncategorized (17)
- Videos (644)

- May Specials! It all starts today!!
- Springtime Scenes diagonal fold – 2 ways!
- Flash Sale on select products; one day only!
- Lovely & Beautiful fancy fold card swap with measurements
- Three pretty swap cards with great layouts
- New Catalog Open House & BOGO is Saturday! NEW product shares are up!
- A set of fun fold cards with NEW designer paper! Free project sheet & video too
- Artistic Sketched Garden fun fold card with free project sheet & video
- A new catalog sneak peek!
- New Catalog designer paper share; coming soon!
- NEW color & bundle in this fun fold card with free project sheet & video
- Beautiful & Soft Barely Blush In Color fun fold card
- Springtime Scenes easy fun fold card
- Double Reward Points today through Friday only! Combine with Last Chance list for big savings!
- Card ideas for the Box & Cards; free project sheet with video tutorial
- You’ll want to make this easy box for cards. Grab the free tutorial!
- Lovely Florals card kit to go with PDF & video tutorial
- Hello Spring card kit to go; so pretty!
- Homemade Sweetness Fun-fold card kit to go or PDF tutorial; reserve yours
- 2 fabulous new Kits in our Kit Collection


Notice: LeeAnn Greff, Independent Stampin’ Up! Demonstrator, Manager. The content of this website is my sole responsibility as an independent Stampin’ Up! demonstrator and the use of, and content of, the classes, services, or products offered on this website is not endorsed by Stampin’ Up! Copyright 2025
Leave a Reply