/


Latest Post

Neat ‘Latch fold’ card with Nature’s Walk suite; video & free project sheet too!


Today is the last day of the February/March specials!

Be sure to use your bonus coupons by today.

And also if you want the new Stampin’ Positioner FREE grab the Starter kit today!

~~~

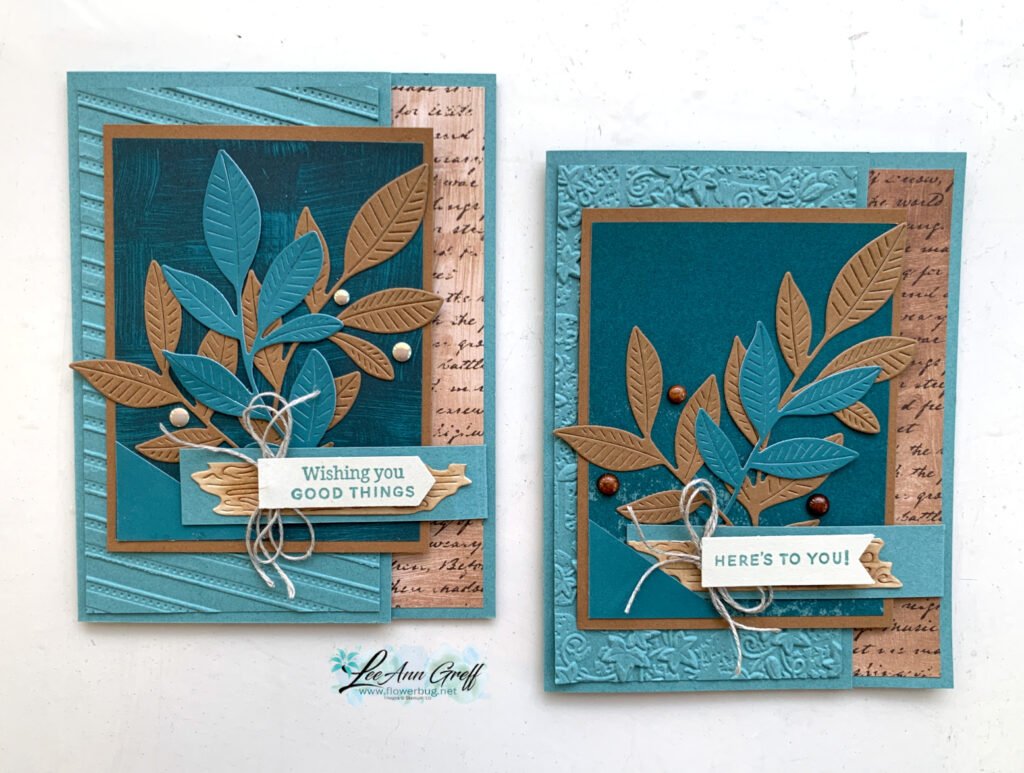
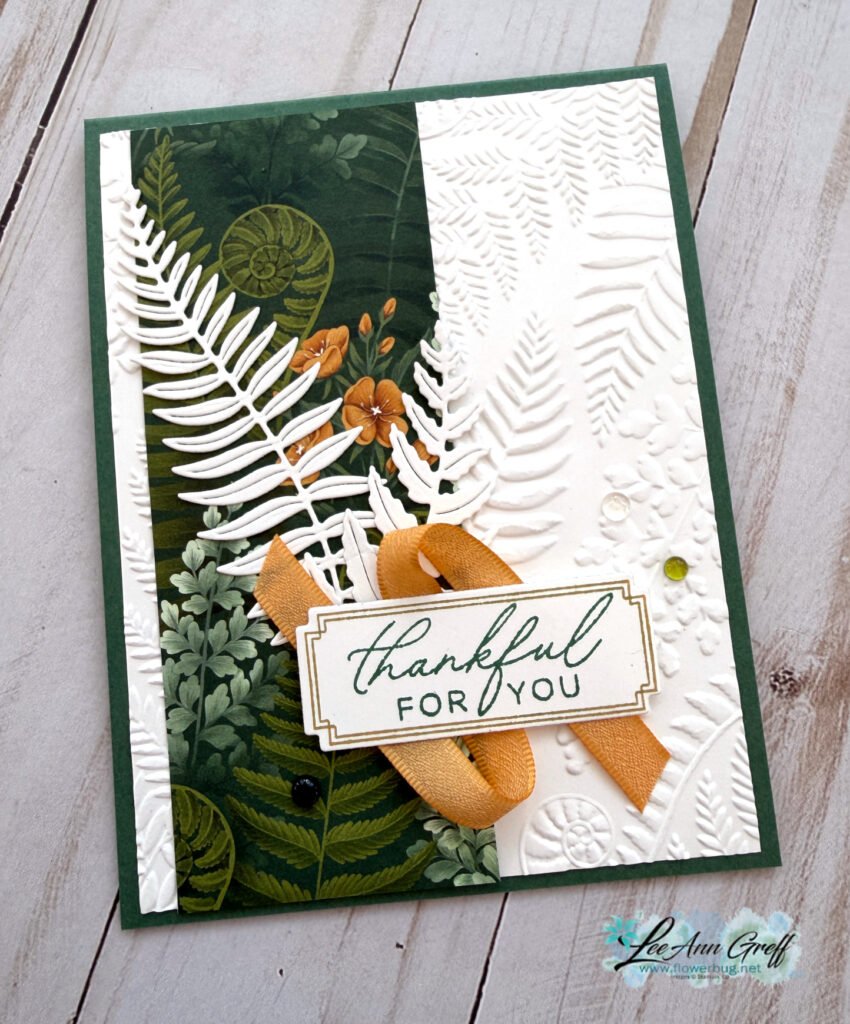
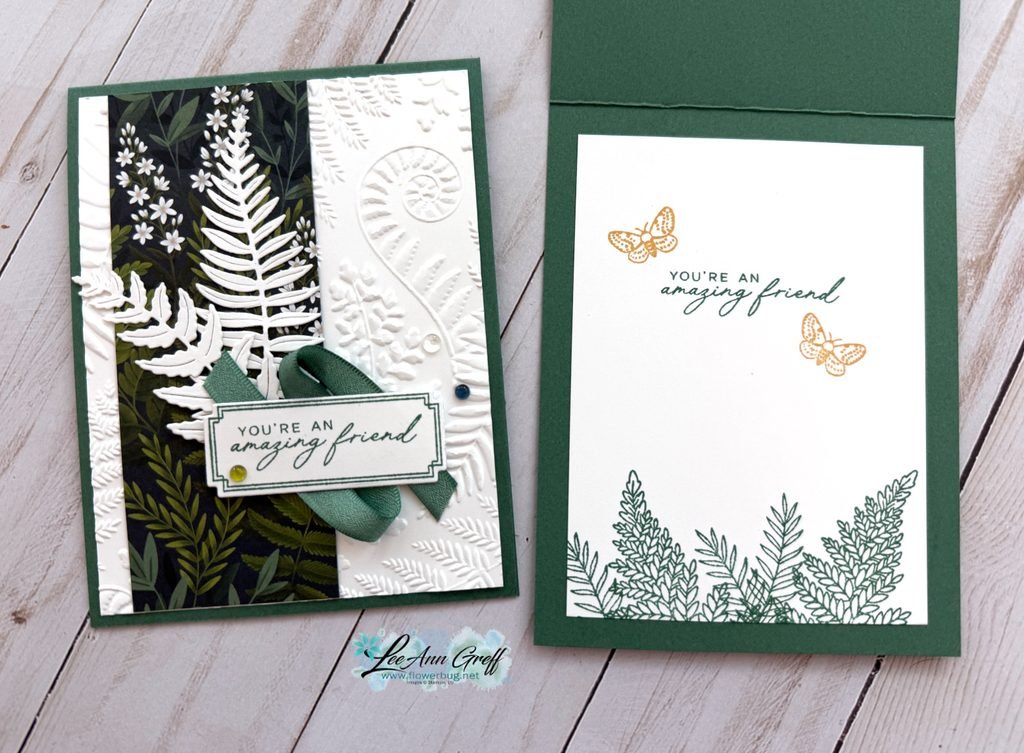
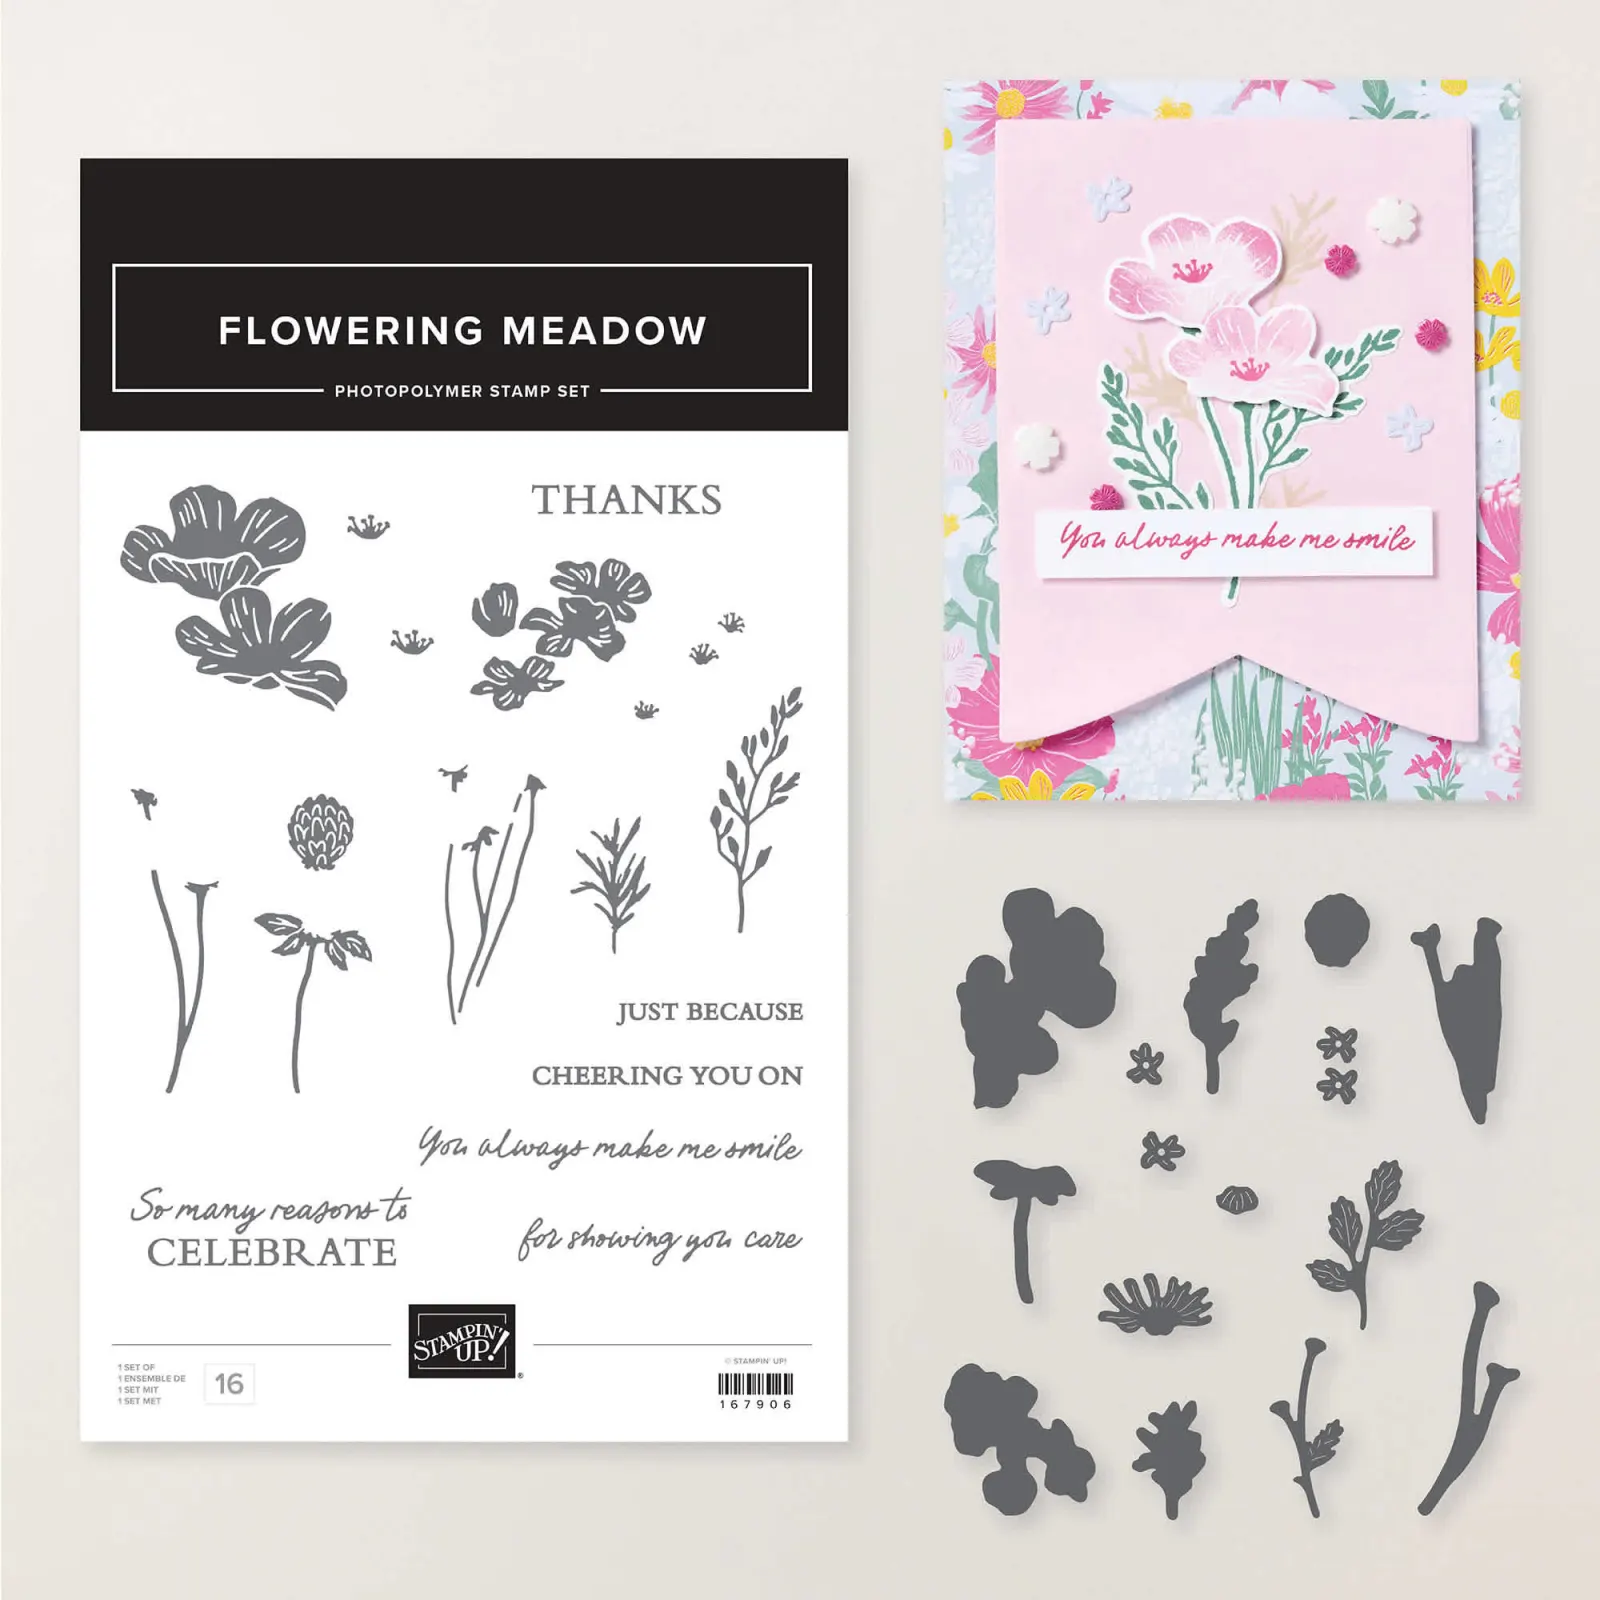
Here’s the card I featured on last week’s video. We made it at my February card clubs locally and it was a big hit!

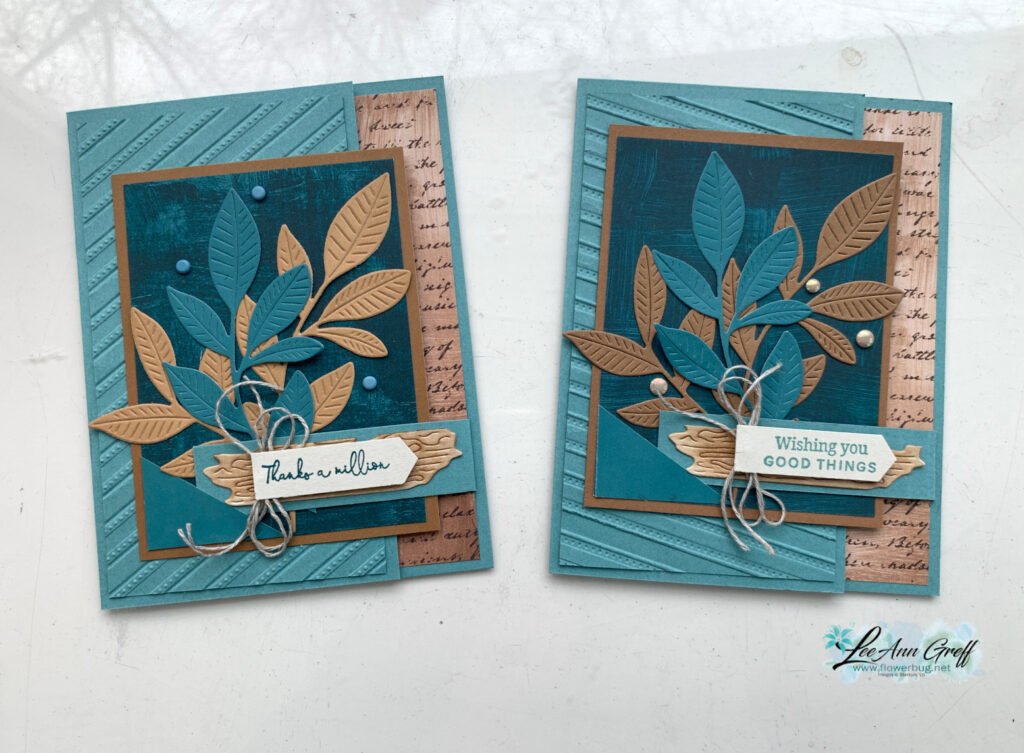
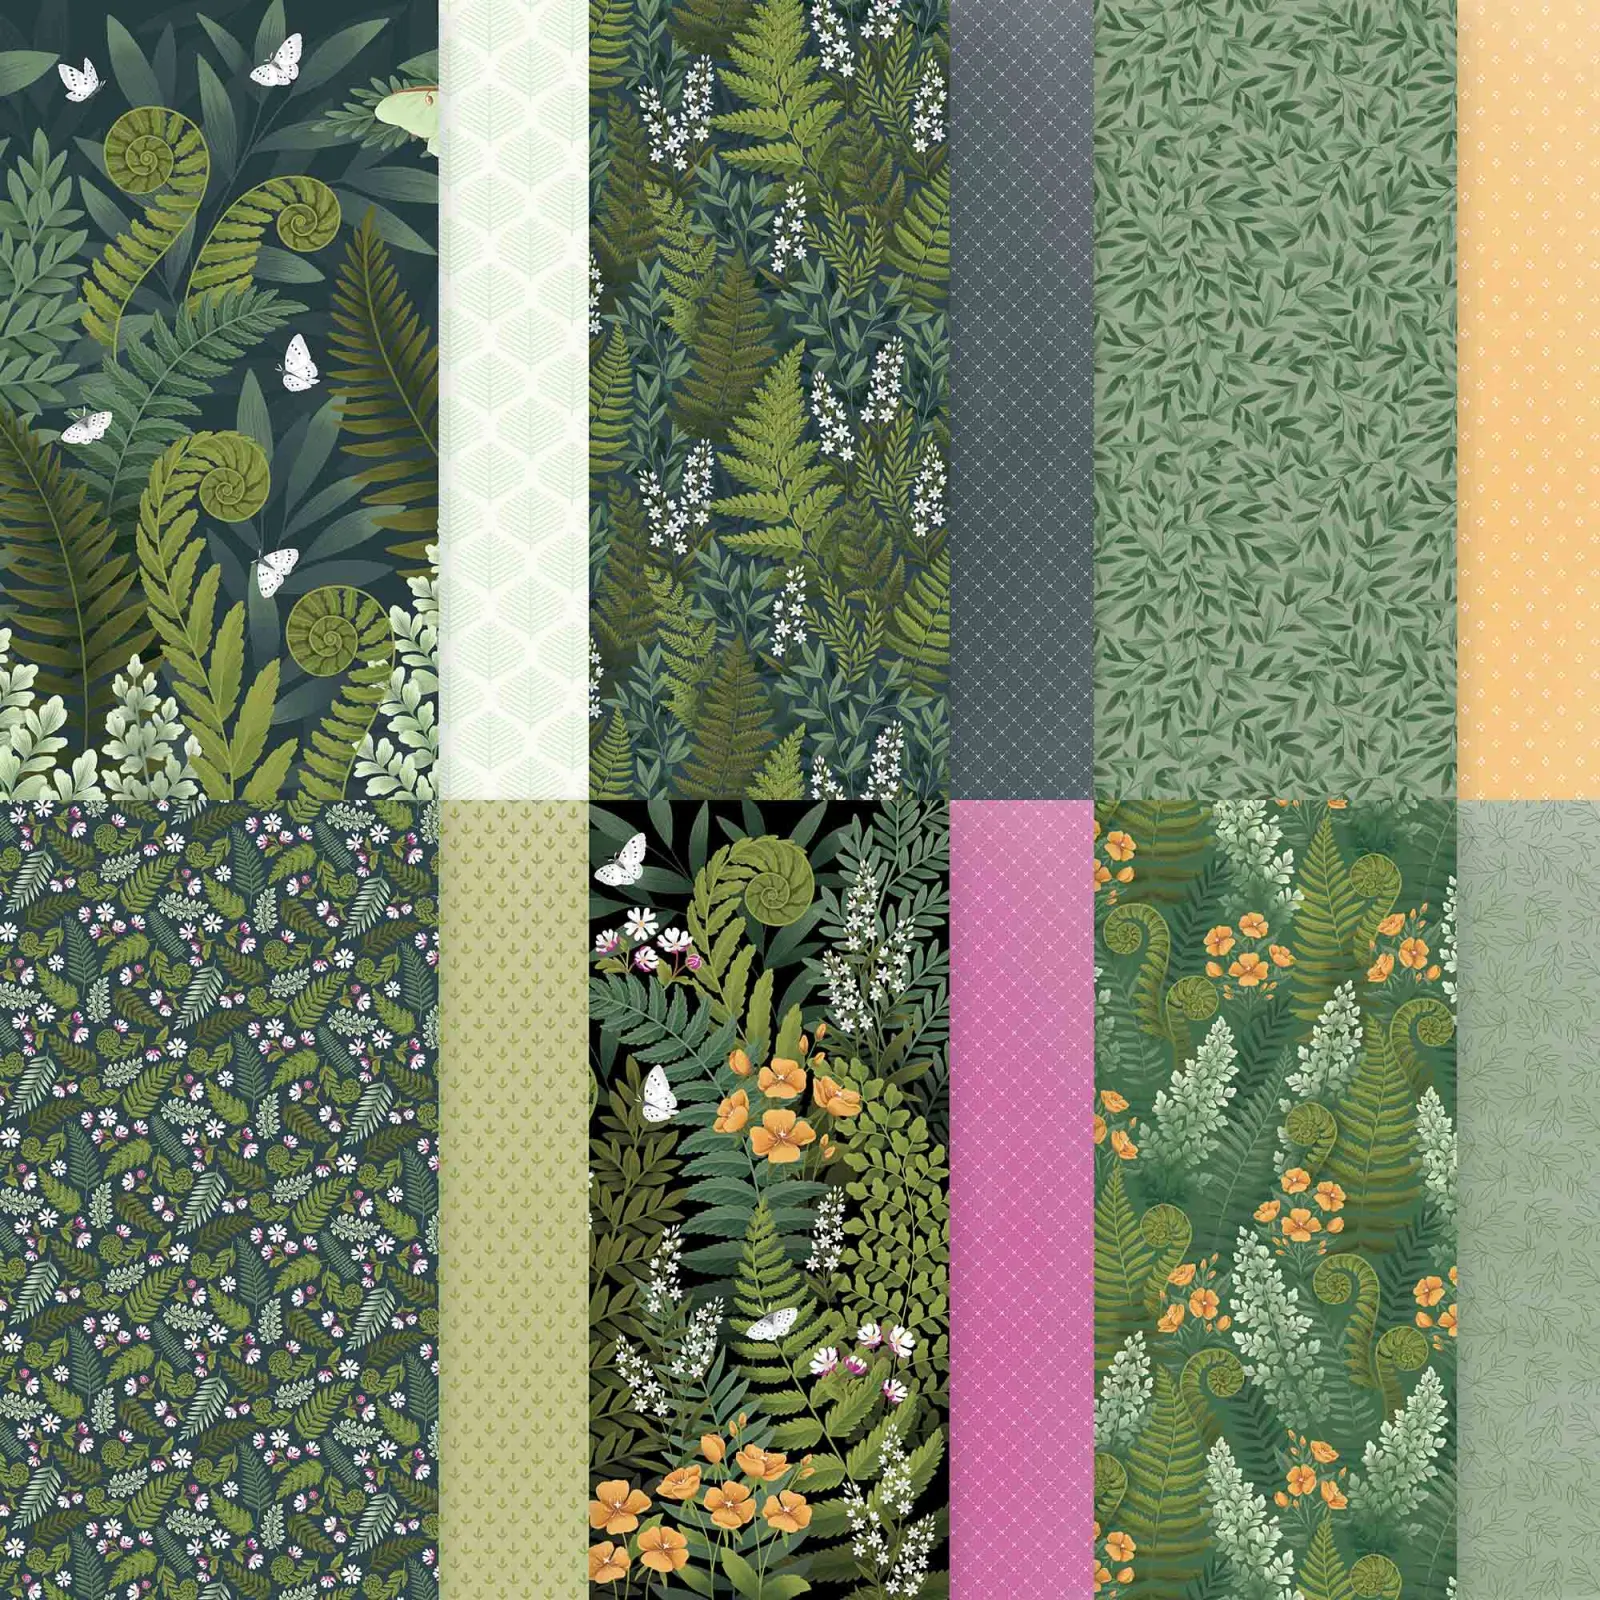
My colors include Lost Lagoon, Pecan Pie & Basic Beige. There are two different pieces of the designer paper that’s called Nature Walk and can be seen here.

There are lots of pieces and extra elements to this card. It was super fun to put together. That neat striped embossing folder on the extra Lost Lagoon layer is called Lovely Stripes and can be seen here. It’s one of my new favorites.

This card is kept closed by the narrow ‘flap’ attached to the right side of the card. I added a small triangle to the DSP layer to tuck the corner into. Works great To hold that flap down!

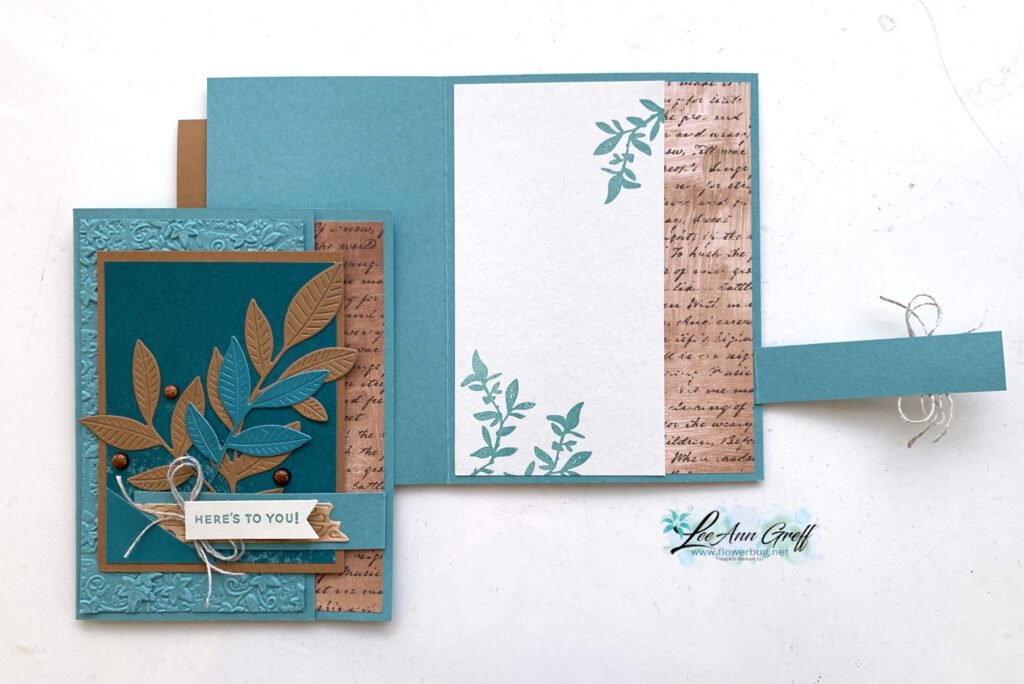
The flap is adhered ‘underneath’ the DSP layer inside the card. *note the other embossing folder used on the card above. It’s called Stone & Vine and is also a deeply textured folder seen here.

There are many, many details on this card I want to highlight. Here goes:

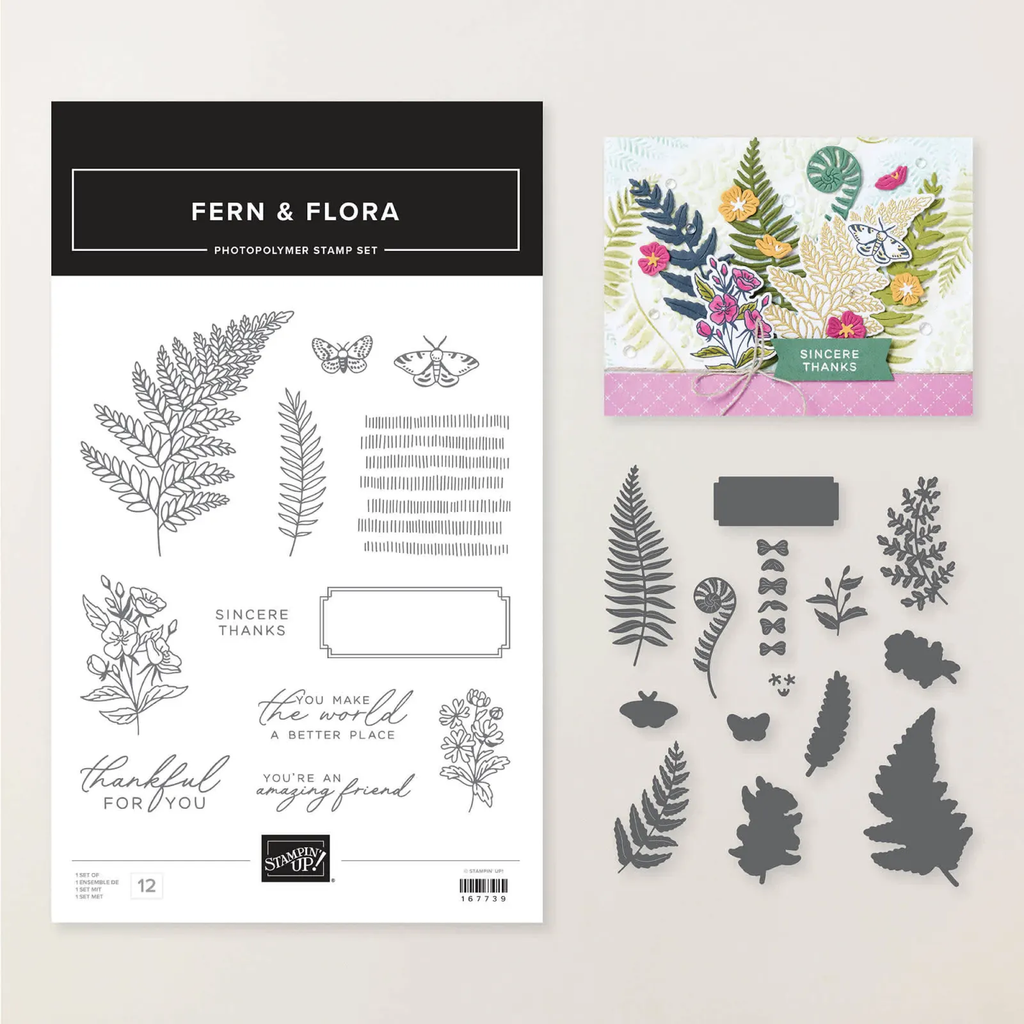
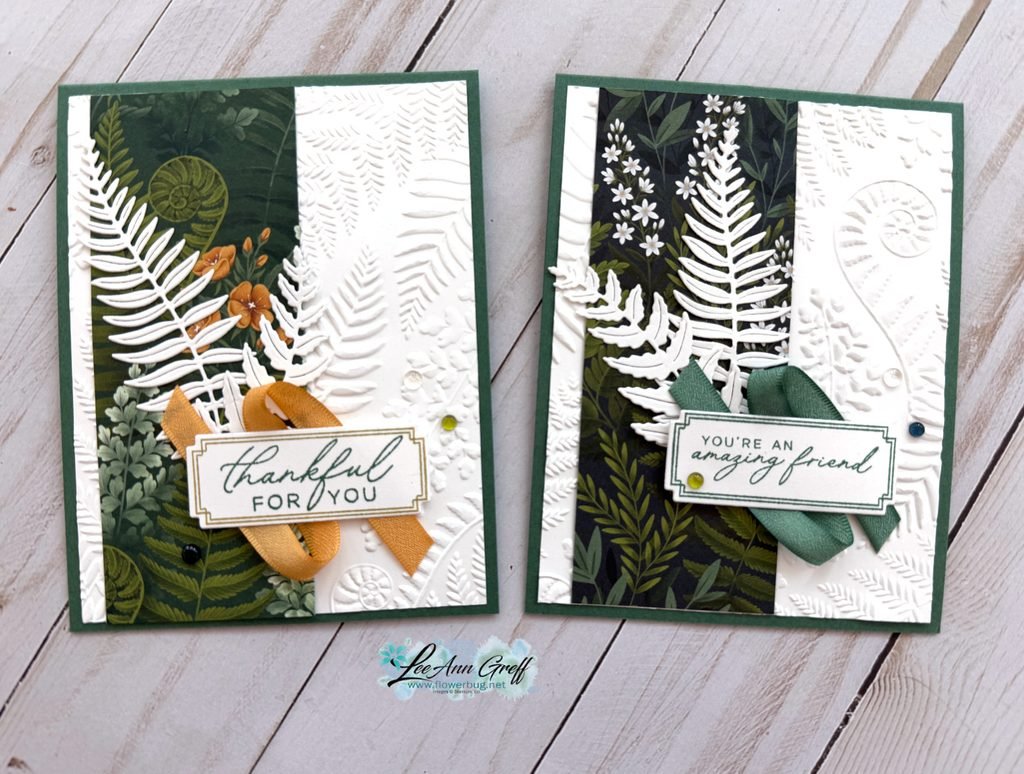
  • The die-cut leaves and ‘wood’ piece under the greeting are from the Nature’s Symphony bundle seen here.
  • The die-cut leaves are cut out from our two-sided card stock. I love that you can choose the light or the dark side which gives more color choices!
  • I added Pecan Pie ink to that wood die-cut with a blending brush.
  • The greeting is from the Three Banner punch bundle seen here.

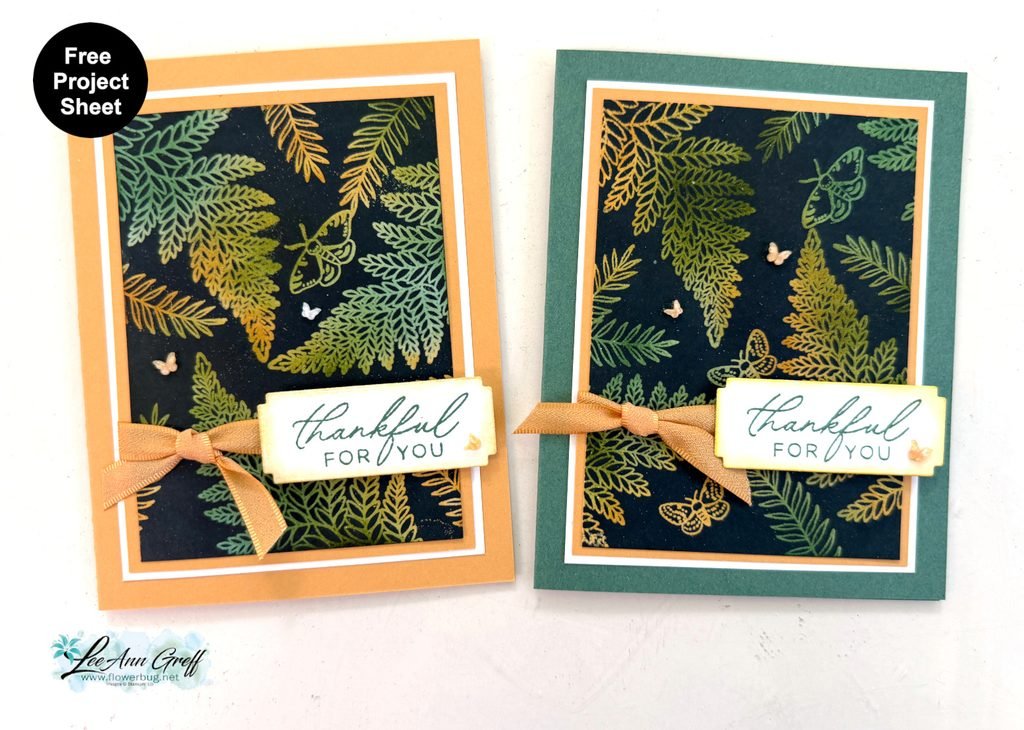
I created a free project sheet you can print or download. Click to see it.

Below is the video tutorial for this card; I hope you watch it as I give multiple tips and ways to make your crafting process easier.

All Posts

  • Nature Walk card kit to go or choose the PDF tutorial option. Both include the exclusive video!


    I had to feature the Nature Walk designer paper for a card kit & tutorial. It’s just gorgeous with deep, rich prints.

    I paired it with the new Covered in Flowers Accents from the Spring catalog, the retiring butterflies and White Baker’s Twine. See those pretty floral & botanical die-cuts on the cards? That’s the Flower Accents! They come in a large single sheet of thick pre-cut pieces. They’re white but can be colored or textured. They were so fun to use on these cards!

    3 of the 5 designs are fun fold layouts. The kit & tutorial include 2 of each. You can choose from the PDF tutorial for $16 or the pre-cut card kit which includes up to $20 in Stampin’ Up! product for just $31.

    Everything is cut for you in this kit except for your new 1/2 package of the designer paper. You will need your own greeting images, inks, adhesives and paper trimmer.

    Reserve your kit here. Purchase the PDF tutorial here. It includes step by step directions, photos, a supply list and measurements.

    The tutorial with exclusive video link is sent via email immediately after purchase. The kit is sent at the end of February.

    See all of my kits here! There are TWO more added to the Shop this month!

    ~~~

    February Specials

    Product of the Month is the new Painted Illusions 12 X 12″ designer paper

    Get the NEW Stampin’ Positioner FREE when you choose the Starter Kit in February! Click here

    Bonus Days – Redeem your coupons in February!

    February’s PDF of the Month!

    Two NEW kits just released here:

    Check out the Last Chance List; new items are added and available

    while supplies last

    Leave a Reply

    Your email address will not be published. Required fields are marked *

  • Neat fun fold card 3 ways! With free tutorial & video


    We made this special card at my January card clubs. They could choose between 3 colors and themes too!

    I featured the Addressed to You stamp set for all three cards. See the cute ovals & rectangle with the ‘filled in’ images on the right? Those are all part of this unique stamp set! See it here.

    I used the retiring Textured Notes dies seen here. They’re the stitched edge rectangle dies used twice on this card. They are on the last chance list right now and reduced in price too!

    This card opens with a type of flip/flap feel. Here’s how we cut off the tabs on the card base. Once you score your card you’ll make a pencil mark from the top and bottom at 1″. Then trim off the corners.

    My colors include Pool Party, White and either Pretty in Pink, Fresh Freesia or Peach Pie.

    I created a free project sheet for this card with measurements, supplies and step by step directions. Click here to print or download it.

    More details:

    • I used the images that finished the lined oval & rectangle to decorate the inside ‘left’ edge on the cards.
    • We used Blends markers to color in the small images.
    • The DSP is the Beach Boardwalk designer paper for the left edge.
    • The greetings are from the stamp set called ‘The Right Words’ seen here. It’s one of my favorite greeting sets.

    I was in the middle of the video tutorial for this card but the video failed right before I started the project. And I made my last packet. So I do not have a video for it. But hopefully the project sheet above helps you out.

    ~~~

    February Specials

    Product of the Month is the new Painted Illusions 12 X 12″ designer paper

    Get the NEW Stampin’ Positioner FREE when you choose the Starter Kit in February! Click here

    Bonus Days – Redeem your coupons in February!

    February’s PDF of the Month!

    Two NEW kits just released here:

    Check out the Last Chance List; new items are added and available

    while supplies last

    Leave a Reply

    Your email address will not be published. Required fields are marked *

  • A new fun fold card with the Nature Walk suite; wow!


    Karen’s swap card blows me away! I haven’t seen a card fold like this one before and I just love her color choices too.

    Isn’t it beautiful?! Can you tell that the front, main layers are ‘caught’ on the diagonal textured layer on the lower left? That’s what is keeping the flap tucked in.
    This is how it opens:

    Her colors include Cloud Cover, Secret Sea, Old Olive & Basic White. I’ll share measurements below.
    Did you catch the pretty textured layer? That’s the new Stone & Vine 3D embossing folder. And did you notice the ‘wood look’ die-cut in Olive near the greeting? That and the greeting are included the Nature’s Symphony bundle seen here.

    She used the Nature Walk suite for her card which includes gorgeous nature focused products. See it all here.

    Here’s how she finished the inside of her card:

    Measurements as follows:

    -card base 7″ X 5 1/2″ scored at 4 1/4″
    -White 7″ X 5″ scored at 3 3/4″. Make a mark on the shorter end at 1″ from the top and the bottom. Trim off the rectangle to the score line for the front flap
    -Secret Sea front is 3″ square, side is 2 1/2″ X 5 1/4″, the diagonal piece is 2 1/2″ X 2 3/4″ cut in half and inside is 4″ X 5 1/4″
    -DSP front is 2 3/4″ square, side is 2 1/4″ X 5″

    Thank you for creating and sharing this amazing card with us Karen!

    ~~~

    February Specials

    Product of the Month is the new Painted Illusions 12 X 12″ designer paper

    Get the NEW Stampin’ Positioner FREE when you choose the Starter Kit in February! Click here

    Bonus Days – Redeem your coupons in February!

    February’s PDF of the Month!

    Two NEW kits just released here:

    Check out the Last Chance List; new items are added and available

    while supplies last

    Leave a Reply

    Your email address will not be published. Required fields are marked *


Notice: LeeAnn Greff, Independent Stampin’ Up! Demonstrator, Manager. The content of this website is my sole responsibility as an independent Stampin’ Up! demonstrator and the use of, and content of, the classes, services, or products offered on this website is not endorsed by Stampin’ Up! Copyright 2025