/


Latest Post

Nature’s Prints 5 sheet wonder; these 5 templates make creating so easy!


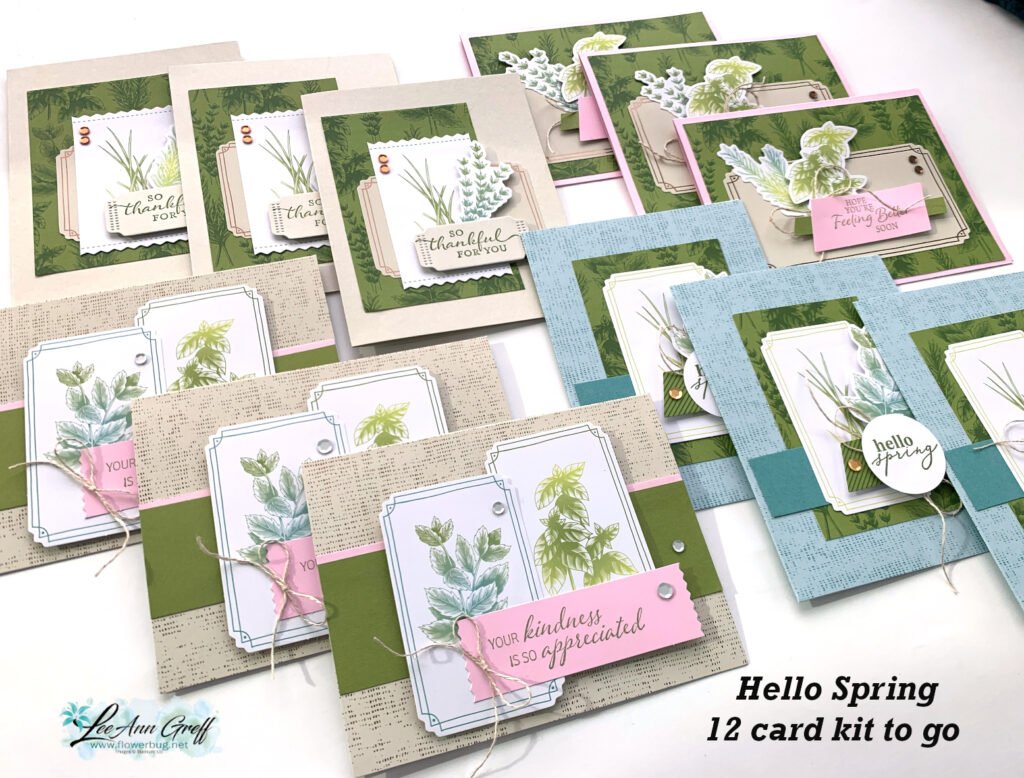
It's been awhile since I made a group of cards with my 5 sheet wonder templates.  The Nature's Prints stamp set was a perfect choice for it.  

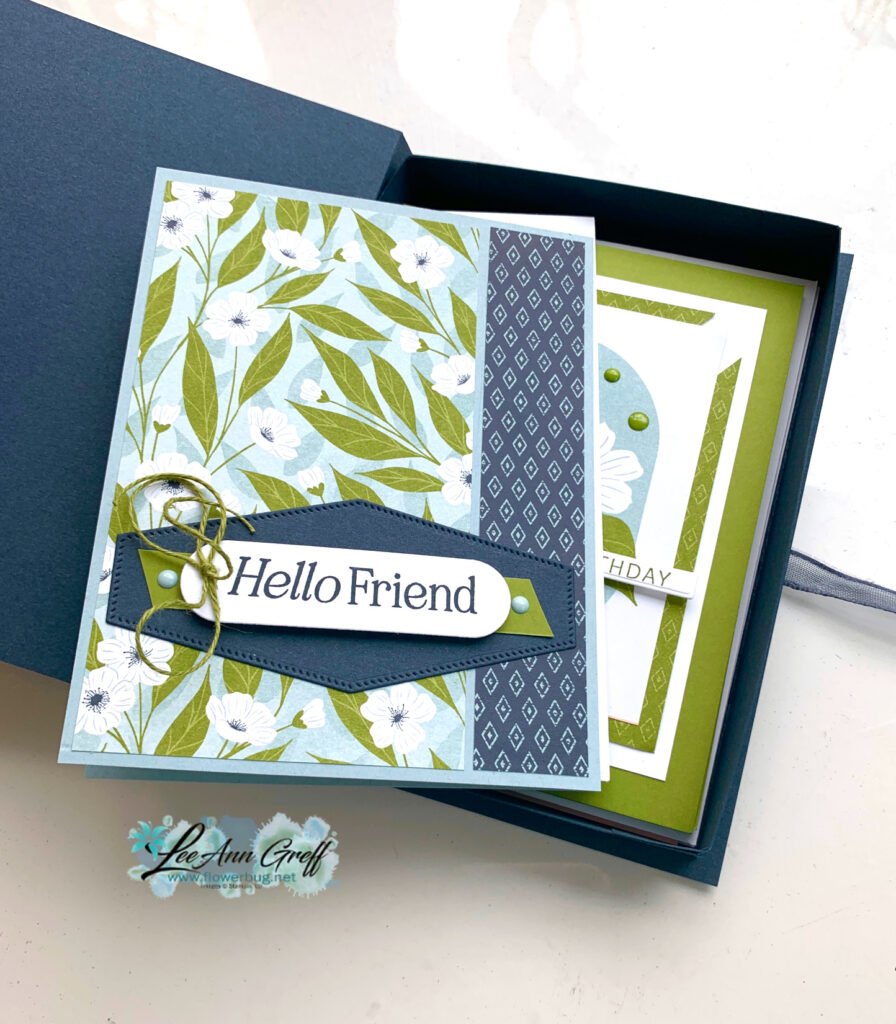
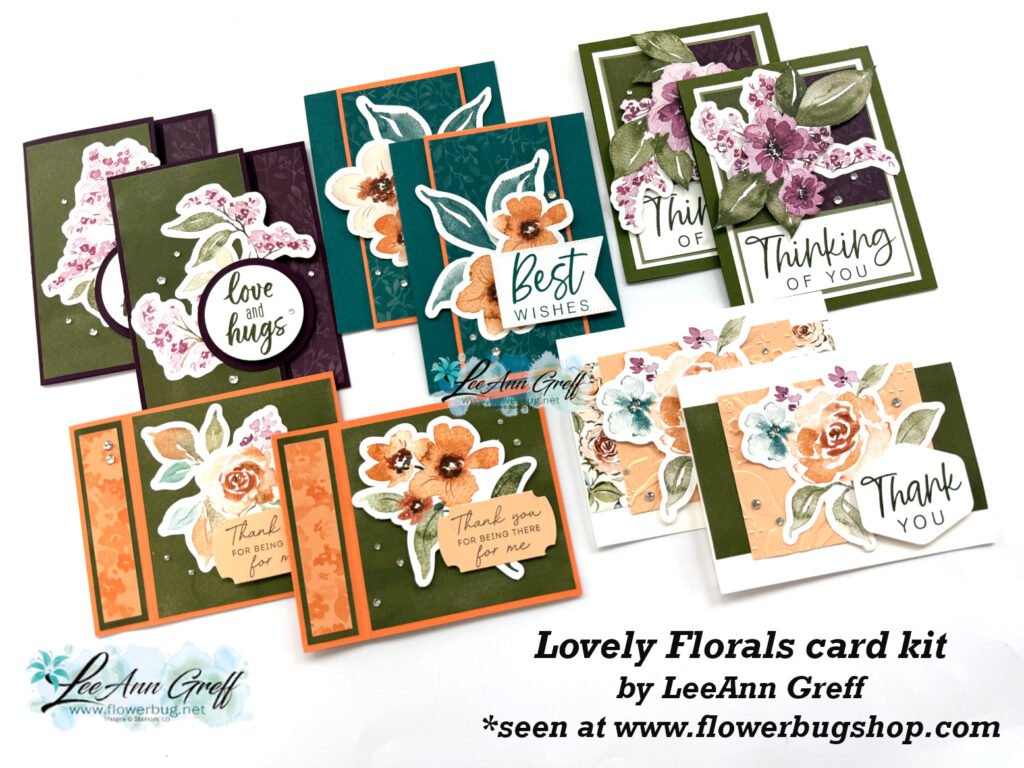
And playing with three of our newest In Colors paired with Navy & White helped create these beautiful cards. 

I'm holding a class on Wednesday, May 25th at 6 pm here in Minot, ND for my local customers. RSVP to attend by May 22nd. You can see my PDF tutorial on my shop here.  I am not offering it as a kit to go at this time. 

I chose the new colors of Starry Sky, Parakeet Party & Orchid Oasis to start with.  I needed a 4th color and wanted to stick with the blues and greens so I added Navy to the mix.  

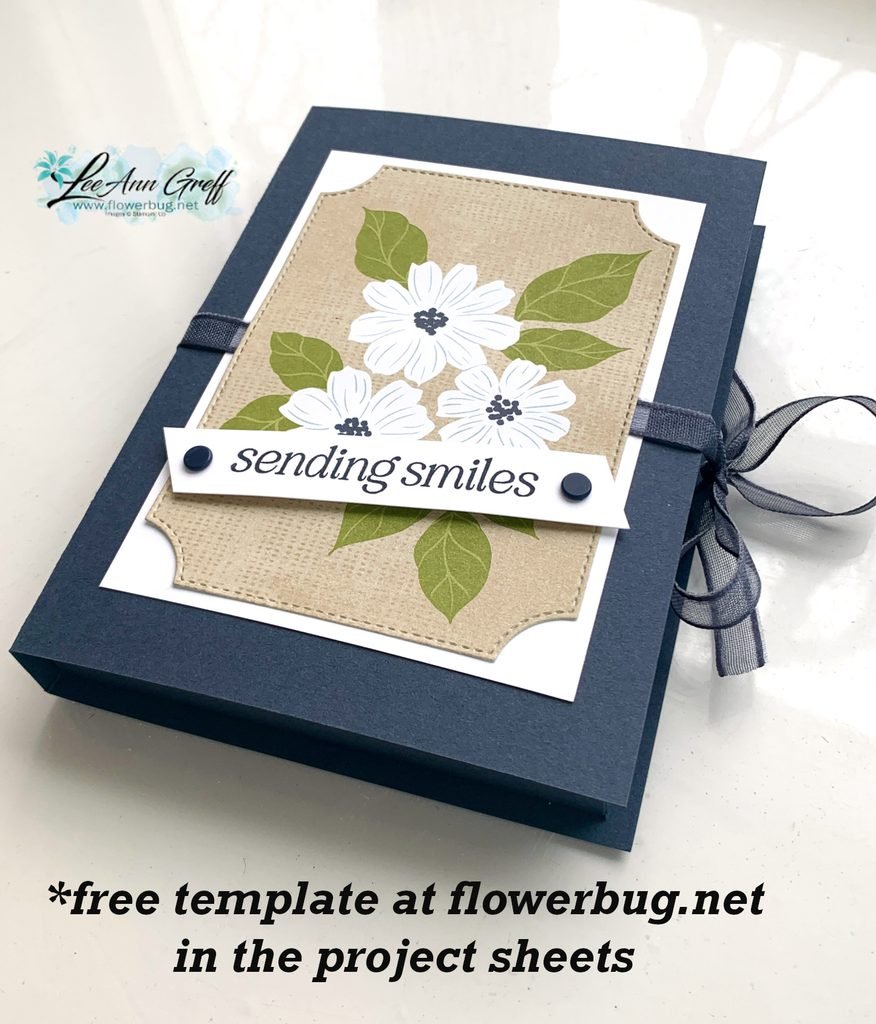
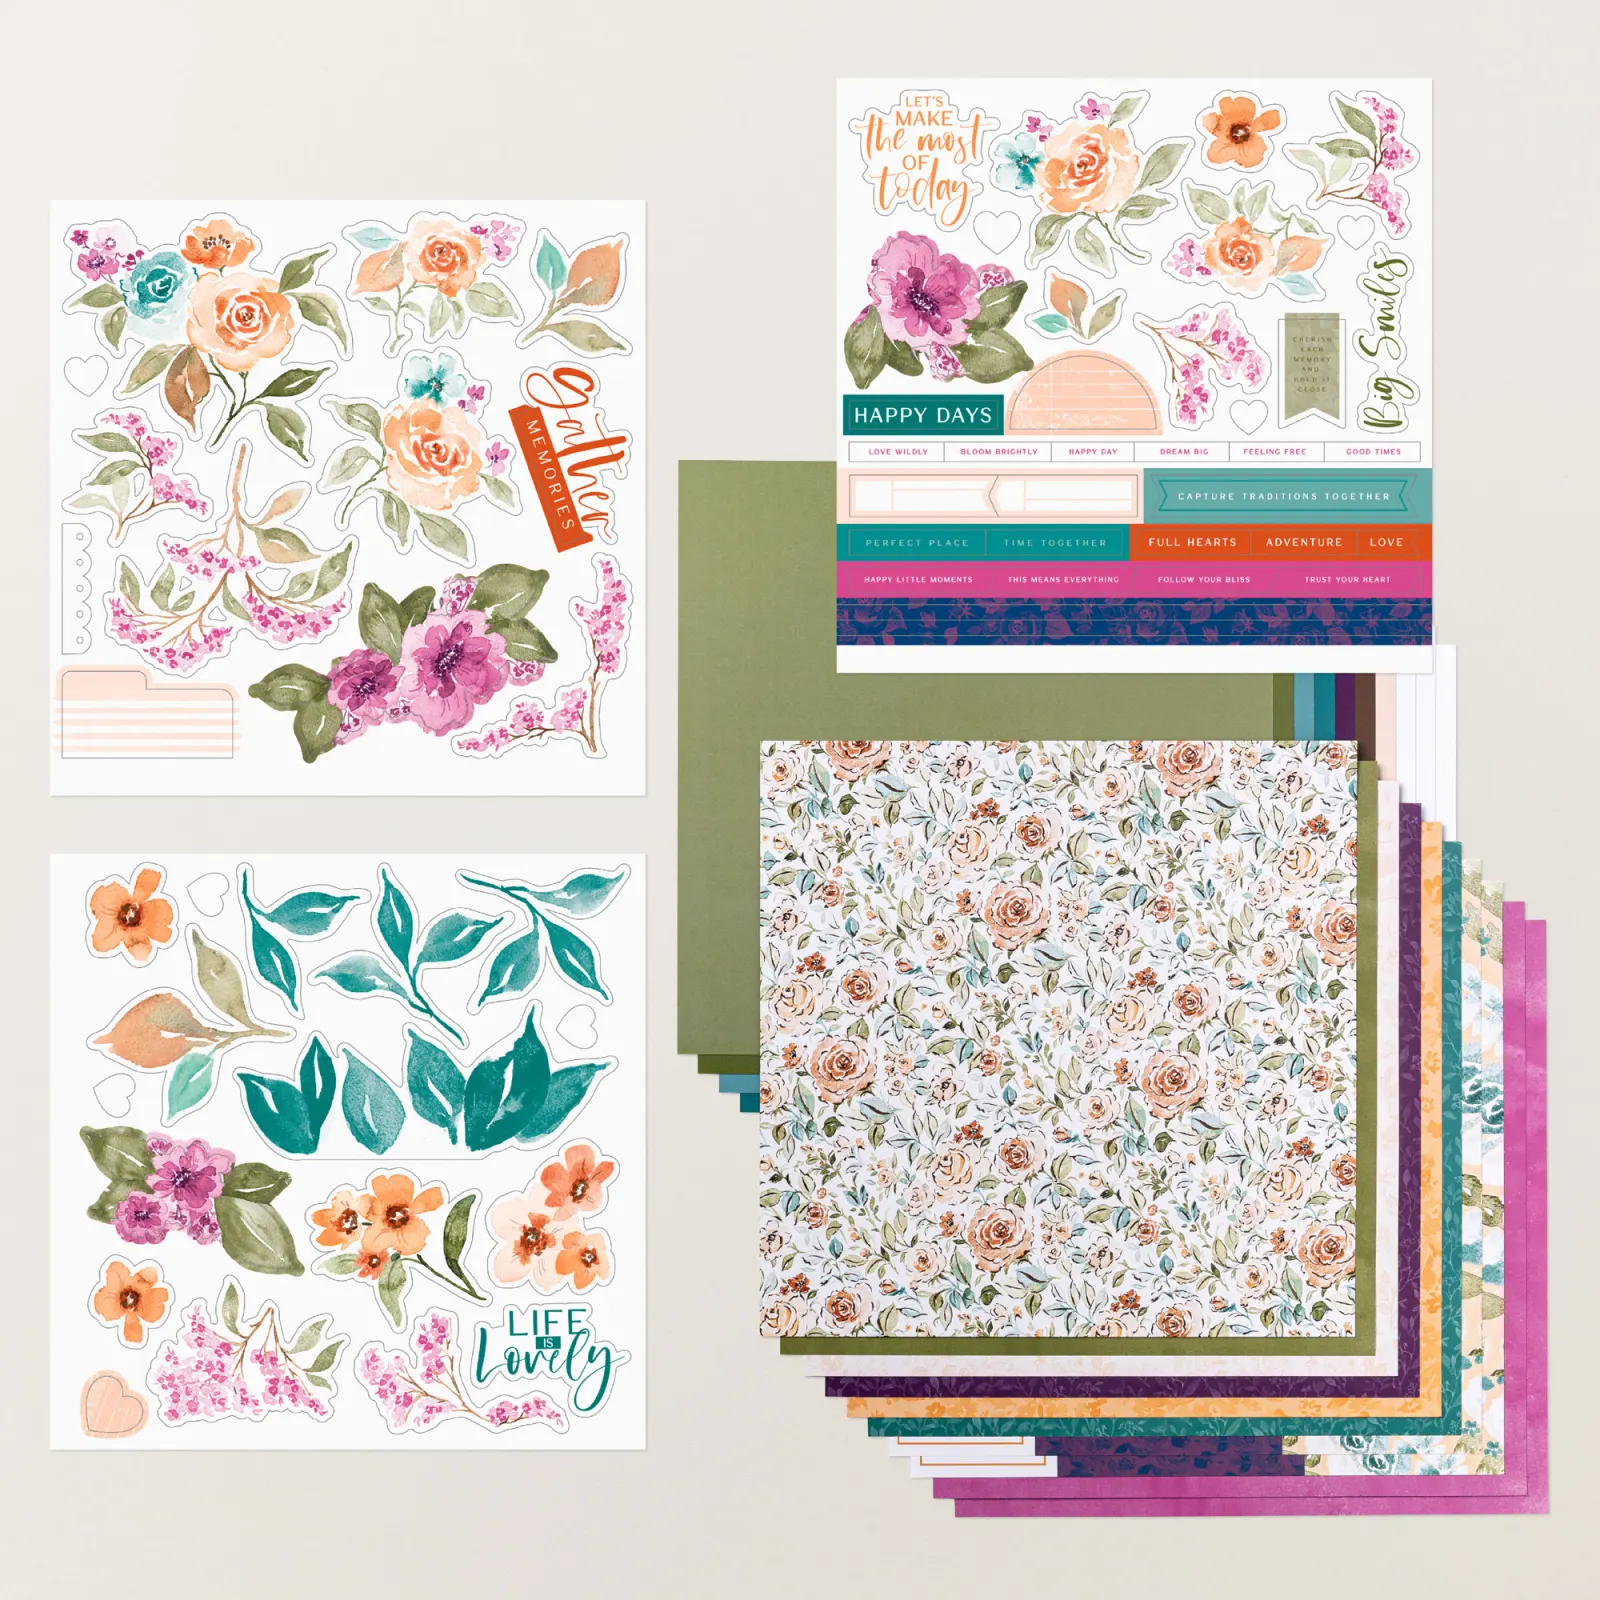
My greetings and images are all from the Nature's Prints stamp set seen here.  

How do my 5 sheet wonder templates work?  Here are the steps:

  1. Choose at least 4 colors of ink and card stock for your cards.  
  2. Choose a stamp set that has a variety of images, from large to small. It helps if they are non directional (okay stamped in different directions). 
  3. Print out Template A on White CS and stamp the non printed side with the images and inks you chose creating your own paper. *You could use DSP but you'll want to print on the reverse side. Here is mine below: 

3. Turn the stamped piece over and cut on the printed lines.  (I print my card stock with a printer but if your printer will not work with card stock you can have a copy place print them for you.  Or just use the template measurements as a guide. 

4. You'll also print templates B-E on four other colors of card stock.  Cut on the printed lines (you'll use the reverse side for your cards).  

5. You'll need 10 card bases in the colors you chose.  Place them on the table and add all of the cut pieces over each card base.  Tip; Use contrasting colors.  If there are many dark pieces I use a light card base and if there are mostly light pieces like the examples below, I'll use a dark card base.  

6.  Now you'll assemble the cards using my finished samples as a guide. 

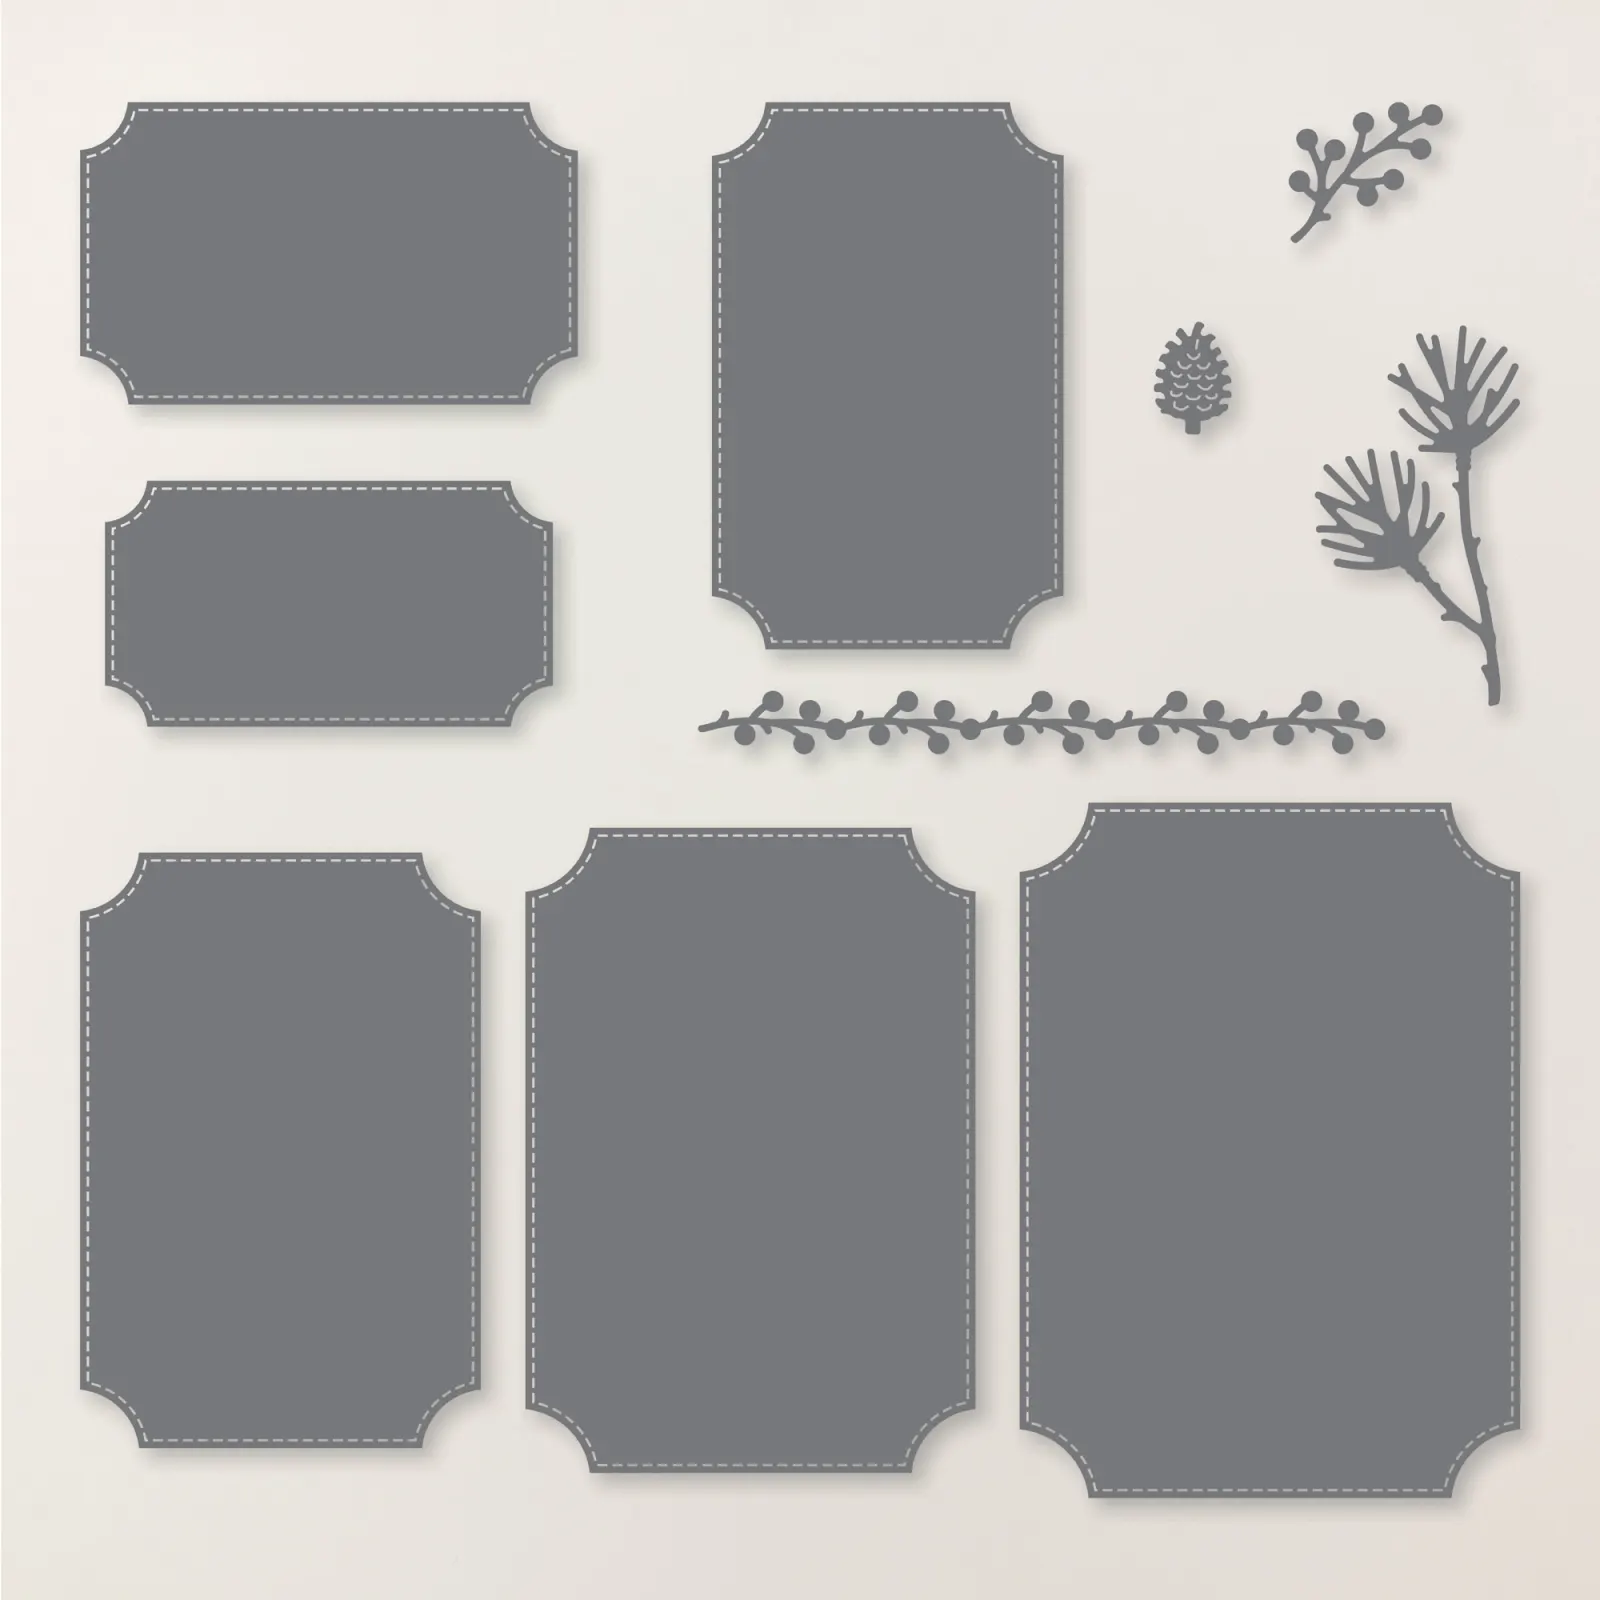
7.  You'll stamp your greetings using a variety of punched or die-cut pieces and finish your cards, adding ribbon or gems as desired.  

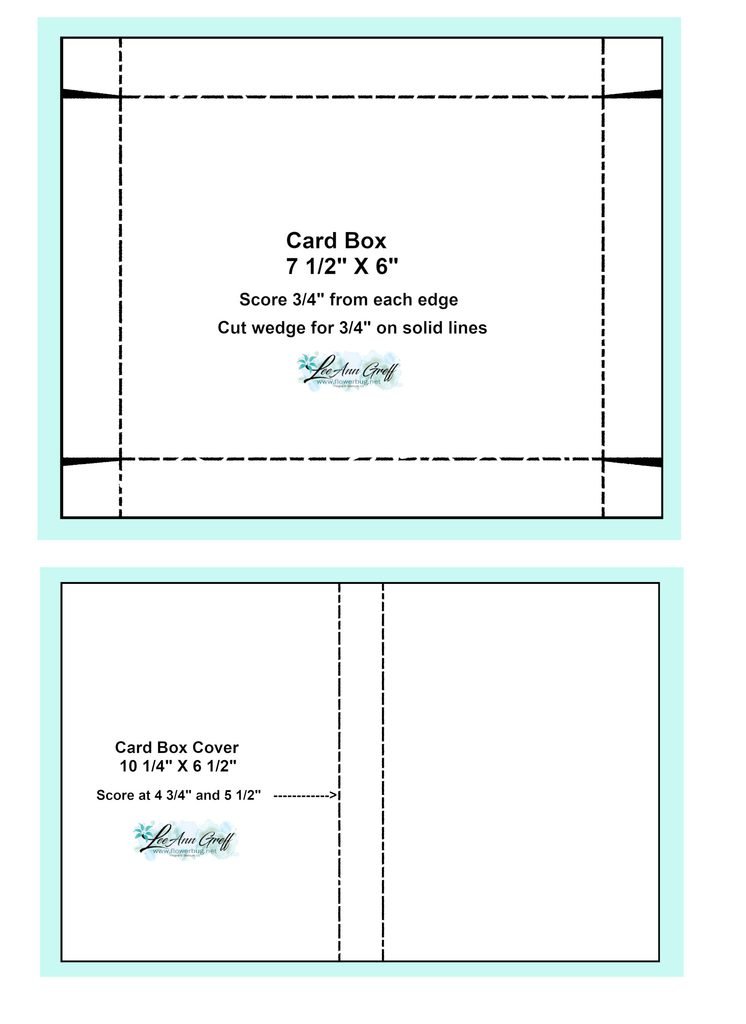
Easy, no measuring cards that are BEAUTIFUL and multi-layered.  You can see my 5 sheet wonder PDF tutorial here on my Shop site.  The PDF tutorial includes multiple card and color examples. 

~~~

Get a bunch of NEW In Color products FREE in your Starter Kit! 

It's $99 for $213 in products!!!  And Free Shipping! Click here. 


Host codes: HUNR9DB6

 *click here to order 

If your order is over $50 you'll receive a set of NEW embellishments from me.

Don't forget about my loyalty rewards! 

Click here to download yours and earn a $50 shopping spree!  

All Posts

  • A neat overlapping fun fold card with free project sheet, video & punch trick!


    Yesterday I shared one of the three fun fold cards I made in the video tutorial last week. Today I’m sharing the second one.

    My colors include Mossy Meadow, Crumb Cake, White and the retired Boho Blue. The colors in the new Delicate Dreams DSP includes a brand new In Color coming out in May. It’s called Hydrangea Hue. I don’t have it yet so I had to substitute.

    The Delicate Dreams designer paper AND the Delicate Whispers bundle are out of stock right now but you can add your email to the list to be notified when it’s available. Click on the links to do this. They should be back in stock in a few weeks.

    The front top flap overlaps the lower one. I added a strip of the Boho Blue and besides texturing it with the Beautiful Pattern embossing folder I used my To the Point punch to mimic the Mossy Meadow punched piece. I love this punch!

    Here’s how you do it.

    You must insert the layer in the back of the punch and wiggle it between the slot. You don’t insert it through the usual space. See the card stock sticking out of the upper part of the punch? *If you don’t want the usual size of your punch this is how it’s done.

    Here’s the inside view of this card with the upper flap lifted:

    And here’s the view with both flaps lifted:

    Notice the colored die-cut on the White layer here? I cut that die from the White layer and sponged it with Mossy Meadow ink. Then re-inserted it into the White CS. I love this effect!

    If you’d like the free project sheet for this card layout click here. You can download or print it off. It includes measurements, supplies, photos and step by step directions. If you’re loving my free project sheets I suggest you create a file on your computer and save them all there. Easy inspiration!

    I’ll share the last card tomorrow. Don’t miss it!

    Below is the video tutorial for this card and two more.

    March Specials!

    March Product of the Month is the Notes of Spring stamp set!

    It’s just $5 with a $75 purchase.

    Get my March PDF free with any Online purchase!

    NEW Online Exclusives are here!

    Get the retiring In Colors while you can; they’re already going fast!

    Leave a Reply

    Your email address will not be published. Required fields are marked *

  • Delicate Dreams fun fold cards with free project sheet & video tutorial


    The beautiful Delicate Dreams suite is new in our online products. The designer paper is especially pretty but unfortunately it’s out of stock right now. So popular! I had planned to offer it as one of my kit to go’s this month but it will have to wait until April.

    I shared 3 unique fun fold cards featuring this suite on last week’s video. We made them at my February Team meeting and I’ll be sharing them all this week.

    Today I’m sharing the double flap card (top right above). This neat fold gives you lots of opportunities to use your beautiful designer series paper.

    My colors include Mossy Meadow, White, Secret Sea and Earthen Metallic foil paper. That beautiful blue you see here is an upcoming NEW in color called Hydrangea Hue. It’s going to be a favorite of many!

    Check out this gorgeous new Suite here. Add your email to the list of any product that’s out of stock and you’ll be notified when it’s available.

    Once you open it there’s a surprise inside; another layer to open!

    I added a simple strip of the pretty watercolor DSP and a flower die-cut from the pretty Delicate Dreams DSP. This pretty paper has bronze foil designs all over it!

    Here’s the final inside layer. I stamped images from the Delicate Whispers stamp set.

    If you’d like the free project sheet for this card layout click here. You can download or print it off.

    I’ll share the other two cards in the next few days. Don’t miss them!

    Below is the video tutorial for these cards; be sure to subscribe to my YouTube channel. Or follow me on Facebook here; I share a video almost every Tuesday at 11 am CT.

    March Specials!

    March Product of the Month is the Notes of Spring stamp set!

    It’s just $5 with a $75 purchase.

    Get my March PDF free with any Online purchase!

    NEW Online Exclusives are here!

    Get the retiring In Colors while you can; they’re already going fast!

    Leave a Reply

    Your email address will not be published. Required fields are marked *

  • Paper Pumpkin kits; get a pre-paid subscription now before the price goes up!


    It seems most prices are going up these days and unfortunately Paper Pumpkin is raising their price for each kit by a few dollars. This will take effect on March 11th..

    These kits in the mail are a great value and are filled with lots of product to create with. I suggest you get a pre-paid subscription before March 11th to save $$. Go here to subscribe.

    Remember you are in full control over which kits you will receive. Once you create your account you can skip a month or add an extra kit. Plus, once you’re a subscriber you get to purchase any of the extras Stampin’ Up! offers like refill kits, add-ons & more.

    Here’s one of my bonus projects with the February kit.

    I used the add-on dies that were available; but are sadly out of stock now.

    Each month I send a bunch of bonus project ideas to my subscribers and my Team. You’ll love using them for creative inspiration.

    Here are the details on getting Paper Pumpkin kits:

    • Each all-inclusive kit comes with everything you need to create fun all-occasion or seasonal handcrafted projects—precut paper pieces, stamps, ink, embellishments, adhesives, and step-by-by-step instructions (contents vary depending on the kit). Kits autoship monthly, but if you need to take a break, you can skip a month. Crafting has never been so fun and convenient!
    • Plus, as a subscriber, you can buy refills, past kits, and add-ons (when available) and connect with your Paper Pumpkin community to share projects and ideas.
    • Select the Pay As You Go option to be billed monthly; you can cancel anytime. Or select the Prepay option if you want to receive kits for a specific number of months; you’ll be billed the entire amount now.

    March Specials!

    March Product of the Month is the Notes of Spring stamp set!

    It’s just $5 with a $75 purchase.

    Get my March PDF free with any Online purchase!

    NEW Online Exclusives are here!

    Get the retiring In Colors while you can; they’re already going fast!

    Leave a Reply

    Your email address will not be published. Required fields are marked *


Notice: LeeAnn Greff, Independent Stampin’ Up! Demonstrator, Manager. The content of this website is my sole responsibility as an independent Stampin’ Up! demonstrator and the use of, and content of, the classes, services, or products offered on this website is not endorsed by Stampin’ Up! Copyright 2025