/


Latest Post

Lovely & Beautiful fun fold card kit; reserve yours soon


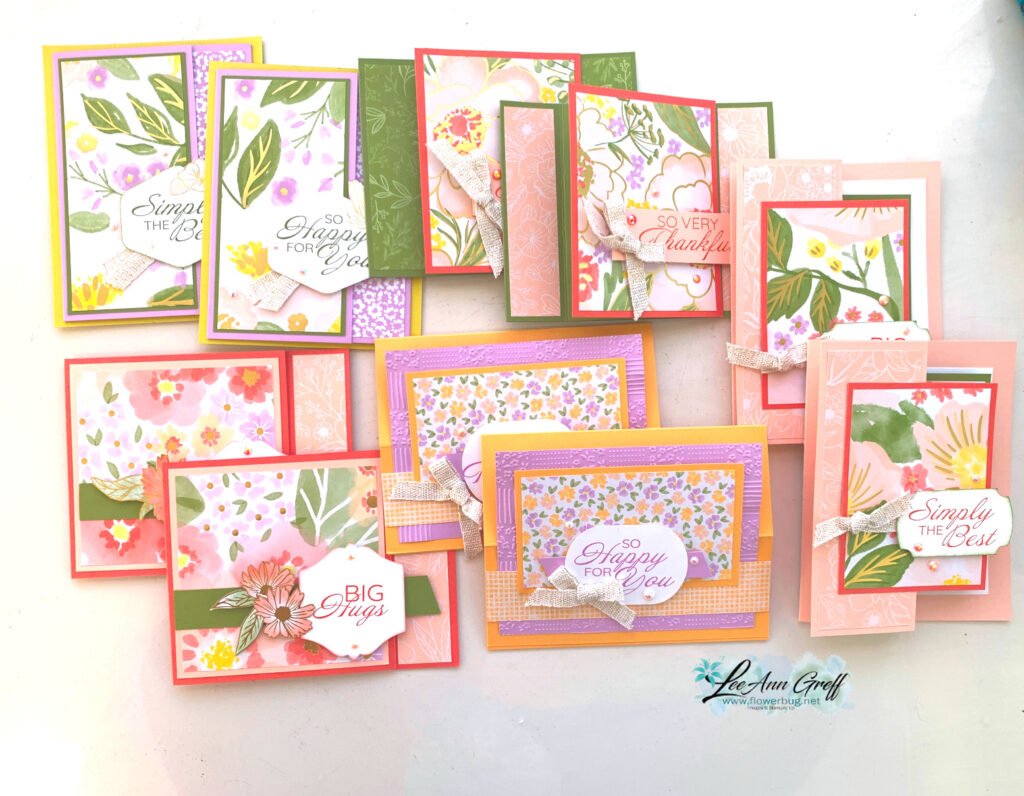
Creating with this stunning designer paper was pure pleasure. This DSP is well named; the colors and designs truly are beautiful. I chose the Lovely & Beautiful Specialty designer series paper for one of my January kits to go.

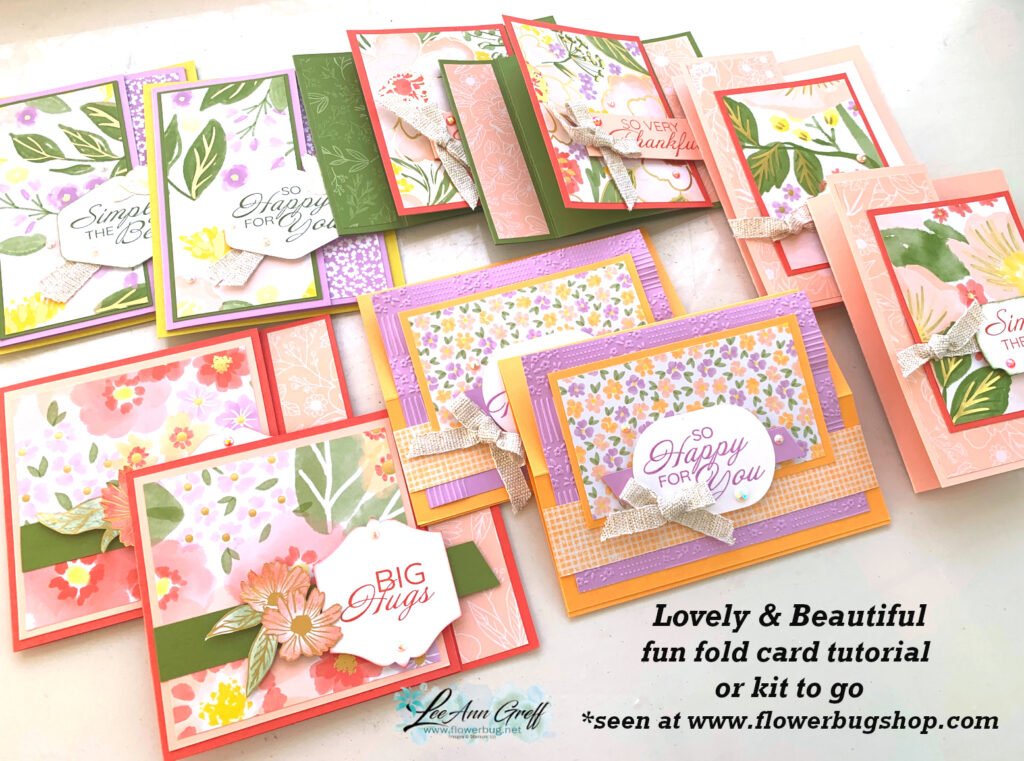
Each of the 5 layouts are fun folds and with the exclusive video they’re quick to assemble too. Interested? You can choose from either my pre-cut kit to go that includes products or the PDF tutorial option.

The Kit to Go is $31 plus shipping and includes 1/2 pkg of the Lovely & Beautiful DSP plus a share of the White/Gold ribbon and the Pearlized Faceted circle gems. You’ll also receive the PDF tutorial and exclusive video link as well. Opt in here to reserve it. The pre-cut kit & product is mailed out via Priority Mail at the end of the month.

The PDF tutorial is $16 and can be seen here. This tutorial includes photos, measurements, supplies list, the video link and step by step directions.
The tutorial is emailed to you immediately after purchase. Be sure to look for it in your spam or junk folder.

Be sure to check out all of my kits and tutorials at my shop here. I have many to choose from!

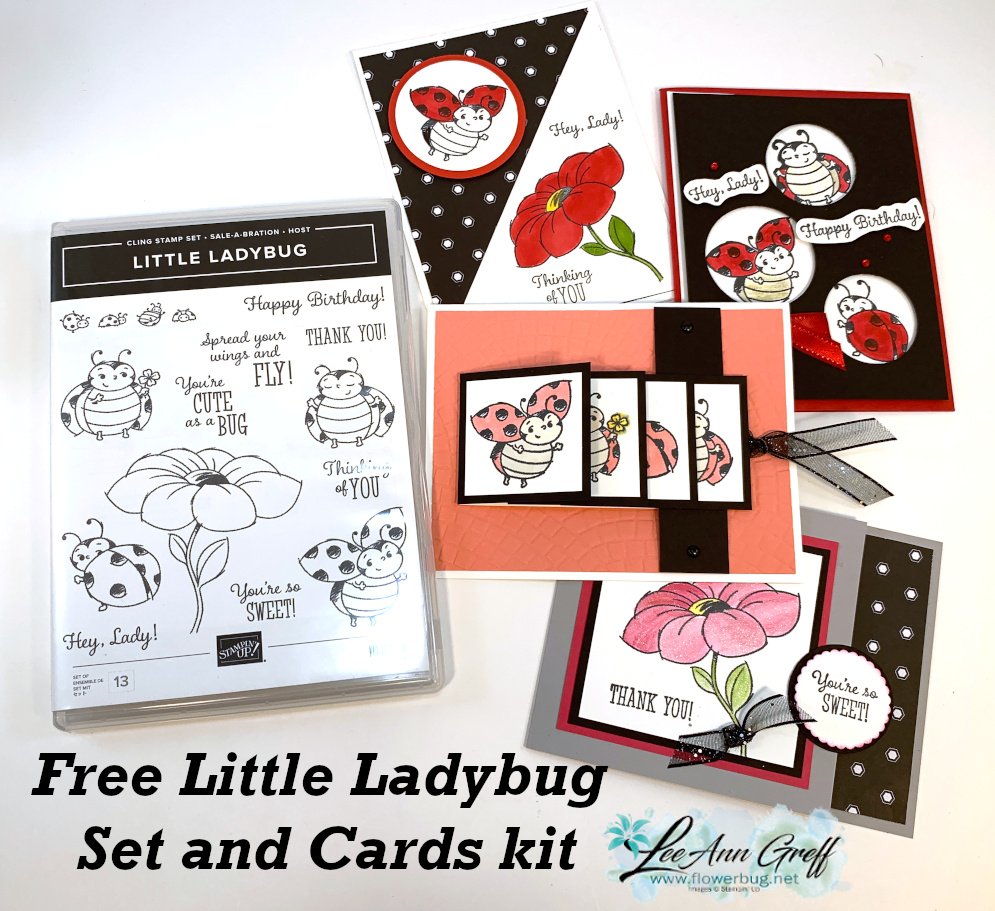
I’ll share the Cute as a Bug kit tomorrow; or see it here now.

Bonus days are here!

Get this free PDF with all online orders in January!

The 2026 Spring Catalog is live!

January’s Product of the Month
Fabulous Sayings set
Get it for $5 with any $75 purchase

Check out the newest Kits in our Kit Collection here.

All Posts

  • Painted Poppies in a window


    Adding dimension and interest to a clean & simple card can be a challenge.  Adding a window with the Stitched Nested Label dies does it easily.

    I had this window piece in my bag of White scraps, so it was extra easy to make this card. I used the Stitched Nested Labels; which are a 'must have' in my opinion. Next time you want a die-cut, consider die-cutting it in the center of a larger piece so you can use both pieces! 

    The top White piece is 3 1/2" X 4 3/4", the second White layer is 3 5/8" X 4 7/8".  The Granny Apple Green piece is 1 1/2" X 5 1/2".

    Just like yesterday's card I used my Dark Poppy Parade blends marker to color the new 1/4" White Crinkled ribbon for the bow. Both of the images are stamped in Black Memento ink. I colored the green leaves and bud with a Granny Apple Green Blends marker.  The poppy flower is colored by stamping with one of the stamps in the Painted Poppies set.  

    The greeting is from the Sending you Thoughts stamp set; it's free with any $50 order right now during our Sale-a-Bration promotion.  You can see all of the free items here. 

    I love the new Peaceful Poppies suite and have created 10 project sheets to send to everyone who places an order in January.  Details below:  

    ~~~

    January Specials 

    All online orders will receive a 10 cards pdf tutorial in an email.


    And if your order is over $65 you'll get a free Coastal Weave embossing folder too!


    January Host Code is GEEFZCZV

    Order online here


    Leave a Reply

    Your email address will not be published. Required fields are marked *

  • Peaceful Poppies; easy cards!


    The new Peaceful Poppies designer series paper is gorgeous with bright, pretty colors and lots of poppies!  There's one sheet in particular that makes it super easy to make quick, floral cards. Click here to see it in my store. 

    It's the sheet of paper on the far left above.  

    I cut the paper at 5 1/2" across and above the flowers.  Then into 3" strips.  Now I have 8 panels of flowers ready for cards!  

    I made two cards here adding a 1" X 5 1/2" strip of Poppy Parade on the left and a white punched border using the Decorative Ribbon Border punch. The cards are Old Olive cut at 4 1/4" X 11" scored at 5 1/2" 

    The greetings are from the new Sale-a-Bration set 'Sending you Thoughts' on page 11 of that catalog.  You can see it here. The punch they're stamped on is the Timeless Label punch seen here.  

    You might wonder where I found that pretty crinkled Poppy Parade ribbon. It's the new 1/4" White crinkled ribbon that I colored Poppy with my Dark Poppy Parade blends.  I LOVE being able to color my ribbon the exact color I need for my projects!  

    Check out all of the Sale-a-Bration items here; remember you get a free choice for every $50 or $100 you spend! 

    ~~~

    January Specials 

    All online orders will receive a 10 cards pdf tutorial in an email.


    And if your order is over $65 you'll get a free Coastal Weave embossing folder too!


    January Host Code is GEEFZCZV

    Order online here


    Leave a Reply

    Your email address will not be published. Required fields are marked *

  • Snowman Peek-a-Boo card with video


    This interactive card is fun& adorable and my gals loved it at our December club events.  

    They were anxious that it would be difficult.  There is a little trick to it but once you 'get it' you'll find it's pretty easy. 

    I cased this card from my very creative friend, Julie Davison.  Her style is simple yet fun.  Her layouts are the best!

    My color scheme came from the Let it Snow specialty designer paper from the Holiday catalog.  Unfortunately that paper is out of stock.  It was VERY popular!  It's Coastal Cabana, Real Red, White and Black. 

    The Snowman Season set is still available as a bundle through today; January 2nd.  Get it at 10% off now.  It will return this year but not as a bundle at the discount. See the stamp set here and the punch here

    Here's the corrected video; not upside down!  Ha! 


    Measurements:
    Red card 5 1/2" X 8 1/2"
    Coastal Cabana tag 2" X 5 3/4" scored at 3 1/2" and 4", front layer is 2 3/8" X 3 1/4"
    White front 2 1/8" X 3", small snowman piece is 1 1/2" X 1 3/4"; inside 3 1/2" X 4 3/4"
    Designer paper 3 1/4" X 4 1/4"

    January Host Code is GEEFZCZV

    Order online here

    Leave a Reply

    Your email address will not be published. Required fields are marked *


Notice: LeeAnn Greff, Independent Stampin’ Up! Demonstrator, Manager. The content of this website is my sole responsibility as an independent Stampin’ Up! demonstrator and the use of, and content of, the classes, services, or products offered on this website is not endorsed by Stampin’ Up! Copyright 2025