/


Latest Post

Look at these 2 beautiful cards with the Autumn Toile Designer paper


These pretty fall themed cards were made by my talented Flowerbug’s for our September Autumn themed card swap. They both feature the gorgeous Autumn Toile designer series paper from the 2025 Holiday catalog.

This first card was made by Lori and it’s a fun fold card.

Her colors include Pecan Pie, Early Espresso and Vanilla. The stamps are from The Right Words and More Messages sets. Gems are Streaked Dots and the metallic paper for that ‘tree’ die-cut is the Earthen Toned Metallic Paper. Can you see that pretty gold hoop around the tree? Wow!

Here’s the inside view. The tree and deer dies are from the Autumn Trees dies.

Measurements are:
– Card base 8 1/2″ X 5 1/2″ scored at 3 1/4″ & 5 1/4″.
– DSP on left is 3″ X 5 1/4″, DSP in the center is 1 7/8″ X 5 1/4″
– Vanilla on the right inside is 3″ X 5 1/4″
– largest circle is3 7/8″, DSP tree circle is 3 1/4″, Vanilla circle is 3 1/2″


Next is a great card made by Ginny who also used the same exact sheet of paper in the Autumn Toile DSP pack.

Her colors are Early Espresso with Very Vanilla. She stamped the greeting from the Amber Autumn bundle on the oval and added leaves from the Gathering Moments stamp set as well.

Measurements:
– card base 8 1/2″ X 5 1/2″ score at 4 1/4″
– Vanilla 4″ X 5 1/4″
– Early Espresso 3 1/2″ X 4 3/4″
– DSP 3 1/4″ X 4 1/2″

You can see this beautiful autumn paper here. I can see this going out of stock soon. It is one of my top selling products so far in September.

~~~

  To see all of the new Online items click here.  Or download & save the Download Online Exclusives flyer 

Get a free project tutorial with any online order in September! 
All Posts

  • Fun Fold card with two versions!


    Saturday was World Card Making Day!  Did you make time to stamp?  First; did you even know about it?  

    We had a few stamping events on my Flowerbug's Team group and Mystery Stamping was one of them.  I sent them measurements so they could prep for the card making event but they didn't have a photo of the card!  Just measurements and supplies.  Use any Designer Paper, etc…..  It was fun to see what they all made.  

    Below are the two fun fold cards I made.  

    The front of the card is cut short to reveal the Designer paper on the left (inside) of the card.  Above I used the Snowflake Splendor designer paper and the Snowflake Wishes stamp set & dies bundle.  This designer paper is on sale right now at 15% off.  See all of the papers on sale here: 

    Next is a card made with the Gilded Autumn specialty designer paper and the Beautiful Autumn stamp & punch bundle.  You can see the measurements for these cards below. 

    Here are the measurements:

    • 2 pieces of Designer Series Paper (3 1/4" x 4" plus a coordinating piece 1 3/4" X 4")
    • Coordinating card base (9" x 4 1/4" scored at 5 1/2")
    • neutral CS like White or Vanilla (2 1/2" X 3 1/2" and 3 3/4" X 3 1/4" for inside)
    • a coordinating layer of CS (2 5/8" X 3 5/8")

    ~~~

    October Specials!

    Current Host code is MJK7R2CU

    Designer Paper Sale; click here!

    Get a free package of Adhesive Backed Snowflakes in October with an

    online order over $45. 


    All online orders will receive my Tutorial of the Month featuring the Poinsettia Petals suite!

    Leave a Reply

    Your email address will not be published. Required fields are marked *

  • Don’t miss this fun technique; use those Designer Paper scraps!


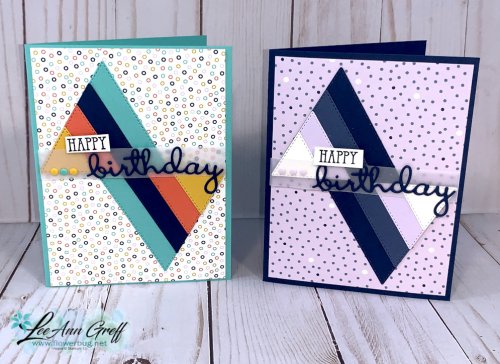
    Do you have trouble tossing those small pieces of Designer Paper left from a project?  I sure do!  There has to be a way to use them, right?  Well you can use them easily with this technique! 

    See?  It's quite eye-catching isn't it?  I kept the cards very simple to highlight the paper.  Each one features the Celebration Tidings stamp set. The card above features the Plaid Tidings designer paper; it's on sale right now too!  

    Watch the video below to get the tips on how to create these.  You just need some 1/2" strips and a ruler. 

    The card above features the Magic in This Night Designer paper.  The card below is the Tis the Season Designer paper; both on sale in October here!  

    Watch the quick video below to get the tricks on this fun technique. 


    ~~~

    October Specials!

    Current Host code is MJK7R2CU

    Designer Paper Sale; click here!

    Get a free package of Adhesive Backed Snowflakes in October with an

    online order over $45. 


    All online orders will receive my Tutorial of the Month featuring the Poinsettia Petals suite!

    Leave a Reply

    Your email address will not be published. Required fields are marked *

  • Trio of Celebrate Sunflowers cards with video & an easy highlighting technique!


    Look at these gorgeous sunflower cards!  They were a big hit at my Card Clubs this month.  They could chose between Daffodil Delight, Poppy Parade and Calypso Coral ink for their sunflower. 

    We sponged each sunflower leaving the center without color except for a bit of Crumb Cake Blends marker.  I know it might not be realistic but I like the pop of White in the center for brightness. 

    Check out the Celebrate Sunflowers bundle here. 

    Then we used White Craft ink and Blender pens to highlight a few petals here and there on the sunflowers.  It's super easy! I created a video below so you can see how it's done. 

    Measurements:

    • Crumb Cake card 5 1/2" X 8 1/2", scraps for die-cuts
      Whisper White 3 1/2" X 4 3/4", plus a 3 1/2" piece for sunflower
      Early Espresso 3 5/8" X 4 7/8"
      In Good Taste DSP 1 3/4" X 4 3/4"


    ~~~

    October Specials!

    Current Host code is MJK7R2CU

    Designer Paper Sale; click here!

    Get a free package of Adhesive Backed Snowflakes in October with an

    online order over $45. 


    All online orders will receive my Tutorial of the Month featuring the Poinsettia Petals suite!

    Leave a Reply

    Your email address will not be published. Required fields are marked *


Notice: LeeAnn Greff, Independent Stampin’ Up! Demonstrator, Manager. The content of this website is my sole responsibility as an independent Stampin’ Up! demonstrator and the use of, and content of, the classes, services, or products offered on this website is not endorsed by Stampin’ Up! Copyright 2025