/


Latest Post

Last of the Clean & Simple Team swaps!


Today I'm sharing the last of the March Team swaps with the Clean & Simple theme.  No designer paper!

Lori created with pretty card with the Linked Together bundle seen here. 

This bundle has stamps, dies and masks which is how she created her background.  All using Bubble Bath ink! 

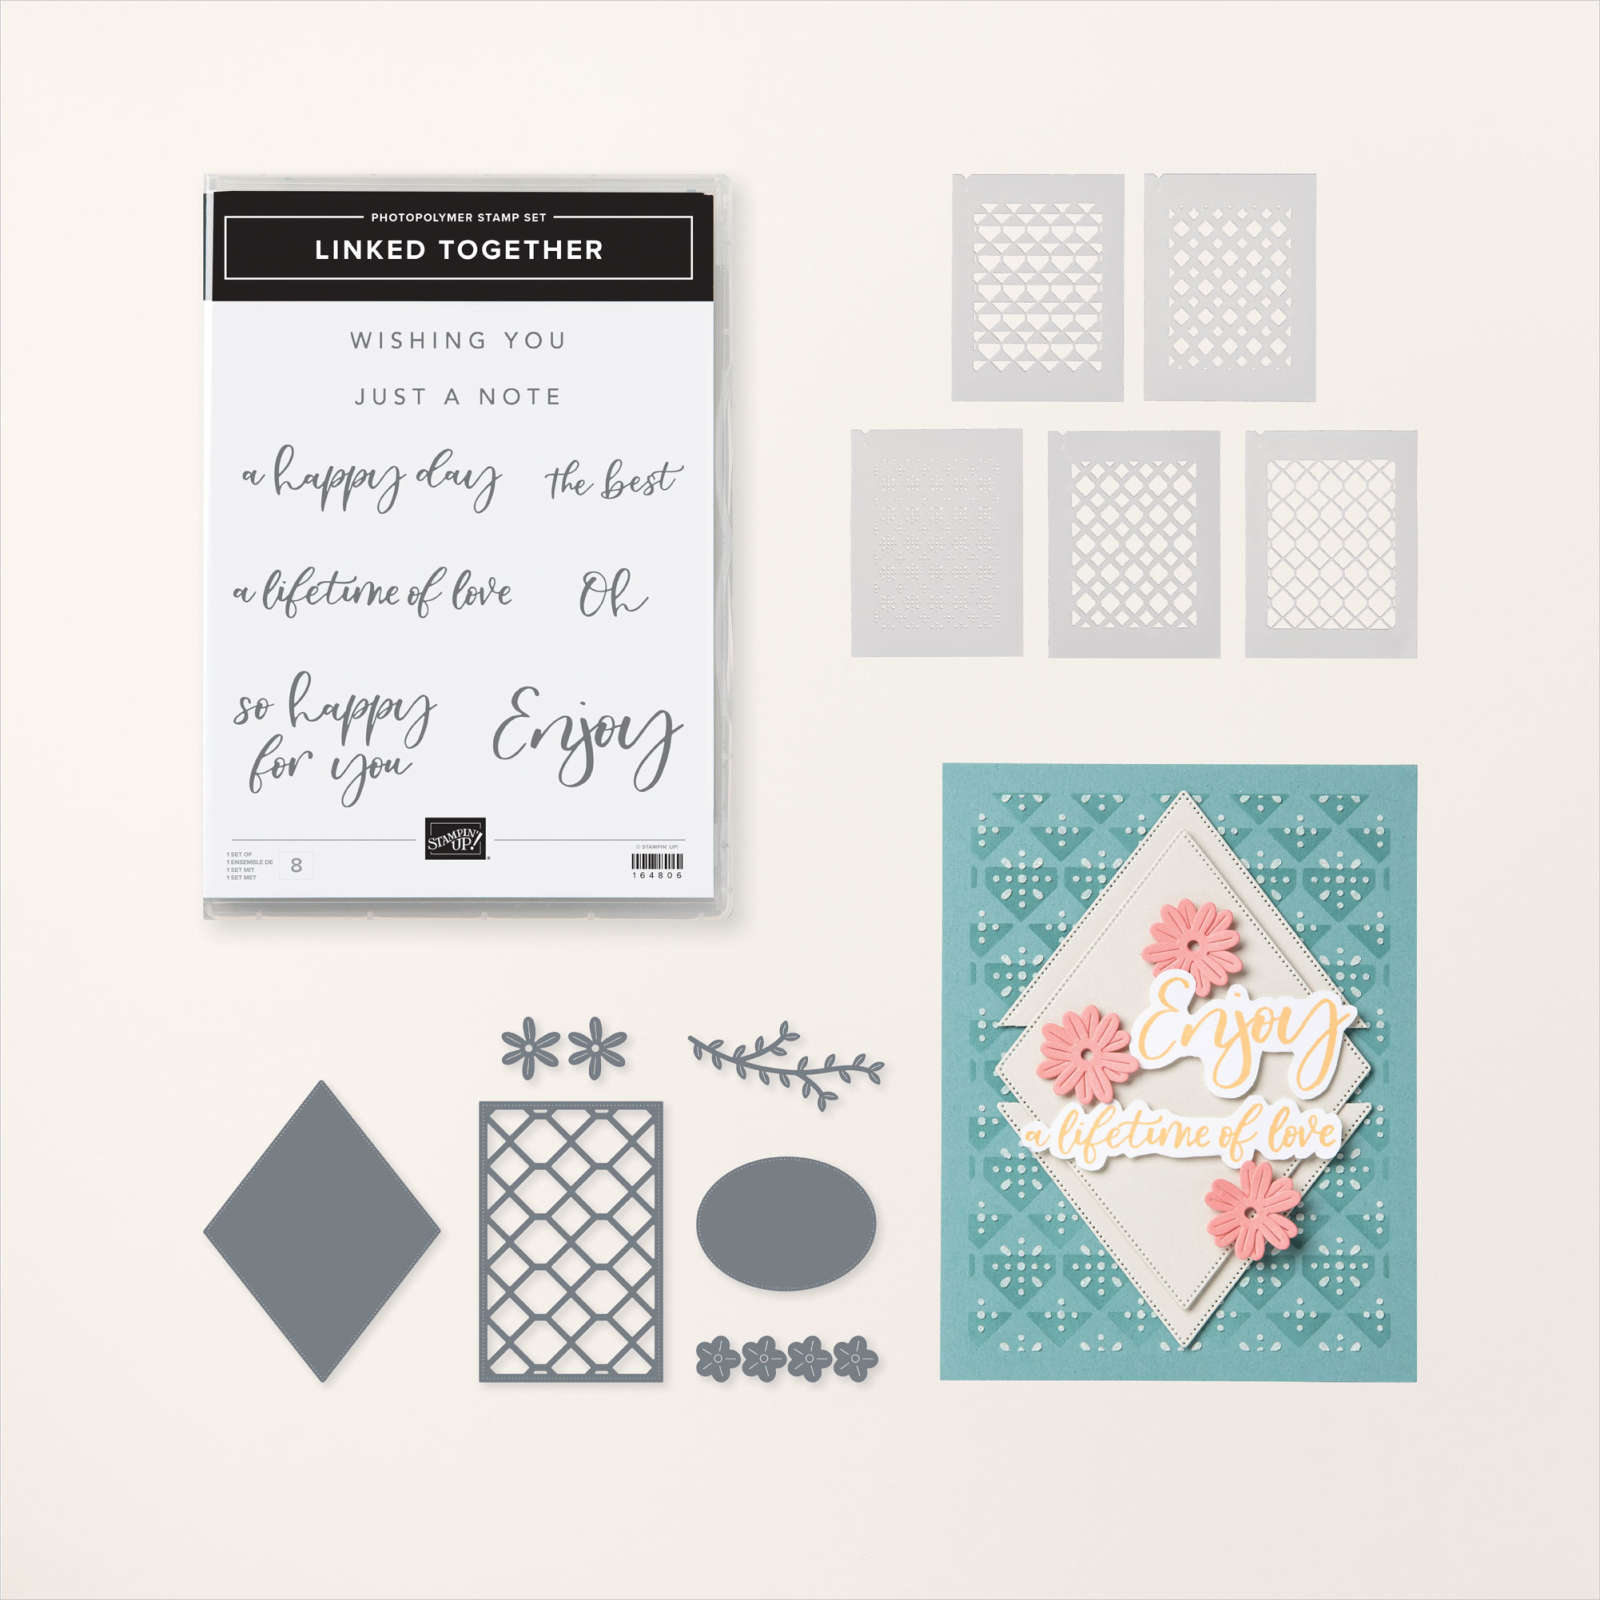
I love her soft background and the die accents she added by the greeting.  Just gorgeous!  

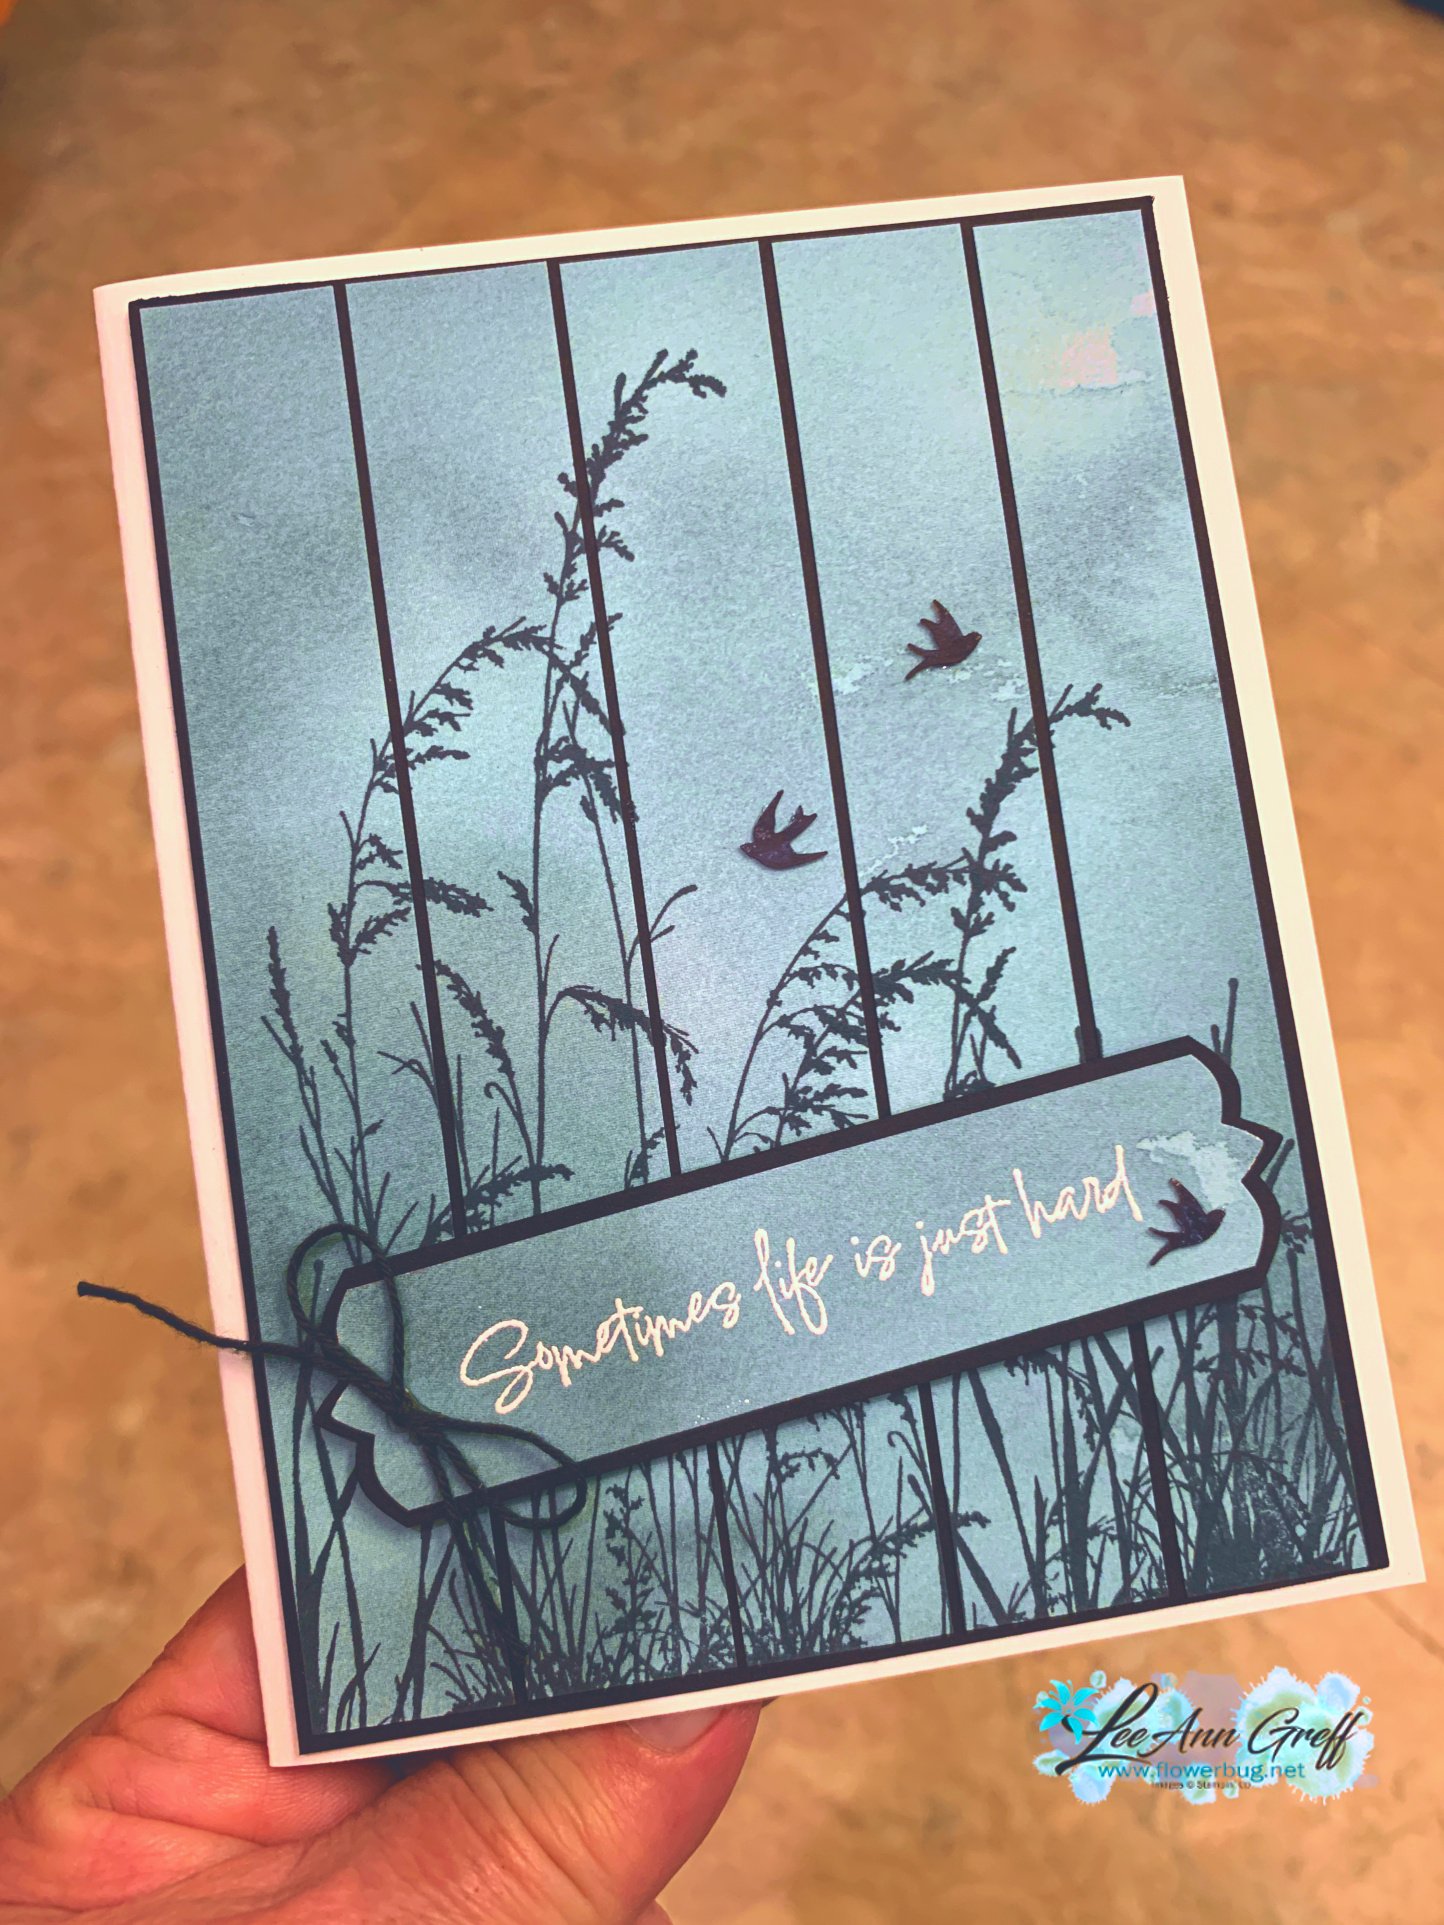
Next is a pretty card made by Tracey. She chose to use the You are Remarkable stamp set seen here.  

She also stamped a soft background behind the flower using the Elements of Text set.  Her color include Daffodil Delight & Crumb Cake with a bit of green on the leaves.  

I love how she stamped the inside; that bee is adorable. 

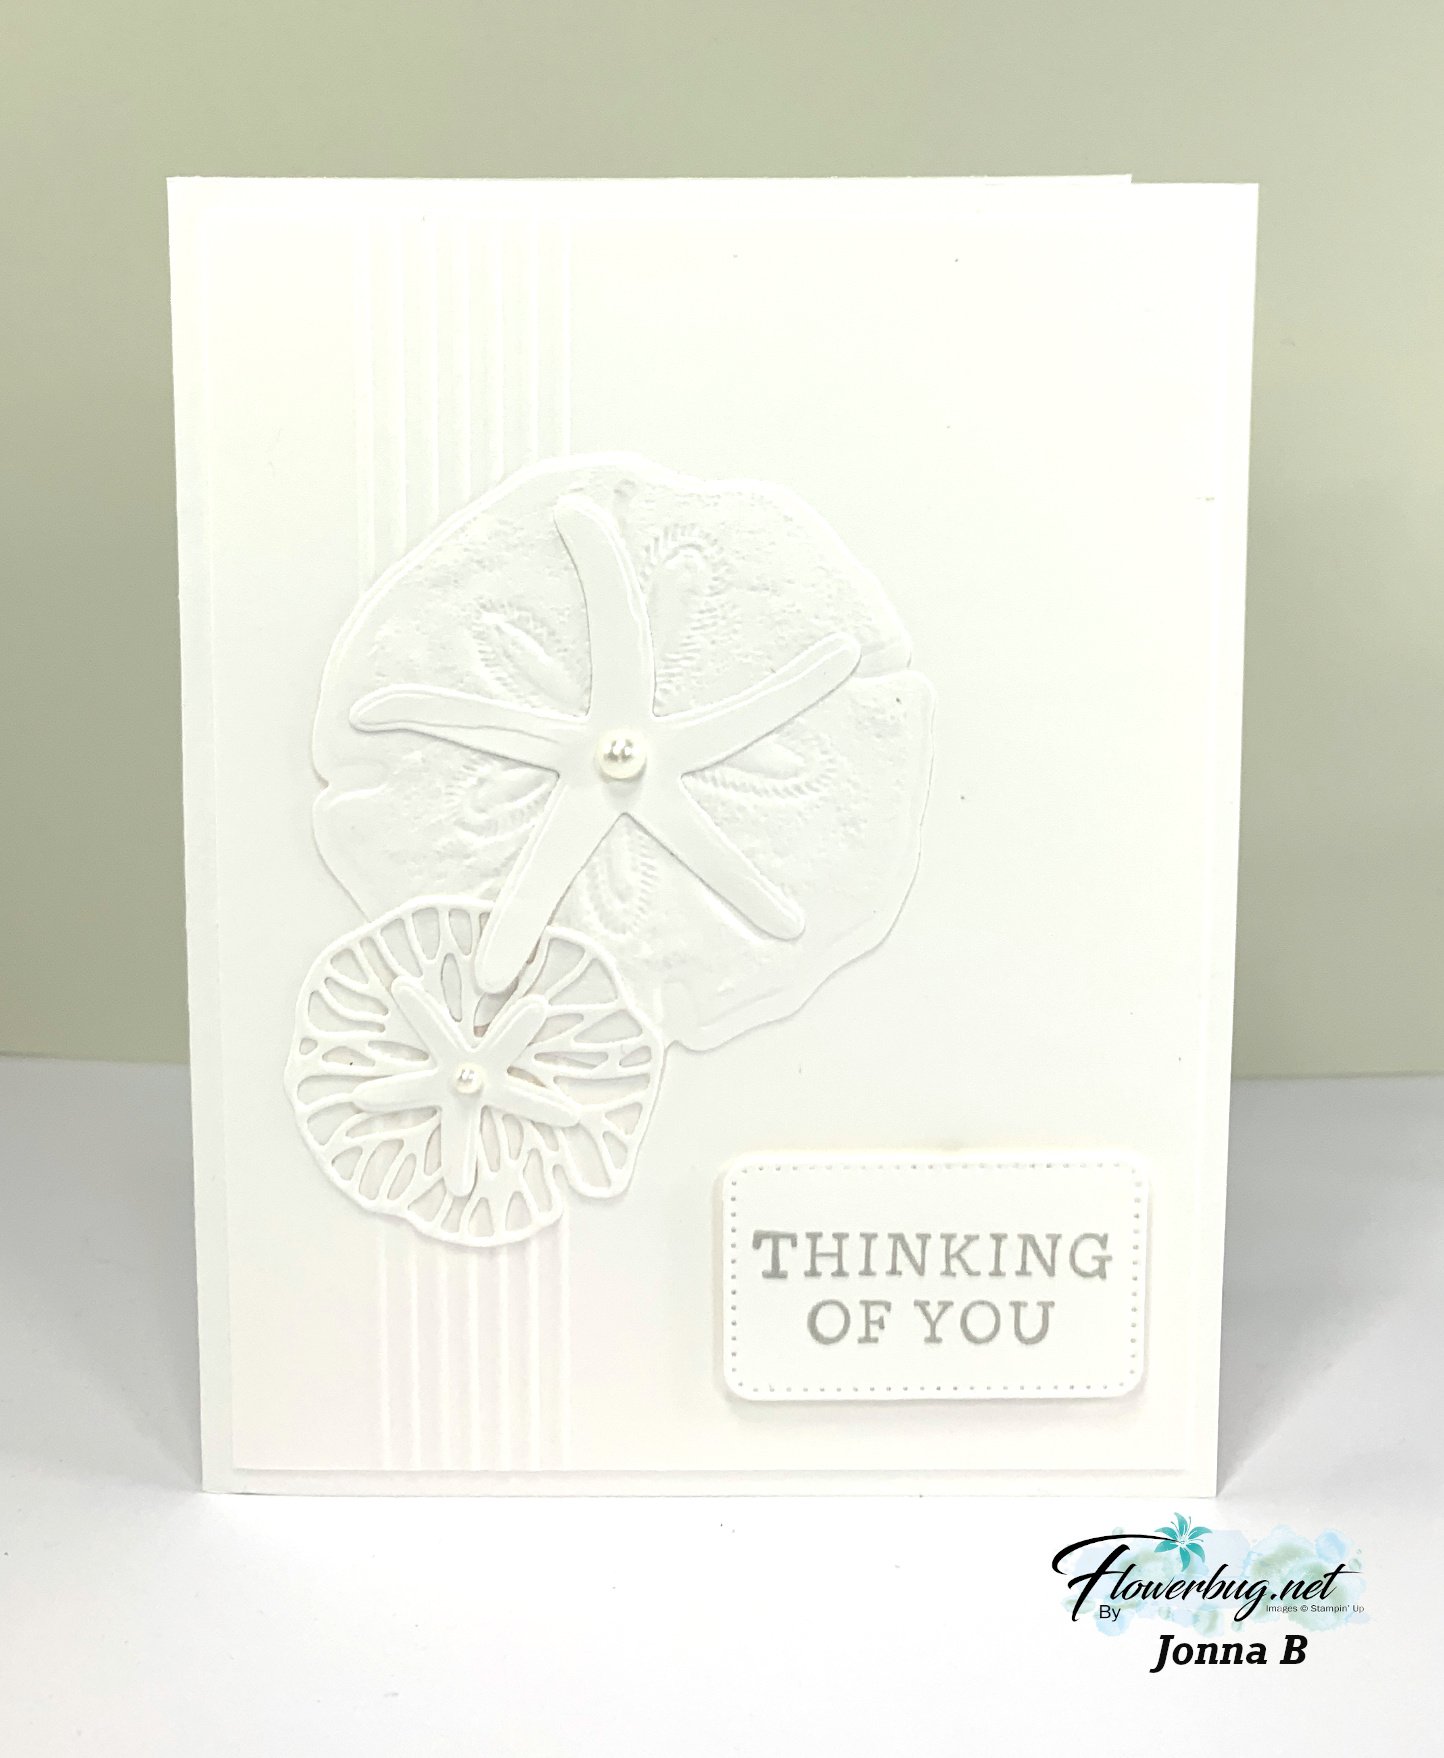
And lastly is this beautiful all White card made by Jonna.  

White on White is hard to photograph; I wish you could see how elegant it is in person!  

She used the Seaside Wishes bundle along with a bunch of score lines on the left side. This little touch anchors the seashells wonderfully!  

I hope you've enjoyed seeing my talented team swaps this month!  

~~~

March Specials:

*current host code link:  

PNQMAWXD

Get a free Floral Delight tutorial with any online order in March!

 Free Iridescent Foil gems!

All Posts

  • Cool Black Magic technique with a free project sheet and video tutorial!


    Oh my gosh, this Black Magic technique is super neat!  Look at these colorful cards!

    What's the Black Magic technique?  It's where you heat emboss on Black card stock with White embossing powder and color onto the embossing with Blends markers.  So easy and a great way to add color to your embossed image. The Layered Thoughts stamp set is perfect for this fun technique. See it here. 

    I also used the Celebratory Sips Designer Series Paper seen here and the coordinating Cheers & Sips stamp set for the inside images. 

    Click on the following link to download or print the free project sheet: Download Layered Thoughts July 2025

    Watch the video below to see how this is done.  It's so easy and lots of fun too! 

    ~~~

    August Specials

    Lots of In Color products are discounted in August!!

    Go here to see them all. 

    Get a free card class with any online order over $55 during August!

    Order online here

    The last chance list has new products! See them here. 

    Leave a Reply

    Your email address will not be published. Required fields are marked *

  • August specials include a free class with online orders!


    Happy August!

    This month I’m offering a free class with online orders over $55. It will include a 3 card kit featuring the Floral Impressions DSP seen here. All you’ll need are greetings, inks and adhesives.  

    • Everything is pre-cut and punched for you. Ribbon is included but embellishments are not. 
    • I’ll mail you the pre-cut kit including the printed project sheets!  All you need to do is place an order with me over $55 before tax and shipping. 

    Go here to order! 

    ~~~

    Starting August 5th Stampin’ Up! is offering a discount on tons of 2025-27 In Color products!  This will include many DSP packages, embellishments, kits, inks, refills and Blends markers! 

    See everything that will be discounted 15% on Tuesday, August 5th here. 

    ~~~

    New products will be released to the Last Chance list on August 5th. Don’t miss out on the best deals that day!

    Go here to shop. 

    Leave a Reply

    Your email address will not be published. Required fields are marked *

  • An easy card with Prairie Grass & Thoughtful Journey


    Here’s the last card I shared on last week’s video – all three featured the beautiful Prairie Grass stamp set seen here.  Unfortunately it is now out of stock but you can add your email to be informed when it’s available. 

    I stamped it onto a piece of Thoughtful Journey designer series paper. Then I cut it into 3/4″ strips before adhering it onto the Black CS layer and then the White card base. 

    You might wonder where the layered greeting shape is from. I used the To the Point punch with a 3/4″ strip of DSP like this: 

    Tip: Insert your paper through the back of the punch like you see above.  Notice it’s not through the side; but inserted into the back area.  Once you do both ends and you’re happy with the length of it, adhere it to a Black strip 1″ wide and punch both ends to layer evenly.  

    Here’s the free project sheet for this card. Print or download it by clicking on this link: Download Prairie Grass scene

    And here’s the video below where I share how to create this gorgeous card and two other cards featuring this amazing Prairie Grass stamp set. 

    ~~~

    July Specials:


    New Online Exclusives are here!  Click here

    ~~~

    Get my Turtle-y Cute PDF tutorial free with any online order in July!

    Leave a Reply

    Your email address will not be published. Required fields are marked *


Notice: LeeAnn Greff, Independent Stampin’ Up! Demonstrator, Manager. The content of this website is my sole responsibility as an independent Stampin’ Up! demonstrator and the use of, and content of, the classes, services, or products offered on this website is not endorsed by Stampin’ Up! Copyright 2025