/


Latest Post

Colorful Hydrangeas


What colors do Hydrangeas come in?  Lots!  I have a white one in my yard; it's blooms are huge and beautiful every year.  

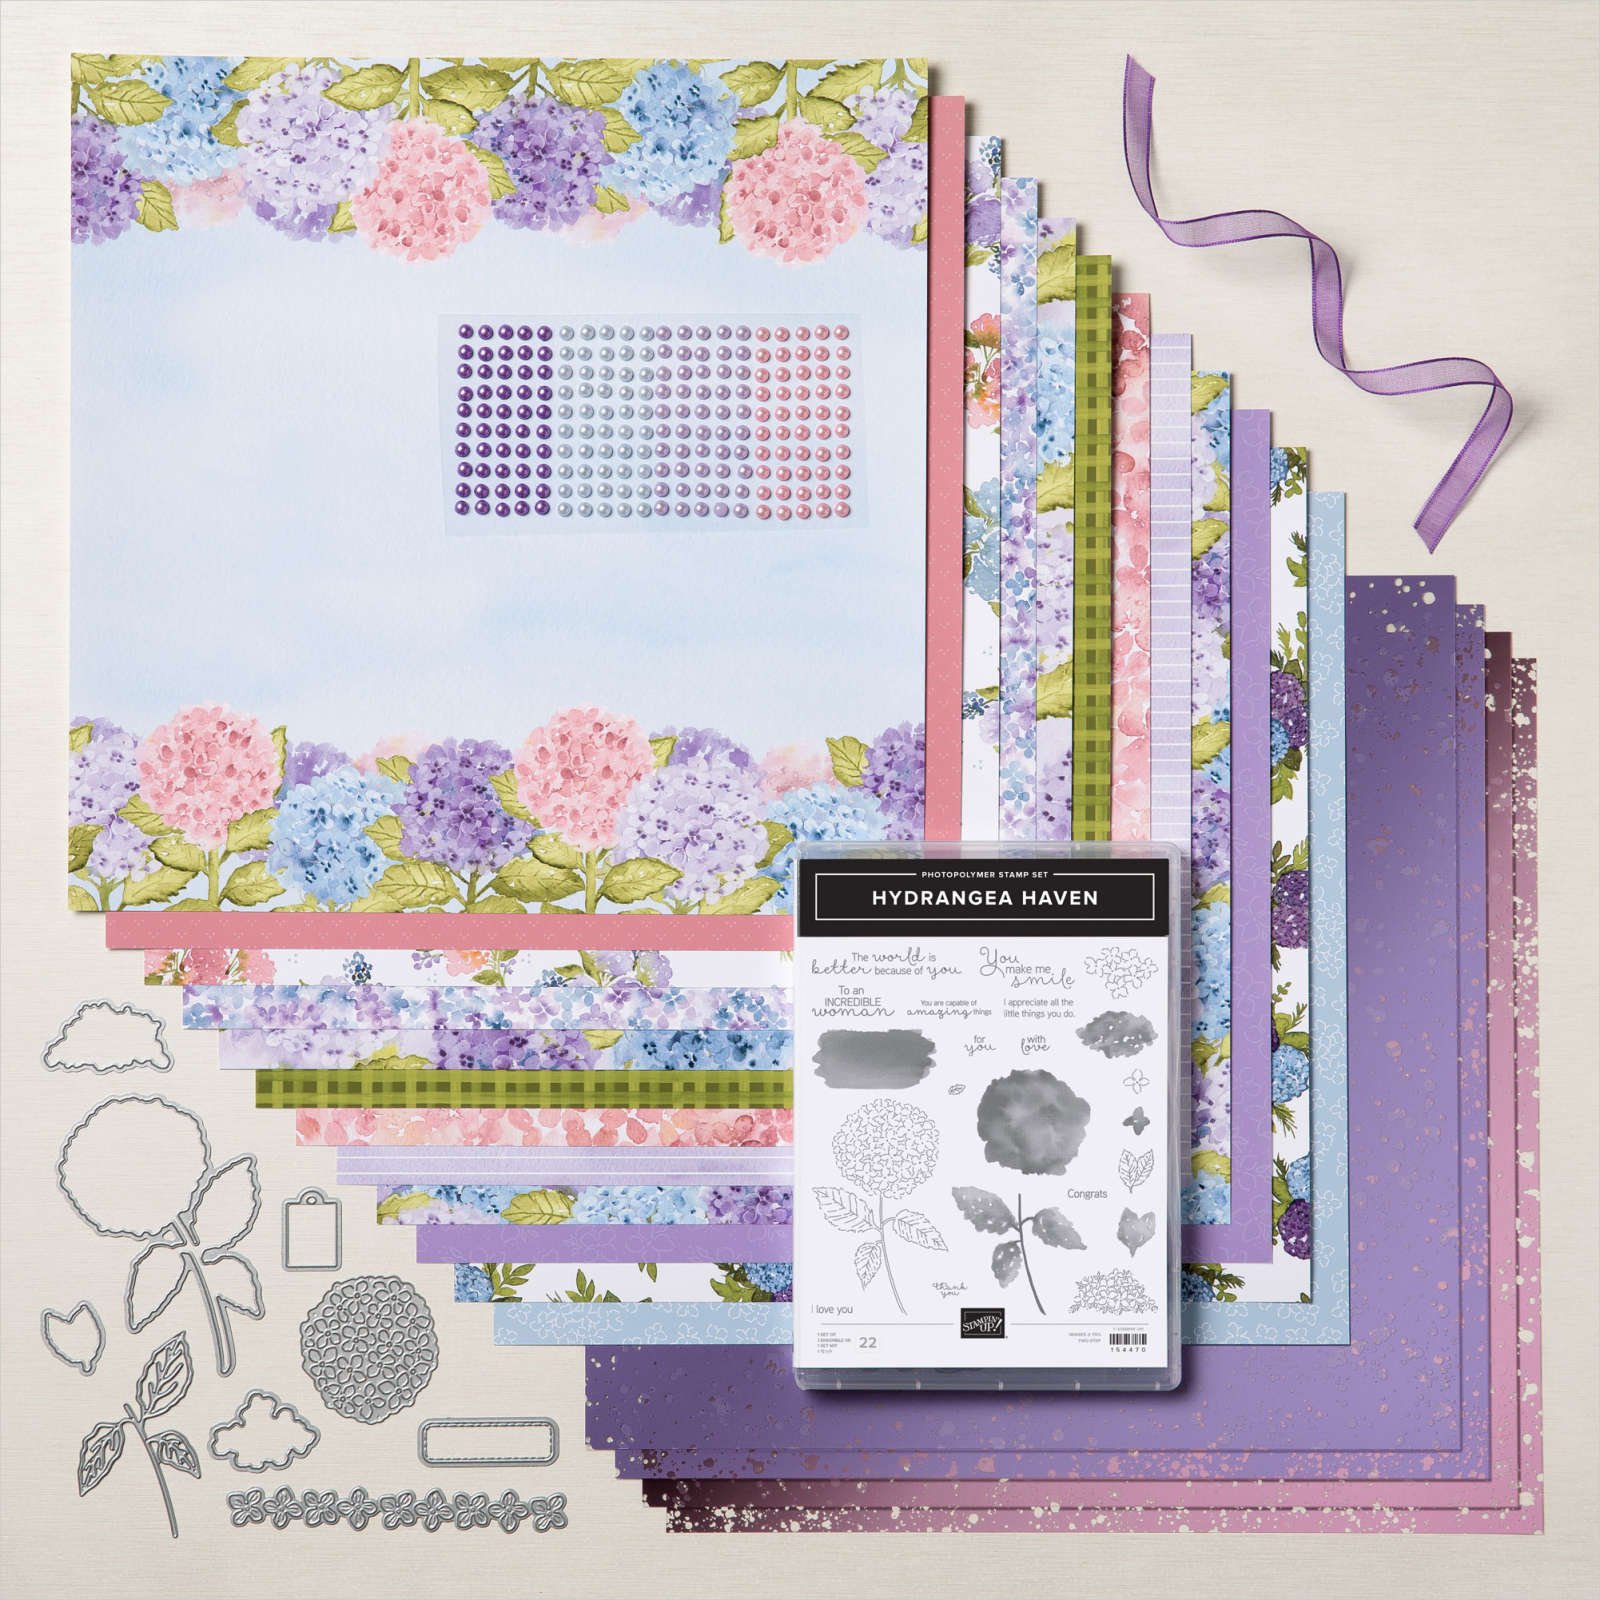
Annette made this pretty card for a swap last month.  She used the Hydrangea Haven bundle seen here.  

Her card is also a simple fun fold where the Real Red opens and adhered to the Black base.  

Products used; click on the highlighted item to see it online:

Note: I'm featuring this bundle and the beautiful Hydrangea Hill designer paper for April's card kit to go!  Stay tuned; I'll share it here soon. 

Measurements:

  • Basic Black 4 1/4" X 5 1/2"
  • Real Red 4" X 10 1/2" scored at 5 1/4"
  • White 2 3/4" X 4 1/4"
  • Silver Foil 2 7/8" X 4 3/8"
  • Black 3 1/8" X 4 5/8" 

Items are running out on the Last Chance List:  Here is what it already gone:

  • RICH RAZZLEBERRY STAMPIN' BLENDS COMBO PACK
  • INK • Item 150083  PRETTY PEACOCK CLASSIC STAMPIN’ PAD
  • INK • Item 150086 TERRACOTTA TILE CLASSIC STAMPIN’ PAD
  • INK • Item 150090  PRETTY PEACOCK CLASSIC STAMPIN’ INK REFILL
  • INK • Item 150092 SEASIDE SPRAY CLASSIC STAMPIN’ INK REFILL
  • INK • Item 150093 TERRACOTTA TILE CLASSIC STAMPIN’ INK REFILL
  • PAPER • Item 150880 PRETTY PEACOCK 8-1/2" X 11" CARDSTOCK
  • PAPER • Item 150881 PURPLE POSY 8-1/2" X 11" CARDSTOCK
  • PAPER • Item 150883 SEASIDE SPRAY 8-1/2" X 11" CARDSTOCK
  • BUNDLE • Item 155349 2019–2021 IN COLOR CLASSIC STAMPIN’ PADS
  • PAPER • Item 149703  2019–2021 IN COLOR 12" X 12" CARDSTOCK
  • PAPER • Item 152460 WHALE OF A TIME DESIGNER SERIES PAPER
  • EMBELLISHMENTS • Item 149708 PURPLE 3/8"  TRICOLOR RIBBON

~~~

March Specials!

Annual Catalog Retiring List; many discounted items while supplies last! 

Current Host code is PX6ZWGM7

Order online here

All online orders receive a free PDF of the new Butterfly Bouquet bundle

with 15 projects!


~~~

Get a free adhesive package from me with an online order over $50 using the host code above. 3 sheets of Dimensionals and 1 for die-cuts!

*If your order is over $150 do not use the code; you'll still receive a gift! 

Below are the Multipurpose Glue stands we're making. They're $6 each and available in my Shop here.  


All Posts

  • Retro style circles layout; super easy! Catch the Live video tonight!


    Tonight at 7:30 pm Central Time I'm sharing how to make these retro style circle cards on Facebook Live.  Click here to join me.   You can also see this video below!

    Basically you need three sizes of circle dies or punches for the start of this layout.  Cut them in half and layer together with the edges meeting on one side. Adhere and add a long greeting between the two. 

    Watch how on my FB Live replay!

    Measurements:

    • 5 1/2" X 8 1/2" card base
    • 3 1/2" X 4 3/4" Whisper White; the greeting strip is about 5" long and either 1/2" or 3/4" wide depending on your greeting image.
    • 1" X 5 1/2" horizontal strip
    • Circles from the Stitched Shapes dies are the largest three circles. 

    You'll want ink, stamps and embellishments that coordinate with your Designer Paper.  Remember you could use card stock instead of DSP. 


    Products used:

    • Designer papers – Heartwarming Hugs, new Classic Christmas & Snowflake Splendor
    • Stamps – Tree Angle, Snowflake Wishes & Curvy Christmas
    • Colors – Real Red & Olive, Seaside Spray & Night of Navy, Sahara Sand & Cherry Cobbler  
    • Other: Stitched Shapes dies, Curvy Dies & Pick a Banner punch

    ~~~

    November Specials!

    Current Host code is GRC9VVUU


    All online orders receive my FREE Curvy Celebrations 22 project PDF Tutorial! 

    Leave a Reply

    Your email address will not be published. Required fields are marked *

  • Curvy Christmas & the Postage Punch


    Check out this easy card using the new Curvy Christmas stamp set and the Postage Punch!  

    It's super simple! Here's how I made it:

    1. Stamp the curvy trees image on the White CS using Shaded Spruce ink.  Color the trees with a Light Shaded Spruce Blends marker.  Add a tiny star using Cherry Cobbler ink on one tree. Adhere it to the Cherry Cobbler layer and to the main card.
    2. Punch out three pieces of Classic Christmas designer paper with the Postage Punch seen here.  Adhere to the White CS. 
    3. Stamp the greeting in Cherry Cobbler ink on a 1/2" strip of White CS.  Punch the ends with the Banners Pick a Punch. Add it to the card with mini dimensionals. 
    4. Finish with a few Holiday rhinestones. 

    You can see this stamp set here; it's only available through January 4th.  And the Classic Christmas Designer Paper is here while supplies last. 

    Remember that everyone who orders any of these products or places an online order with me in November will receive a free 22 project PDF tutorial featuring the Curvy Celebration products! 


    ~~~

    November Specials!

    Current Host code is GRC9VVUU


    All online orders receive my FREE Curvy Celebrations 22 project PDF Tutorial! 

    Leave a Reply

    Your email address will not be published. Required fields are marked *

  • Gift Wrapped Box Fold Card with video


    Check out this cute Christmas card we made at my October Card Clubs!  It's a box fold card; a super cute but easy fun fold. 

    The colors are Real Red with Granny Apple Green & White. The dies on the front are the Stitched Shapes and Hippos & Friends.

    It even folds flat for mailing!  As you can see the back is similar to the front; leaving some space to write or sign the card.  

    I used the Gift Wrapped punch bundle from the Holiday catalog.  You can see it here. 

    Check out the video and measurements below. 

    Here's the video: 


    Measurements:

    Real Red 4 1/4" X 11" scored at 5 1/2", 7", 9" and 10 1/2"
    Granny Apple Green 3 5/8" X 4 7/8" (2 pieces) plus scrap for die-cut
    Whisper White 3 1/2" X 4 3/4" (2 pieces) plus scrap for circle die-cut and bow

    ~~~

    November Specials!

    Current Host code is GRC9VVUU


    All online orders receive my FREE Curvy Celebrations 22 project PDF Tutorial! 

    Leave a Reply

    Your email address will not be published. Required fields are marked *


Notice: LeeAnn Greff, Independent Stampin’ Up! Demonstrator, Manager. The content of this website is my sole responsibility as an independent Stampin’ Up! demonstrator and the use of, and content of, the classes, services, or products offered on this website is not endorsed by Stampin’ Up! Copyright 2025