/


Latest Post

How to make a bumblebee with the Ladybug Builder punch


This month my Flowerbug's Team's swap theme was cards featuring an animal, bug or bird with a unique fold.  I decided to use the Hello Ladybug bundle for mine. Click here to see the bundle.  I changed the ladybug into a bumblebee!  

I shared how to make this card on last week's Facebook Live.  It's now on YouTube as well.  Click here to see it and two other cards featuring this cute Ladybug Builder punch.  
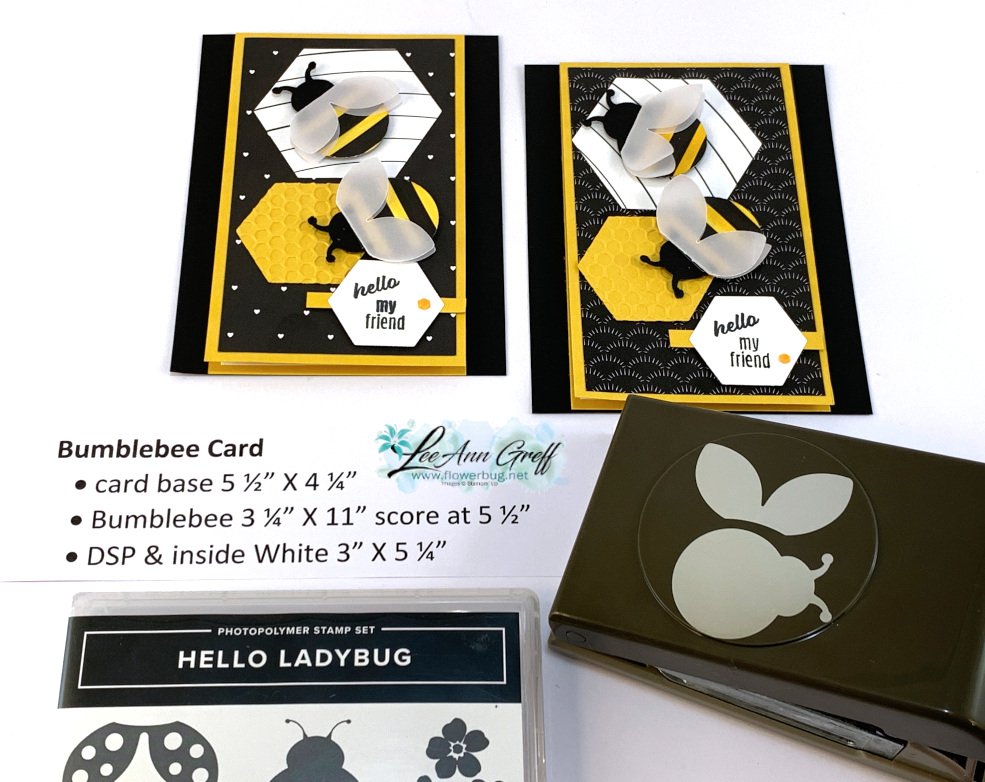
 

You may have seen this done before; it's so simple if you have some Black & White designer paper.  I colored the white stripes with a Dark Daffodil Delight Blends marker.  I used the Ladybug Builder punch to punch out the body circle and added it to the main Black Ladybug body.  

Then I punched out wings from Vellum.  I made them double wings by folding a piece of vellum in half and punching so the fold was intact.  The wings are adhered with a few mini glue dots. 

Details:

  • I used the Beautiful Shapes dies seen here for the hexagon shapes.  
  • Designer paper is the All Together 6 X 6" black & white paper seen here. 
  • The Bumblebee hexagon is textured with the Hive 3D embossing folder.
  • That hexagon embellishment on the greeting was pink. It's one of three colored in the Adhesive-backed Hexagon gems in the 2022 Jan-June catalog. I colored it with the Dark Daffodil Delight blends marker. 


This is an easy fun fold card to make.  And it makes great use of your Designer Paper – you can get 2 fronts from each 6 X 6" piece or 8 fronts from a 12 X 12" piece of paper. 

Below is the video; click on the photo to watch.  Don't forget to subscribe to my You Tube Channel here. 

~~~

 Hot Deals in February:

Choose $125 in product PLUS any 2 stamp sets free in February!

It's just $99. Get FREE shipping too!

Click here to get the deal.


Host codes: PA93N9CF

 *click here to order 


Use the host code above & get a free Easel Calendar kit

& the Gingham embossing folder with a $55 order in February, 2022! 

All Posts

  • New items on the Clearance Rack! Don’t wait; order now!


    They've added new items on the Clearance Rack today! 

    Check it out here ASAP; items are while supplies last and go quickly!

    While you're shopping be sure to get all of the retiring 2028-20 In Color items while you can.  They will retire next week and many, many people have had regrets that they missed getting items they wanted. 

    Double check your card stock, ink pads, ink refills, ribbons, enamel dots, markers and Designer Paper.   See it all here. 

    ~~~~

    April ordering specials:

    All online orders in April will receive my tutorial of the month; with 16 cards

    featuring the Ornate Garden products seen here.

    **Order either Ornate bundle from me and get a free 3 cards pre-cut kit! Order both and get a 6 cards kit with pdf tutorial! 

    Orders between $55 and $99 will receive a free Simple Shammy!

    Use this host code for April: MMM4SXSB  

    ~~~~~


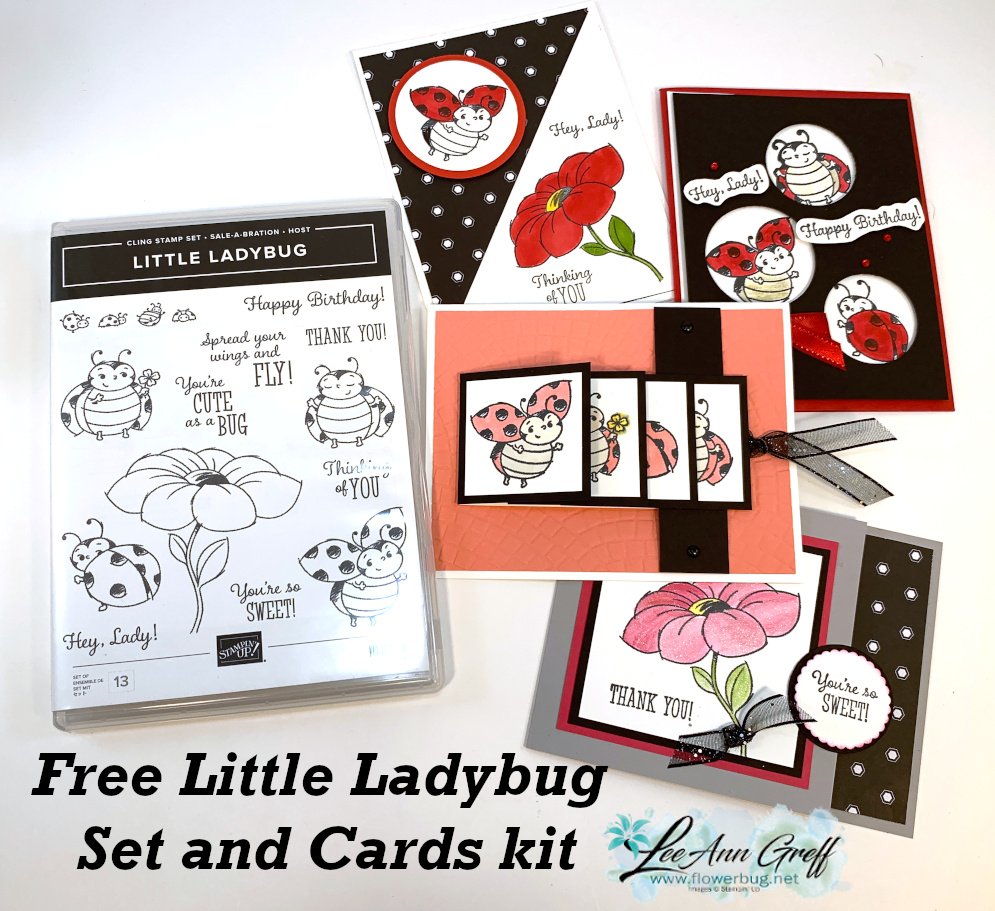
    Join my Little Ladybug party! 

    While supplies last; the first 10 people in April to order over $100 using this exclusive party host code 49HFZ6G3 will get a free Little Ladybug cards class that includes the stamp set and a 4 cards pre-cut kit! 

    Sold out!


    Leave a Reply

    Your email address will not be published. Required fields are marked *

  • Look at this! Ornate Borders wow!


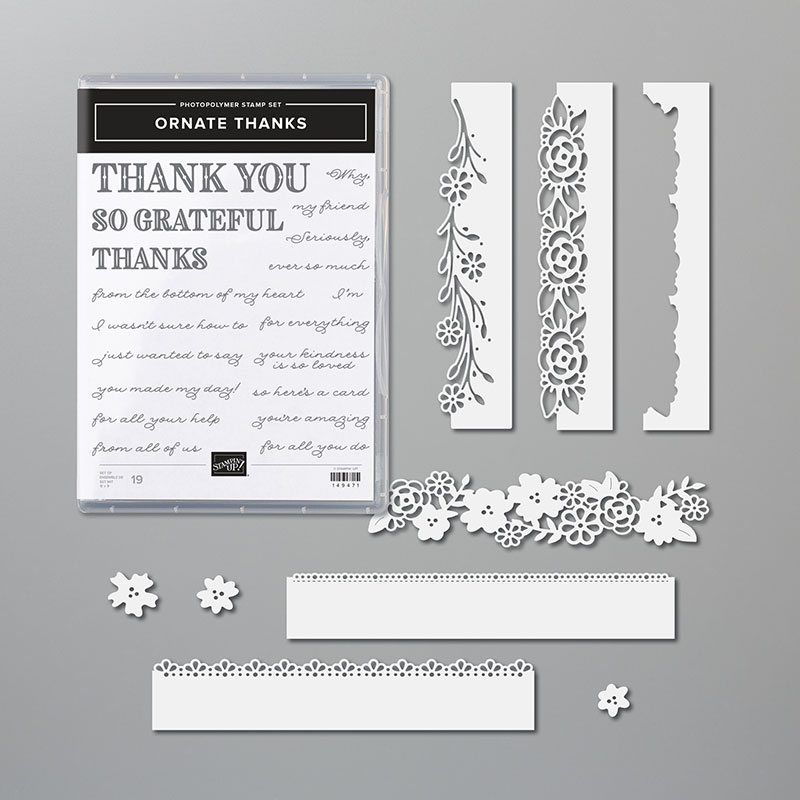
    This is one of the cards I made for everyone who orders the Ornate Thanks bundle (or the Ornate Garden Suite) from me this month. 

    I used THREE of the Ornate Border dies for this card! 

    It's Blueberry Bushel with White accents.  I will sure miss this color!  It will be retiring in just 9 days!  Be sure to get any of the 5 retiring in colors while you can. Once the list comes out on April 22nd they go very fast.

    Isn't that border die amazing?  And so simple too. The Blueberry Bushel card starts out as usual at 5 1/2" X 8 1/2", scored at 4 1/4".  Then I used the detailed floral border die on the lower edge. *save a few of the leaves for the flower accent in the corner. 

    I used the dotted border die on the lower edge of the White card stock.  Stamp your greetings and add the ribbon and bow. 

    Next cut out the third detailed floral die-cut from a strip of White card stock.  Trim off just a little section of the flowers to add to the upper left corner; with a few of the extra leaves from the lower edge die-cut. 

    Adding a White layer inside the card for stamping and/or writing your message highlights the gorgeous floral trim on the front.  

    This is just one of the FREE 3 cards you'll receive from me when you purchase either the Ornate Thanks bundle OR the entire Ornate Garden Suite from me this month.  See it all here in my online store. 

    And remember that all online orders over $55 in April will receive a free Simple Shammy from me too! Details below. 

    ~~~~

    Two April ordering specials to choose from:

    All online orders in April will receive my tutorial of the month; with 16 cards

    featuring the Ornate Garden products seen here.

    **Order either Ornate bundle from me and get a free 3 cards pre-cut kit! Order both and get a 6 cards kit with pdf tutorial! 

    Orders between $55 and $99 will receive a free Simple Shammy!

    Use this host code for April: MMM4SXSB  

    ~~~~~

    Or….

    Join my Little Ladybug party! 

    While supplies last; the first 10 people in April to order over $100 using this exclusive party host code 49HFZ6G3 will get a free Little Ladybug cards class that includes the stamp set and a 4 cards pre-cut kit! 

    There is just 1 set left!

    Sold out! 


    Leave a Reply

    Your email address will not be published. Required fields are marked *

  • Welcome Easter; three adorable card swaps!


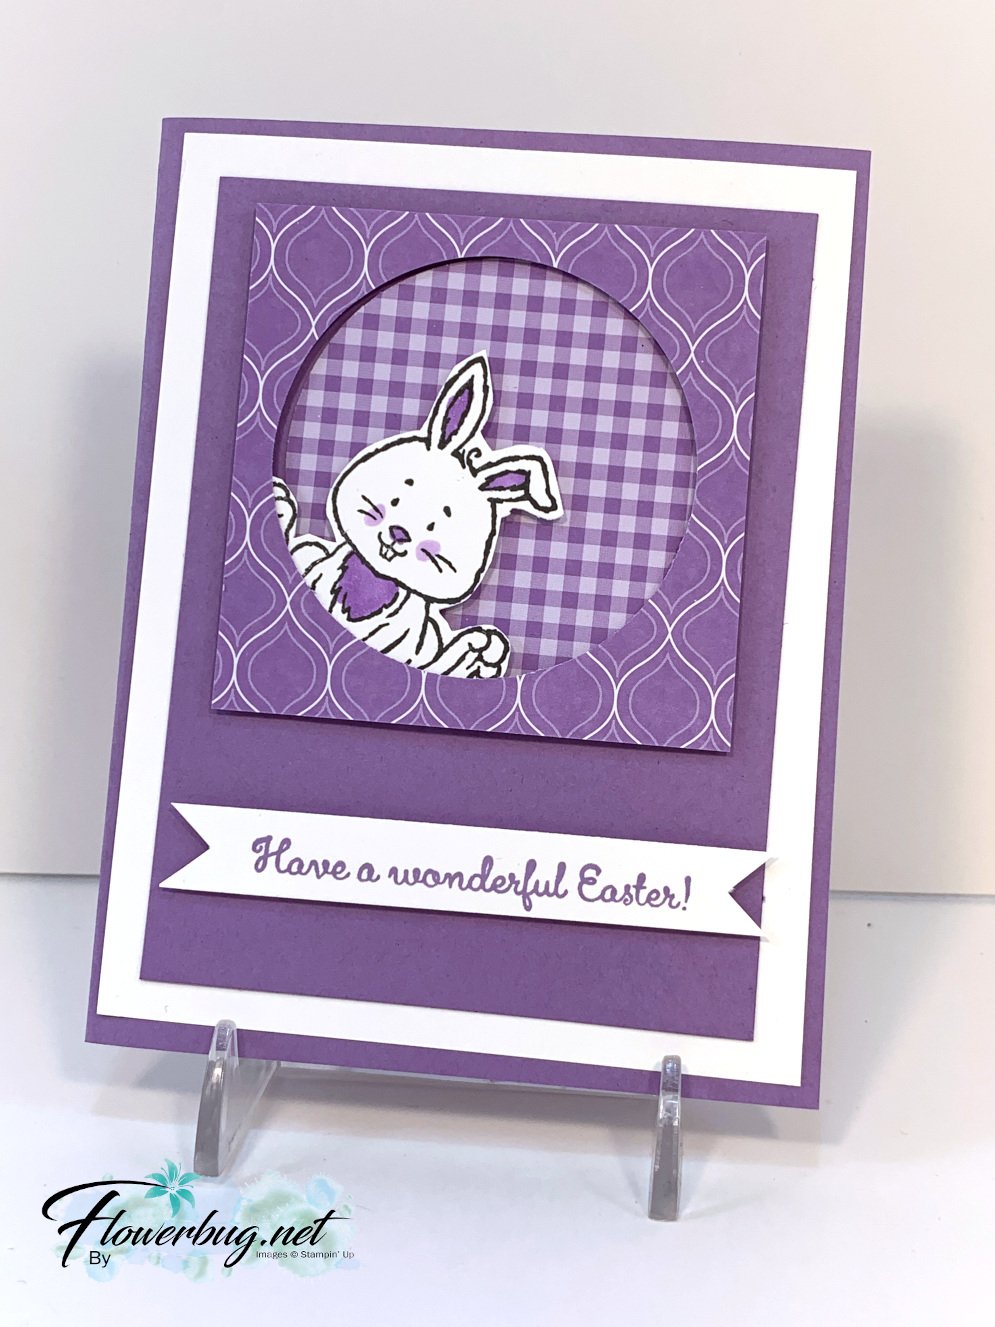
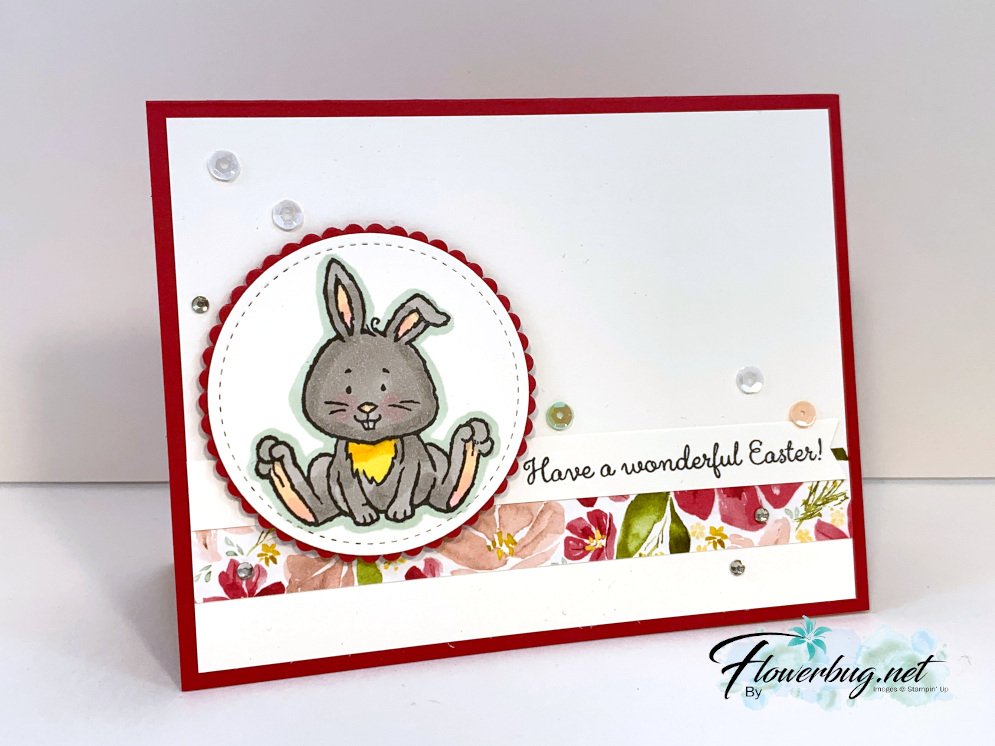
    I received these cards in a long distance swap I participated in.  Unfortunately their labels came off so I don't know who made two of them so I cannot give credit.  So if you know of if it's yours please let me know!

    They're so adorable I just had to share them with you! You can see this stamp set here: 


    I love this peek-a-boo bunny here!  Yes; it's fussy cut.  There aren't dies for it.  She used Highland Heather and our Subtles designer paper.  I really like how she die-cut a circle from the square, flipped it over to reveal the reverse side of the designer paper. Very cool!  See all of our packages of 6 X 6" designer paper here. 

    That thin strip of Best Dressed designer paper adds a spring-like touch to it!  The sequins are from our Adhesive Backed package. 

    I know Karen Titus made this one. I just love her water-coloring!  Adding that bit of light gray or tan with a Blends marker adds so much depth!  

    The White is 2 5/8" stitched square from the Stitched Shapes dies.  The other colors are Seaside Spray, Gray Granite, Petal Pink and Soft Seafoam and are 1 3/4" square.  This layout really highlights the main image. 

    Have a wonderful Easter weekend! 

    ~~~~

    Two April ordering specials to choose from:

    All online orders in April will receive my tutorial of the month; with 16 cards

    featuring the Ornate Garden products seen here.

    Orders between $55 and $99 will receive a free Simple Shammy!

    Use this host code for April: MMM4SXSB  

    ~~~~~


    Leave a Reply

    Your email address will not be published. Required fields are marked *


Notice: LeeAnn Greff, Independent Stampin’ Up! Demonstrator, Manager. The content of this website is my sole responsibility as an independent Stampin’ Up! demonstrator and the use of, and content of, the classes, services, or products offered on this website is not endorsed by Stampin’ Up! Copyright 2025