/


Latest Post

How to make a bumblebee with the Ladybug Builder punch


This month my Flowerbug's Team's swap theme was cards featuring an animal, bug or bird with a unique fold.  I decided to use the Hello Ladybug bundle for mine. Click here to see the bundle.  I changed the ladybug into a bumblebee!  

I shared how to make this card on last week's Facebook Live.  It's now on YouTube as well.  Click here to see it and two other cards featuring this cute Ladybug Builder punch.  
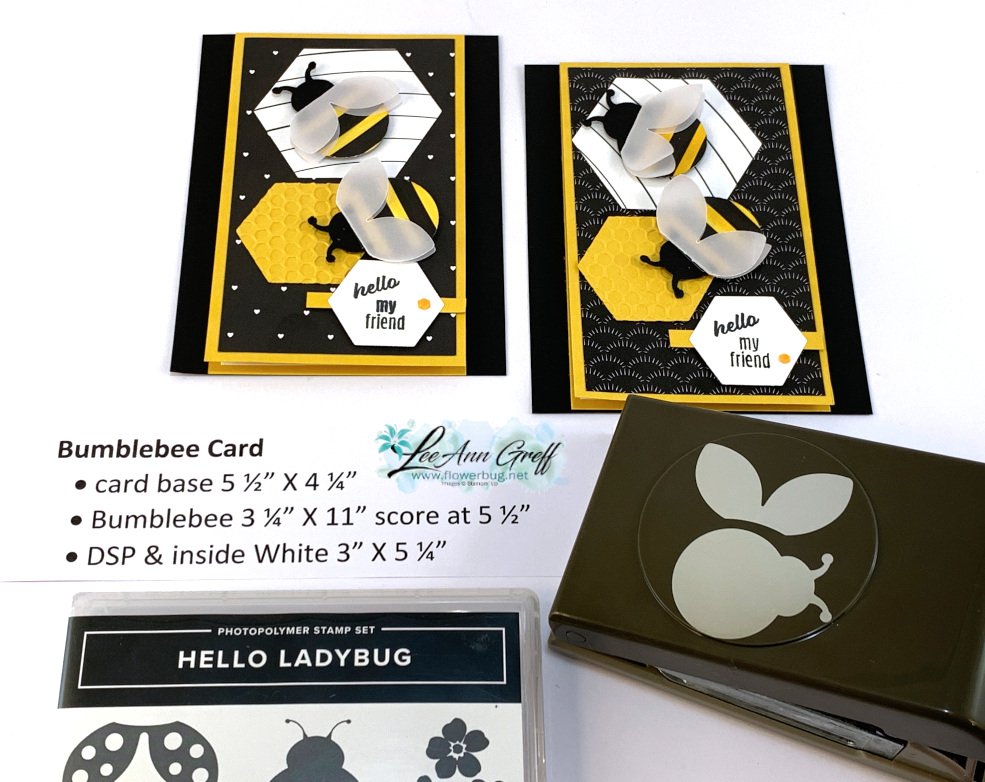
 

You may have seen this done before; it's so simple if you have some Black & White designer paper.  I colored the white stripes with a Dark Daffodil Delight Blends marker.  I used the Ladybug Builder punch to punch out the body circle and added it to the main Black Ladybug body.  

Then I punched out wings from Vellum.  I made them double wings by folding a piece of vellum in half and punching so the fold was intact.  The wings are adhered with a few mini glue dots. 

Details:

  • I used the Beautiful Shapes dies seen here for the hexagon shapes.  
  • Designer paper is the All Together 6 X 6" black & white paper seen here. 
  • The Bumblebee hexagon is textured with the Hive 3D embossing folder.
  • That hexagon embellishment on the greeting was pink. It's one of three colored in the Adhesive-backed Hexagon gems in the 2022 Jan-June catalog. I colored it with the Dark Daffodil Delight blends marker. 


This is an easy fun fold card to make.  And it makes great use of your Designer Paper – you can get 2 fronts from each 6 X 6" piece or 8 fronts from a 12 X 12" piece of paper. 

Below is the video; click on the photo to watch.  Don't forget to subscribe to my You Tube Channel here. 

~~~

 Hot Deals in February:

Choose $125 in product PLUS any 2 stamp sets free in February!

It's just $99. Get FREE shipping too!

Click here to get the deal.


Host codes: PA93N9CF

 *click here to order 


Use the host code above & get a free Easel Calendar kit

& the Gingham embossing folder with a $55 order in February, 2022! 

All Posts

  • More amazing Clean & Simple swap cards by the Flowerbug’s


    I shared 4 of our Team swaps yesterday and today I'm sharing more. They're all incredible! 

    Our theme was to create cards that are 'Clean & Simple' without any designer paper.  This is NOT easy for some advanced stampers! 

    First up is Karen's card which is just her style: 

    She used the Mini corrugated 3D embossing folder seen here and linen thread.  Plus the Painted Lavender & Friends for Life die-cuts on her Basic Beige & White card.  

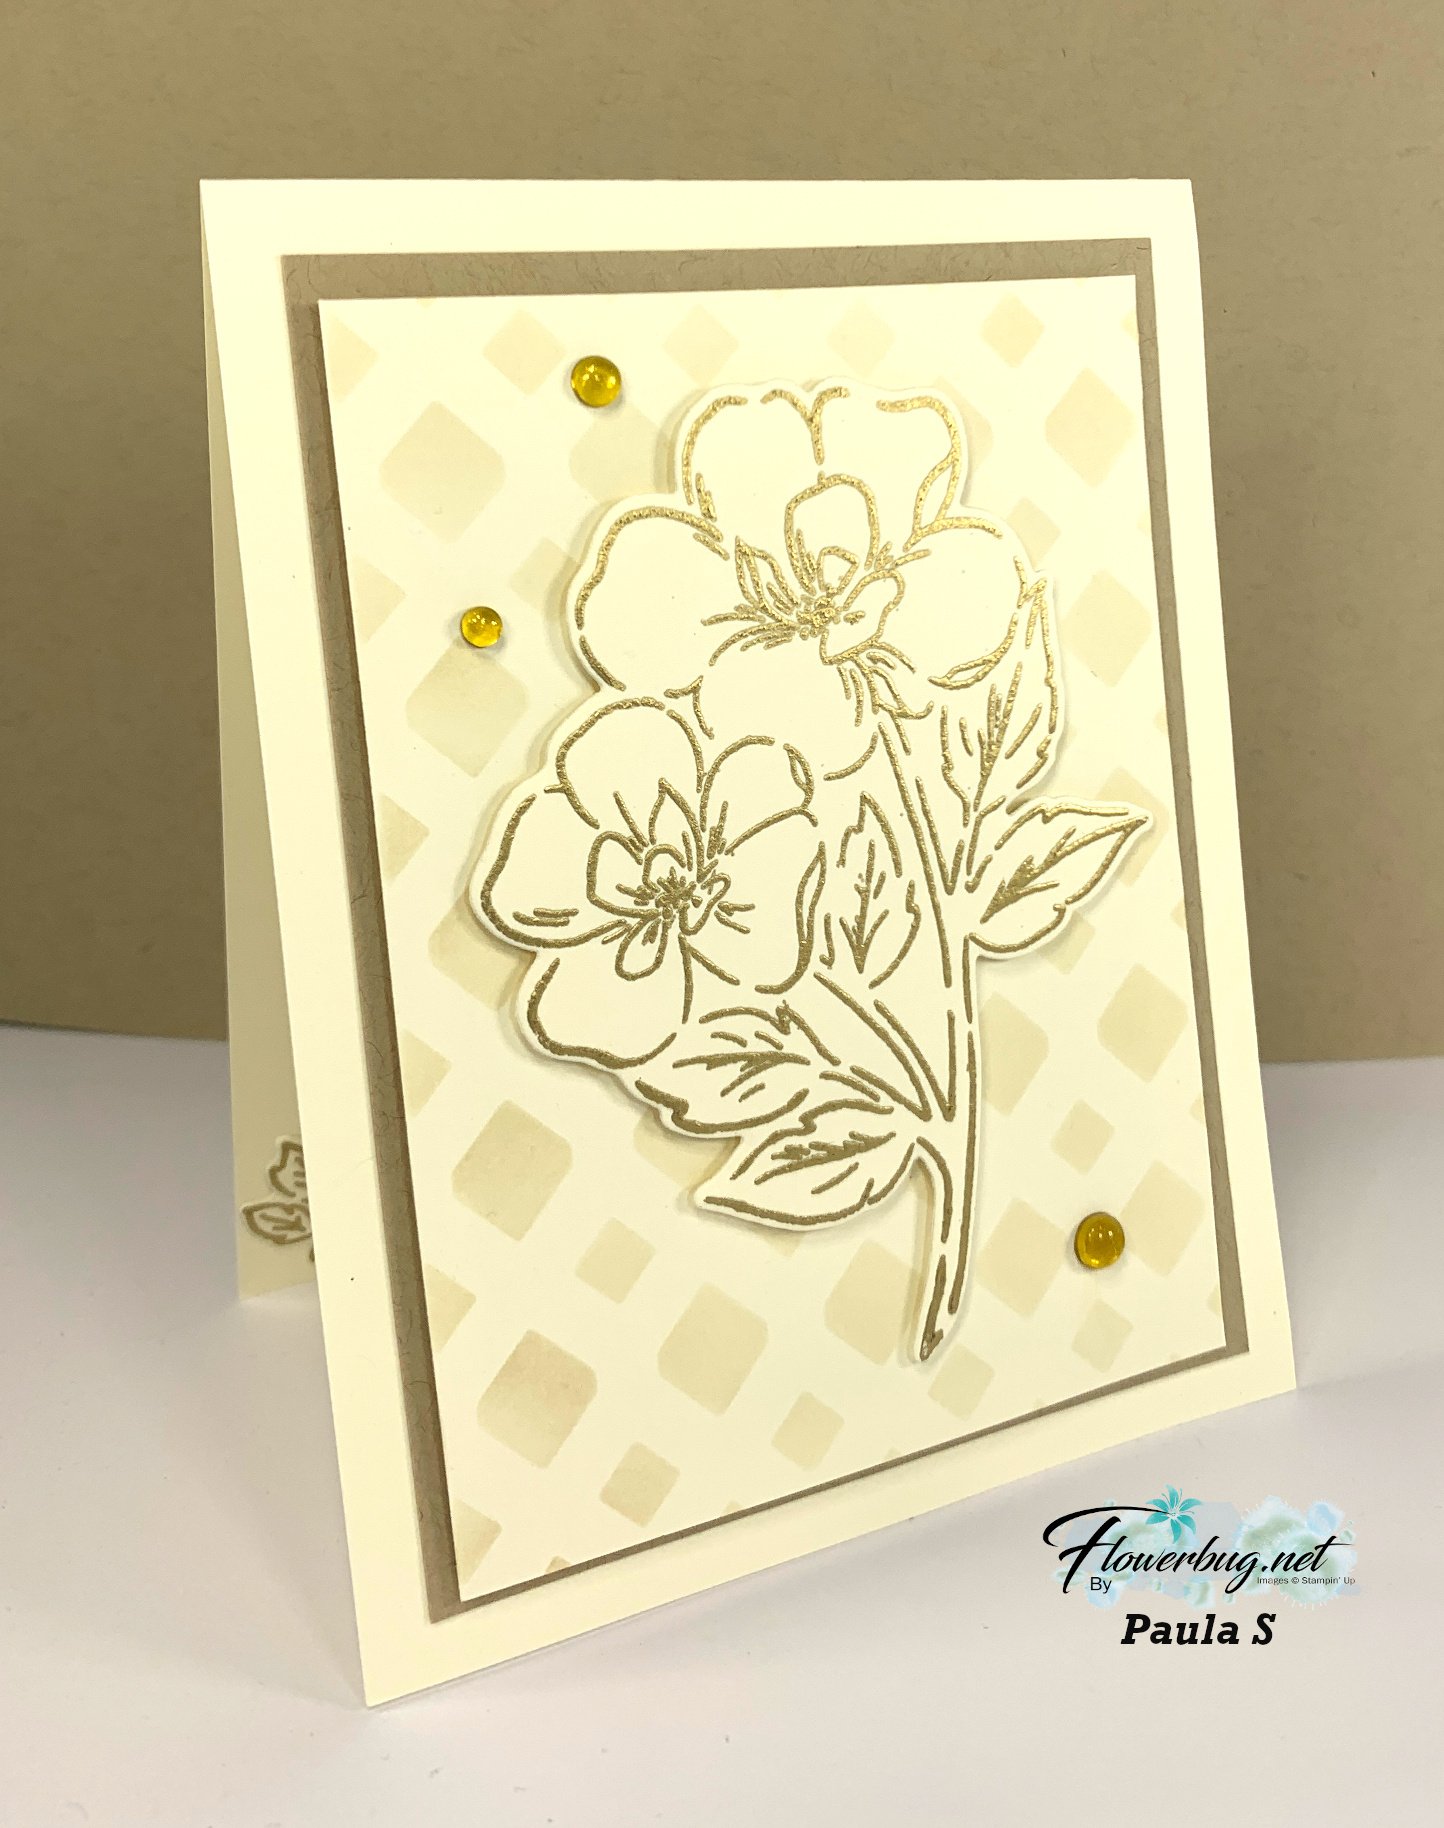
    Next is a stunning card made by Paula.  She used the new Thankful Garden bundle seen here.

    Her colors include Very Vanilla & Crumb Cake. She heat embossed the floral image in Gold embossing powder. The background is made with the Thankful Garden stencils included in the bundle.  

    Just gorgeous Paula!!

    And look at the incredible card Jacki made!  

    She used the Friends for Life dies and the Waves 3D embossing folder.  Simply White with a pop of Black for an elegant look. 

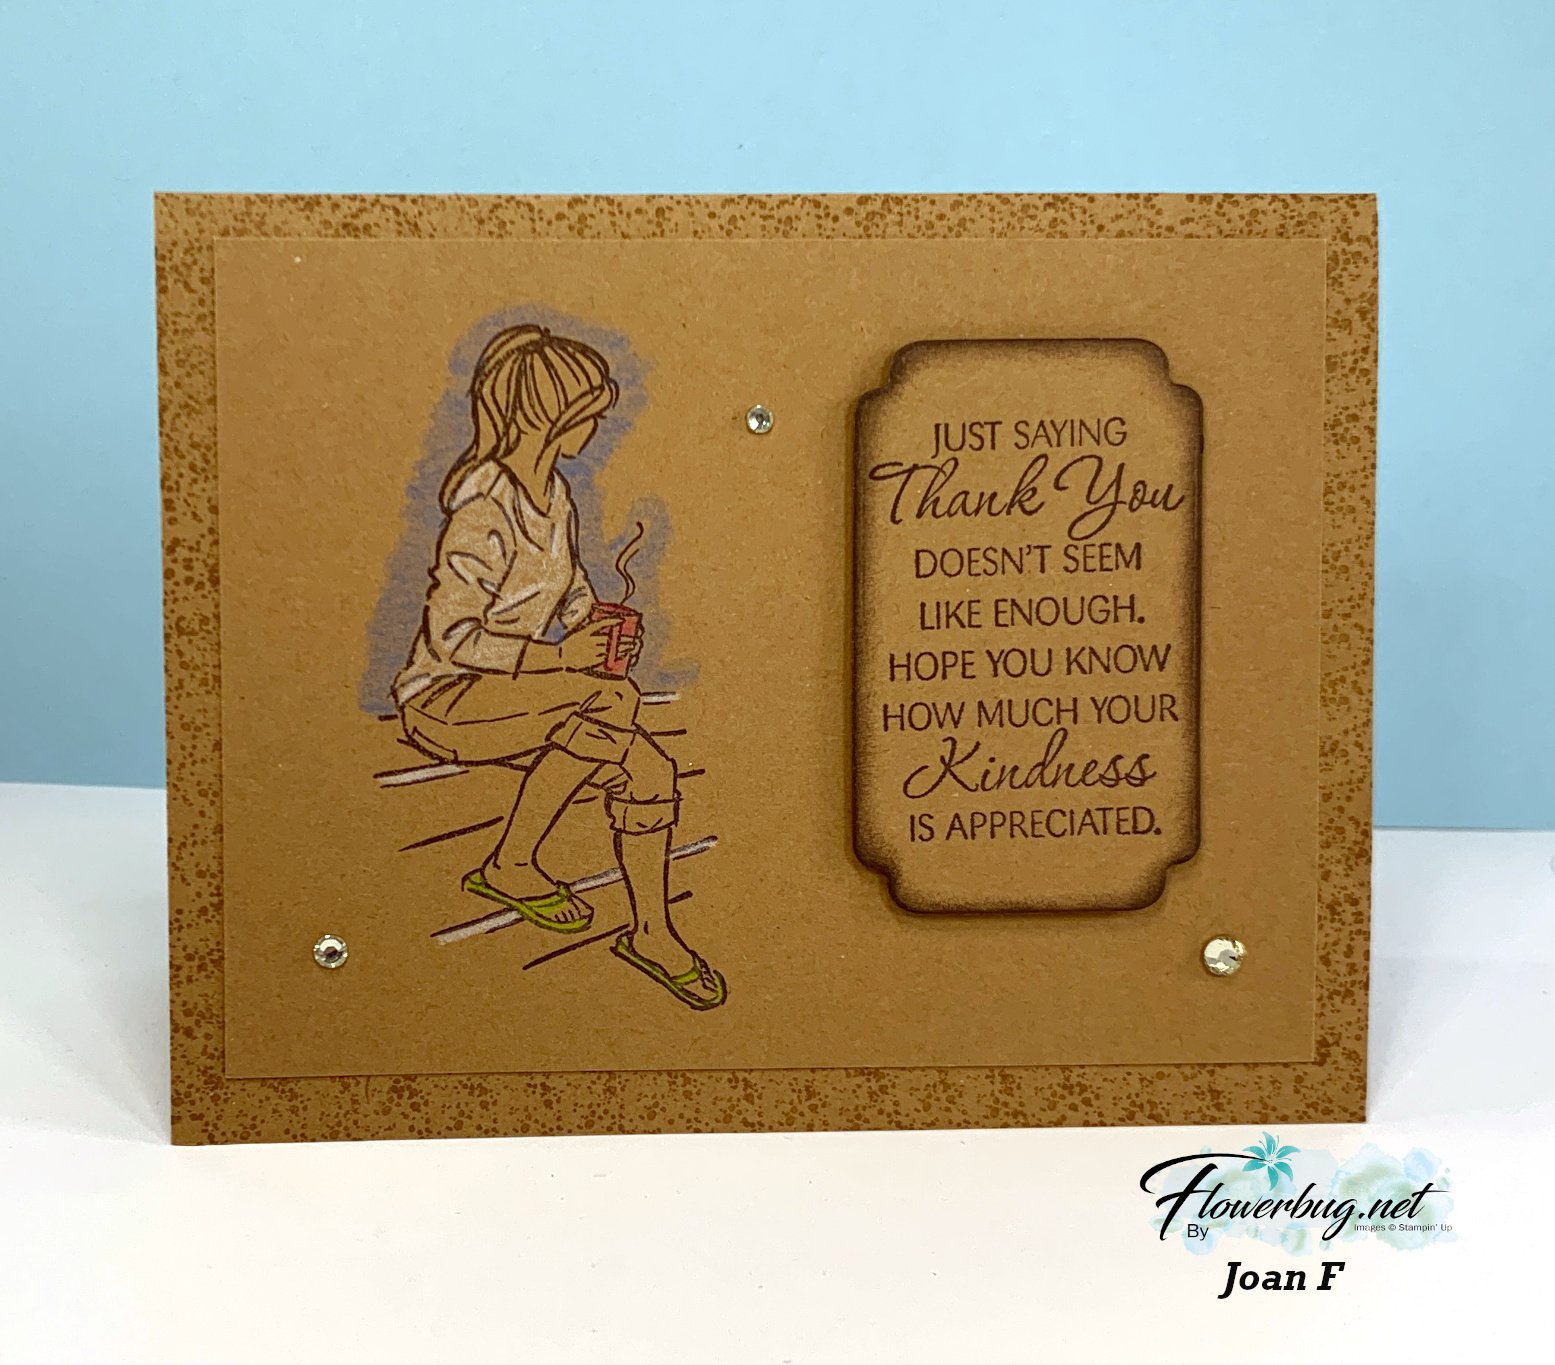
    Next is Joan's monochromatic card featuring the Coffee with Friends stamp set:

    She used Pecan Pie and colored the images in with watercolor pencils.  Beautifully done!  

    I'll share the last of our swaps tomorrow! 

    ~~~

    March Specials:

    *current host code link:  

    PNQMAWXD

    Get a free Floral Delight tutorial with any online order in March!

     Free Iridescent Foil gems!

    Leave a Reply

    Your email address will not be published. Required fields are marked *

  • Team Card swaps with a Clean & Simple theme


    This week I'm sharing our Team card swaps from March.  Our theme was Clean & Simple which can be a challenge for some. We also couldn't use any designer series paper! 

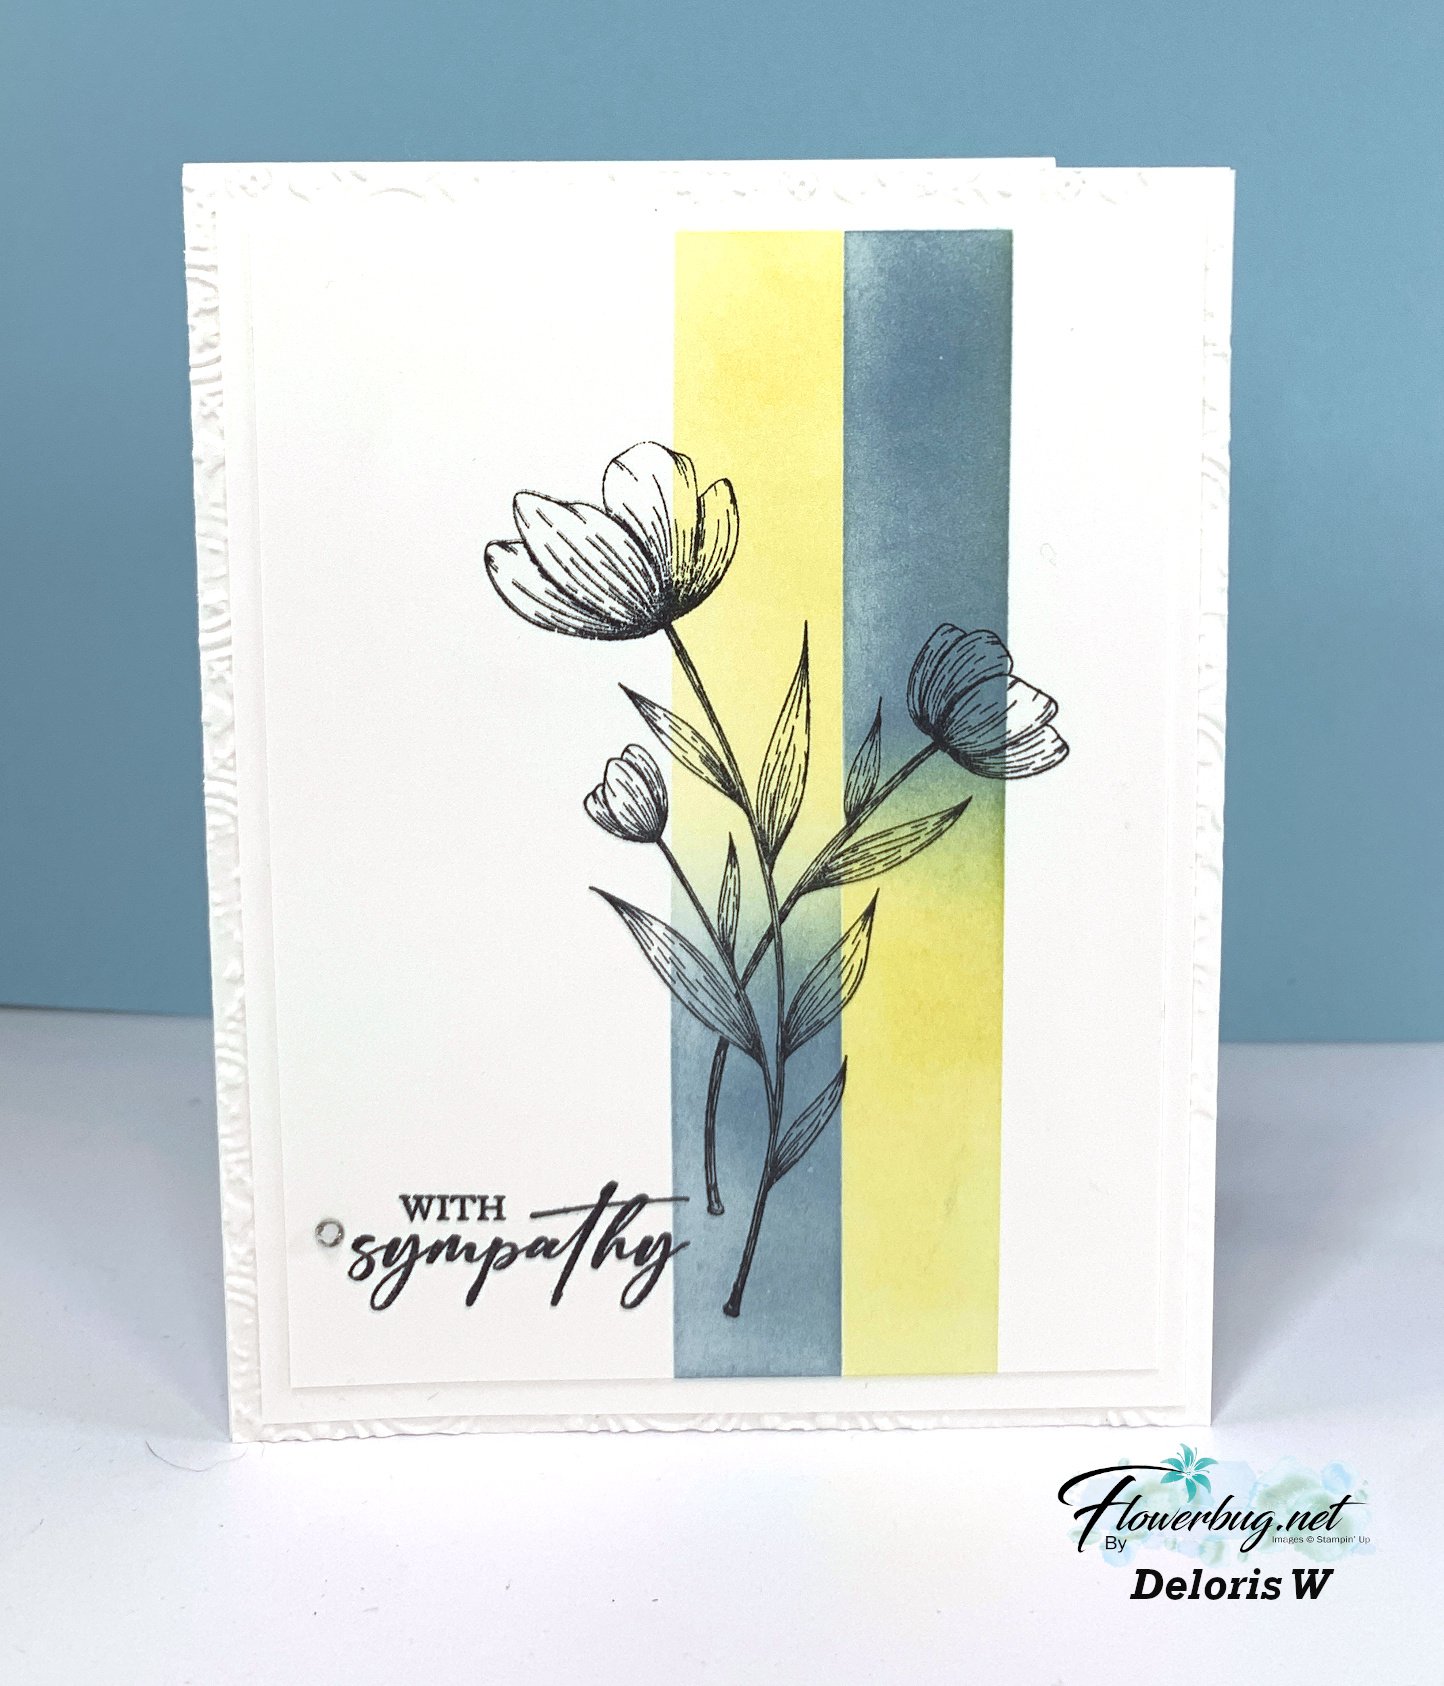
    First up is a stunning card made by Deloris.  

    She masked her White card stock to sponge yellow & blue ink to create a pretty background for the floral stamp.  This flower is from the Spotlight on Nature stamp set.  Her card also has 3 layers of White – the bottom layer is textured.  Gorgeous!

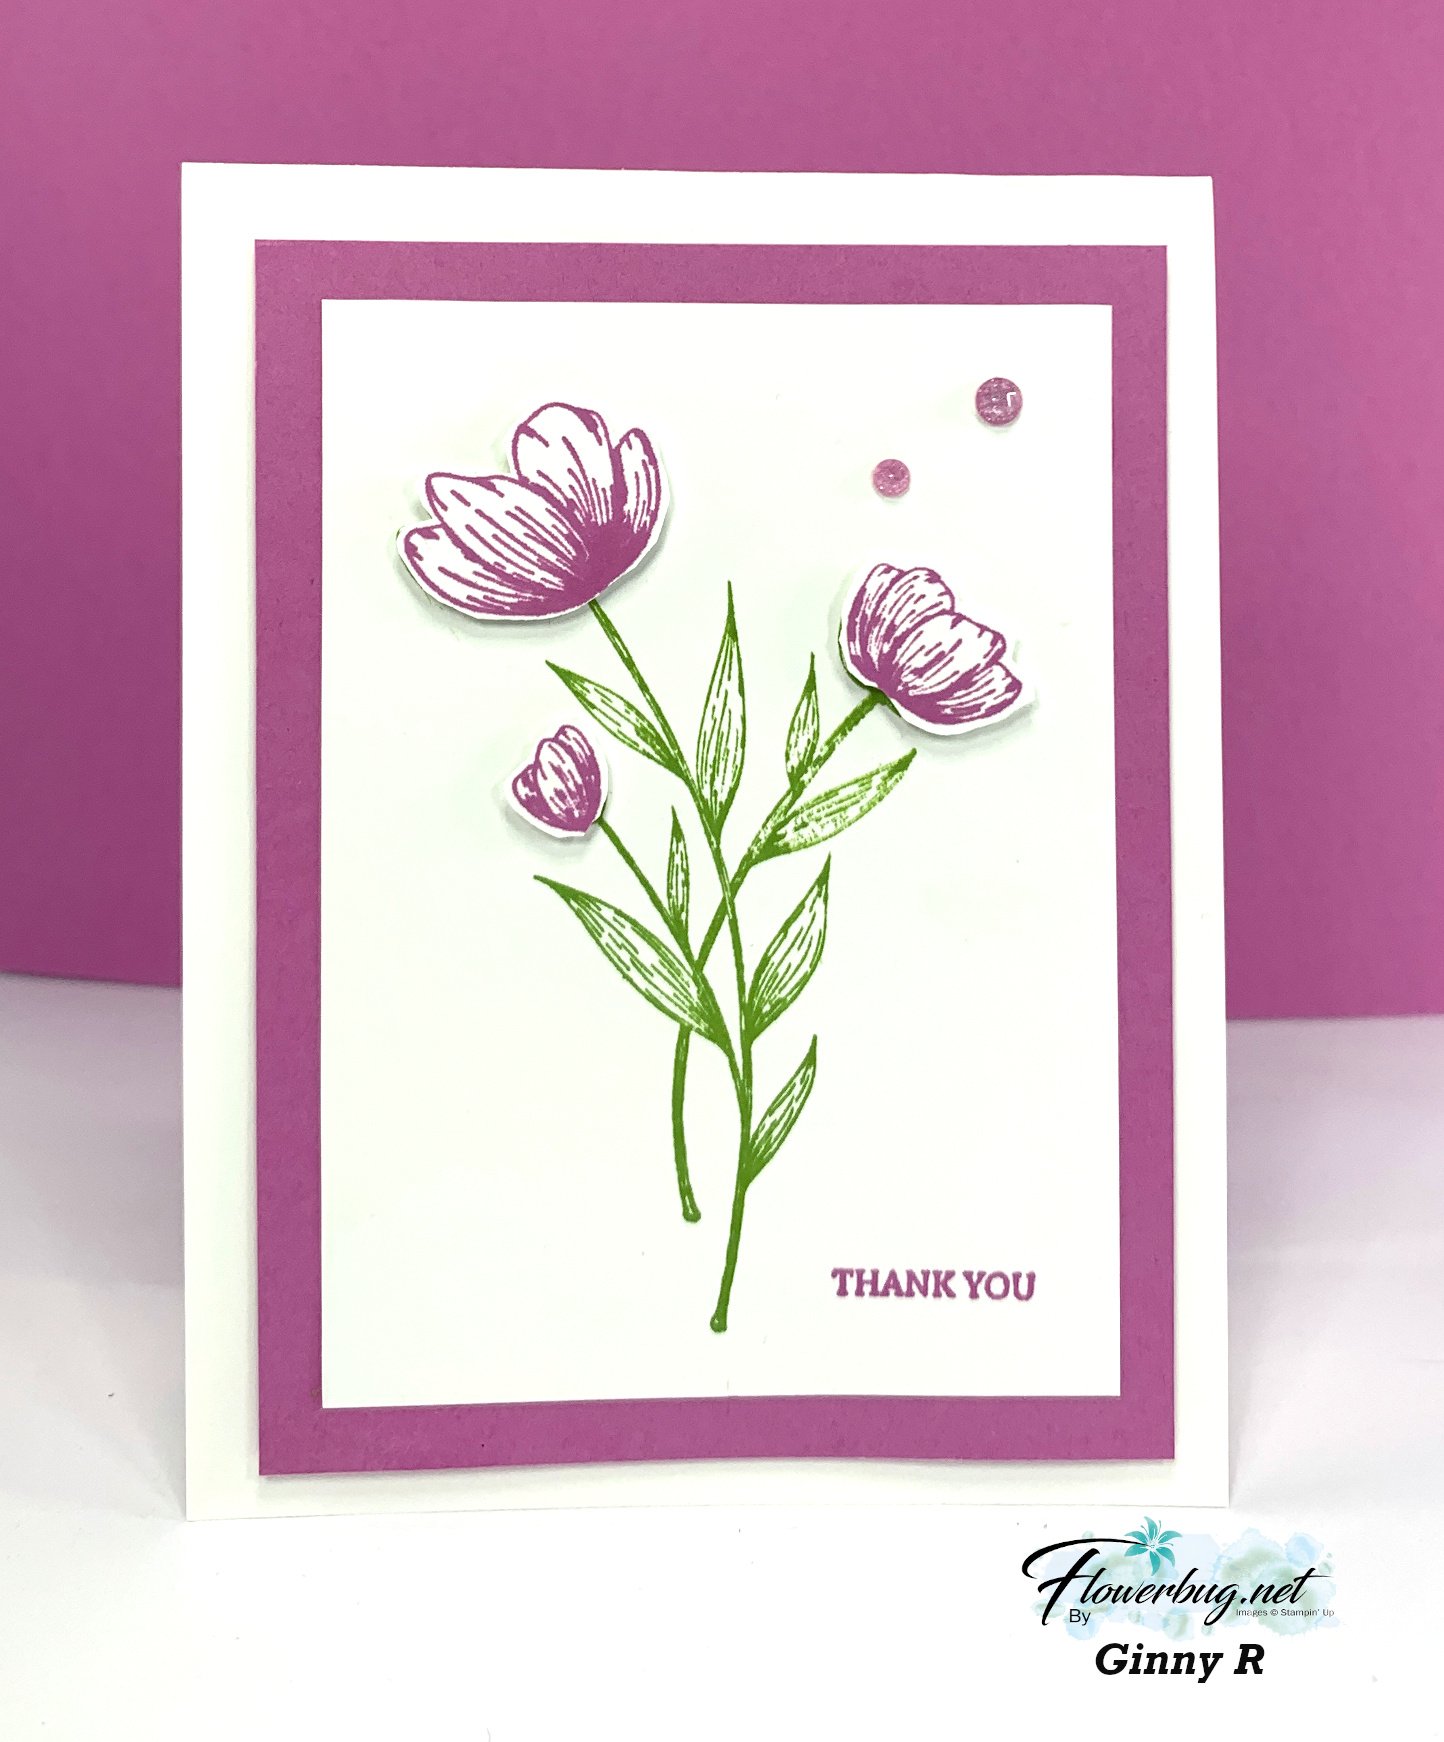
    Ginny also used the Spotlight on Nature stamp set on her beautiful card:

    She used Petunia Pop with Granny Apple green and popped up her flowers on Dimensionals.  Well done!  

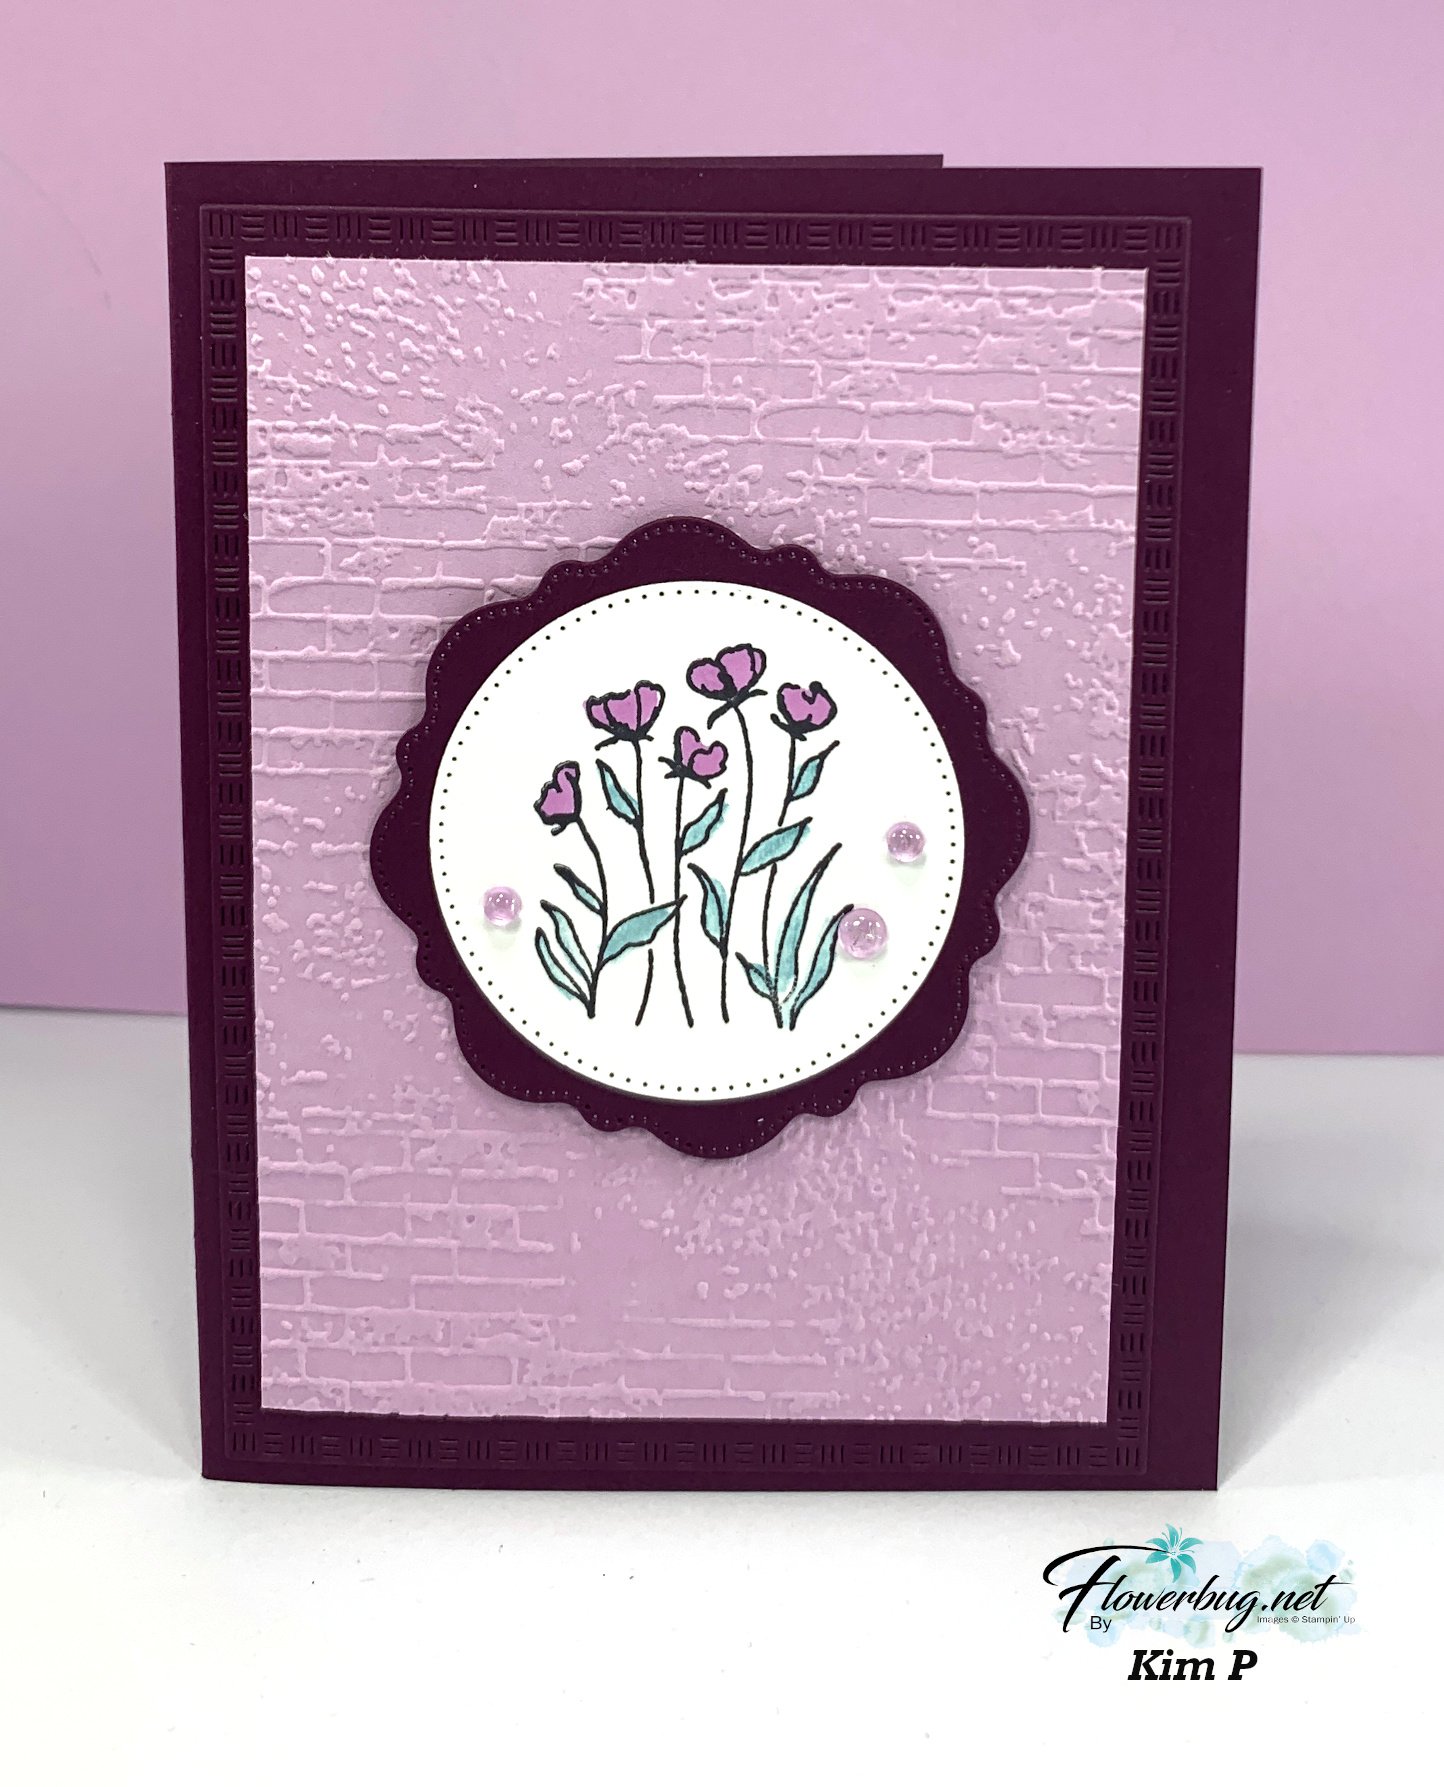
    Kim is a first time swapper in our group and did a great job on her card: 

    She used the Thoughtful Wishes stamp set and the Exposed Brick 3D embossing folder here.  Her colors include Fresh Freesia and Blackberry Bliss. Sweet & simple!  Good job Kim!

    Candy made this adorable card with the Resourceful Rusty stamp set.  

    Her colors include Gray Granite, Real Red, & Balmy Blue.  She trimmed off half of her card front so the circle dies & main image hang over. 

    Other products include: New Mini Corrugated embossing folder, New Textured Notes dies, Stylish Shapes and Spotlight on Nature dies. Blends markers for coloring.  Love that tail!  

    More swaps will be shared tomorrow! 

    ~~~

    March Specials:

    *current host code link:  

    PNQMAWXD

    Get a free Floral Delight tutorial with any online order in March!

     Free Iridescent Foil gems!

    Leave a Reply

    Your email address will not be published. Required fields are marked *

  • Corner DSP pop up fun fold card with video tutorial & free project sheet


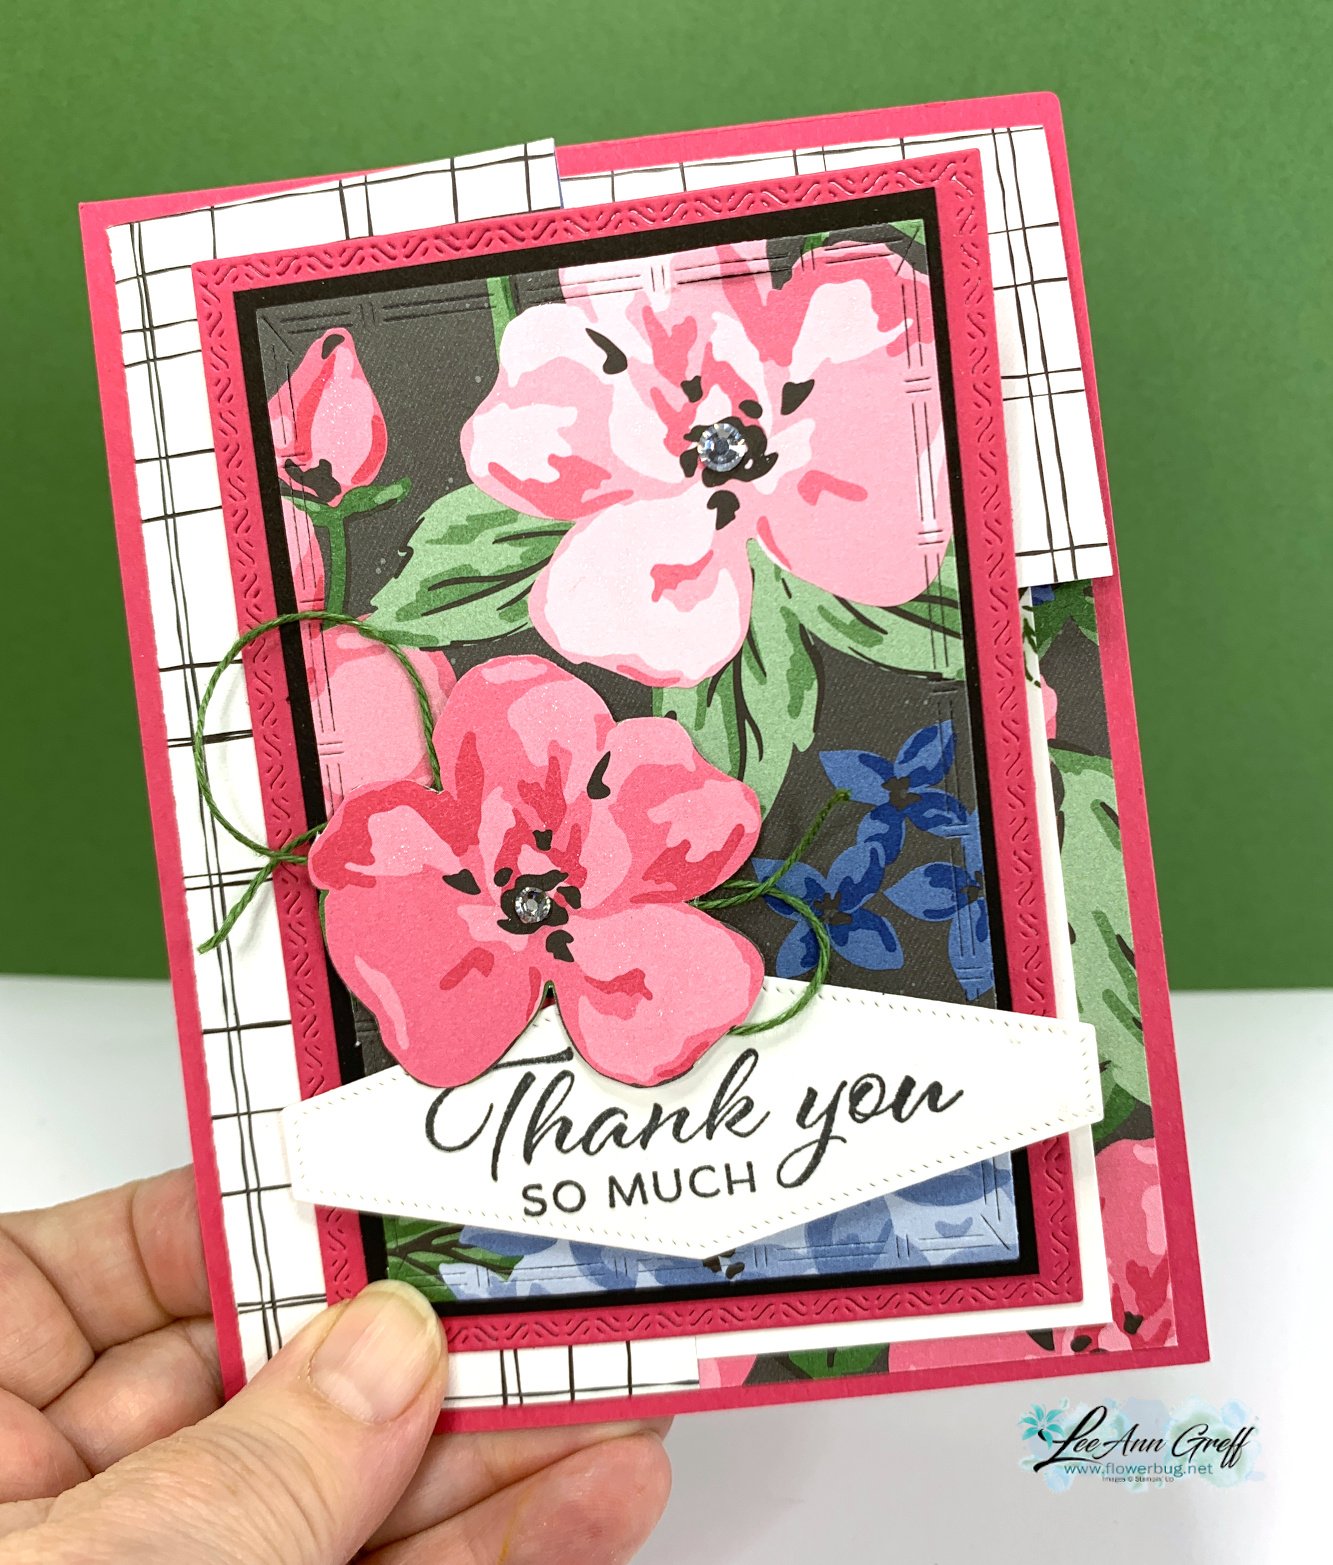
    I shared this card on last week's video and am happy to share it with you here today.  I also have a free project sheet below too. 

    It features the Lovely Garden designer paper seen online here.  

    My card base is Melon Mambo with Black, White & Garden Green accents. The greeting is from the Layering Leaves stamp set and the Stylish Shapes dies. 

    I made a second version during the video (seen here) in different colors.  

    The stitched die-cut I used on the DSP is from the new Textured Notes dies seen here.  I love these!  I bet they'll sell fast!

    I fussy cut extra flowers to pop up over the printed flower in the DSP.

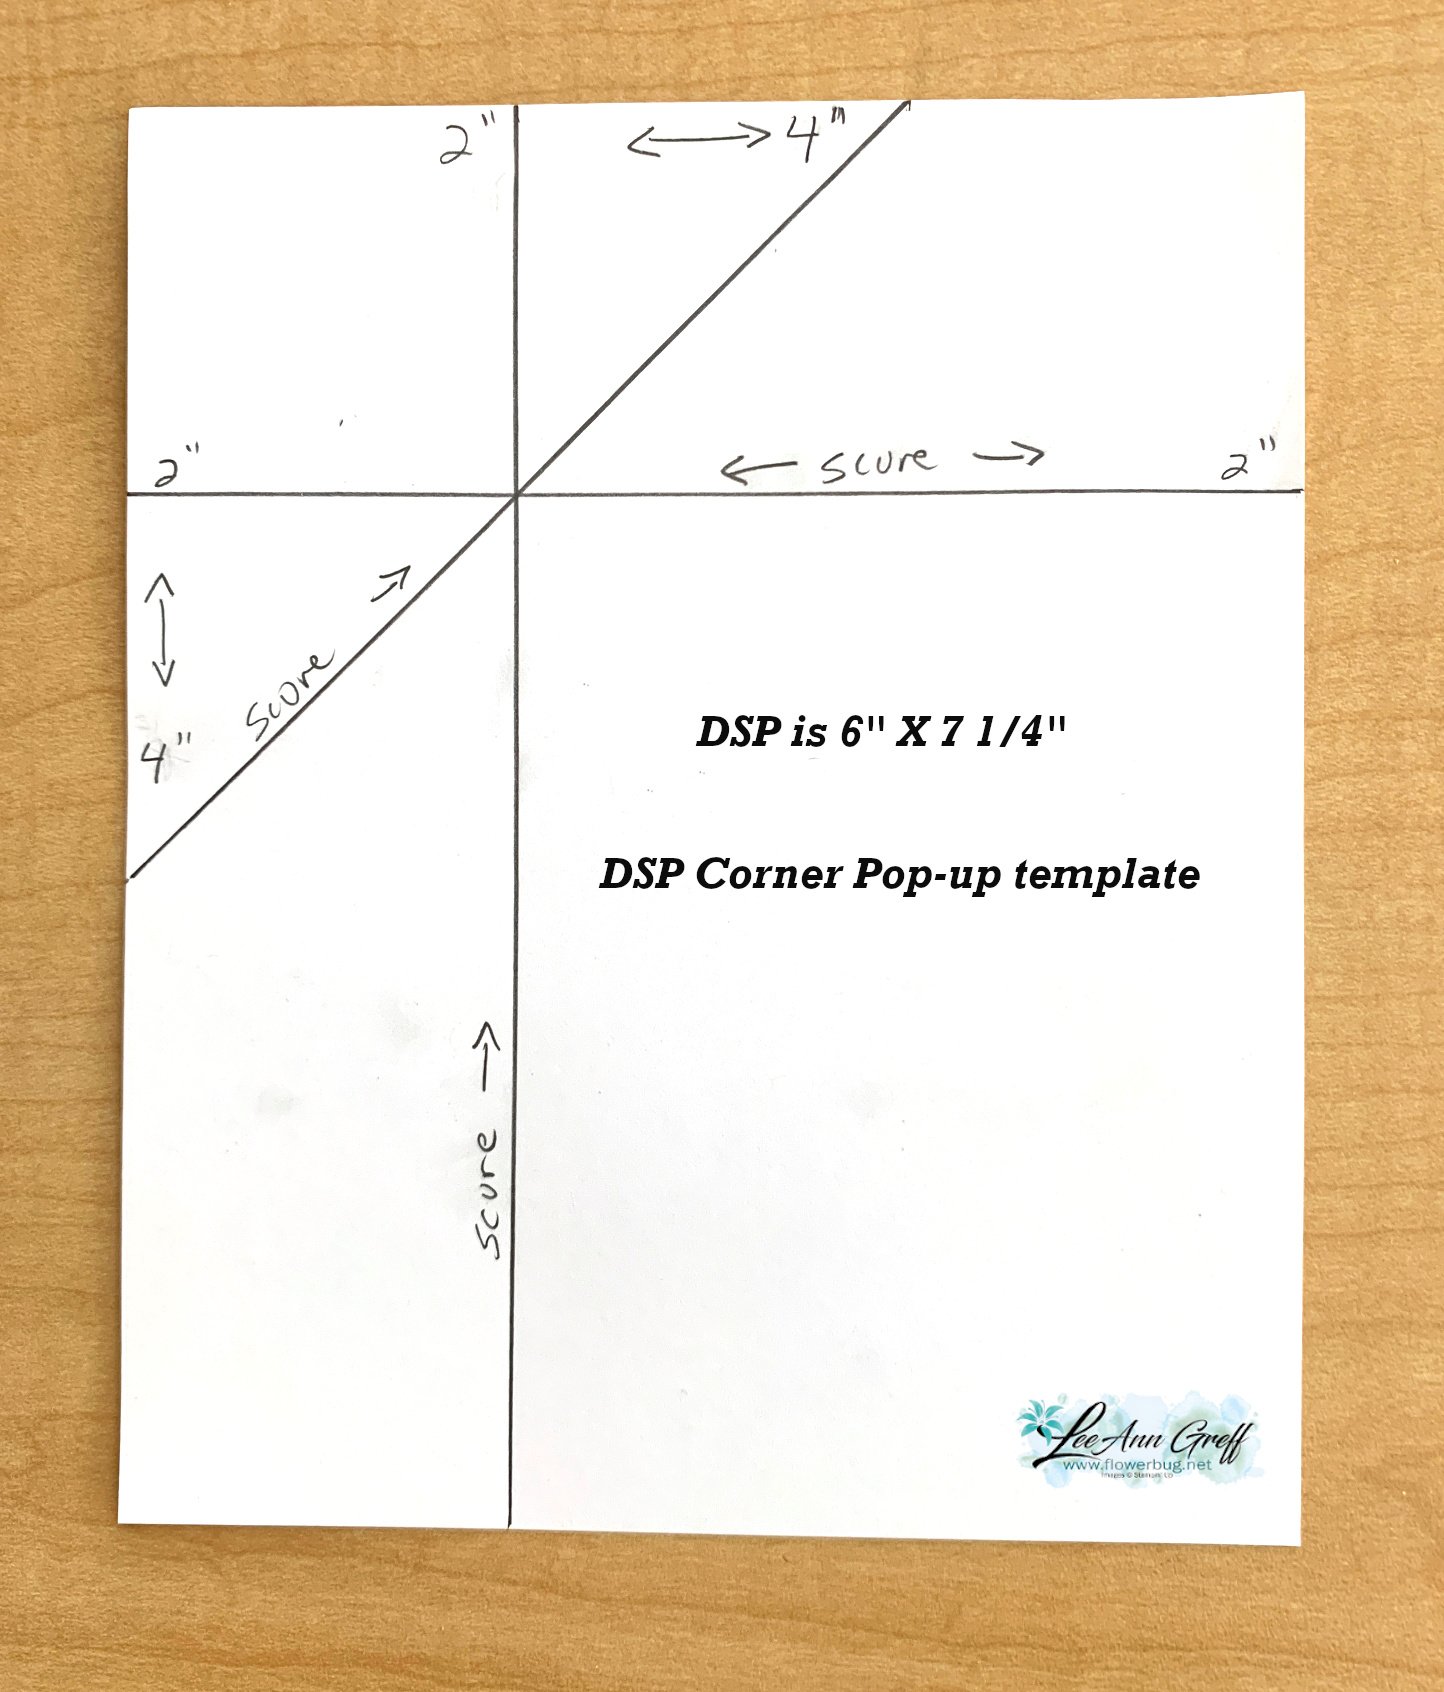
    Here's the template for the DSP part of this card.  My generous friend Susie Wood shared this with me. 

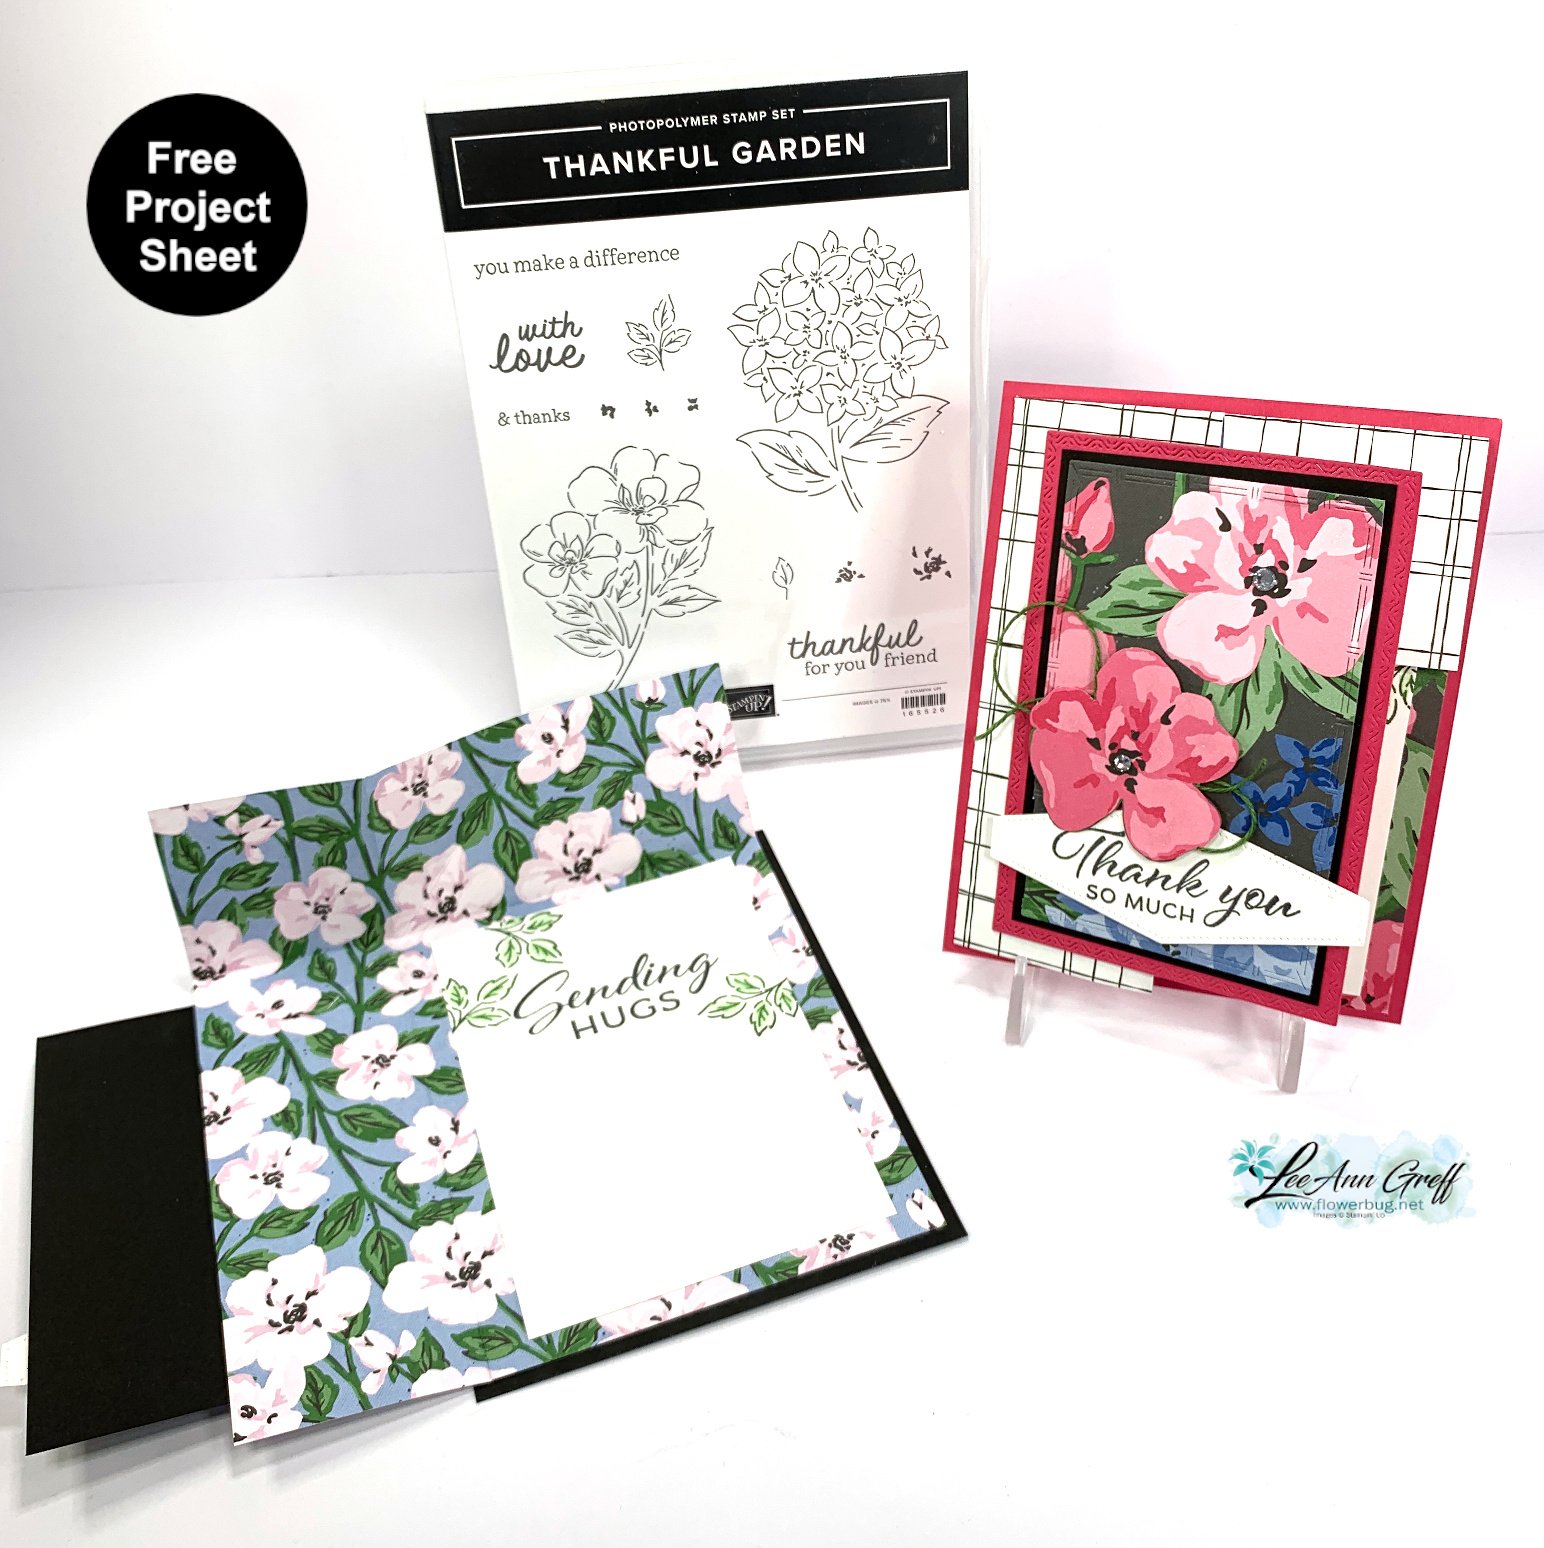
    In the photo below you can see how this card opens. The DSP measures 6" side and 7 1/4" tall and is scored at 2" from the upper and left sides.  Then fold it at an angle matching up the score lines.  Watch the video below to understand this. 

    Here is the free project sheet for this card. Click on the following link to print or download it. Download Lovely Garden Corner pop up

    Below is the video tutorial for this card and another unique fun fold using the Lovely Garden designer series paper.  

    ~~~

    March Specials:

    *current host code link:  

    PNQMAWXD

    Get a free Floral Delight tutorial with any online order in March!

     Free Iridescent Foil gems!

    Leave a Reply

    Your email address will not be published. Required fields are marked *


Notice: LeeAnn Greff, Independent Stampin’ Up! Demonstrator, Manager. The content of this website is my sole responsibility as an independent Stampin’ Up! demonstrator and the use of, and content of, the classes, services, or products offered on this website is not endorsed by Stampin’ Up! Copyright 2025