/


Latest Post

How to add color to the Peaceful View stamp – video tutorial too!


Today I'm sharing the second card I made during last week's live video.  Both featured the amazing and beautiful Peaceful View stamp set seen here.  
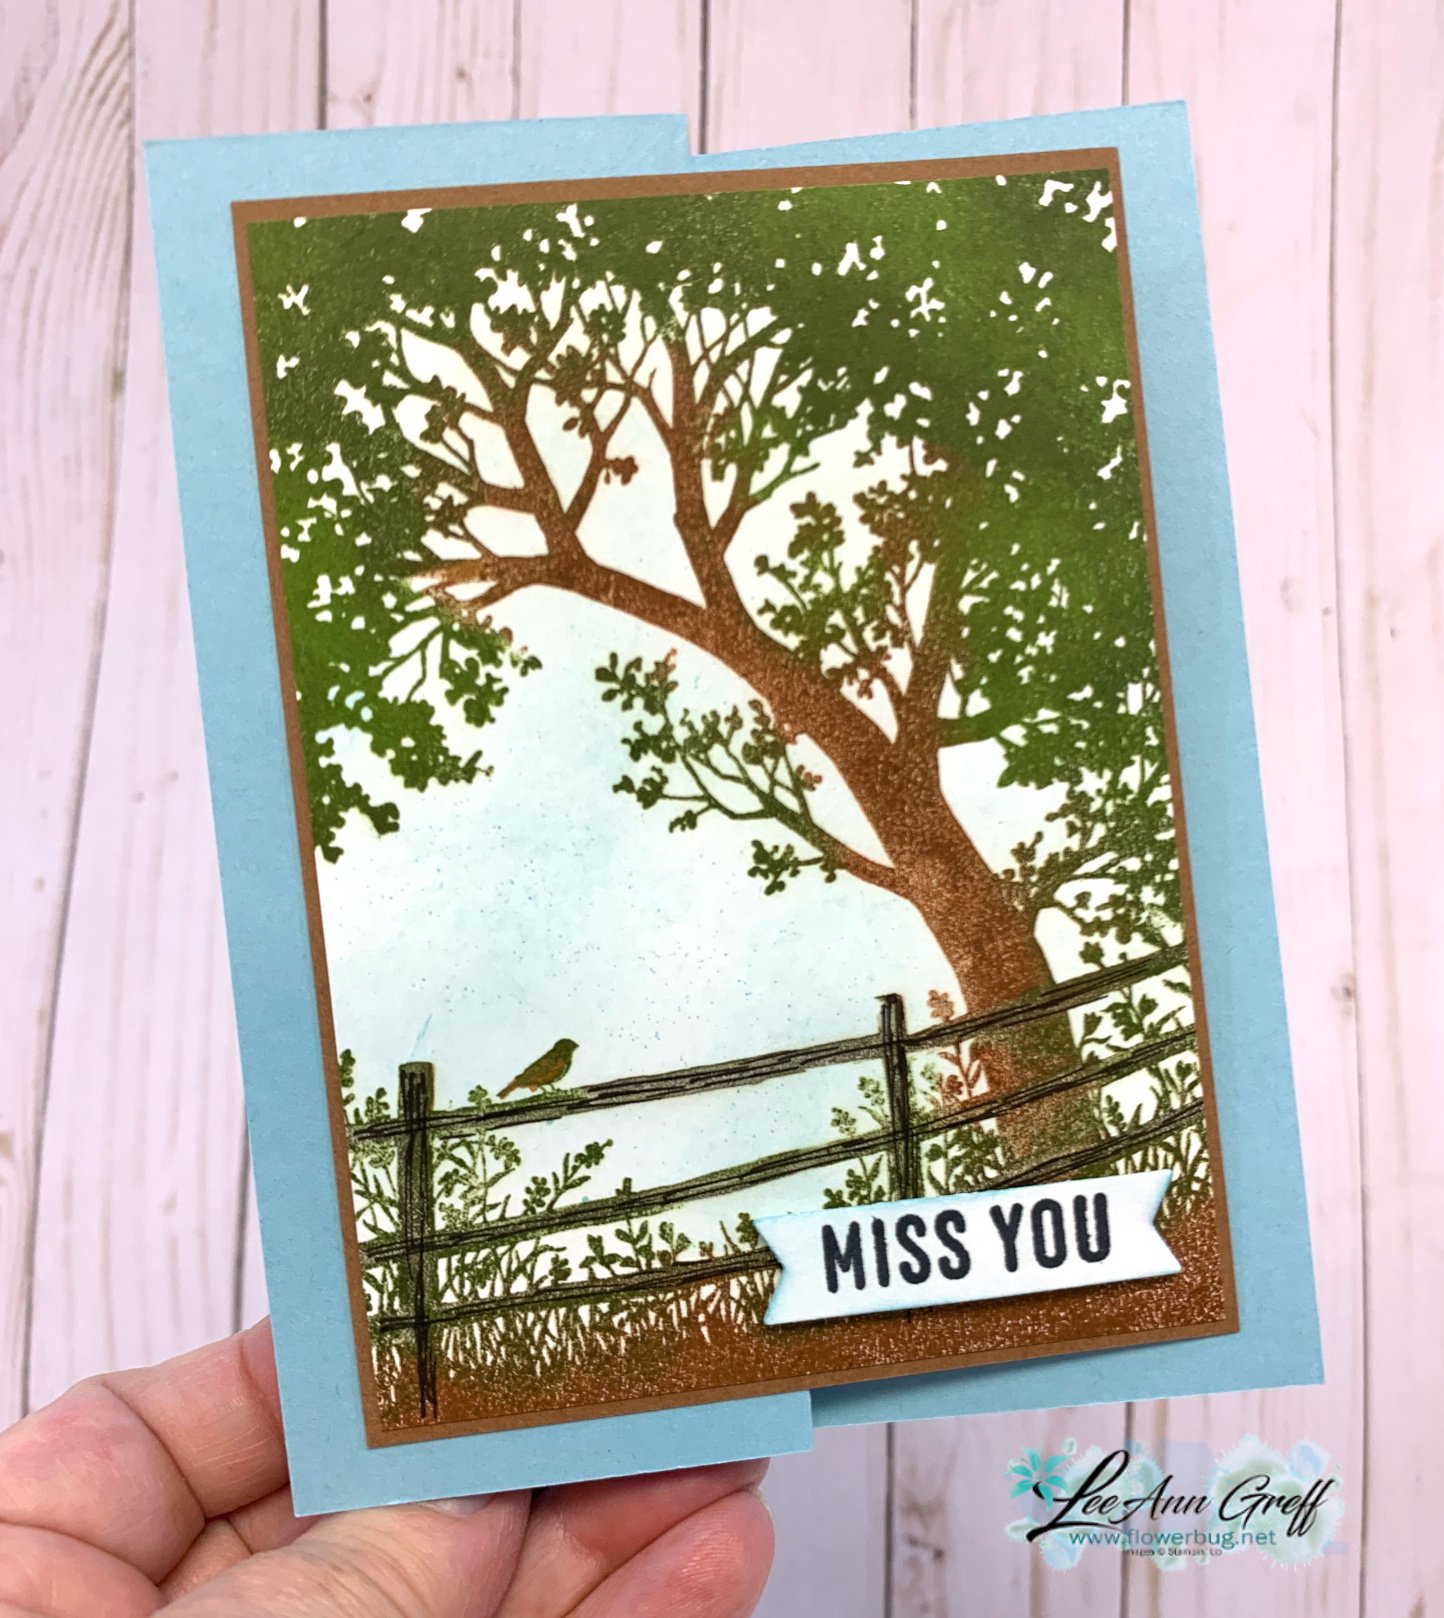
I used Balmy Blue, Pecan Pie and White card stock.  Inks include Balmy blue, Old Olive, Granny Apple Green and Pecan Pie. I used a Blending Brush with Balmy Blue ink to lightly color the sky before stamping. 

Notice the fence. If you look closely you'll see the woodgrain in the fence. This was done by using an Early Espresso Stampin' Write marker to add to the stamped fence directly on the cardstock. It was mostly Pecan Pie colored before.  

How did I color the image?  I inked the trees with Old Olive ink first using the direct to stamp method. The I used Pecan Pie on the grass and fence.  I used a sponge dauber to remove ink from the plants on the bottom so I could add Green ink to them with a sponge dauber.  I used Pecan Pie ink and a sponge dauber to add color to the trunk as well.  I hope you'll watch the video below to watch this in action. 
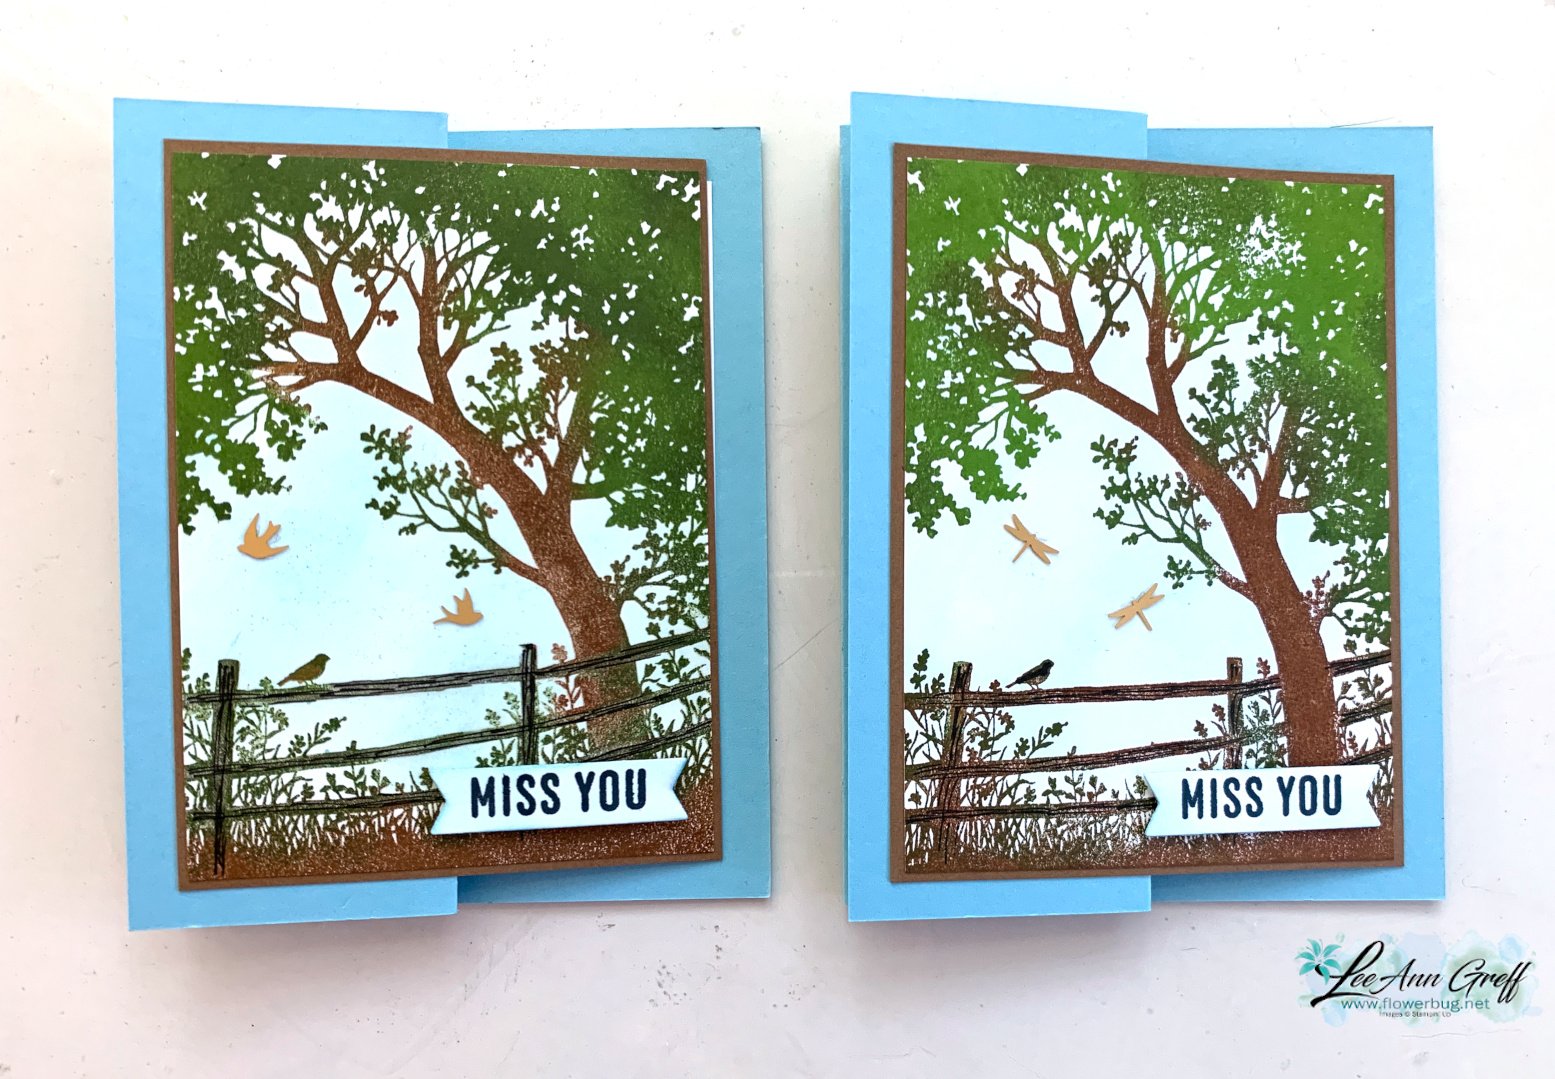
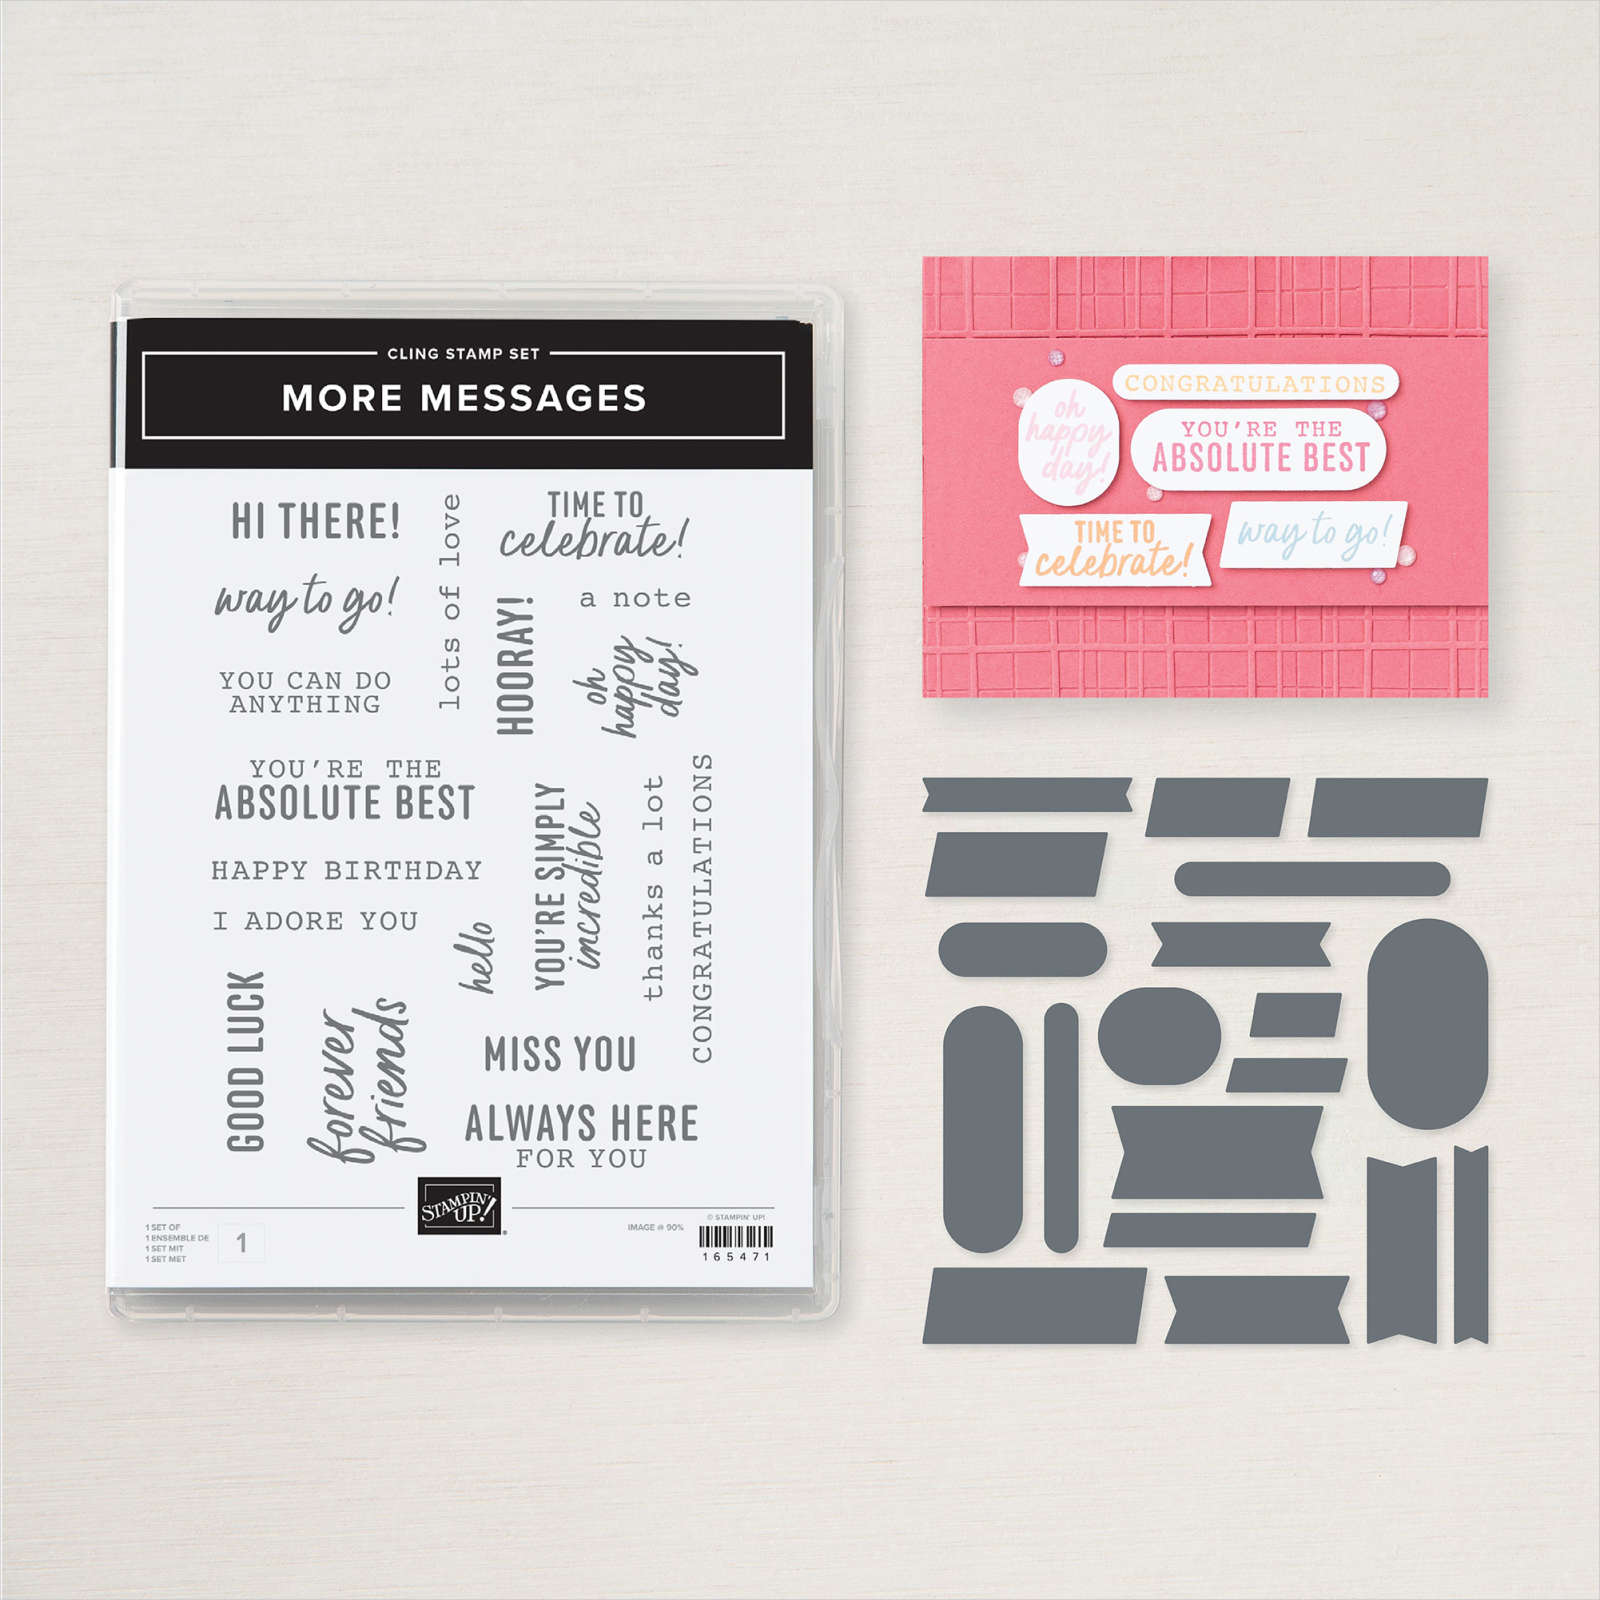
For the greetings I stamped the More Messages stamp a few times and used the coordinating die to cut them all out.  I had lots to choose from this way and can save them to use whenever I need it. Here I added Balmy Blue ink lightly to color the greeting.

What I love about this new messages bundle is that the greetings and die-cuts are such a nice size; larger than ever before. See the bundle here. 
Here's the free project sheet with measurements and supplies for you: Download Multi-colored Peaceful View

Below is the video for this card and another where I show you how to use this stamp on pretty designer paper for a stunning background. I shared that yesterday here. 

~~~

July Specials:

New Online Exclusives are here!  

~~~

Last Chance List has been updated!  see it all here. Don't miss out on the deals!

~~~

Get my Turtle-y Cute PDF tutorial free with any online order in July!

All Posts

  • Color Challenge with Seriously the Best with Ornate Frames


    My Flowerbug's Team had a color challenge this past month – to use Black and White with a 'Pop' of color.  Here's the card I made: 

    This card literally took me 5 minutes to make.  Here's the steps:

    1. Cut a White card base 5 1/2" X 8 1/2"
    2. Cut the See a Silhouette DSP to 4" X 5 1/4".  Adhere to the card
    3. Die-cut two pieces a White 2 1/2" X 4"  stitched rectangle and a Black Ornate Frame.
    4. Stamp the greeting and leaves in Black Memento ink.  Add the flowers in Poppy Parade ink. Adhere to the card.
    5. Stamp the 'I miss you a lot' greeting on a scrap of White. Punch out with the Classic Label punch. Add with mini dimensionals.
    6. Add a few rhinestones. Done! 

    You can see the See a Silhouette stamp set here and the Ornate Frames dies here.  Remember that if you order any Ornate bundle from me in April you get a free 3 cards pre-cut kit!  Details below: 

    ~~~~

    April ordering specials:

    ~~~

    All online orders in April will receive my tutorial of the month; with 16 cards

    featuring the Ornate Garden products seen here.

    **Order either Ornate bundle from me and get a free 3 cards pre-cut kit! Order both and get a 6 cards kit with pdf tutorial! 

    Orders between $55 and $149 will receive a free Simple Shammy! (over that and receive your own host benefits plus a Shammy!)

    Use this host code for April: MMM4SXSB  

    Leave a Reply

    Your email address will not be published. Required fields are marked *

  • Stamp with me LIVE every Thursday night!


    Here are the cards we made last Thursday during my weekly 'Stamp with Me' FB live video. Since I cannot meet my stamping peeps in person this is one way we can stamp together.  See it here.

    Join me each Thursday at 8 pm CT here on my FB page. 

    I featured the Perennial Essence designer paper here.  I kept the dimensions of the paper simple so everyone could prep ahead of time and make their cards with me.  It's so fun to see what paper, stamps and ink everyone uses! 

    Details:

    Top left card – Blushing Bride 5 1/2" X 8 1/2" card base, DSP 2" X 5 1/2", Flirty Flamingo 3 1/2" X 2 1/4"
    Top right card – Gorgeous Grape 5 1/2" X 8 1/2", DSP 5 1/2" X 2 1/2", white die-cut strip, 2 3/8" wide Stitched Nested Label, cut off at 3 1/2" wide
    Bottom left card – White 5 1/2" X 8 1/2" card base, 3" X 5 1/2", die-cut White strip

    Other supplies:
    – Die-cut White strips (Ornate Border dies or use a punch), Medium Daisy punch, Leaf punch, Label Me Lovely punch, rhinestones, Faceted gems, sponge, purple Striped ribbon, bone folder, Basket Weave embossing folder
    Inks: Flirty Flamingo, Gorgeous Grape, Old Olive, Blueberry Bushel

    I made a second version with the Noble Peacock specialty designer paper seen here.  One of my favorite papers ever!  It will likely be retiring next week; get it while you can!  Measurements are the same as above. 

    ~~~~

    April ordering specials:

    ~~~

    All online orders in April will receive my tutorial of the month; with 16 cards

    featuring the Ornate Garden products seen here.

    **Order either Ornate bundle from me and get a free 3 cards pre-cut kit! Order both and get a 6 cards kit with pdf tutorial! 

    Orders between $55 and $149 will receive a free Simple Shammy (over $150 and receive your own host benefits plus a Shammy!)

    Use this host code for April: MMM4SXSB  

    Leave a Reply

    Your email address will not be published. Required fields are marked *

  • New items on the Clearance Rack! Don’t wait; order now!


    They've added new items on the Clearance Rack today! 

    Check it out here ASAP; items are while supplies last and go quickly!

    While you're shopping be sure to get all of the retiring 2028-20 In Color items while you can.  They will retire next week and many, many people have had regrets that they missed getting items they wanted. 

    Double check your card stock, ink pads, ink refills, ribbons, enamel dots, markers and Designer Paper.   See it all here. 

    ~~~~

    April ordering specials:

    All online orders in April will receive my tutorial of the month; with 16 cards

    featuring the Ornate Garden products seen here.

    **Order either Ornate bundle from me and get a free 3 cards pre-cut kit! Order both and get a 6 cards kit with pdf tutorial! 

    Orders between $55 and $99 will receive a free Simple Shammy!

    Use this host code for April: MMM4SXSB  

    ~~~~~


    Join my Little Ladybug party! 

    While supplies last; the first 10 people in April to order over $100 using this exclusive party host code 49HFZ6G3 will get a free Little Ladybug cards class that includes the stamp set and a 4 cards pre-cut kit! 

    Sold out!


    Leave a Reply

    Your email address will not be published. Required fields are marked *


Notice: LeeAnn Greff, Independent Stampin’ Up! Demonstrator, Manager. The content of this website is my sole responsibility as an independent Stampin’ Up! demonstrator and the use of, and content of, the classes, services, or products offered on this website is not endorsed by Stampin’ Up! Copyright 2025