/


Latest Post

How to add color to the Peaceful View stamp – video tutorial too!


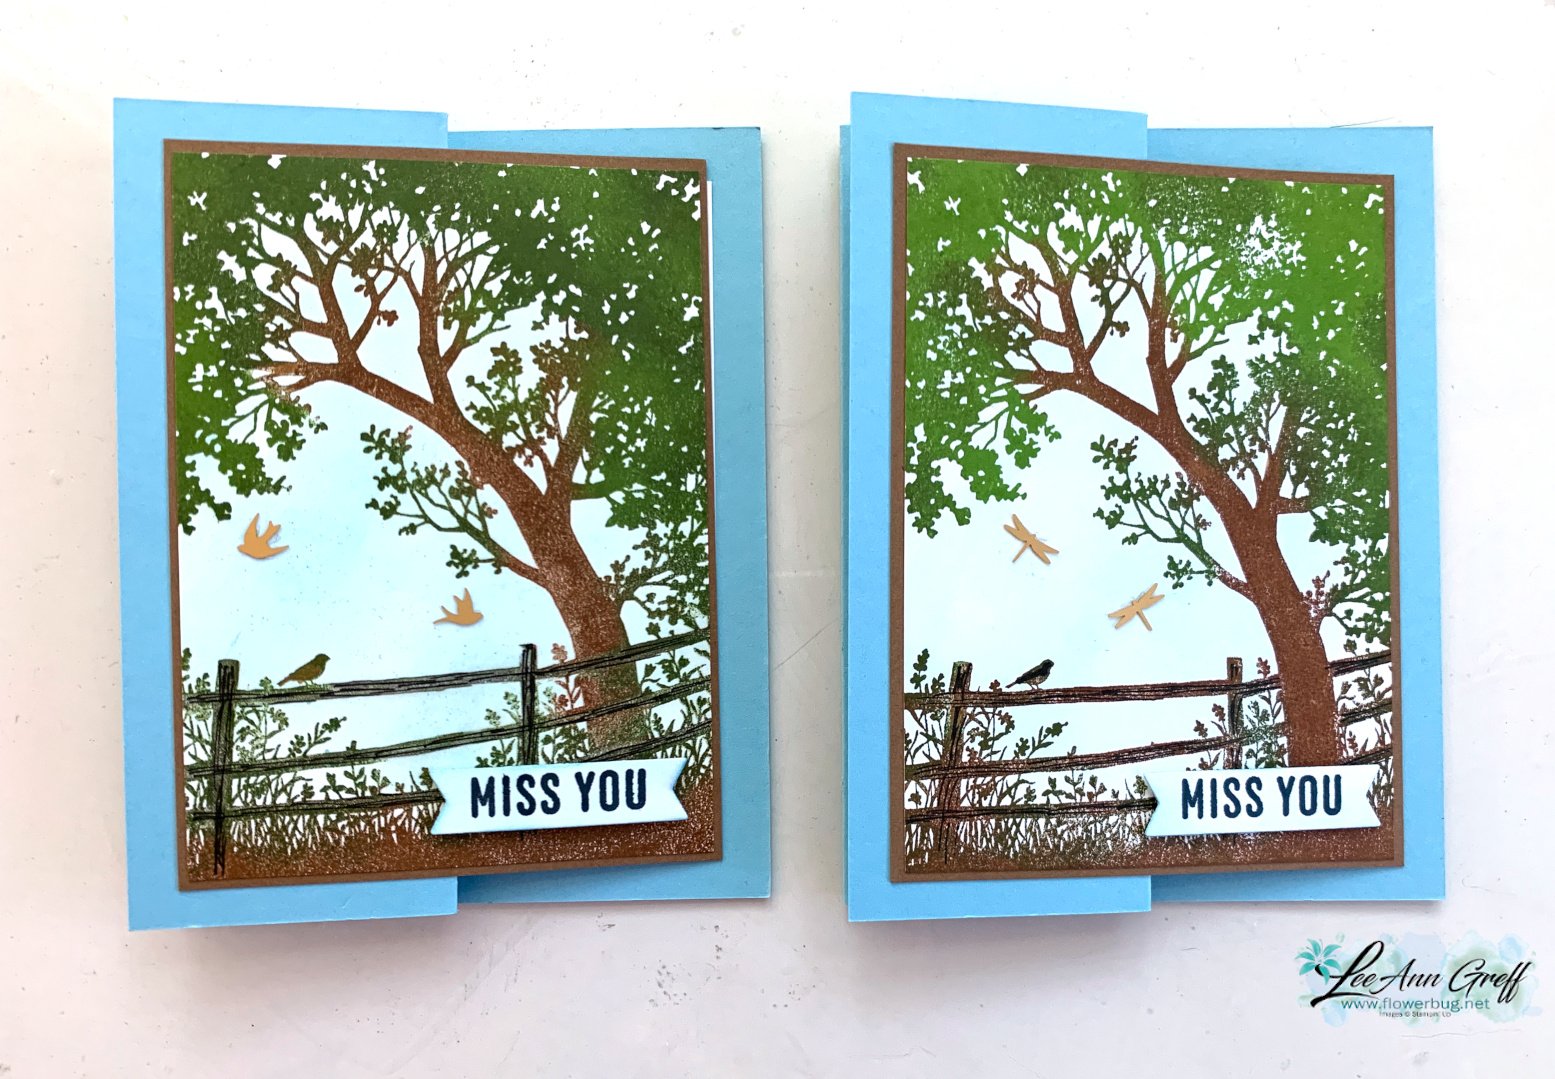
Today I'm sharing the second card I made during last week's live video.  Both featured the amazing and beautiful Peaceful View stamp set seen here.  
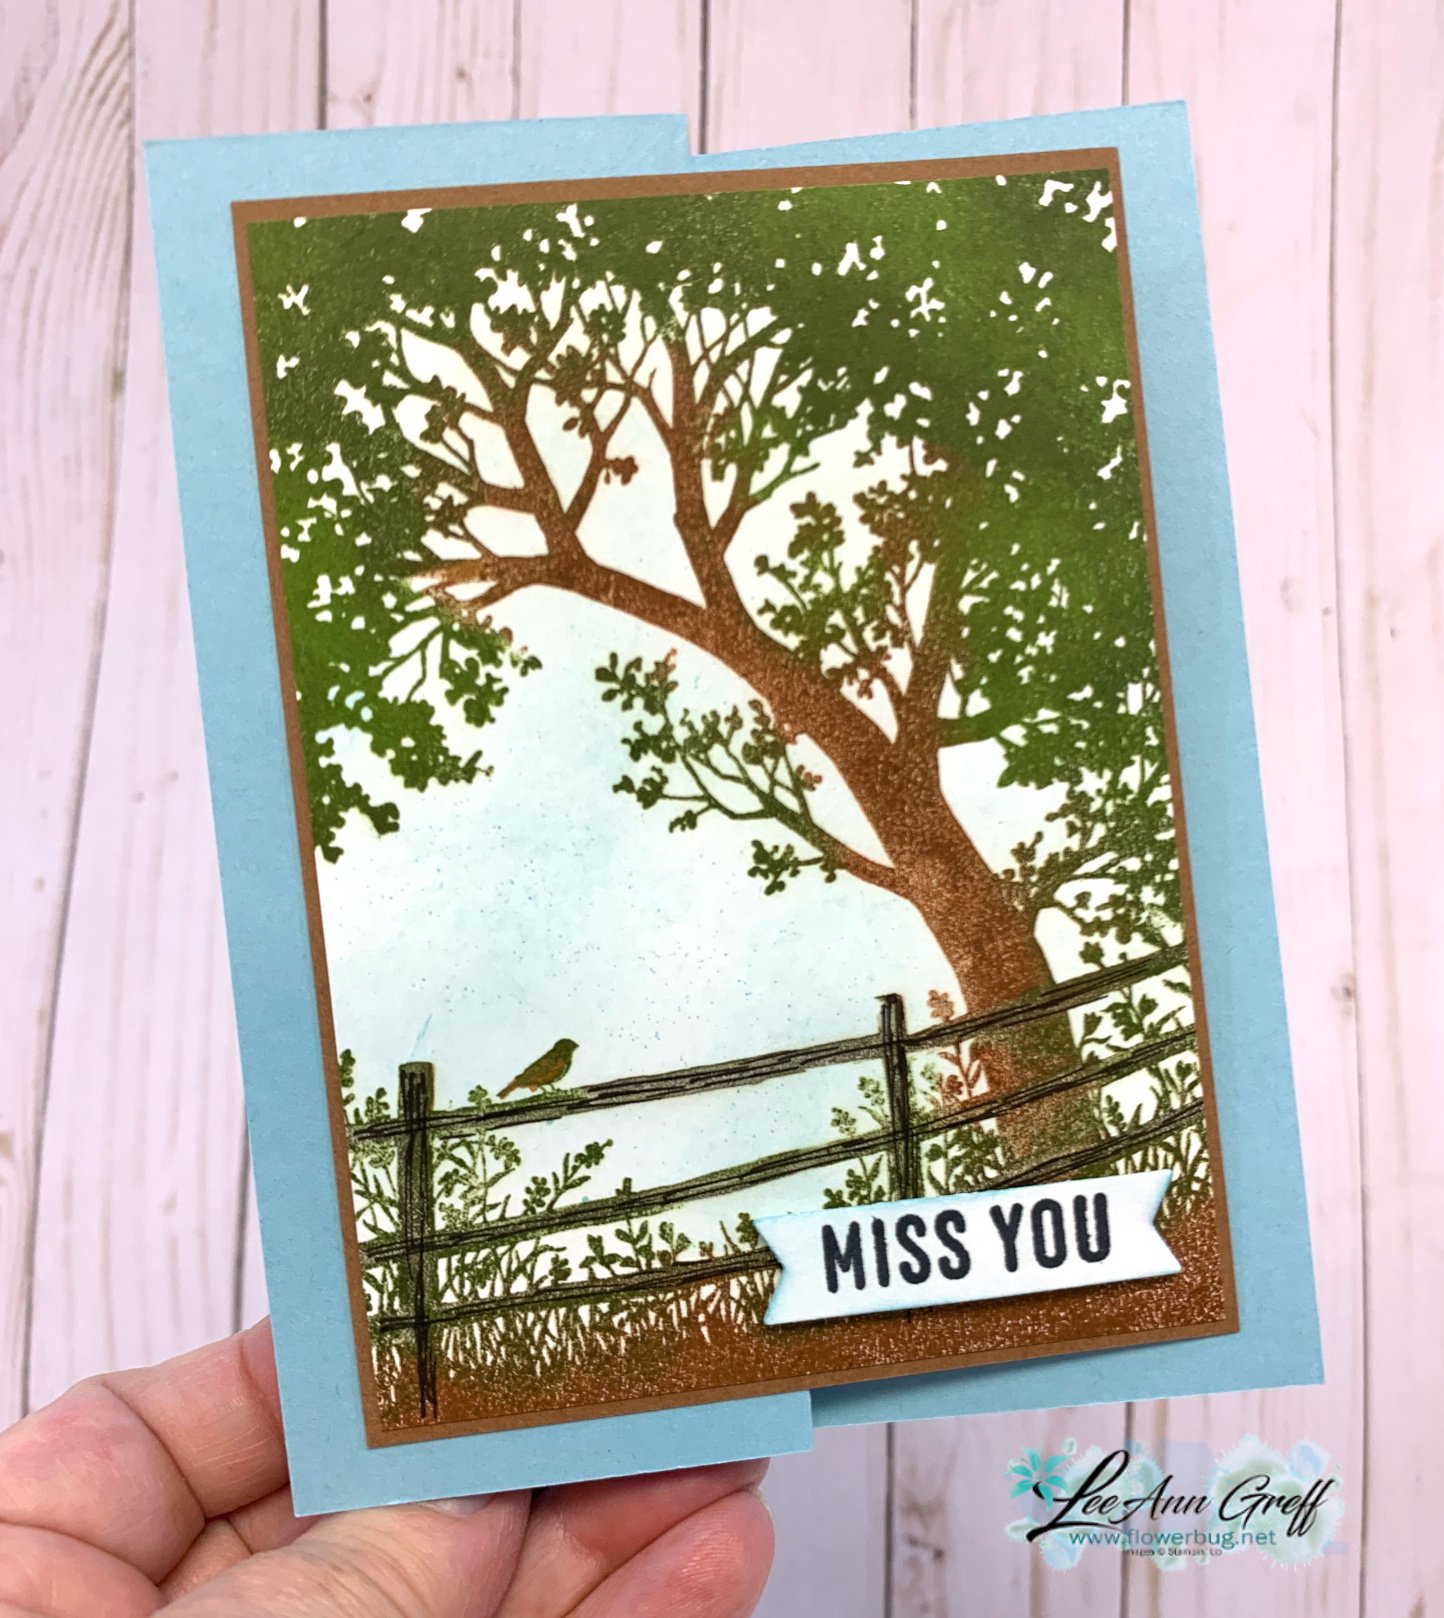
I used Balmy Blue, Pecan Pie and White card stock.  Inks include Balmy blue, Old Olive, Granny Apple Green and Pecan Pie. I used a Blending Brush with Balmy Blue ink to lightly color the sky before stamping. 

Notice the fence. If you look closely you'll see the woodgrain in the fence. This was done by using an Early Espresso Stampin' Write marker to add to the stamped fence directly on the cardstock. It was mostly Pecan Pie colored before.  

How did I color the image?  I inked the trees with Old Olive ink first using the direct to stamp method. The I used Pecan Pie on the grass and fence.  I used a sponge dauber to remove ink from the plants on the bottom so I could add Green ink to them with a sponge dauber.  I used Pecan Pie ink and a sponge dauber to add color to the trunk as well.  I hope you'll watch the video below to watch this in action. 
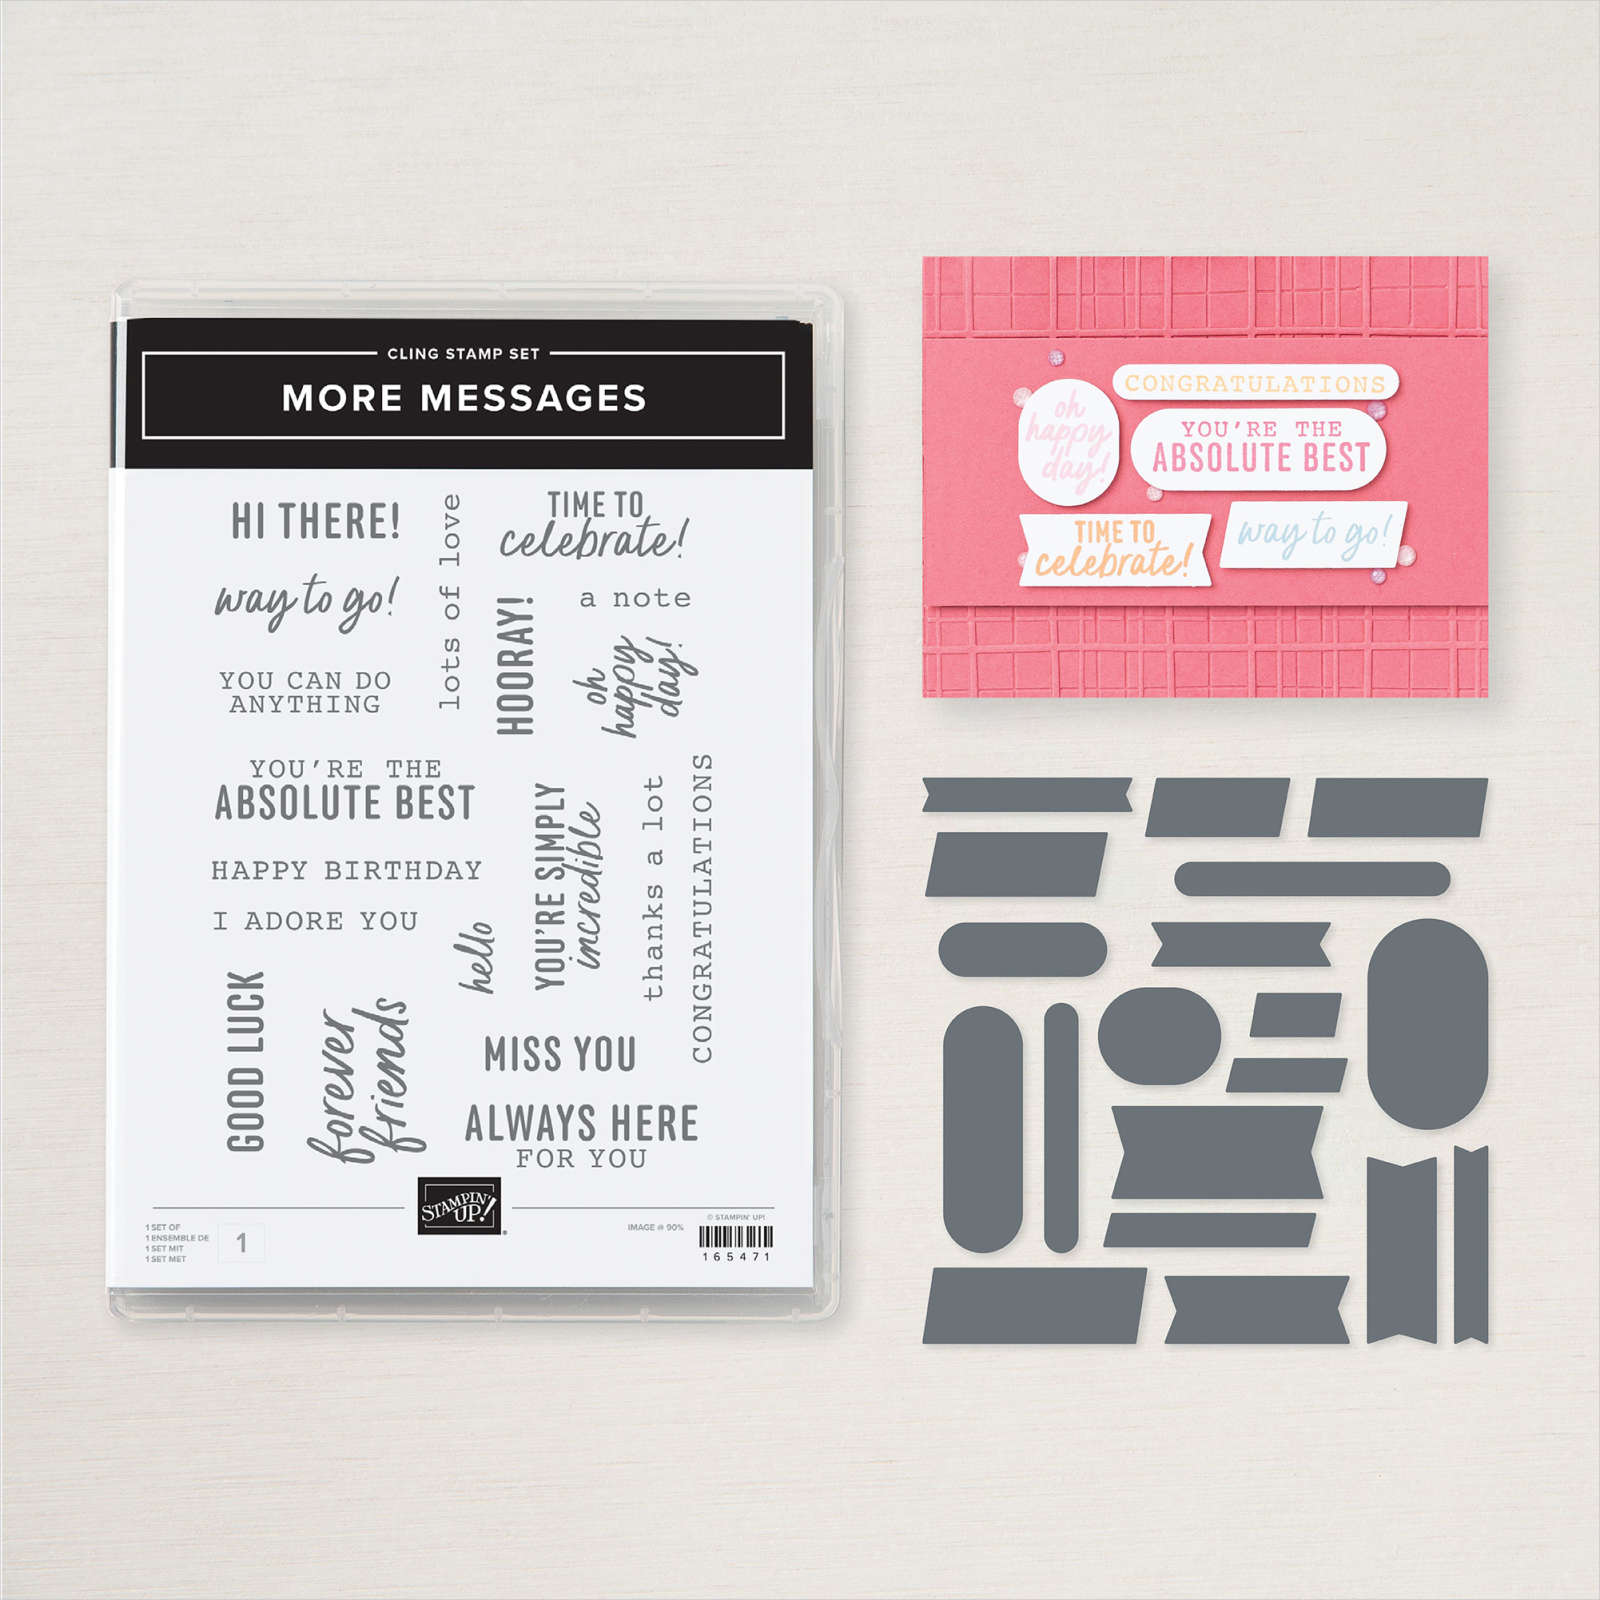
For the greetings I stamped the More Messages stamp a few times and used the coordinating die to cut them all out.  I had lots to choose from this way and can save them to use whenever I need it. Here I added Balmy Blue ink lightly to color the greeting.

What I love about this new messages bundle is that the greetings and die-cuts are such a nice size; larger than ever before. See the bundle here. 
Here's the free project sheet with measurements and supplies for you: Download Multi-colored Peaceful View

Below is the video for this card and another where I show you how to use this stamp on pretty designer paper for a stunning background. I shared that yesterday here. 

~~~

July Specials:

New Online Exclusives are here!  

~~~

Last Chance List has been updated!  see it all here. Don't miss out on the deals!

~~~

Get my Turtle-y Cute PDF tutorial free with any online order in July!

All Posts

  • Beautiful Blooms is the gorgeous Paper Pumpkin ‘Add-On’ dies


    Make the most of your Paper Pumpkin crafting with the Beautiful Blooms Dies add-on seen here!

    These four exclusive dies are the perfect way to keep the creativity going, because they coordinate beautifully with the January, February, and March kits!

    Make sure to subscribe so you can purchase the add-on! Message me to learn more or click here to subscribe. Once you’re a subscriber you can get the refills and add-ons to so many past kits! http://www.stampinup.com/…/paperpumpkin-refills…

    If you subscribe by March 10th you’ll receive the Fluttering Garden kit. Plus, besides the usual coordinating stamp set it will include a BONUS stamp set!

    Each month I send a bunch of bonus projects to my subscribers AND my TEAM! Don’t miss out on the fun of receiving a special kit in the mail each month. Click here to get yours.

    Here’s the graphic showing you some sneak peeks of last month’s Bonus Projects:

    ~~~

    February Specials

    Product of the Month is the new Painted Illusions 12 X 12″ designer paper

    Get the NEW Stampin’ Positioner FREE when you choose the Starter Kit in February! Click here

    Bonus Days – Redeem your coupons in February!

    February’s PDF of the Month!

    Two NEW kits just released here:

    Check out the Last Chance List; new items are added and available

    while supplies last

    Leave a Reply

    Your email address will not be published. Required fields are marked *

  • Sweet & Simple Treat pouch with free project sheet & video


    I shared this neat treat pouch on last week’s Live video. It’s super simple and requires a 6″ X 12″ sheet of designer paper.

    I made one before and one during the video. The left pouch above features the Made with Love designer paper. The right one uses the Lovely & Beautiful specialty designer series paper.

    What I like about this is there’s no special measuring; just score on the lines on the template in the project sheet seen below. The belly band makes closure easy and you can decorate the front in any way you’d like. It’s 1 1/4″ X 10 1/2″. Watch the video to see how I form it around the pouch. There’s no need to score it; just bend at the folds leaving a bit of room for sliding it off.

    I used the 1 3/4″ circle punch and the To the Point punch. The greetings are from the Words of Beauty bundle seen here. The little heart punch is retired.

    I created a free project sheet with template for you. Click here to download it or print it.

    You can watch the short video below.

    ~~~

    February Specials

    Product of the Month is the new Painted Illusions 12 X 12″ designer paper

    Get the NEW Stampin’ Positioner FREE when you choose the Starter Kit in February! Click here

    Bonus Days – Redeem your coupons in February!

    February’s PDF of the Month!

    Two NEW kits just released here:

    Check out the Last Chance List; new items are added and available

    while supplies last

    Leave a Reply

    Your email address will not be published. Required fields are marked *

  • Stunning cards in the Full of Charm card kit to go; reserve yours now!


    I created these gorgeous, colorful cards from the Full of Charm Paper Pumpkin refill kit.

    The card kit includes the refill kit, gems, assorted pre-cut pieces, 12 envelopes and a spool of iridescent ribbon. I used the printed floral stencils in the kit along with blending brushes to create some of the pretty backgrounds.

    You will need the following to complete the cards: greeting stamps, Mossy Meadow & Peach Pie ink, blending brushes or sponges, Paper Trimmer, scissors and adhesives.

    I have a limited number of kits available; reserve yours here. It’s $30 and includes the PDF tutorial which is sent via email immediately after purchase. The kit is mailed at the end of the month (February).

    Check out all of my kits to go here. I have lots of kits available to choose from. Get more than one to save on shipping costs!

    ~~~

    February Specials

    Product of the Month is the new Painted Illusions 12 X 12″ designer paper

    Get the NEW Stampin’ Positioner FREE when you choose the Starter Kit in February! Click here

    Bonus Days – Redeem your coupons in February!

    February’s PDF of the Month!

    Two NEW kits just released here:

    Check out the Last Chance List; new items are added and available

    while supplies last

    Leave a Reply

    Your email address will not be published. Required fields are marked *


Notice: LeeAnn Greff, Independent Stampin’ Up! Demonstrator, Manager. The content of this website is my sole responsibility as an independent Stampin’ Up! demonstrator and the use of, and content of, the classes, services, or products offered on this website is not endorsed by Stampin’ Up! Copyright 2025