/


Latest Post

How to achieve the Floating Technique? Lots of examples!


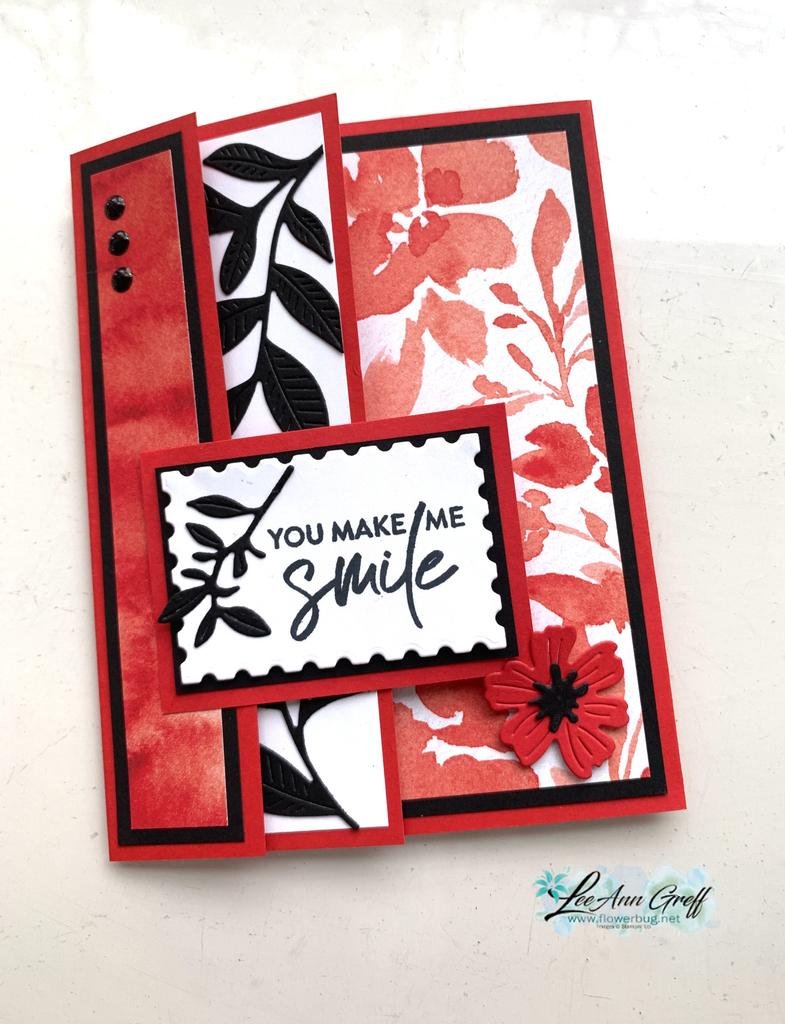
Our current Team creative challenge for my Flowerbug's group is to make a card using the Floating Technique.  It's a fun technique that uses a window sheet or transparency.  

Here are some of mine I shared on a recent Facebook Live video you can see here. 

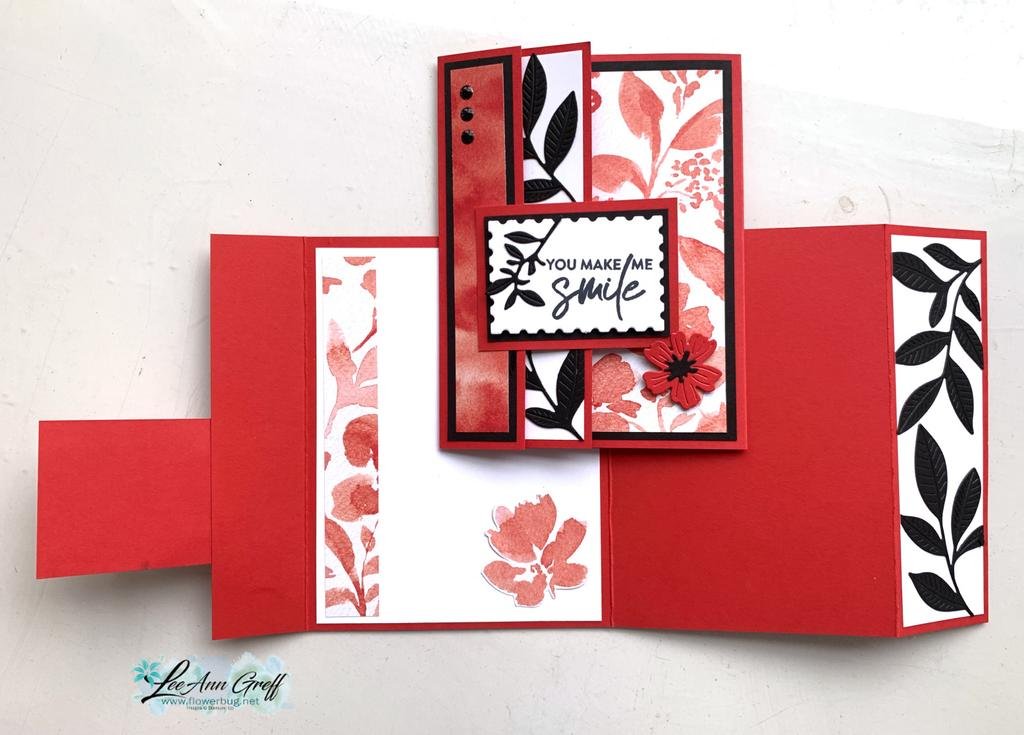
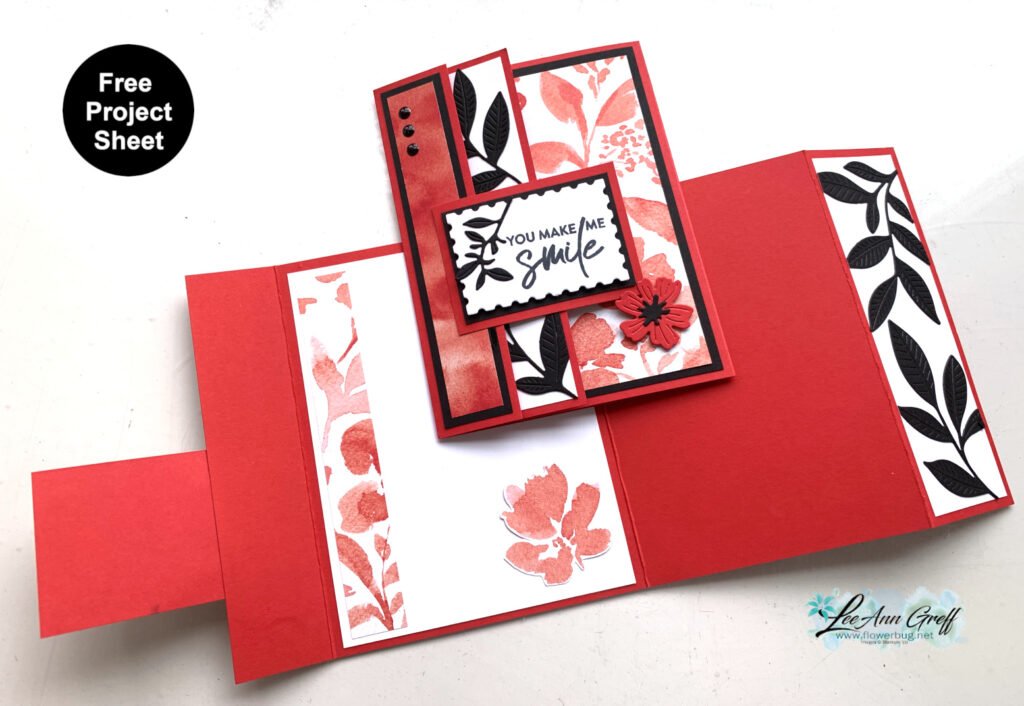
This first one features Black & White with a 'pop' of color – Magenta Madness in this case. Magenta Madness is retiring next week!   

I used the Dandy Wishes dies and the Layering Circles dies here.  I adhered a bunch of strips of the All Together designer paper to a window sheet, leaving space between them.  I cut it out with the largest circle in the set and popped it up on a Gingham textured White layer. 

I added die-cuts from the neat Dandy Wishes dies and a heat embossed image from the Garden Wishes stamp set. This set is in a bundle with the Dandy Wishes dies and on sale in March!  See it here. 

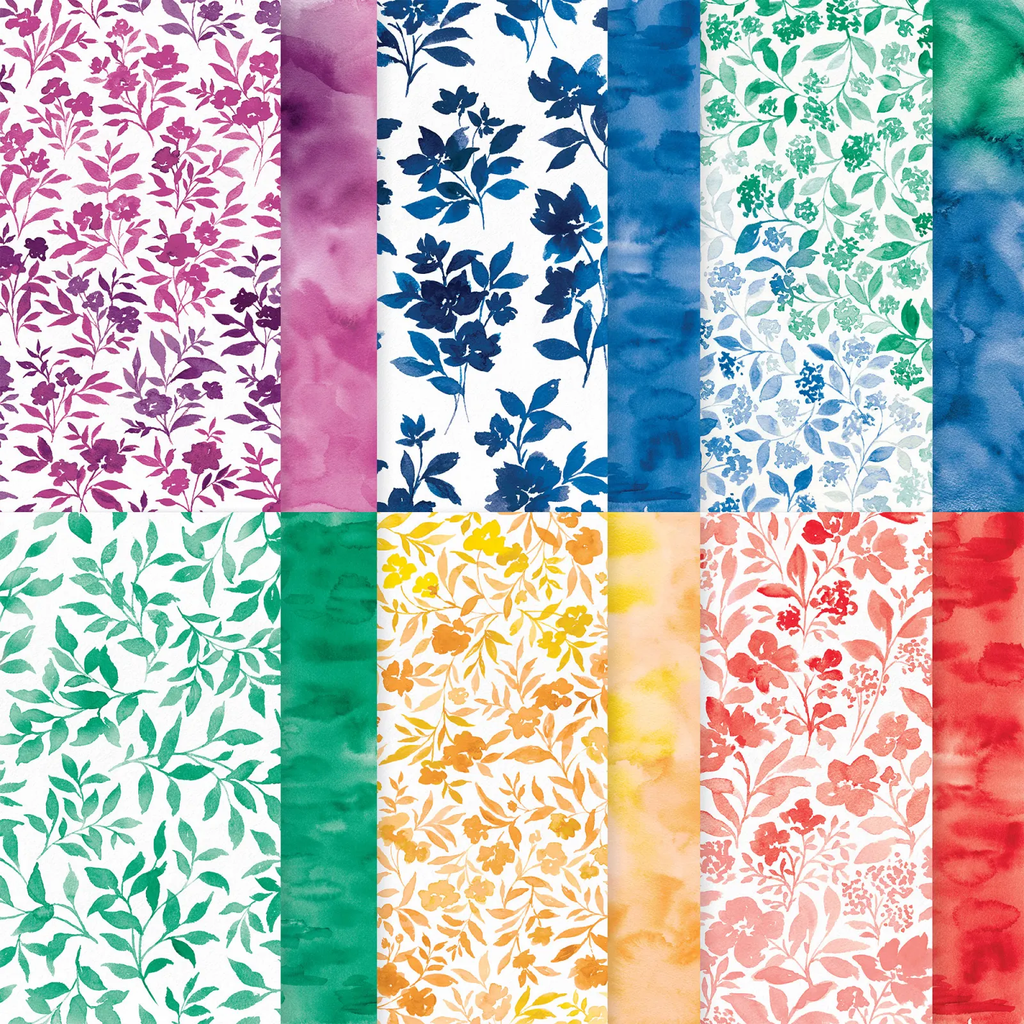
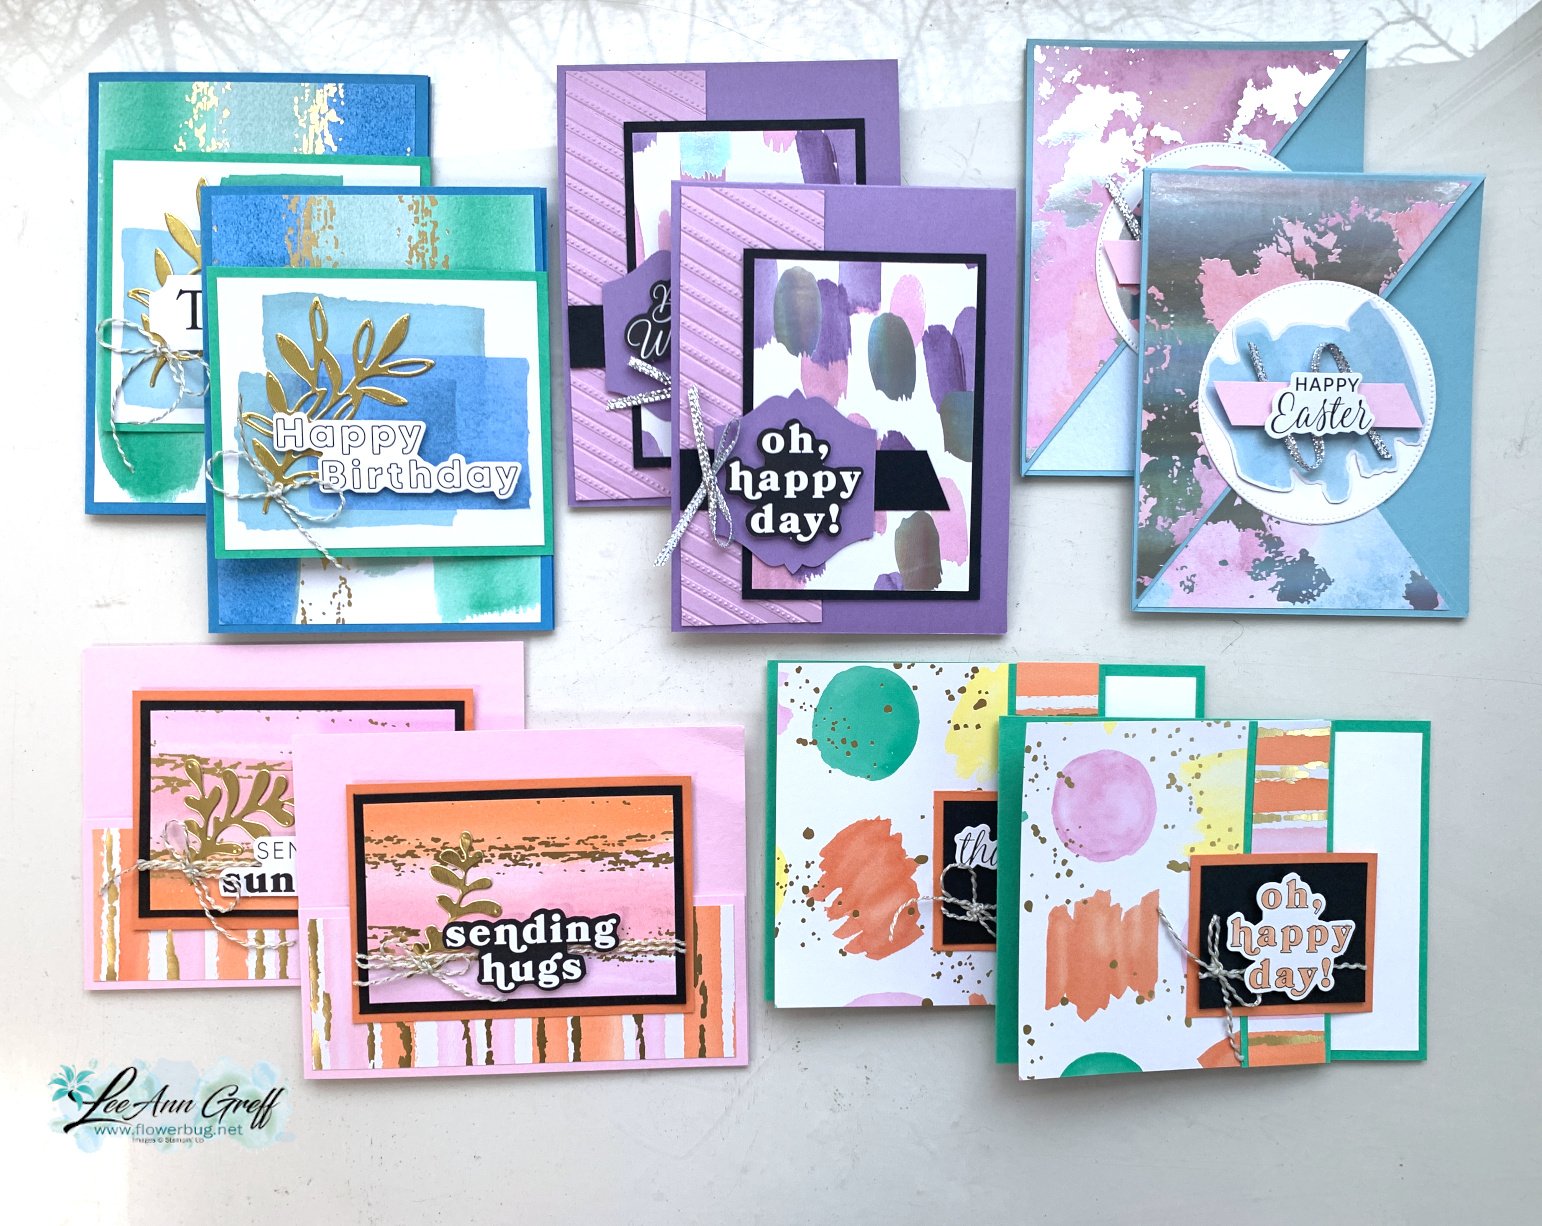
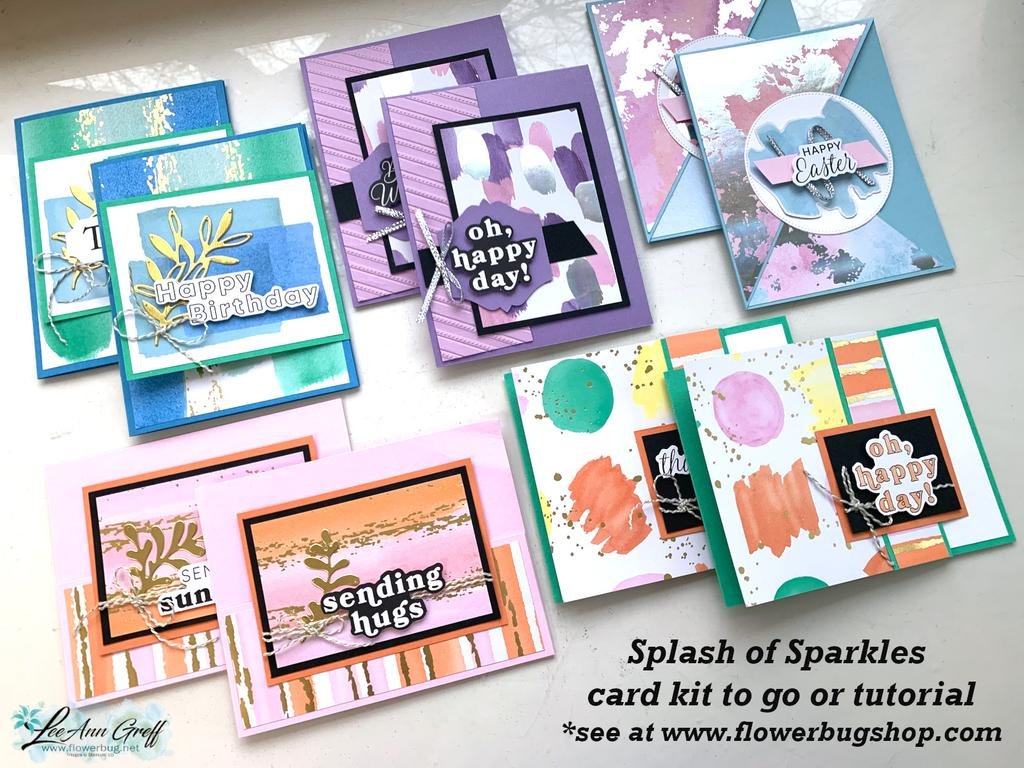
This next card features Misty Moonlight and the Abstract Beauty DSP.  I cut the feathers from this pretty DSP that has touches of Gold on it using the Iconic dies seen here.  

For this card the window sheet is a simple rectangle.  After adding the feathers I trimmed off the excess and added it to the card with mini dimensionals.  

Other details: 

  • the greeting die-cuts are the Amazing Thanks dies seen here.
  • The textured White layer is done with the Bark 3D embossing folder.
  • That strip of gold & white strips is also from the Abstract Beauty DSP. 
  • Colors are Gold, White, Misty Moonlight and Night of Navy

Next is a card done in purples – Fresh Freesia, Highland Heather & Gorgeous Grape.  

Details:

  • Layering Circle & Amazing Thanks dies
  • Greeting stamped from Special Moments SAB set
  • Texture is Hive 3D folder seen here 
  • Basic Rhinestone jewels were colored purple with Blends markers 

This next sample features the Artistic dies along with the SAB Simply Marbelous DSP. 

Colors are Basic Gray, White & Black; very monochromatic.  The greeting is from Friendly Hello SAB set, heat embossed.  

Tip; to adhere the finely cut die-cut pieces I used our Adhesive Sheets seen here.  They're the best solution for these types of die-cuts. 

You can see how I achieved these cards on the link below; just click on the photo to watch. 

~~~

March Specials: 

Host codes: FS239K9C

 *click here to order 

If your order is over $50 you'll receive a free embellishment

from the Jan-June catalog in your thank you card.

Annual Catalog Retiring List is out March 23rd!  Deep discounts coming! 

Don't forget about my loyalty rewards! 

Click here to download yours and earn a $50 shopping spree!  

All Posts

  • Gorgeous Triple Fold card with Garden Poetry with video & free project sheet


    I shared this stunning card on last week’s Live video. It features a few of my favorite products..

    I chose to feature my favorite new designer paper – Garden Poetry seen here. Aren’t the patterns and watercolor backgrounds beautiful?

    This is Poppy Parade, Black & White.
    The other items I used are the Nature’s Symphony bundle, the Perennial Postage and Springtime Scenes dies (flower).

    The front left flap opens like this:

    Then you open the right side and fold the left in and this is what you see:

    I fussy cut a flower from the designer paper to add inside. The Black die-cut leaves are both from the Nature’s Symphony dies.

    Here’s the free project sheet; click here to download or print it off.

    The card was inspired by my teammate Jacki, who shared this neat fun fold in our February swap. I’ll share her card tomorrow.

    Below is the video tutorial; I hope you like it enough to make one. It’s a super fun card!

    March Specials!

    March Product of the Month is the Notes of Spring stamp set!

    It’s just $5 with a $75 purchase.

    Get my March PDF free with any Online purchase!

    NEW Online Exclusives are here!

    Get the retiring In Colors while you can; they’re already going fast!

    Leave a Reply

    Your email address will not be published. Required fields are marked *

  • Splash of Sparkles card kit to go or tutorial; reserve yours now


    The Splash of Sparkles specialty designer paper is the star of these cards! This striking DSP is fun & playful with both bright and soft prints with foil accents.

    I truly enjoyed playing with it and am excited to show you the results!

    Aren’t they bright & pretty cards?! 4 of the 5 layouts are fun fold designs and the color combinations are unique! I paired it with the Greetings for All ephemera so there’s no stamping needed to finish your cards.

    You can choose from the pre-cut kit to go that includes products OR the PDF tutorial option.

    The pre-cut kit includes the following: 1/2 pkg Splash of Sparkles specialty paper (6″ X 12″), a share the Greetings for All ephemera, Silver trim and Gold/White twine. Plus you’ll receive the PDF tutorial AND the exclusive video tutorial. It’s $32 and will be mailed out at the end of March. Click here to get yours.

    If you’d prefer the PDF tutorial option click here. It’s $16 and includes step by step directions, measurements, photos and a supplies list. It is sent to you via email immediately after purchase.

    I have many more tutorials and kits to go available. Be sure to check them out here. You can save money on shipping when purchasing more than one kit.

    March Specials!

    March Product of the Month is the Notes of Spring stamp set!

    It’s just $5 with a $75 purchase.

    Get my March PDF free with any Online purchase!

    NEW Online Exclusives are here!

    Get the retiring In Colors while you can; they’re already going fast!

    Leave a Reply

    Your email address will not be published. Required fields are marked *

  • Stunning Garden Poetry Fun-fold card kit with tutorial option


    The Garden Poetry designer paper was a firm choice for one of my card kits. It’s absolutely breathtaking with the coordinating prints in leafy and watercolor designs.

    I wanted to show off both sides of this beautiful paper so I chose to feature fun folds for these cards.

    I love the vibrant colors so much. If you enjoy creating with ‘ready to go’ kits I hope you’ll try one or more of my kits to go.

    This kit to go includes multiple products to create cards like these click here. The kit includes all 10 pre-cut cards, 1/2 pkg of the designer paper, a share of the Garden Epoxy gems and the Berry Burst ribbon and costs $31. Plus you’ll receive the PDF tutorial AND the link to the exclusive video tutorial.

    The PDF tutorial includes photos, measurements, a supplies list and step by step directions. You’ll need a paper trimmer to cut your new designer paper using the measurements in the tutorial. You’ll also need a few ink colors, greeting images and adhesives to finish your cards. I have a limited supply of these kits available; reserve yours soon!

    If you’d like the PDF tutorial click here. It’s $16.

    The PDF tutorial is sent to you via email immediately after purchase. Check your spam folder.

    Each month I add at least two card kits & tutorials to my shop. It’s smart to purchase more than one and save on shipping costs. Browse them all here.

    March Specials!

    March Product of the Month is the Notes of Spring stamp set!

    It’s just $5 with a $75 purchase.

    Get my March PDF free with any Online purchase!

    NEW Online Exclusives are here!

    Get the retiring In Colors while you can; they’re already going fast!

    Leave a Reply

    Your email address will not be published. Required fields are marked *


Notice: LeeAnn Greff, Independent Stampin’ Up! Demonstrator, Manager. The content of this website is my sole responsibility as an independent Stampin’ Up! demonstrator and the use of, and content of, the classes, services, or products offered on this website is not endorsed by Stampin’ Up! Copyright 2025