/


Latest Post

Hey Chuck Fancy Fold cards! Part 3


And today I'm sharing the last 2 projects featuring Hey Chuck.  Annette is one of my talented Flowerbug's and she chose this bundle for her Artist of the Month projects.

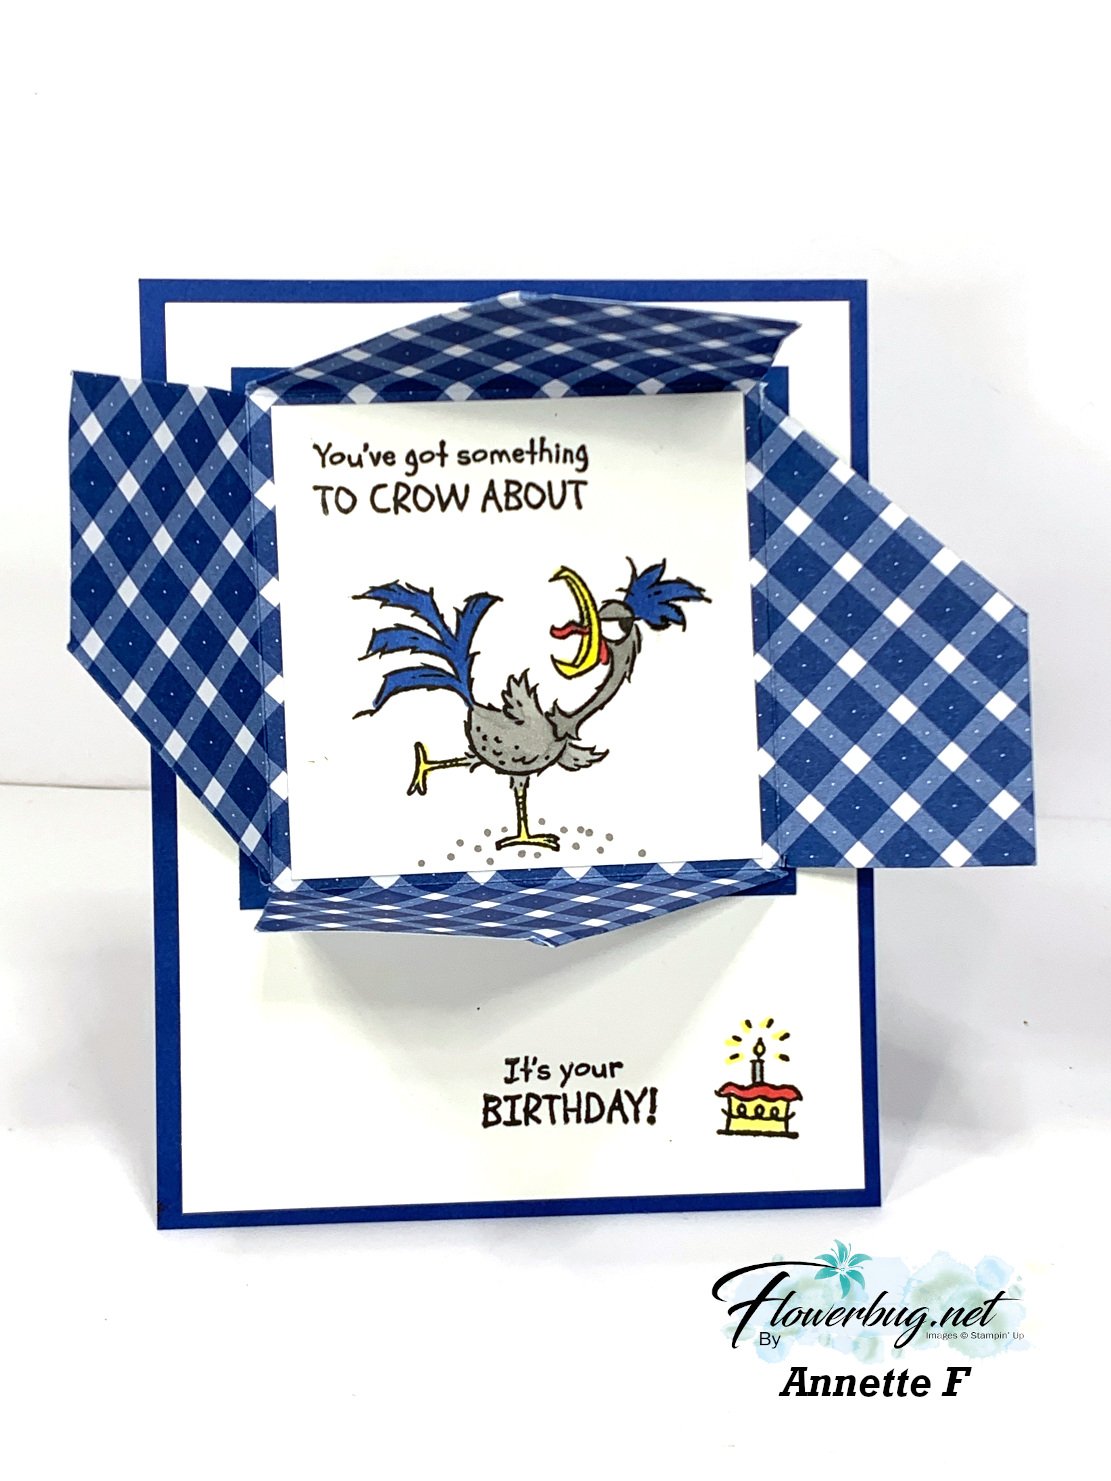
This first project features the Masterfully Made designer paper seen here and it's also a fun fold…

I love how she added a torn edge greeting; it fits perfectly with this designer paper that has a torn look to many sheets. 

So here's a clue to her fun fold design: 

Do you recognize this fold? It's called a Pop & Twist fun fold card.  It's not easy to learn; but super cool to give out!  I do not have a video on this fold but you can do a search on YouTube and find many video tutorials.  

Here's the open view: 

Isn't it cool? She added some soft blended background colors on each layer which makes a huge difference to the finished look.  Isn't that designer paper perfect with this bundle?  

If you like a challenge you should enjoy making one of these.  I've made a few and honestly I don't plan to make any more!  Ha! 

Here's the Hey Chuck bundle she used.  The dies are back now and available!

~~~

Look at this hilarious rooster!  And the perfect greeting for him….. 


Details:

~~~

Next is a fun fold card featuring the Earthen Elegance designer paper.  


She got this fun fold idea from Lisa Curcio.  It has 4 pieces of Misty Moonlight card stock measuring 4 1/4" X 5 1/2" scored at 2 1/8". They're adhered together back to back like this: 


There are 8 pieces of designer paper on each card stock side; measuring 2" X 5 3/8".  The pop-up designer paper on the front and back has a window cut out of it to reveal the rooster image inside; using the same die-cut.  She used the Tailored Tags dies.  This DSP measures 4 1/2" wide X 5". Score 1/2" from each side on the 4 1/2" edge. 

Here's the back side:  


There's a folded strip of card stock under the White tag that pops it up when opened. I may share one of these cards on an upcoming video soon; it's quite intriguing!  

I hope you enjoyed seeing all of her projects; she did an incredible job! If you want to see details on each one, click here for part 1 and here for part 2.  


 ~~~

August Specials: 

 *current host codes: KY99RPXP 

ShopwithLeeAnn.com

Redeem your Bonus Days coupons in August!  

Free Gift with orders in August: 

Get a pack of at least 5 beautiful cards with orders over $50 this month. 

The more you order the more cards you get!

*cards are previous card kits to go; over the top and many fun folds.  

All Posts

  • Fun Fold card with two versions!


    Saturday was World Card Making Day!  Did you make time to stamp?  First; did you even know about it?  

    We had a few stamping events on my Flowerbug's Team group and Mystery Stamping was one of them.  I sent them measurements so they could prep for the card making event but they didn't have a photo of the card!  Just measurements and supplies.  Use any Designer Paper, etc…..  It was fun to see what they all made.  

    Below are the two fun fold cards I made.  

    The front of the card is cut short to reveal the Designer paper on the left (inside) of the card.  Above I used the Snowflake Splendor designer paper and the Snowflake Wishes stamp set & dies bundle.  This designer paper is on sale right now at 15% off.  See all of the papers on sale here: 

    Next is a card made with the Gilded Autumn specialty designer paper and the Beautiful Autumn stamp & punch bundle.  You can see the measurements for these cards below. 

    Here are the measurements:

    • 2 pieces of Designer Series Paper (3 1/4" x 4" plus a coordinating piece 1 3/4" X 4")
    • Coordinating card base (9" x 4 1/4" scored at 5 1/2")
    • neutral CS like White or Vanilla (2 1/2" X 3 1/2" and 3 3/4" X 3 1/4" for inside)
    • a coordinating layer of CS (2 5/8" X 3 5/8")

    ~~~

    October Specials!

    Current Host code is MJK7R2CU

    Designer Paper Sale; click here!

    Get a free package of Adhesive Backed Snowflakes in October with an

    online order over $45. 


    All online orders will receive my Tutorial of the Month featuring the Poinsettia Petals suite!

    Leave a Reply

    Your email address will not be published. Required fields are marked *

  • Don’t miss this fun technique; use those Designer Paper scraps!


    Do you have trouble tossing those small pieces of Designer Paper left from a project?  I sure do!  There has to be a way to use them, right?  Well you can use them easily with this technique! 

    See?  It's quite eye-catching isn't it?  I kept the cards very simple to highlight the paper.  Each one features the Celebration Tidings stamp set. The card above features the Plaid Tidings designer paper; it's on sale right now too!  

    Watch the video below to get the tips on how to create these.  You just need some 1/2" strips and a ruler. 

    The card above features the Magic in This Night Designer paper.  The card below is the Tis the Season Designer paper; both on sale in October here!  

    Watch the quick video below to get the tricks on this fun technique. 


    ~~~

    October Specials!

    Current Host code is MJK7R2CU

    Designer Paper Sale; click here!

    Get a free package of Adhesive Backed Snowflakes in October with an

    online order over $45. 


    All online orders will receive my Tutorial of the Month featuring the Poinsettia Petals suite!

    Leave a Reply

    Your email address will not be published. Required fields are marked *

  • Trio of Celebrate Sunflowers cards with video & an easy highlighting technique!


    Look at these gorgeous sunflower cards!  They were a big hit at my Card Clubs this month.  They could chose between Daffodil Delight, Poppy Parade and Calypso Coral ink for their sunflower. 

    We sponged each sunflower leaving the center without color except for a bit of Crumb Cake Blends marker.  I know it might not be realistic but I like the pop of White in the center for brightness. 

    Check out the Celebrate Sunflowers bundle here. 

    Then we used White Craft ink and Blender pens to highlight a few petals here and there on the sunflowers.  It's super easy! I created a video below so you can see how it's done. 

    Measurements:

    • Crumb Cake card 5 1/2" X 8 1/2", scraps for die-cuts
      Whisper White 3 1/2" X 4 3/4", plus a 3 1/2" piece for sunflower
      Early Espresso 3 5/8" X 4 7/8"
      In Good Taste DSP 1 3/4" X 4 3/4"


    ~~~

    October Specials!

    Current Host code is MJK7R2CU

    Designer Paper Sale; click here!

    Get a free package of Adhesive Backed Snowflakes in October with an

    online order over $45. 


    All online orders will receive my Tutorial of the Month featuring the Poinsettia Petals suite!

    Leave a Reply

    Your email address will not be published. Required fields are marked *


Notice: LeeAnn Greff, Independent Stampin’ Up! Demonstrator, Manager. The content of this website is my sole responsibility as an independent Stampin’ Up! demonstrator and the use of, and content of, the classes, services, or products offered on this website is not endorsed by Stampin’ Up! Copyright 2025