/


Latest Post

Happy Valentine’s Day! Do you have a favorite??


Happy Valentine's Day!  

I shared this on FB last night and hoped you would to pick a favorite too!  I'm curious what the top pink Stampin' Up! color is….

I have a ton of Valentine's swaps I want to share with you too.  Most of these are made by my stamping friends. I cannot give credit to all of them as their post-it or business card was lost as my local customers browsed through them.  

My friend Susie Wood made this adorable Hello Ladybug card.  She used the Checks & Dots embossing folder on the Red layer. 

This next one features the Nuts & Bolts stamp set & is made by Julie Davison.  
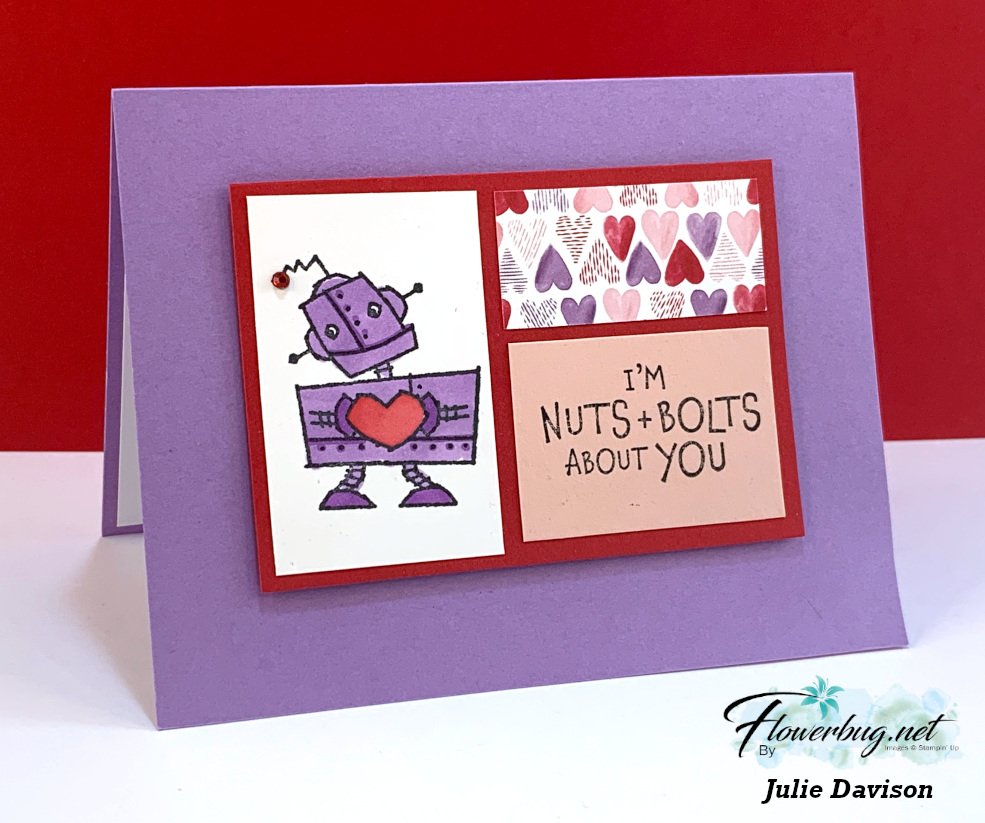
This cute card lost it's post-it so I cannot give credit.  I love how the panels are cut apart but the Sweet Talk designer paper still shows it's pattern.  

This next card was made by Jodi Reinert and features the Love & Happiness bundle seen here.  Love the textures! 

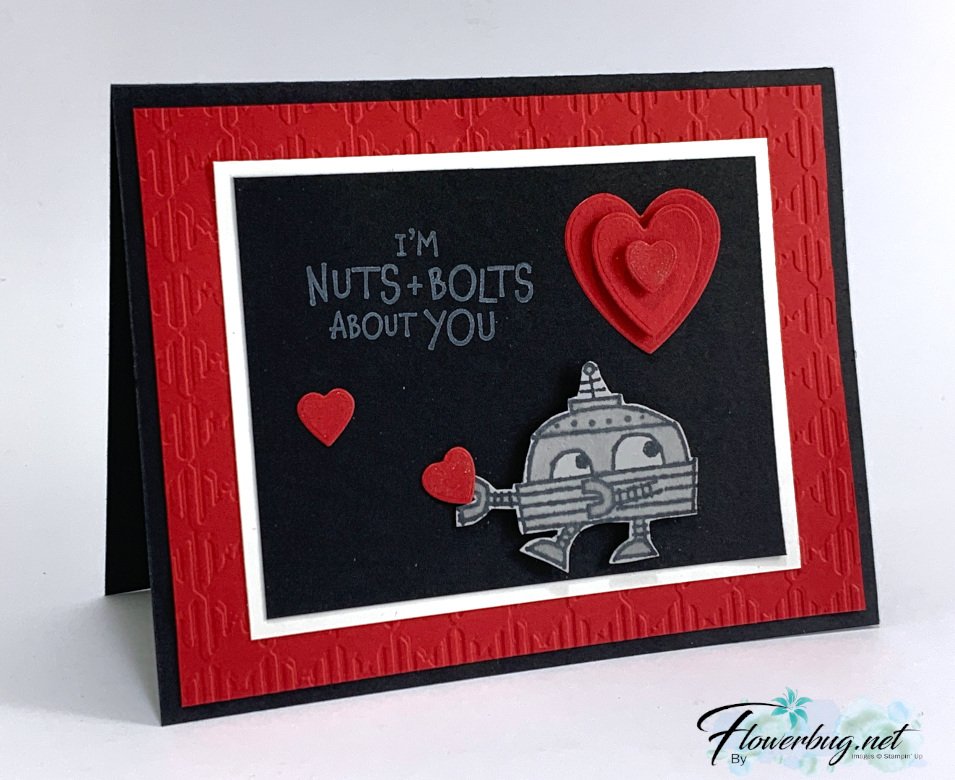
This next card is so cute!!  It was also made by my friend Susie Wood. I love the chalkboard effect of stamping on Black with White Craft ink.  Nuts & Bolts is the stamp set & the Gingham embossing folder was used on the background. 
Lastly is a sweet card made by Jennifer Cotton.  She used the Stitched So Sweetly dies and the Sweet Conversations stamp set.  

~~~

 Hot Deals in February:

Choose $125 in product PLUS any 2 stamp sets free in February!

It's just $99. Get FREE shipping too!

Click here to get yours.


Host codes: 3WCHFFUW

 *click here to order 


Use the host code above & get a free Easel Calendar kit

& the Gingham embossing folder with a $55 order in February, 2022! 

All Posts

  • Blossoms in Bloom cards; it’s pretty even without the die-cuts!


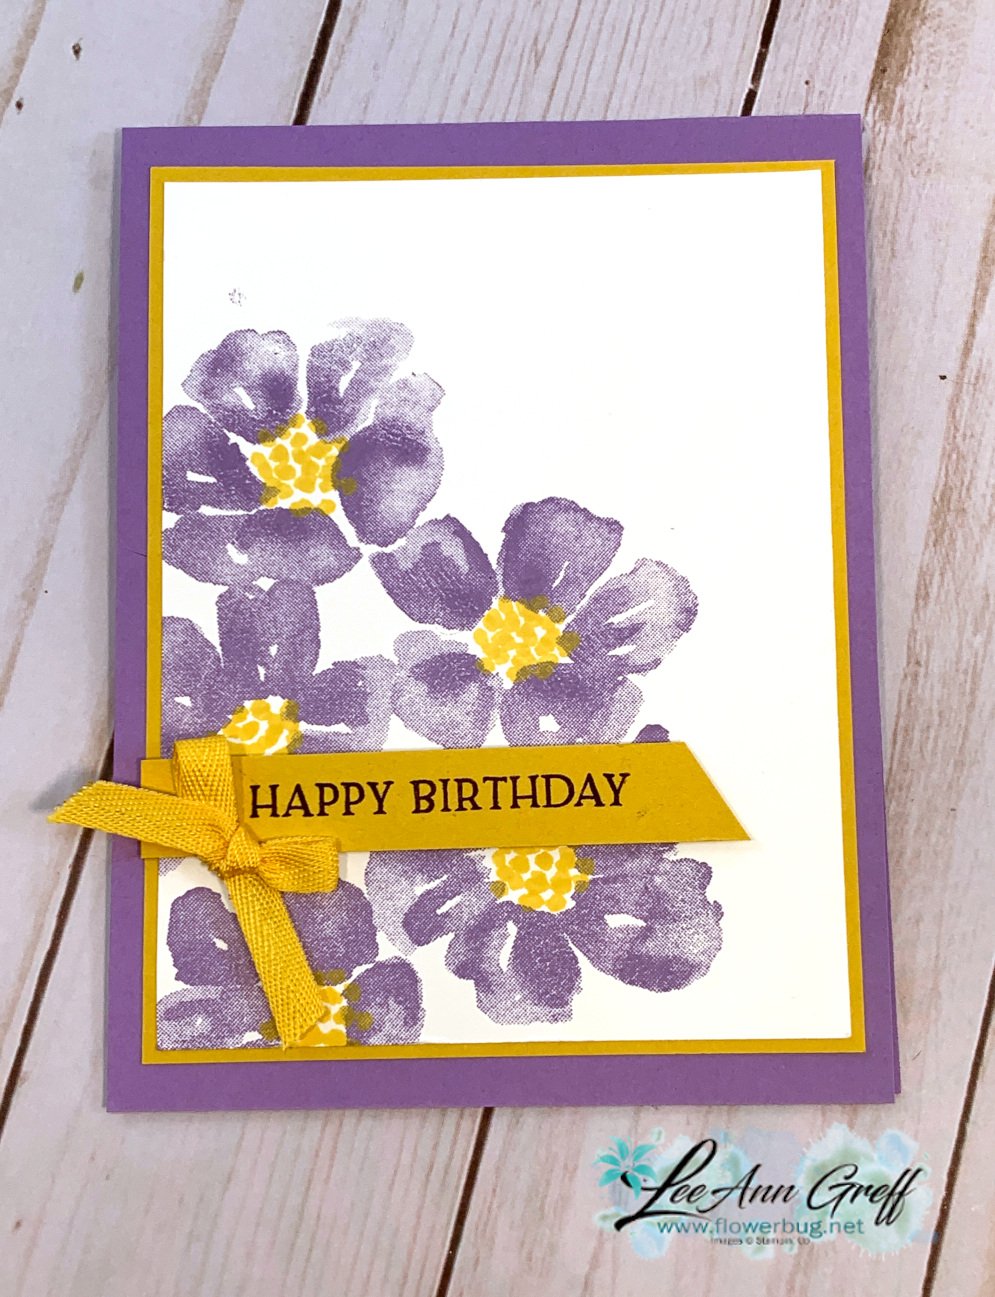
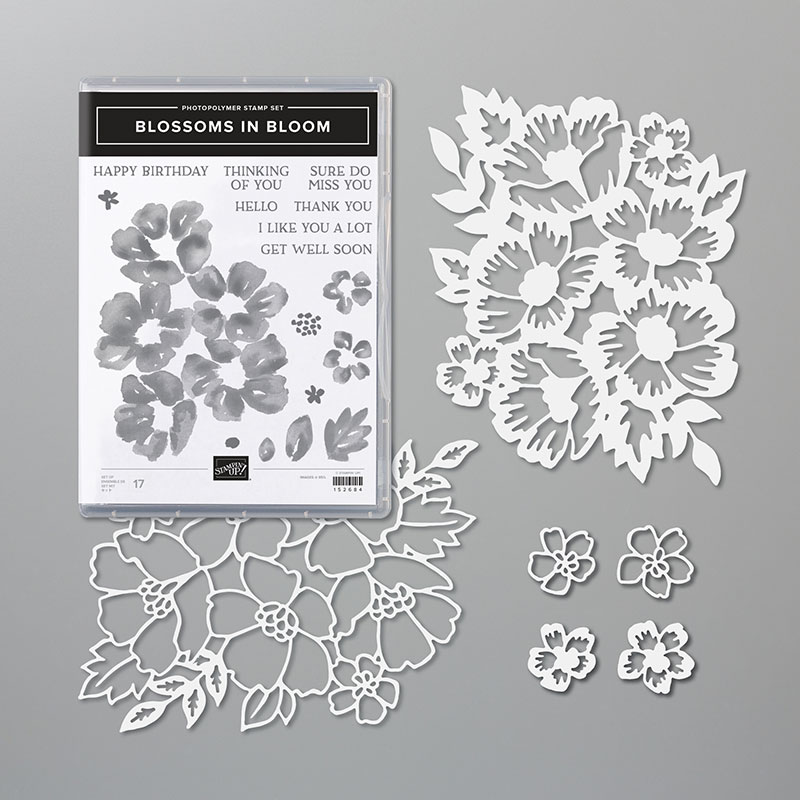
    Today I'm sharing cards made with the Blossoms in Bloom stamp set.  It comes with a gorgeous set of dies too but today it's all about the stamps. 

    First is a pretty card made by my friend Ruth Bingle.  I always love her swap cards! 

    She used the triple time stamping technique.  This is where you cut out three layers of descending sizes of card stock and stamp on them all at the same time.  

    Her White layers are from smallest to larges: 2" X 3 1/4", 3" X 4 1/4" and 4" X 5 1/4".  The Bumblebee layers are 2 1/4" X 3 1/2", 3 1/4" X 4 1/2" and the card base of 5 1/2" X 8 1/2".  This is a fun technique to do with many style of stamps to create your own background.  

    Next is a sweet & simple card I made combining Bumblebee with Gorgeous Grape. 

    This stamp set is one of those where you stamp once and get multiple hues of color; all with one inking!  Love this so much! 

    And last is a card where I stamped directly onto the designer paper. 

    This is the In Good Taste designer paper seen here; it's full of amazing photo realistic textures like wood, tile and textiles.  My colors are Early Espresso, Flirty Flamingo with a touch of Bumblebee. The dies are from the Tasteful Labels dies seen here; my top pick for the most used/versatile dies so far! 

    ~~~

    June Specials

    The new catalog is here!!!  


    Get my Lovely You pdf tutorial free with any online order in June

    It includes directions, photos and measurements for 10 cards!


    June Host code is 7H2FW9FG

    Get a free pkg. of Elegant Faceted Gems from me if your order is over $55. 

    Order online here

    Leave a Reply

    Your email address will not be published. Required fields are marked *

  • Blossoms in Bloom; cut for 2 cards at once!


    The Blossoms in Bloom bundle seen here was a big hit at my New Catalog open house event last week.  Everyone was amazed at the many options you have with the dies and stamps. 

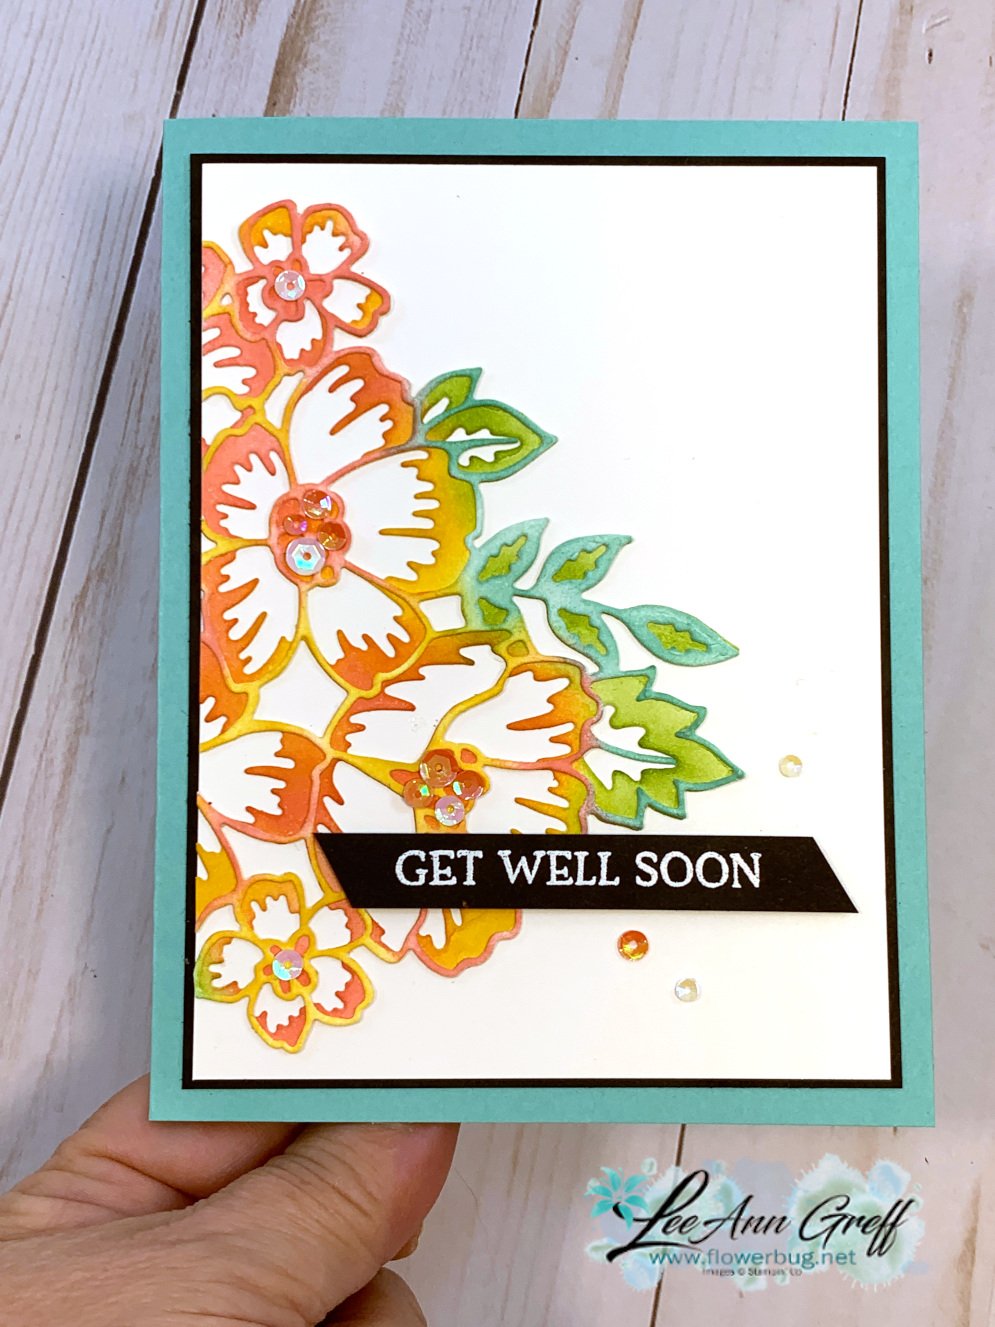
    Look at these pretty cards!  They're made from one set of dies cut in half to create two cards at once. 

    On these cards I die-cut one full set of flowers with both the thin and the thicker die in White.  Then I sponged each of them with the following colors: Daffodil Delight, Calypso Coral, Coastal Cabana and Granny Apple Green.  

    When you purchase this bundle you're getting a discount of 10% off. It's always nice to get a break on the price. It's also one of the 34 Bundles you can choose free when you purchase the Stampin' Up! starter kit here. 

    Besides the pretty distinktive flowers look at all of the greetings you get in the stamp set!  And the flower dies are nice and large and fill up a standard card fully. Or use just half like I did! 

    I added some sequins in the flower centers and added a heat embossed greeting from this stamp set to both cards. 

    The white layer is 3 3/4" X 5", the black is 4" X 5 1/4" on the standard 5 1/2" X 8 1/2" Coastal Cabana card base. 

    I hope you enjoy the idea of getting two cards from one set of die-cuts.  I have more cards to share with you featuring this bundle; it's quite amazing! 

    ~~~

    June Specials

    The new catalog is here!!!  


    Get my Lovely You pdf tutorial free with any online order in June

    It includes directions, photos and measurements for 10 cards!


    June Host code is 7H2FW9FG

    Get a free pkg. of Elegant Faceted Gems from me if your order is over $55. 

    Order online here

    Leave a Reply

    Your email address will not be published. Required fields are marked *

  • Jar of Flowers shaker card


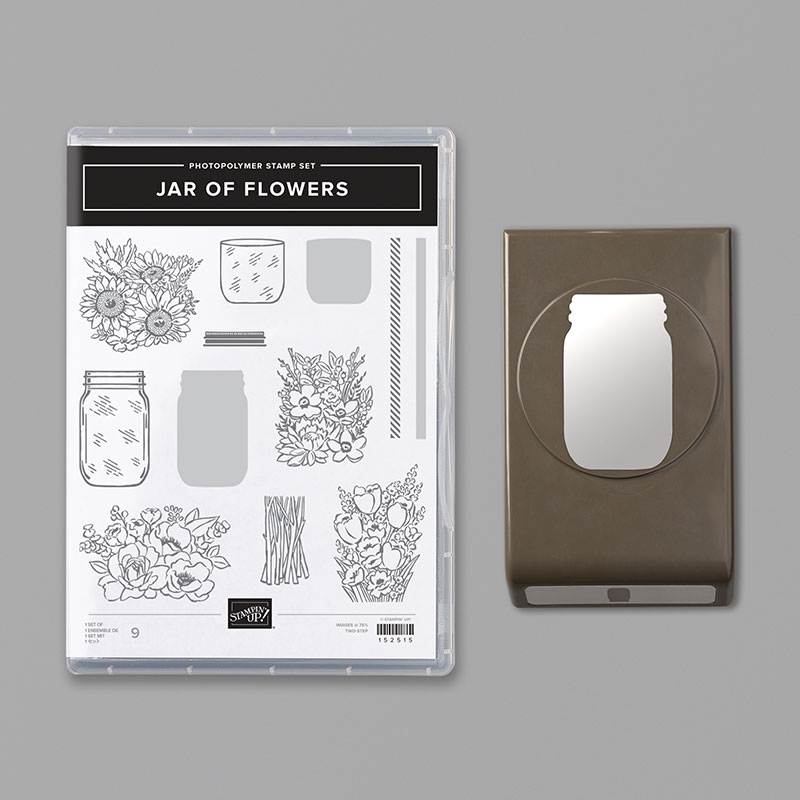
    I'm sure many of you have seen cards made with this pretty Jar of Flowers bundle seen here. It's one of our reversible stamps; you get the outline and the solid jar on one stamp! It's only $36.75 for the bundle. I know it's going to be a go to set for many of us.  I have lots of ideas with this set and I love that it comes with Mason Jar Shaker Domes!  

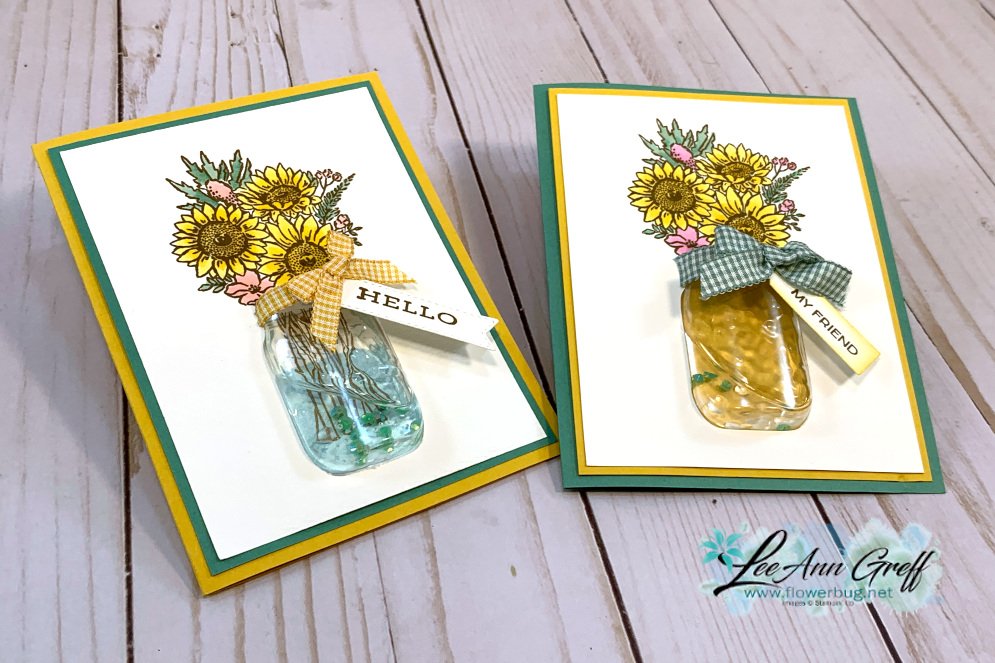
    I just had to try making a jar filled with water & beads!  When I bring flowers into the house from the garden that's usually how I display them. 

    Mine is filled with clear hand sanitizer (I had it right beside me) and our new Flowers for Every Season gems. And with my method the sanitizer does not leak out onto the card stock!  

    I stamped the flowers in Soft Suede and colored them in with Blends markers – Daffodil combo, Light Flirty Flamingo and Dark Mint Macaron.  I added the ribbon in two different ways.  On the left I secured it behind the dome.  On the right I adhered the cut ends on the dome. You can see how I did both on the video below.  

    I hope you take time to watch it; you'll get tips on making a liquid filled shaker card and on coloring with the Blends too. 

    ~~~

    June Specials

    The new catalog is here!!!  


    Get my Lovely You pdf tutorial free with any online order in June

    It includes directions, photos and measurements for 10 cards!


    June Host code is 7H2FW9FG

    Get a free pkg. of Elegant Faceted Gems from me if your order is over $55. 

    Order online here

    Leave a Reply

    Your email address will not be published. Required fields are marked *


Notice: LeeAnn Greff, Independent Stampin’ Up! Demonstrator, Manager. The content of this website is my sole responsibility as an independent Stampin’ Up! demonstrator and the use of, and content of, the classes, services, or products offered on this website is not endorsed by Stampin’ Up! Copyright 2025