/


Latest Post

So many fabulous Kit choices – Paper Pumpkin or those in the Kit Collection


One of my favorite product lines Stampin' Up! is excelling at is their kits. There are quite a few options but a favorite is Paper Pumpkin.  Each month we get a sneak peak of the coming kit. We all have an option of getting one each month or purchasing a pre-paid subscription.  I usually get a pre-paid during Sale-a-Bration so I earn free product at the same time. 

We have until the 10th of each month to opt in for the coming kit. That's tomorrow! This month it's the Sunshine & Smiles kit; it coordinates with the Rain or Shine suite in the current Jan-June mini catalog. 

They had offered a pair of die-cuts that match the stamps in this kit but they sold out.  

Opt in here to subscribe to monthly kits – remember you have full control of which kits you receive. Skip a month or cancel.  Or choose a pre-paid subscription here. When you get a pre-paid for 3 months or more you can choose free Sale-a-Bration choices too!  At least through February 28th. 

~~~

You might not realize Stampin' Up! has an entire collection of kits in the online store.  They call it the Kit Collection.  


The photo above includes just some of the kits available!  See them all here.  These kits are all inclusive which means almost everything you need is included in the kit to complete them.  

I recently made the cards in the Saying Thanks kit and LOVE how they turned out!

You can see this kit here.  It is a non-stamping kit with 9 cards & envelopes.  It's just $13 and would make a fabulous gift!  Everything comes in this kit; I believe all you need is a scissors.  

Another new and exciting kit is the Wreath of Blooms kit. 

Everything you need to make this kit is includes but they do recommend hot glue to adhere the flowers to the wreath.  It's about 8" around and costs $13. See it here.  

You might also like to know that my favorite kits – the Birthday Organizer kit – is back and available again.  It was so popular they ran out.  

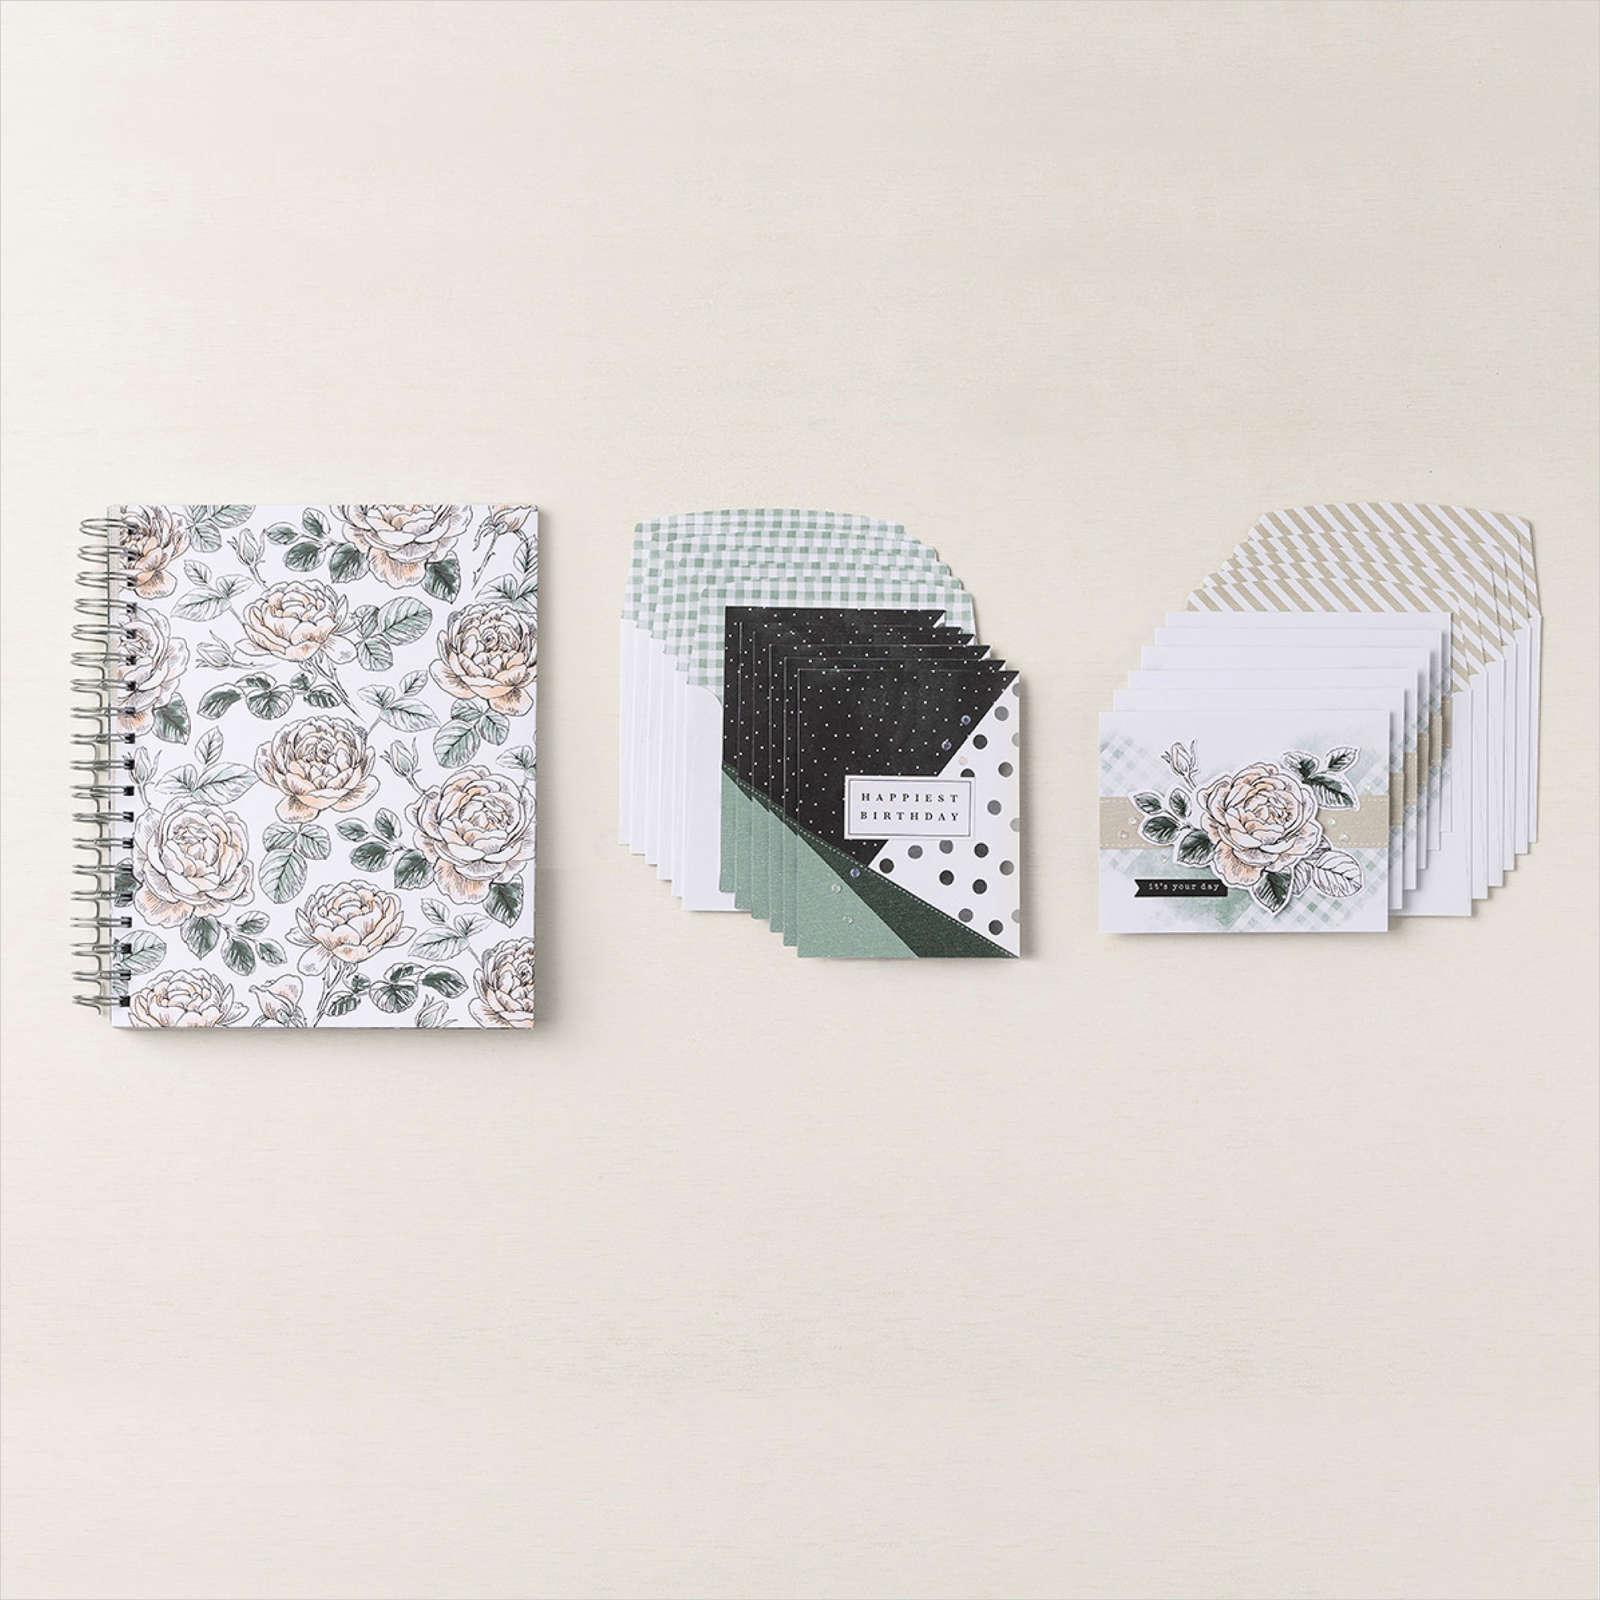
This photo includes my 'jazzed up' cover and a few extra cards I made for a kit to go. I have sold out of this kit now but you can still get the original kit from Stampin' Up! here. The full kit includes the card organizer and 12 birthday cards & envelopes for just $25.  

You can see it here.  It's another 'all inclusive' non-stamping kit that most people would love to organize their cards. 

~~~

February specials:

Mystery Boxes get one free with a $100 online order using a host code.

I still have 2 left!  

February Host code links:

  CNV2VCBT or 7EUM6NB9 

Get free Pastel Sequins with online orders over $55 when using the host code above!

 Earn free products with my loyalty rewards! 

Click here to download yours and earn a $50 shopping spree!

~~~

Best Deal Ever on the Starter kit here!

Choose $175 in products for just $129 plus the new mini machine!

Or choose $175 for $99 without a new Mini.  AMAZING!

All Posts

  • Two more fun fold card swaps by my Flowerbug’s; with measurements!


    Today I'm sharing a few more fun fold cards from our June Team swap with my Flowerbug's.  Our theme was to do a fun fold card using at least one new In Color.  Their cards are amazing!  I'll be sharing them all week!

    First is Marla's card made with the Florals in Bloom DSP seen here.  

    It starts out as a book binding fold… but look what's inside!  An explosion card! 

    Measurements:

    • Card base 11" X 4 1/4" scored at 4 1/4" & 5 1/2"
    • DSP in front 4" square, 1" X 4" strip
    • DSP inside is 6" square. Score in half twice and once diagonally. Adhere only the flat (non-scored) squares to the card inside. 
    • inside white 2 3/4" square

    ~~~

    Next is Jacki's amazing card; who also chose the Florals in Bloom DSP. 

    Her colors include the new Secret Sea (dark blue) with Peach Pie & Pumpkin Pie. Her stamp set is 'With You in Mind' and the 'Delightful Wishes bundle' for the flowers.  Here's how it opens: 

    Measurements:

    • White card bases – two pieces at 10 1/4" X 4" scored at 4 3/4". It's then scored from the bottom left corner to the upper right at 4". The center flat panels overlap each other. 
    • Secret Sea – 3 3/4" square, cut in half on the diagonal – 1 for each side, panel under greeting 3 1/8" square, sides are 5/8" X 3 3/4"
    • DSP 3 1/2" cut in half on the diagonal – 1 for each side
    • White front 3" square, white inside 5 1/4" X 4"

    Isn't it neat?  Her inside greeting is from the Notes & Totes stamp set seen here.  

    ~~~

    June Specials:

    The Suite Sale is on! 

    Buy one get 50% the second item – on all available suite products. 

    Shop here or see products below: 

    ~~~

    Last Chance List has been updated!  see it all here. Don't miss out on the deals!

    ~~~

    Earn free card kits in June with online orders! Get 4 kits with a $50 order and orders over $80 receive all 6 cards. All you need are greetings, gems and adhesives to assemble. 

    Order here 

    ~~~

    Get my Celebratory Sips PDF tutorial free with any online order in June!

    Leave a Reply

    Your email address will not be published. Required fields are marked *

  • Irresistible Designs emboss resist technique with free project sheet & video


    I shared this card on last week's Live video. I wanted to feature the new Irresistible Designs specialty paper seen here in the new Annual catalog.  It has printed/embossed patterns that are perfect for the emboss resist technique.  

    Which color do you prefer? Are you a yellow or a purple person?  

    My colors include Lemon Lolly, Basic Gray, Smoky Slate and Highland Heather. For inks I chose Lemon Lolly, Smoky Slate and Highland Heather. 

    I cut my strips first, then blended the inks on. I textured the center Smoky Slate layer with the Glass & Gardens embossing folders.  The circle die-cut is from the Spotlight on Nature dies.

    I stamped the greeting twice; first on the circle and again on a small piece of card stock.  I fussy cut the 'Celebrate' out and added it with Stampin' Dimensionals.  This was such an easy card! 

    Here's the free project sheet for these cards: Click on the following link to print or download it.  Download Paper Tags with Irresistible Designs

    I featured the Paper Tags bundle for this card and another one below.  See it here. 

    You can see the other card I shared during the video below.  Besides the emboss resist technique on the diagonal I featured the Joseph's Coat technique.  See it here.  

    Here's the free project sheet with directions, photo, measurements and a supplies list: Download Paper Tags Joseph's Coat card

    Below is the video tutorial for this card and another I shared in the video:

    ~~~

    June Specials:

    The Suite Sale is on! 

    Buy one get 50% the second item – on all available suite products. 

    Shop here or see products below: 

    ~~~

    Last Chance List has been updated!  see it all here. Don't miss out on the deals!

    ~~~

    Earn free card kits in June with online orders! Get 4 kits with a $50 order and orders over $80 receive all 6 cards. All you need are greetings, gems and adhesives to assemble. 

    Order here 

    ~~~

    Get my Celebratory Sips PDF tutorial free with any online order in June!

    Leave a Reply

    Your email address will not be published. Required fields are marked *

  • Paper Tags Joseph’s Coat technique with video tutorial


    I played with the Paper Tags stamp set and the Irresistible Designs Specialty Paper for last week's video.  Here's my favorite project: 

    The colors include Daffodil Delight, Coastal Cabana and Gorgeous Grape in inks.  The card stock is Black, White, Daffodil and Highland Heather. 

    For the colored designer paper panel I started with a piece at 4" X 5" and blended the three inks on it diagonally. This Irresistible specialty paper seen here resists the ink where they printed the resist designs. Once you add ink, it reveals their pattern.  So cool!  

    After I blended the colors on I randomly cut the single panel into 5 pieces on the diagonal. I share how I did this in the video here. I adhered each panel one at a time starting in the corner. You may need to trim one of the pieces slightly to fit the card base.  


    For the inside of the card I stamped the greeting and added color to it with coordinating Blends markers. 

    Here's how you do the Joseph's Coat technique:

    1. Sponge or blend multiple colors onto your neutral cardstock. 
    2. Swipe the embossing buddy over this layer; tap off excess powder. 
    3. Ink the stamp image in Versamark ink; stamp onto the layer. 
    4. Immediately heat emboss with Black embossing powder. 

    Once I had my tag, I trimmed it by hand (there are coordinating dies) and added a few extra pieces to lengthen the tag and add more layers. I finished it off with a bow. 

    Here's the free project sheet with directions, photo, measurements and a supplies list: Download Paper Tags Joseph's Coat card

    Below is the video tutorial for this card and another I shared in the video:

    ~~~

    June Specials:

    The Suite Sale is on! 

    Buy one get 50% the second item – on all available suite products. 

    Shop here or see products below: 

    ~~~

    Last Chance List has been updated!  see it all here. Don't miss out on the deals!

    ~~~

    Earn free card kits in June with online orders! Get 4 kits with a $50 order and orders over $80 receive all 6 cards. All you need are greetings, gems and adhesives to assemble. 

    Order here 

    ~~~

    Get my Celebratory Sips PDF tutorial free with any online order in June!

    Leave a Reply

    Your email address will not be published. Required fields are marked *


Notice: LeeAnn Greff, Independent Stampin’ Up! Demonstrator, Manager. The content of this website is my sole responsibility as an independent Stampin’ Up! demonstrator and the use of, and content of, the classes, services, or products offered on this website is not endorsed by Stampin’ Up! Copyright 2025