/


Latest Post

Gorgeous Garden dies & Blending Brushes; wow!


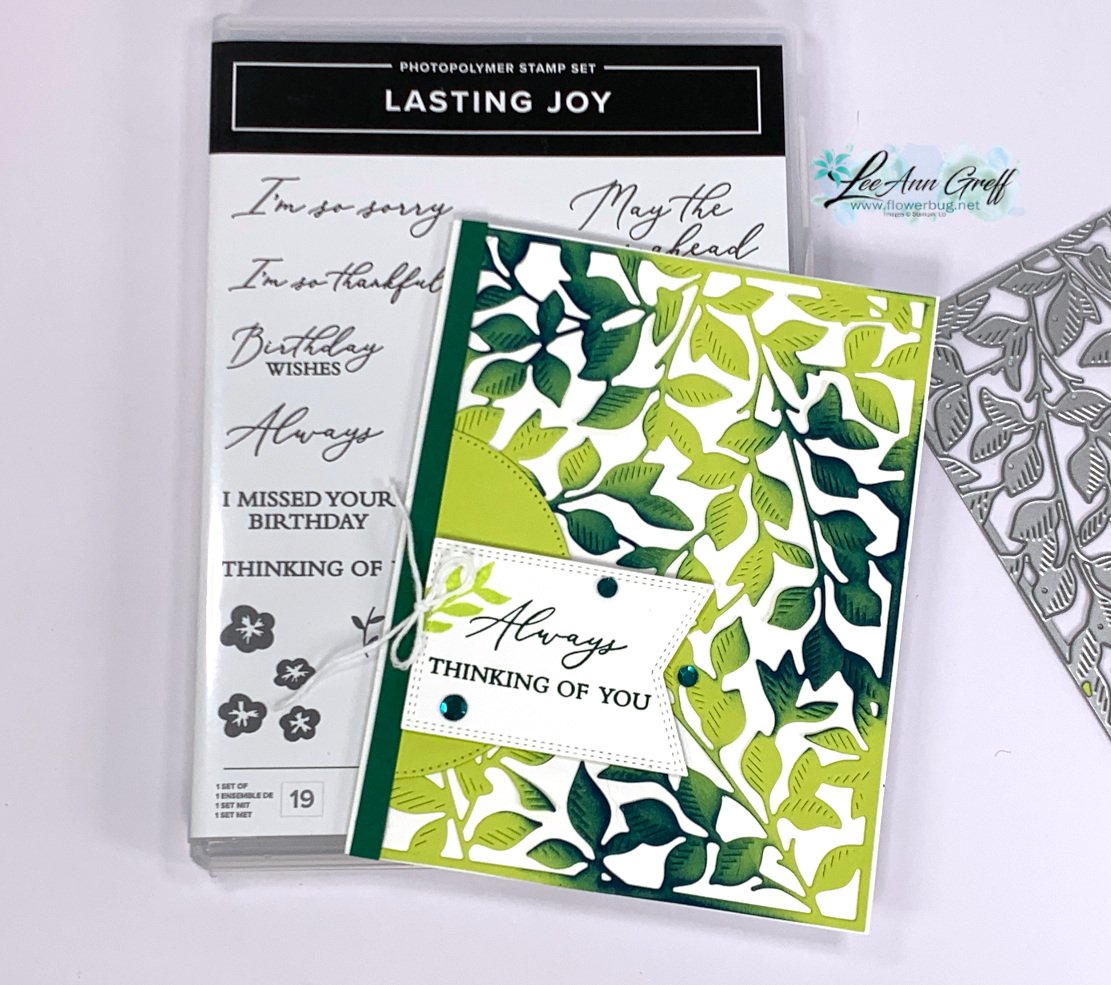
Check out this beautiful card made with the Gorgeous Garden dies!  


I think it's stunning.  Don't you love the pretty blending of the greens? I simply added one color to the finished die-cut.  I cut it out from Lemon Lime Twist cardstock and added Pretty Peacock ink with a blending brush in a few areas.  Easy!  
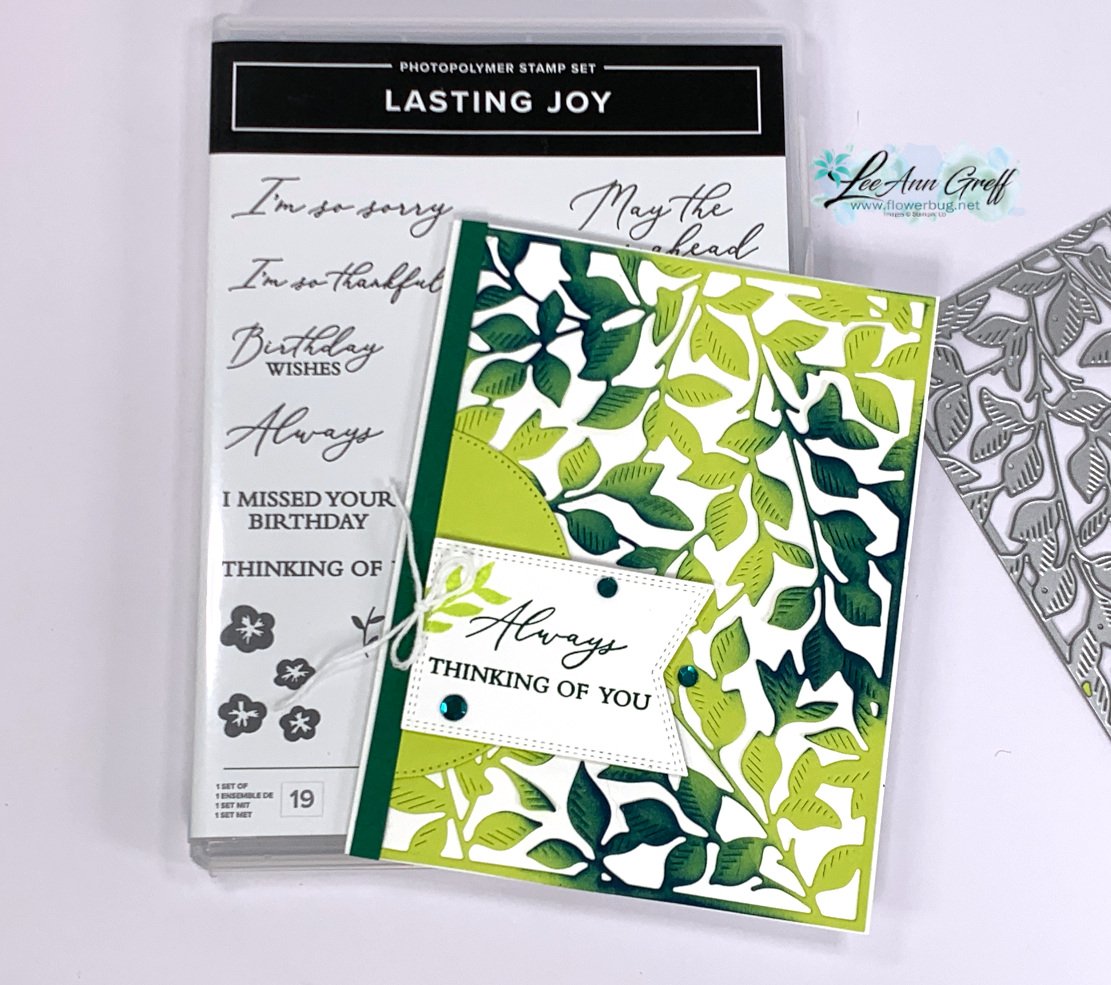
I was surprised that the finished color (after adding Pretty Peacock to Lemon Lime Twist) was close to Shaded Spruce.  Who knew?!  So I added a 1/4" strip to the left edge of the card to bring in that color and also stamped the greetings in Shaded Spruce too.  

Tip: Adding your colors in two or more ways to your project gives them a cohesive look. For example if I use green card stock I will add a layer of green or a stamped image. If you struggle with choosing color combinations stick with just two colors.  Or better yet try a monochromatic card – add one color to a neutral like white, browns or black.  

I used the Lasting Joy set for my greetings.  I really love this set with the mixed fonts; I find I use it often.  
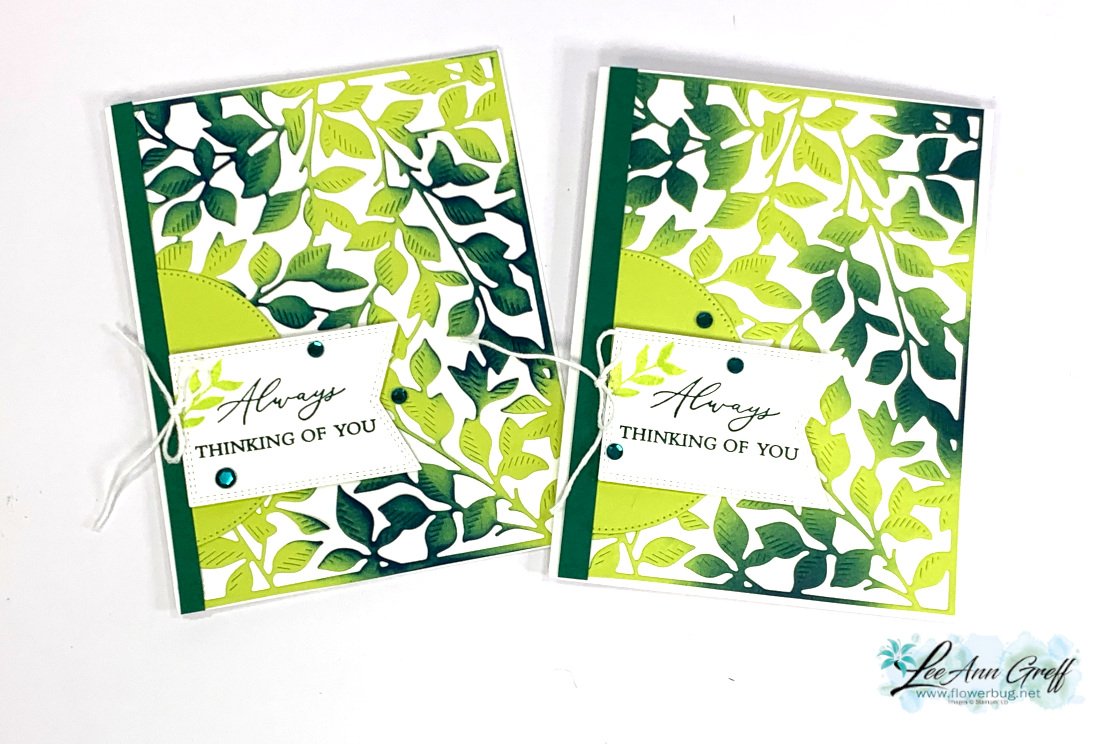
I added a stitched circle to the left side to anchor the greeting.  Both of these dies are from the Stylish Shapes dies; they're a must have! See them here.  

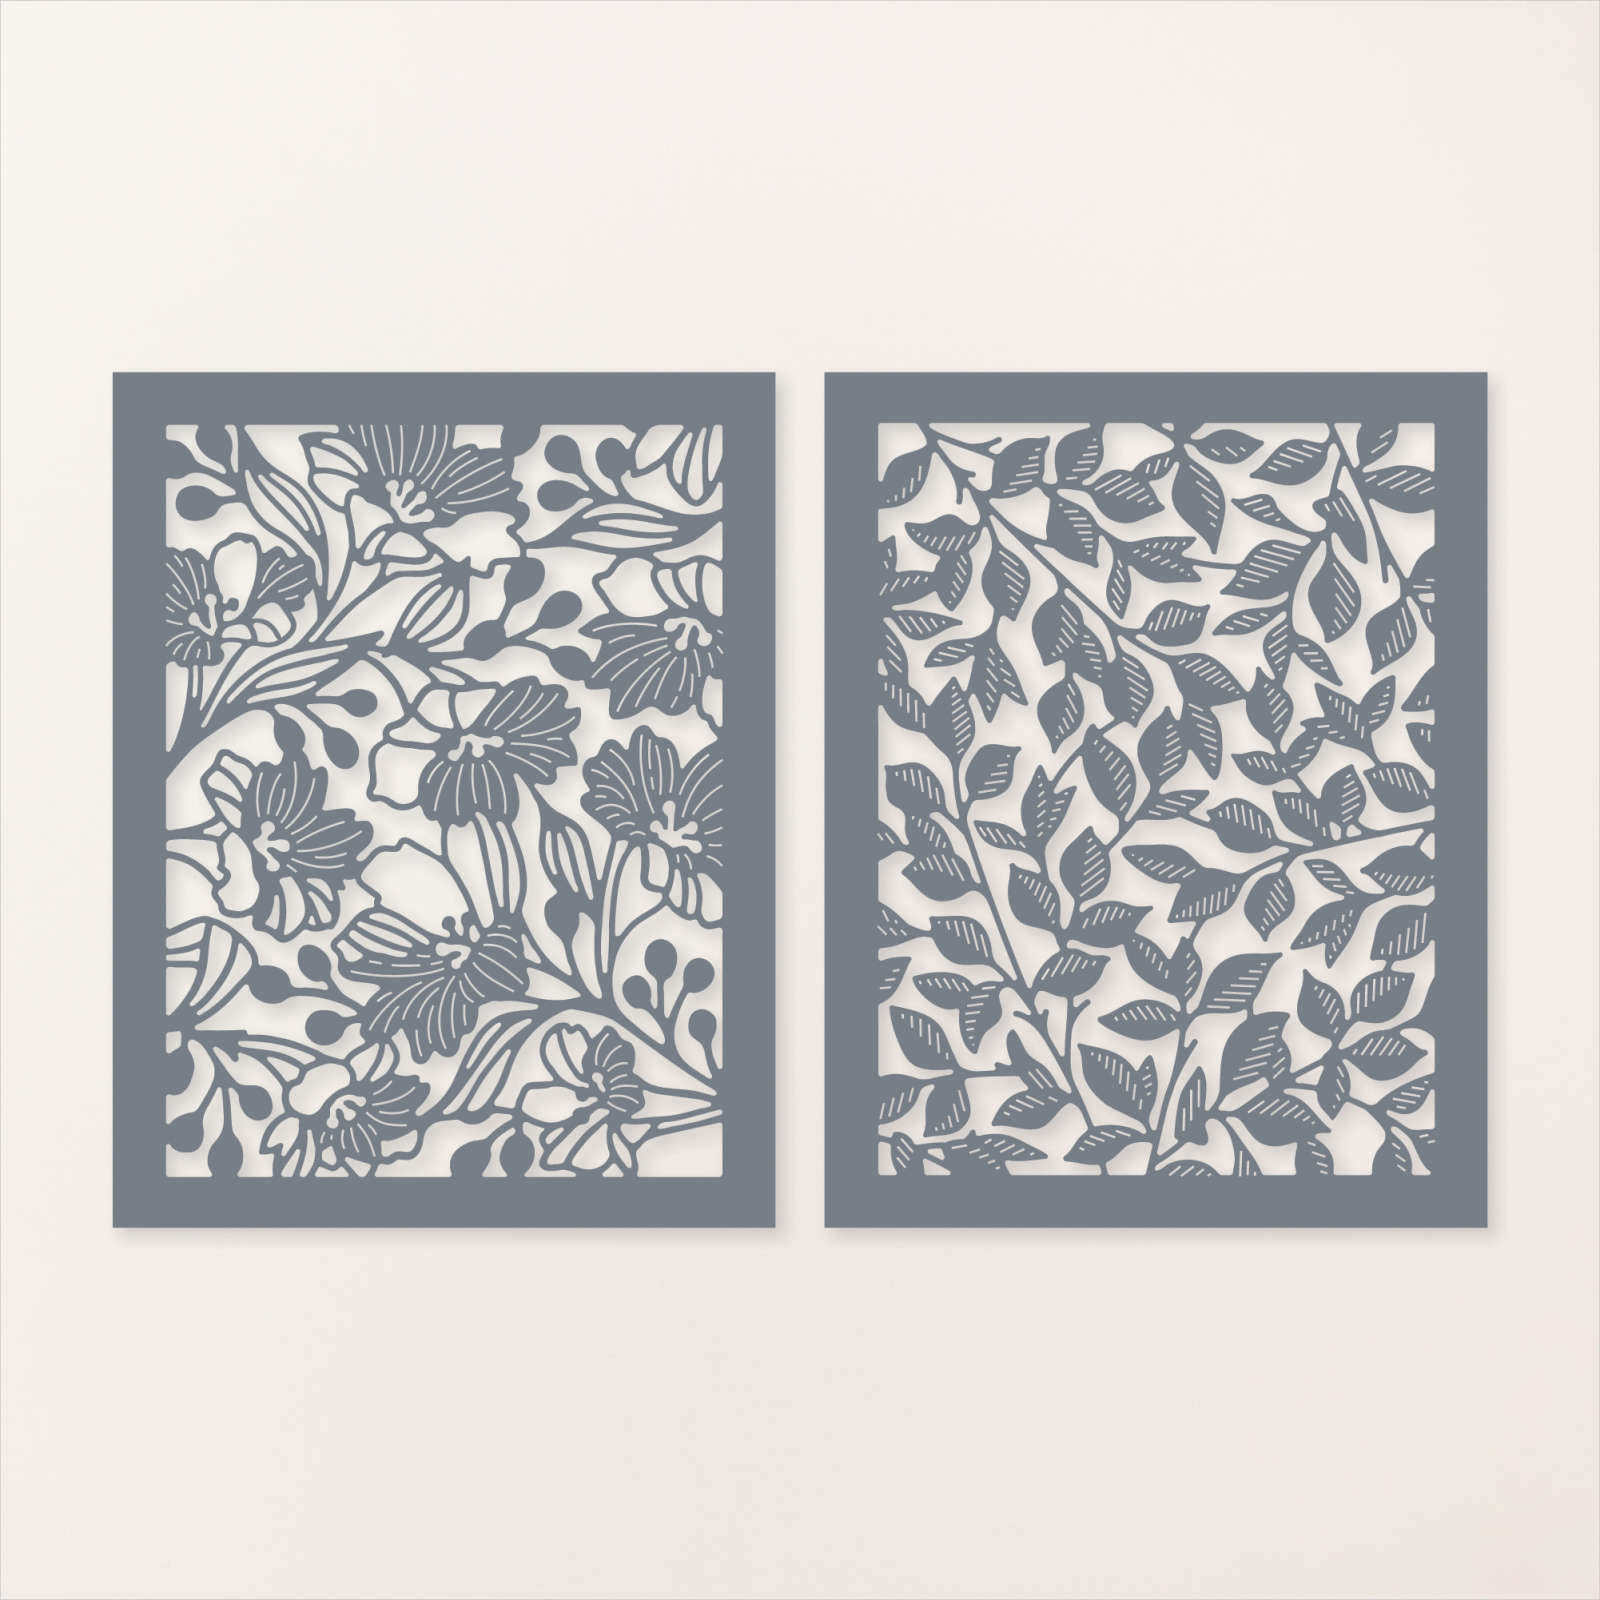
Here are the Gorgeous Garden dies. 
I made these cards on a recent video seen here.  Or click on the photo below to watch.  

Don't forget to follow me on YouTube here or on Facebook here. 

 ~~~

August Specials: 

 *current host codes: KY99RPXP 

Free Gift with orders in August: 

Get a pack of at least 5 beautiful cards with orders over $50 this month. 

The more you order the more cards you get!

*cards are previous card kits to go; over the top and many fun folds.  
All Posts

  • Easy Wildflower Birthday fun fold with free project sheet & video tutorial


    I'm excited to share this card with you today.  

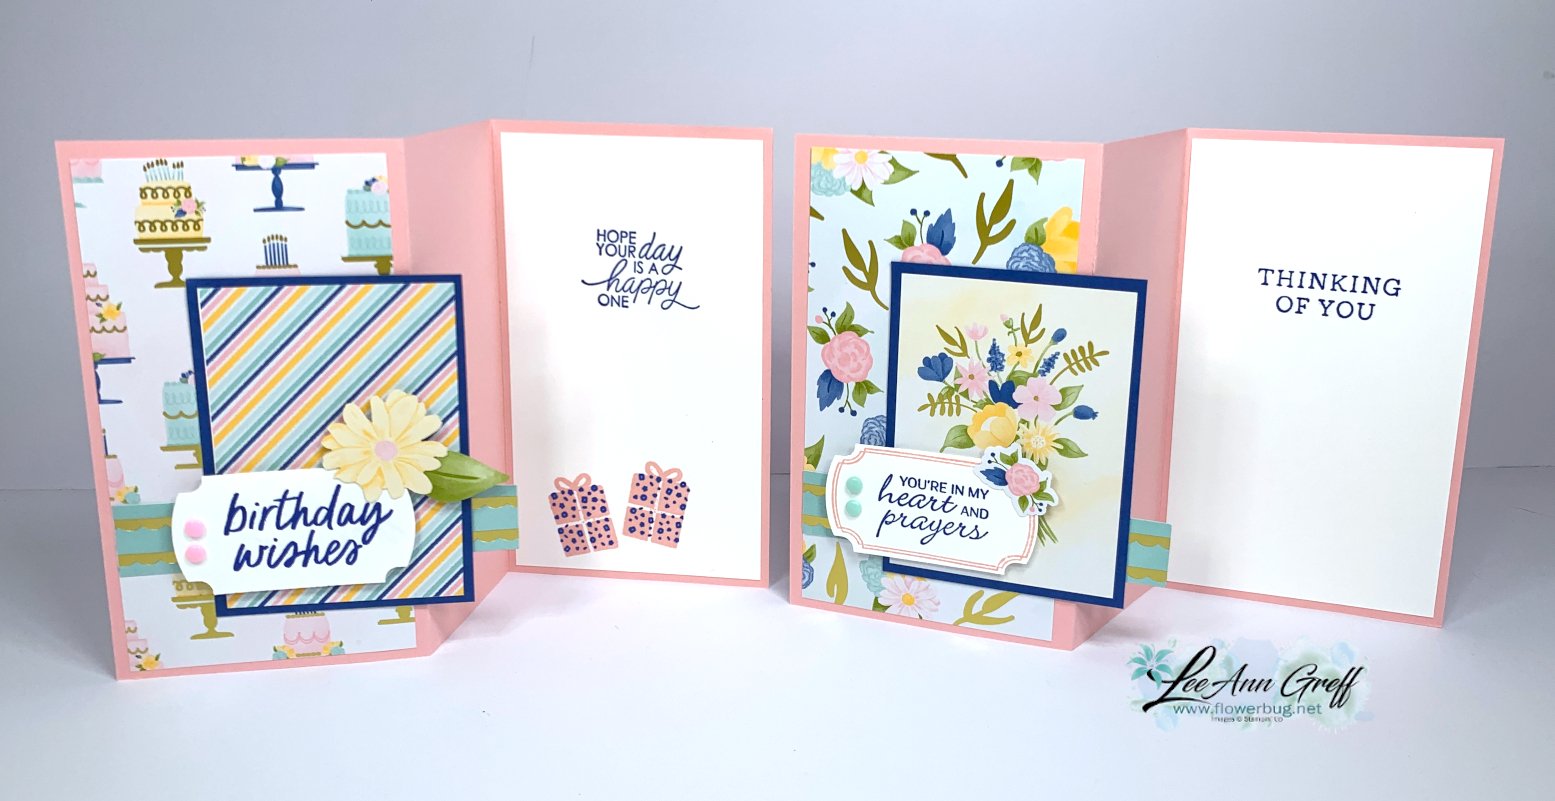
    It's a type of Z-fold but different than I've seen before.  With two quick score lines you have an easy & unique card fold! I love how this card gives you three ways to show off our coordinating DSP.  

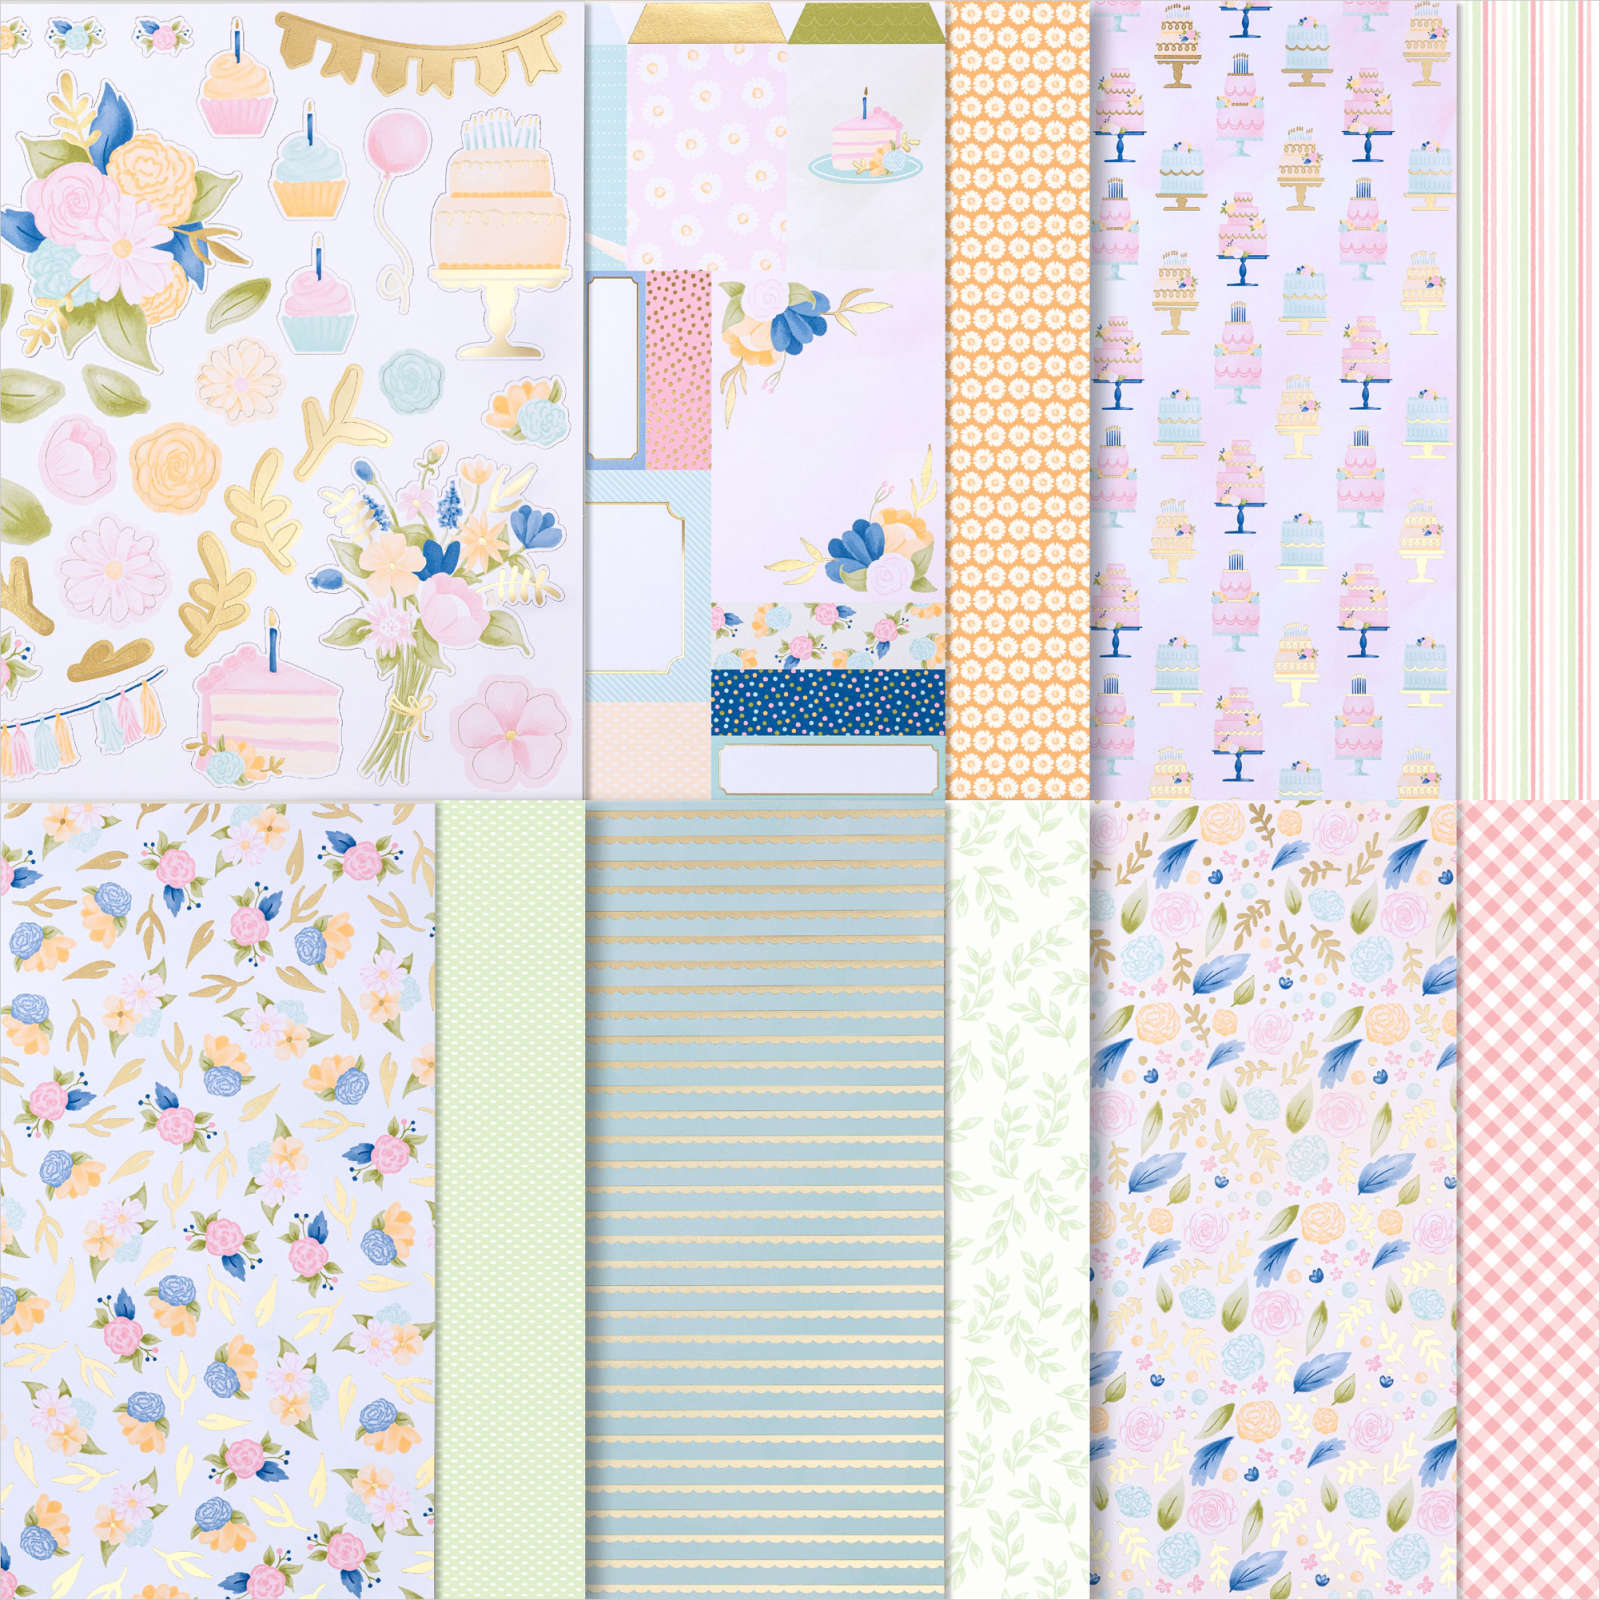
    I featured the Wildflower Birthday specialty designer series paper on these pretty cards.  It's filled with floral & birthday prints with splashes of gold foil.  It also comes with 2 sheets of die-cut elements as shown below which allows for super quick creating.  See it here. 

    I still have a few of my pre-cut kits to go available with this pretty DSP or the PDF tutorial. See it here. 

    Here's how the cards look fully opened.  For greetings I used the So Sincere which is retiring & Simply Said which is carrying over. 

    There's a free project sheet with measurements, photos, supplies list and directions.  Click on the following link to print or download it.  Remember these project sheets can be used as a starting point with whatever products you own! Download Wildflower Birthday April Club

    This stamp set just sold out but the Labeled with Love punch is carrying over into the new catalog.  


    And here's the video below. Besides this card I created another similar card with just a few adjustments to the original.  

    ~~~

    April Specials

    Reserve the In Color bundle by May 6th!


    Don't miss the deals in the Last Chance list here!


    *host codes have been discontinued; no need to add one. 

    Now you'll earn host rewards on all orders over $20!

    ~~~  

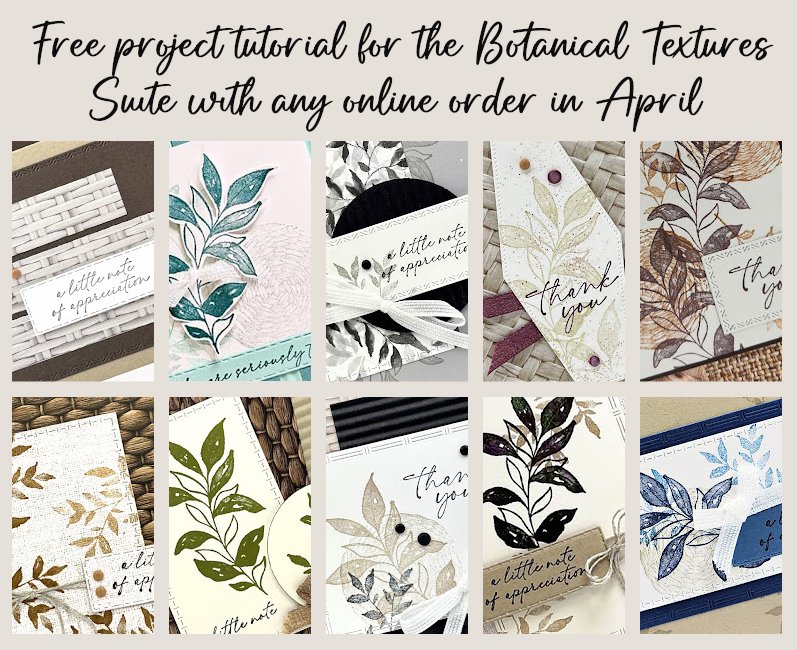
    Get a free Botanical Textures PDF tutorial with any online order in April!

    See this gorgeous suite here

    Get a free PDF tutorial of your choice with any order over $55 at my shop here 

    Leave a Reply

    Your email address will not be published. Required fields are marked *

  • It’s here! My In Color bundle offer! Reserve yours by May 6th


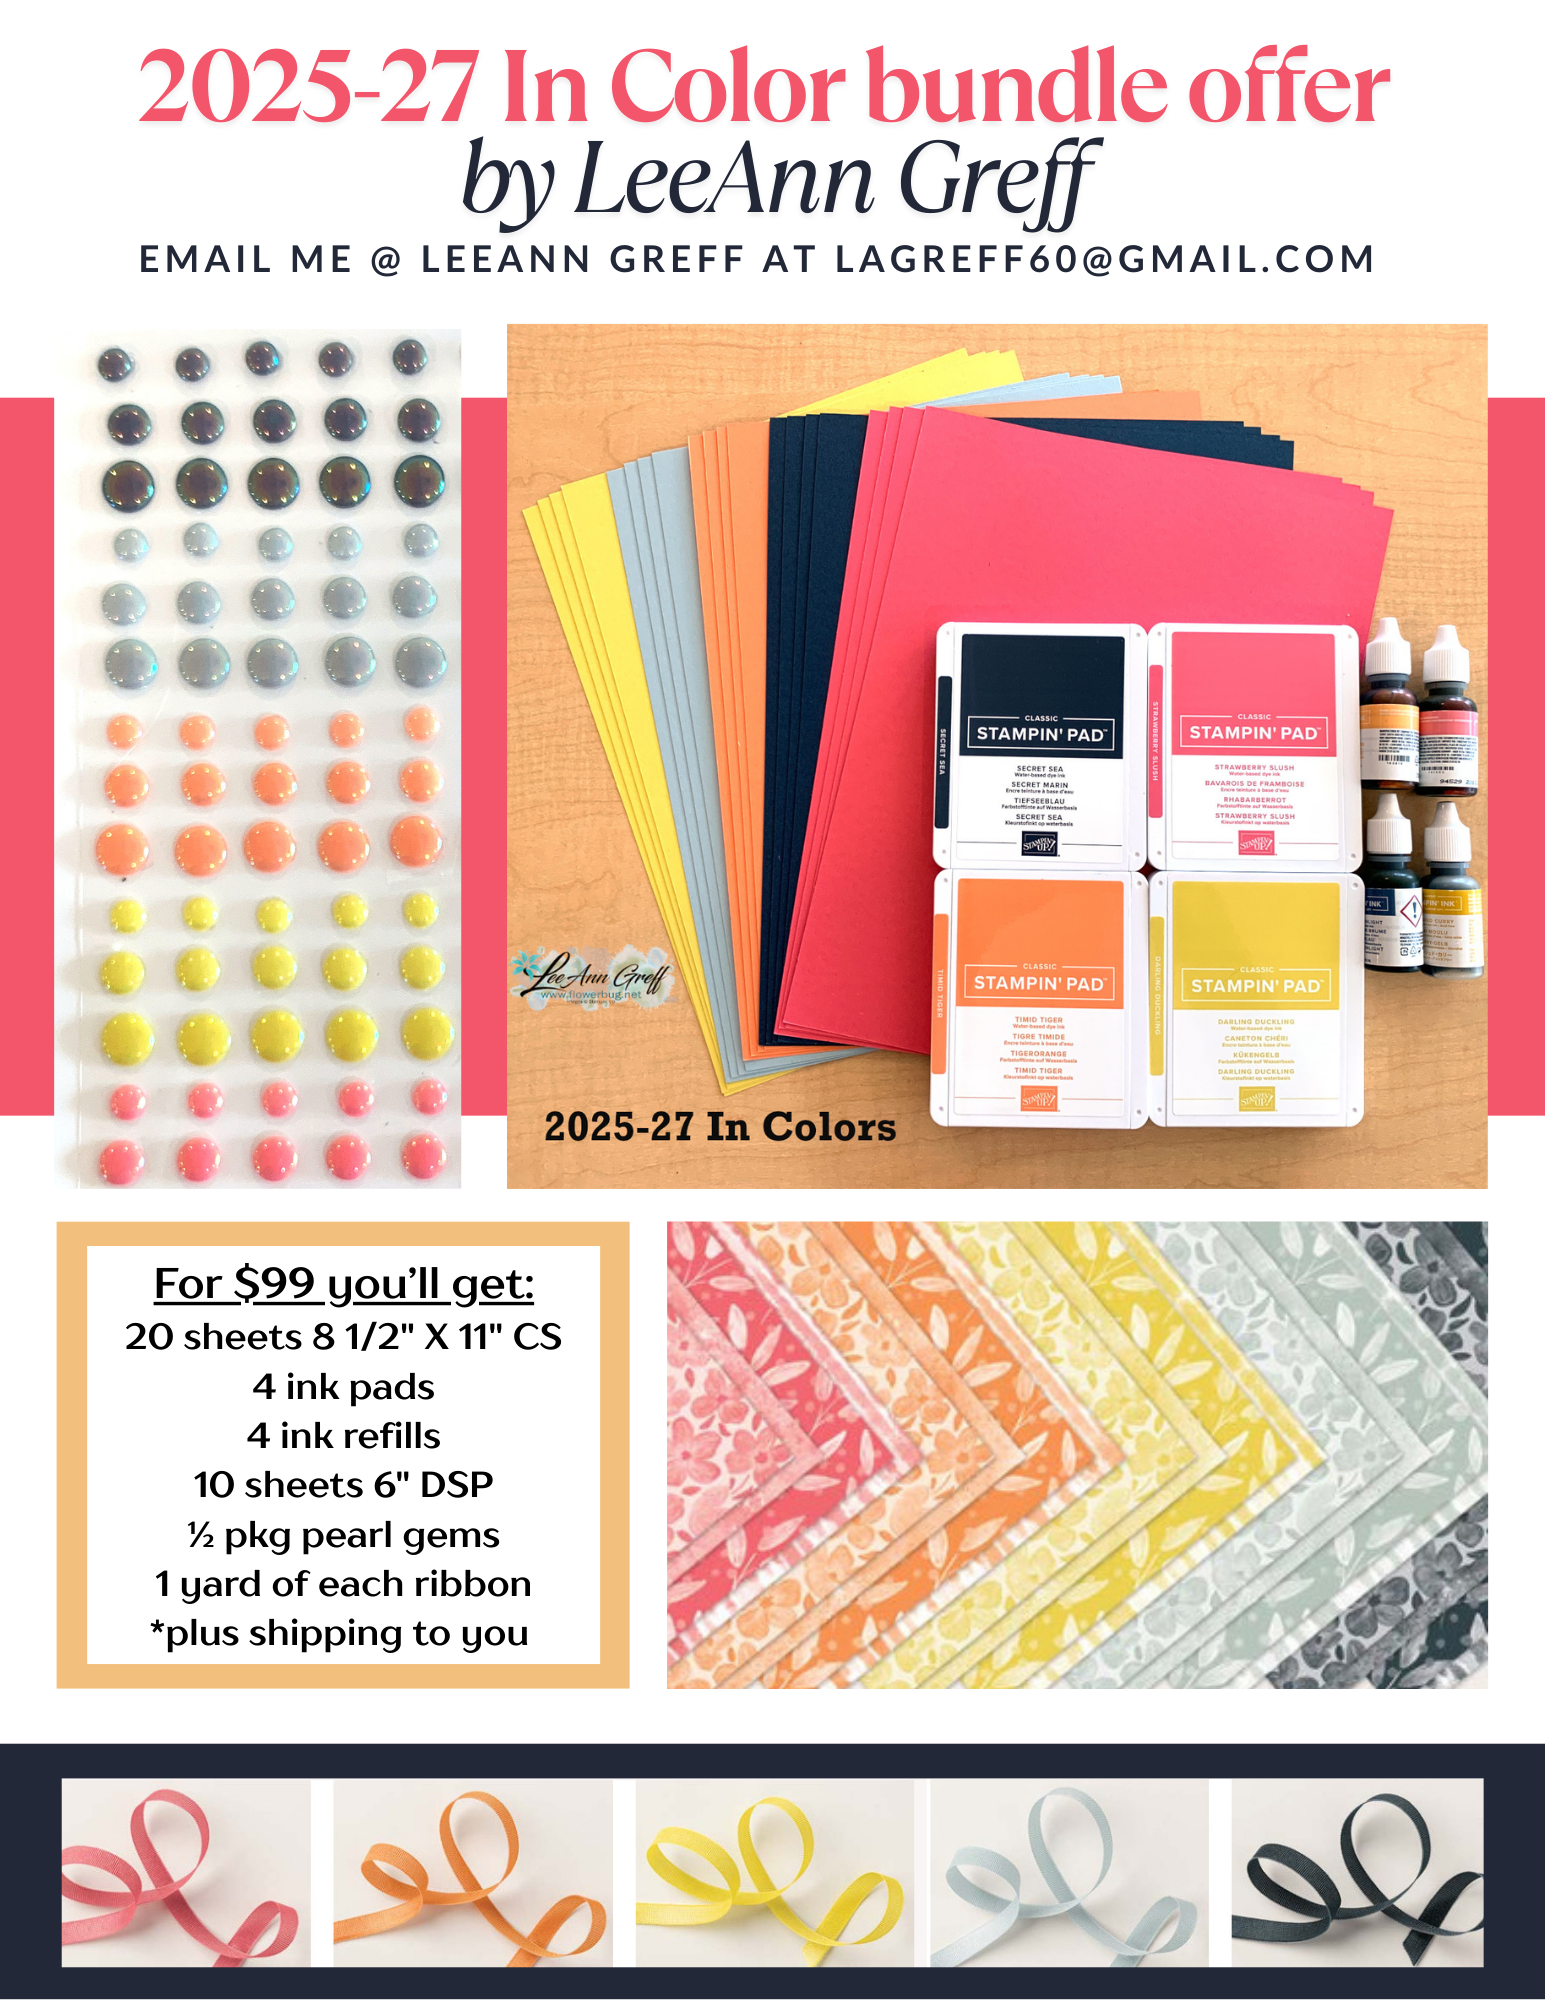
    Each year I offer a package deal with most of the new In Color products.  Reserve yours by May 6th!  

    The advantage of my bundle is that you'll get the products all at once; there's no waiting for each color monthly.

    Details:

    • There are 4 colors of ink available right now. Secret Sea, Strawberry Slush, Timid Tiger and Darling Duckling. Cloud Cover ink pad & refill are currently unavailable. *Lost Lagoon (stamped off once) works well for Cloud Cover ink. 
    • Add on 4 Blends markers and get the 5th one free! 
    • The bundles will ship out around May 21st via Priority Shipping.  

    Payment:

    • Basic bundle is $99 and I'll pay the shipping to you!  
    • Add on the 5 sets of Blends markers and it's $151.50 (one set is free and shipping to you is also free!)
    • Pay via check, cash, PayPal or Zelle 

    Message me here to reserve your bundle.

    ~~~

    April Specials

    Don't miss the deals in the Last Chance list here!


    *host codes have been discontinued; no need to add one. 

    Now you'll earn host rewards on all orders over $20!

    ~~~  

    Get a free Botanical Textures PDF tutorial with any online order in April!

    See this gorgeous suite here

    Get a free PDF tutorial of your choice with any order over $55 at my shop here 

    Leave a Reply

    Your email address will not be published. Required fields are marked *

  • Last day of FREE shipping! More Team card swaps too


    Today is the last day of the free shipping promotion; don't miss out on the savings! 

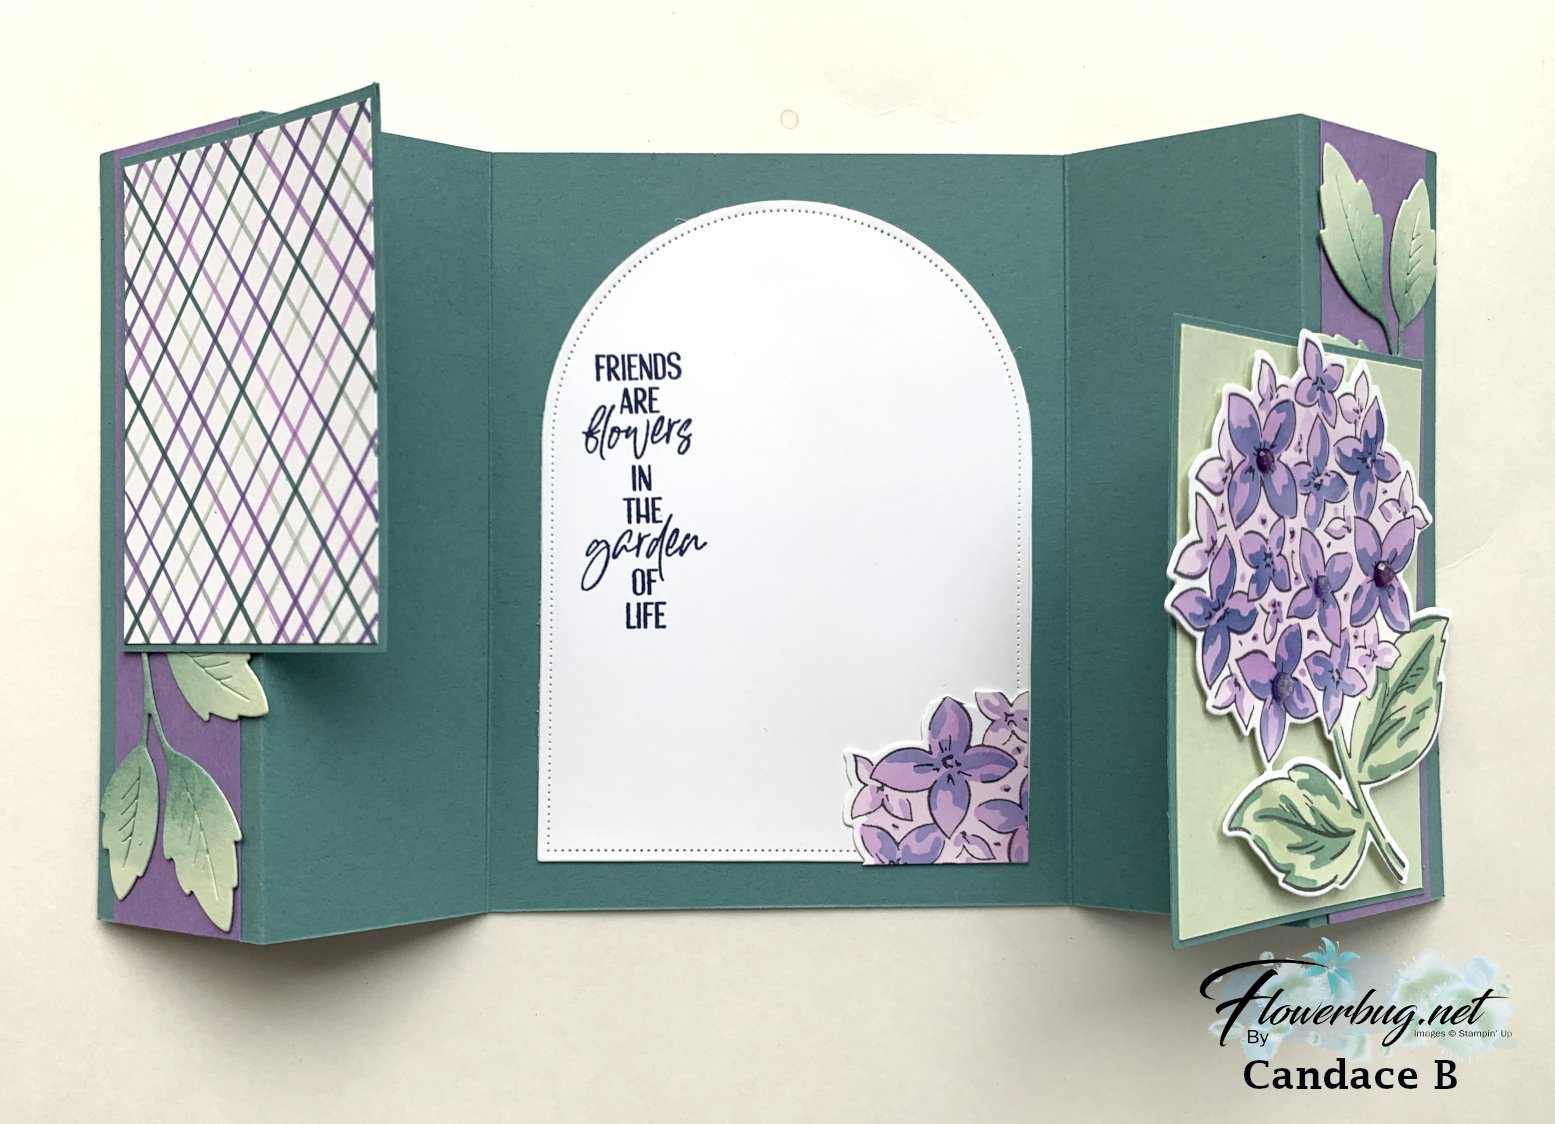
    Today I'm sharing two incredible fun fold swaps from our Team card swap this month.  The theme was to feature plaid. 

    Candace created her own plaid using markers on the upper left panel.  Wow!  He also used the Thankful Garden bundle for her flowers and leaves. This bundle includes dies and masks!  See it here.  

    I love the sponging she did on her die-cut leaves.  Her colors include Lost Lagoon, Soft Sea Foam and Highland Heather.  The inside die is from the Arches dies – currently unavailable unfortunately.  

    Measurements:

    • card base 10 3/4" X 5 1/2" sc0re at 1 5/8", 3 1/4", 7 1/2" & 9"
    • left panel 2 1/2" X 3 1/2"; right panel 2 7/8" X 3 7/8"
    • purple side panels 1 1/4" X 5 1/2"
    • left 'plaid' panel is 2 3/8" X 3 3/8"; right panel is 2 3/4" X 3 3/4"

    ~~~~

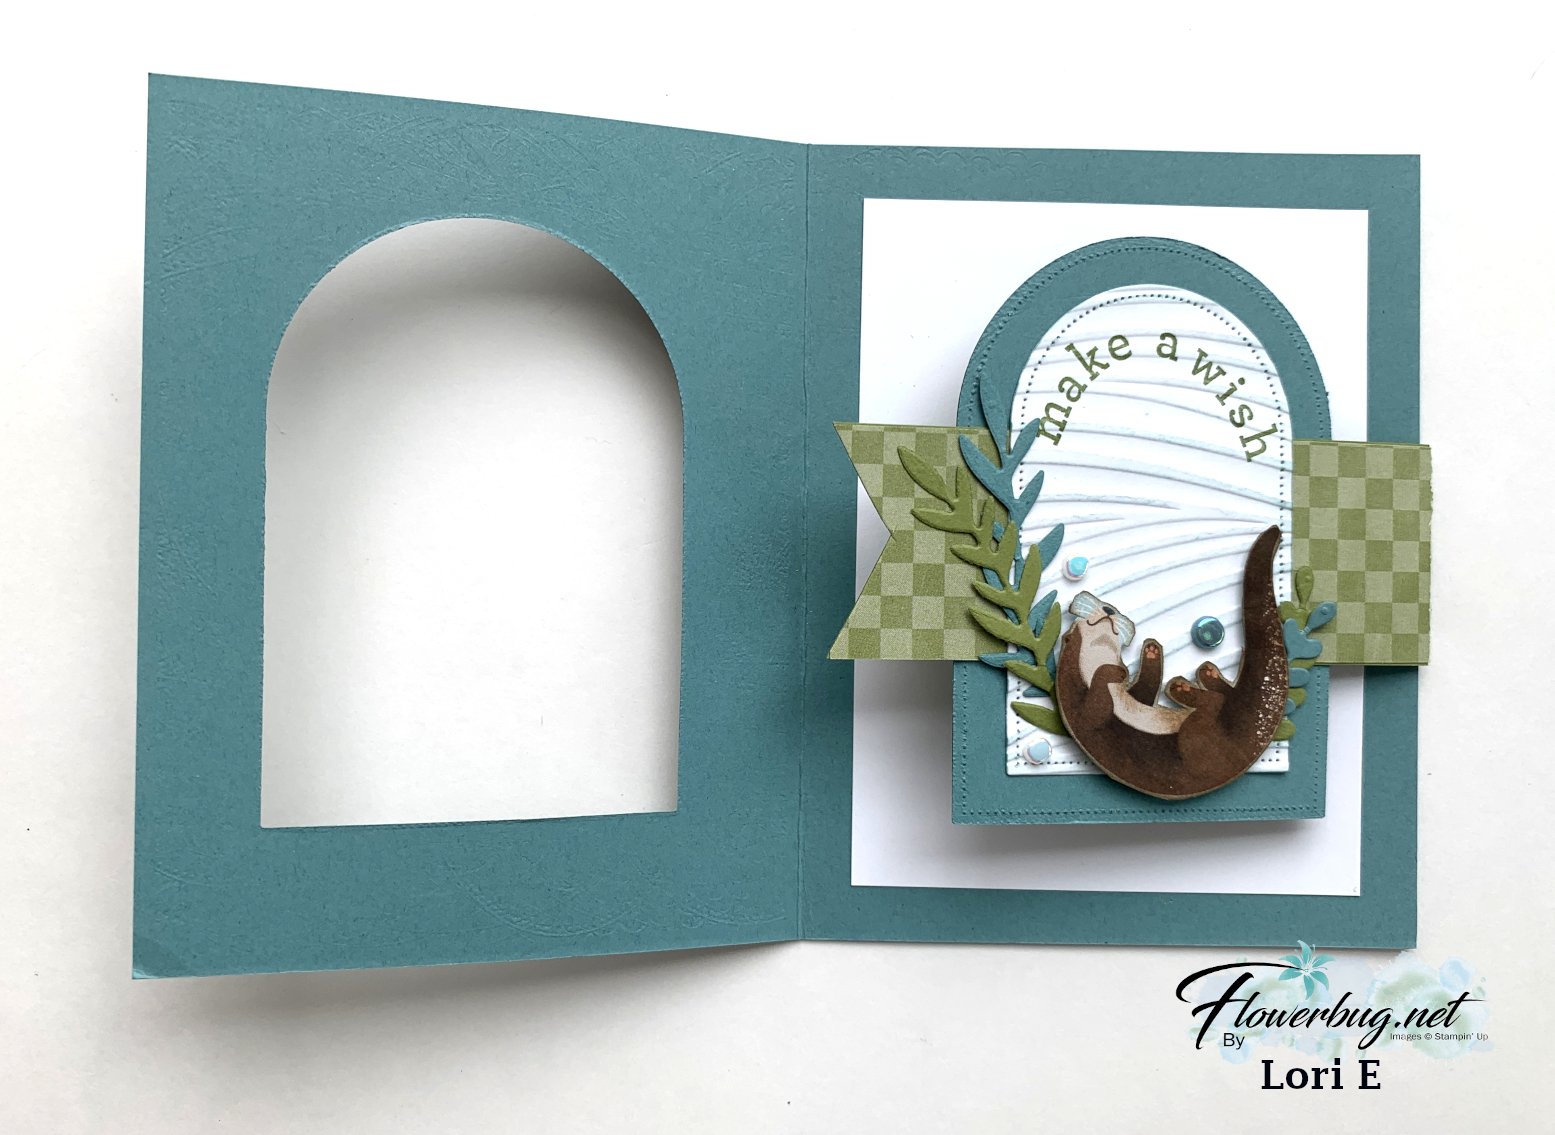
    Next is an adorable fun fold made by Lori.  


    Note how the front panel with the checkered banner is outside the left side of the card. 

    She used the Timeless Plaid & Otterly Adorable DSP here as well as the Arches dies.  Inside you'll find the Soft Waves embossing folder with a bit of sponging to catch the texture.  

    And it opens yet one more time!  I love how she added details to every layer on each side.   Her greetings are from the Everyday Arches bundle and Arched Wishes set.  

    Measurements:

    • card base 8 1/2" X 5 1/2"
    • White inside 3 1/2" X 4 3/4"
    • DSP – front panel is 4" X 5 1/4", checkered flap is 4 3/4" X 1 1/2" scored at 4 1/4" 

    ~~~

    April Specials

    Don't miss the deals in the Last Chance list here!


    *host codes have been discontinued; no need to add one. 

    Now you'll earn host rewards on all orders over $20!

    ~~~  

    Get a free Botanical Textures PDF tutorial with any online order in April!

    See this gorgeous suite here

    Get a free PDF tutorial of your choice with any order over $55 at my shop here 

    Leave a Reply

    Your email address will not be published. Required fields are marked *


Notice: LeeAnn Greff, Independent Stampin’ Up! Demonstrator, Manager. The content of this website is my sole responsibility as an independent Stampin’ Up! demonstrator and the use of, and content of, the classes, services, or products offered on this website is not endorsed by Stampin’ Up! Copyright 2025