/


Latest Post

Gorgeous cards with my ‘5 at a time’ templates! Free project sheet, templates & video tutorial


I shared these beautiful cards on last week’s Live video. They were a big hit!

I love making cards with my 5 at a time templates. Making the most of my card stock gives me a great deal of satisfaction. I hope you’ll save these templates and use them in your own crafting.

Below is the template I stamped on; it’s slightly smaller than the one I used for layering. I often use this or the larger one for the neutral layers inside my cards.

Tip: I recommend making your first cut vertically at 4 3/4″. Then cut the left 3 pieces into 3 1/2″ layers. Once you cut all 5 pieces you’ll have one small piece left for a greeting or for punching.

Next is the template for layering the above ‘stamped’ pieces on. It’s just slightly larger – 1/8″ so it’s quite a narrow margin.

The above template has even less waste! It’s so nice to get 5 layered card pieces from 2 sheets of 8 1/2″ X 11″ card stock. Please save these templates!!

In the past when I made cards with these templates I stamped before cutting the 5 pieces apart. This was a bit tricky to stamp in the right place. This time I cut my pieces before I stamped on them. *Always start with your greetings!

As you can see I made sure I stamped three pieces landscape and two vertical. This isn’t necessary but it does change your cards up a bit.

I used Cherry Cobbler, Timid Tiger; and Pretty Peacock here. I like adding Pretty Peacock and Cherry Cobbler to my fall cards. The stamp set is called Gathering Moments seen here.

Tip on stamping – always stamp the greeting image first. Then start with the largest image and work your way down to the smallest to fill in any gaps. It’s okay to overlap your images.

As you can see I blended a light wash of Timid Tiger over the stamped leaves. This softens the appearance and truly enhances your stamping.

Here you can see the stamped pieces added to the larger layers from the 2nd template above.

These were made simply with no punches or die-cuts. Sometimes it’s fun to just stamp and create. You can easily add the greetings on another layer (punches or die-cuts) to add more dimension.

I’ll share my second set of cards using this template later this week. And I’ll also show the fabulous card box I made to gift them in!

See how pretty they are once they’re added to the card bases and gems and twine have been added.

I created a free project sheet that includes directions, photos, templates and supplies. Click here to download or print it. Please save this one!!

Below is the video tutorial. Please subscribe to my YouTube Channel while you’re there.

~~~

  To see all of the new Online items click here.  Or download & save the Download Online Exclusives flyer 

Get a free project tutorial with any online order in September! 
All Posts

  • More Team swaps!


    Here are a few more of the Team swaps featuring brand new catalog products.

    Jacki created this striking card with the Scalloped Blooms bundle seen here.

    Her colors include Melon Mambo, Black & White. Those scalloped circle dies are so fun aren’t they? The leaf die-cuts are from the Delicate Whispers dies seen here.

    Next is a striking card made by Joan: She chose to highlight the Scenic Coast DSP.

    She also used the Relaxing Waterside bundle seen here. Love that chair! As you might guess, it’s a fun fold ‘bridge card’.

    Super cool! To make this card you’ll start with a 5 1/2″ X 8 1/2″ card base, scored at 4 1/4″. Now use the paper trimmer to cut up to the score line on each side at 1 1/4″.
    The DSP is 2 3/4″ X 4″ and on the sides it’s 1″ X 4″. There’s also a lower and an upper strip that is 5 1/4″ X 1″.

    Great cards ladies! I’ll share more later this week.

    May Specials:

    I have one Mystery Box left! The first person to place an online order from me over $100 will receive it.
    It has over $200 in Stampin’ Up! products in it and I’ll ship it to you FREE! Order here.

    Don’t forget to consider the Starter Kit Deal in May; time is almost up!

    You’ll get either all 5 new Magnetic ink pads or an extra $35 in product of your choice; all for $99!

    Leave a Reply

    Your email address will not be published. Required fields are marked *

  • Kits to Go Clearance sale starts today! While supplies last!


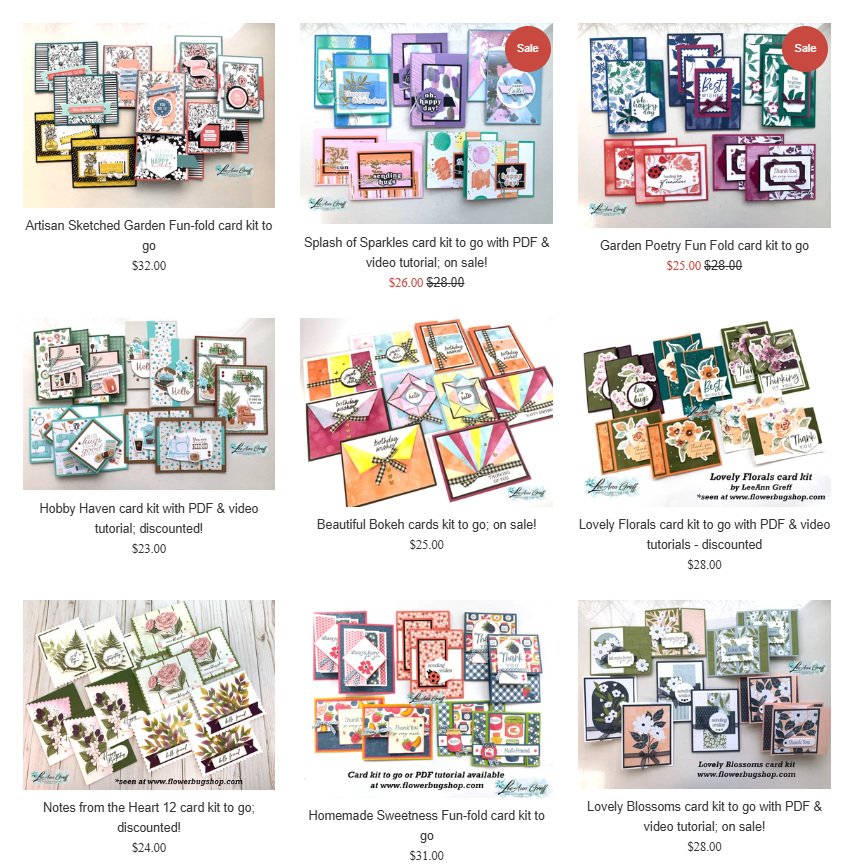
    I have 14 available kits to go right now and I’ve marked most of them down to de-stash my stock. I want to clear them out before we move in a month.

    Be sure to check them all out here.

    Even if they don’t have a ‘Sale’ icon most are still reduced in price. My kits include about $20 in SU product plus the 10-12 pre-cut cards! Most only need greeting images added. You will need adhesives, ink and a paper trimmer to cut the DSP in most cases.

    These are a steal of a deal!

    They’re so fun to create with and many come with both PDF & video tutorials too. Most will include fun fold layouts and you’ll find new ways to create with my unique layouts.

    Shop all tutorials and kits here.

    Leave a Reply

    Your email address will not be published. Required fields are marked *

  • Beautiful swaps with NEW products!


    We held out Team card swap Saturday and I want to share some of these awesome swaps they made. Our theme was to use new catalog products. This swap was ‘shoebox’ style so we made each other’s cards in person. I love shoebox swaps!

    Tracey created this special card using the new Peaceful Pine in color. She paired it with Cloud Cover and Berry Burst here.

    Look at that stamped panel; it is NOT designer paper! She stamped it because she loves to create with our stamps. And she finds it fun to create unique color combos too. She used the stamps from the Boutique Blossoms bundle seen here.

    The Heirloom Boutique suite is one that Stampin’ Up! says will remain current for a year! I love knowing this; it helps when you join swaps and post projects for customers.

    Here I stamped the outline image in 1st generation ink and the inside of the flower and leaves in 2nd generation ink. *that means stamped off once.

    A fabulous card Tracey!

    ~~~~

    And here is Lori’s neat pop-up fun fold card:

    It had three layered panels that pop up from the card front. Very cool!
    It also features the Bloom Boutique suite seen here. It was hard to get a good photo of this fun fold card that she cased from Susan Campfield. The die-cuts on the front are cut from the new 2026-28 In Color Pearlized Specialty paper seen here.

    Here are the measurements:

    Card Base 8 1/2″ X 5 1/2″ score at 4 1/4″
    Flaps – center is 3″ X 5 3/4″ score at 3/4″, 1 1/2″, 4 1/4″, 5″
    top & bottom flaps 3/4″ X 5 3/4″ score at 3/4″, 1 1/2″, 4 1/4″, 5″
    Inside panel of DSP 2 1/2″ X 5 1/4″
    DSP – middle is 2 3/4″ X 2 1/2″, top & bottom 1/2″ X 2 1/2″, left & right 1/2″ X 5 1/4″, sides 1/2″ X 2 3/4″, corners 1/2″ square

    What a special card she made!

    ~~~~

    Next is another special fancy fold card featuring the Bloom Boutique specialty designer paper; this one is created by Kim.

    She featured the All Aflutter punch bundle seen here. I’m so happy we have a new butterfly punch again!

    Her card is a spinner card using Baker’s Twine. It’s fun to set up a card like this so when the recipient removed the card from the envelope the circle spins. You simply wind it up before inserting it in your envelope. So cool!

    We added stamped & punched butterflies all over this card; using the newest In Colors. The inside polka dot DSP panel is from the new Painted Patterns 12 X 12″ DSP seen here. It’s available in most of our color families!

    Before the string is added to the crease of the fold you’ll cut the larger circle from the front. She has so many layers on her card; it can be tricky to get the circle die-cut ‘cut’ through the layers. We ran it back and forth the Cut & Emboss machine but it did cut!

    It’s an amazing card Kim!

    ~~~~~

    Need a few new things from the Summer Catalog?
    Be sure to tack on one of the Product of the Month choices for just $5 (once the order is over $75).

    And if you’re already at $75 bump it up to $100 and earn a FREE Mystery Box from me! I have a few left and they’re stocked up with recently retired Stampin’ Up! products valued at over $200! Shop here.

    Leave a Reply

    Your email address will not be published. Required fields are marked *


Notice: LeeAnn Greff, Independent Stampin’ Up! Demonstrator, Manager. The content of this website is my sole responsibility as an independent Stampin’ Up! demonstrator and the use of, and content of, the classes, services, or products offered on this website is not endorsed by Stampin’ Up! Copyright 2025