/


Latest Post

3 FUN ways to use Window Sheets – check out these Team swaps!


Our swap theme for our Flowerbug's Team was to feature either Window Sheets or Vellum on their cards.  The cards were amazing; as usual! 

Today we're focusing on Window Sheets. 

First is a special card made by Lori.  She used the Window Sheet as her card base!  I'm not sure I've ever seen that before…

She used the Cup of Tea bundle and the newest In Colors on her card.  Orchid Oasis, Parakeet Party & Sweet Sorbet.  

She used the Stitched Rectangle dies for her front 'frame'. It measures 3" X 4 3/8" at the largest. She made two frames; one for the front and one for the inside. The die-cut tea cup is also positioned on the front and the back of the front.  

She added a folded White layer inside that opens up.  It's 3 3/8" X 4" folded in half.  
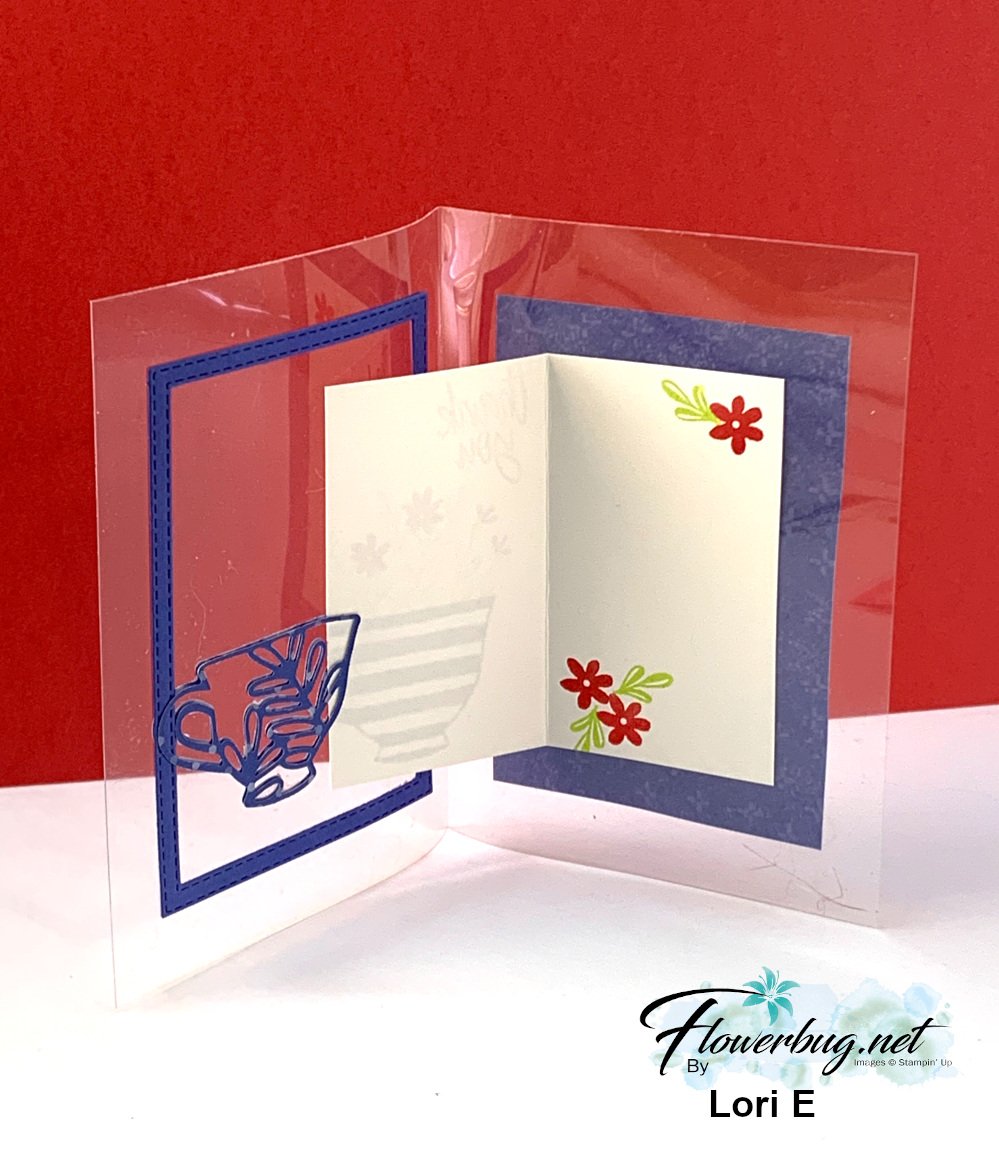
Then on the very back she added a piece of the Tea Boutique DSP that measures 3" X 4 1/4".  Such a unique card!  

~~~

This next card was made by Ginny.  She used the Dandy Designs DSP for her card front.  It's almost monochromatic but there is a bit of Pear Pizzazz and Black too. So pretty!!
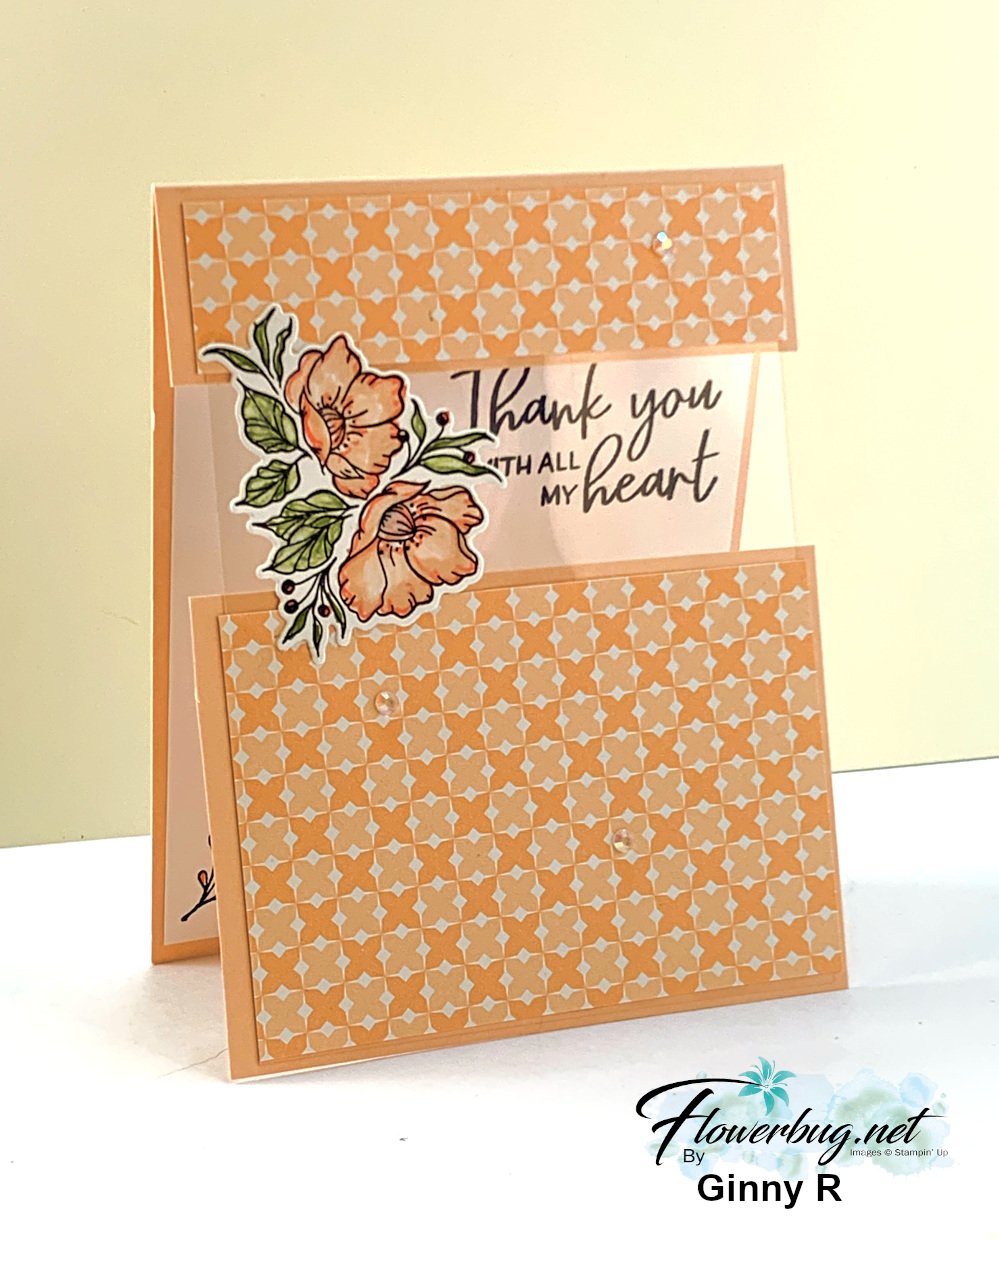

She added a window sheet to bridge the upper and lower layers of the card front.  You can see the greeting through the window sheet.  Her greeting and the pretty floral die-cut is from the Framed Florets bundle.  

Measurements:

  • Card base 4 1/4" X 6 3/4" scored at 5 1/2". Lower card stock layer is 4 1/4" X 3".
  • DSP is 4" X 1" and 4" X 2 3/4"
  • Window sheet is 4" X 2 1/4"

~~~

This next card was made by Paula.  She created a window from her DSP layer, adding Window Sheet behind it and a die-cut flower from the Framed Florets bundle in front. 
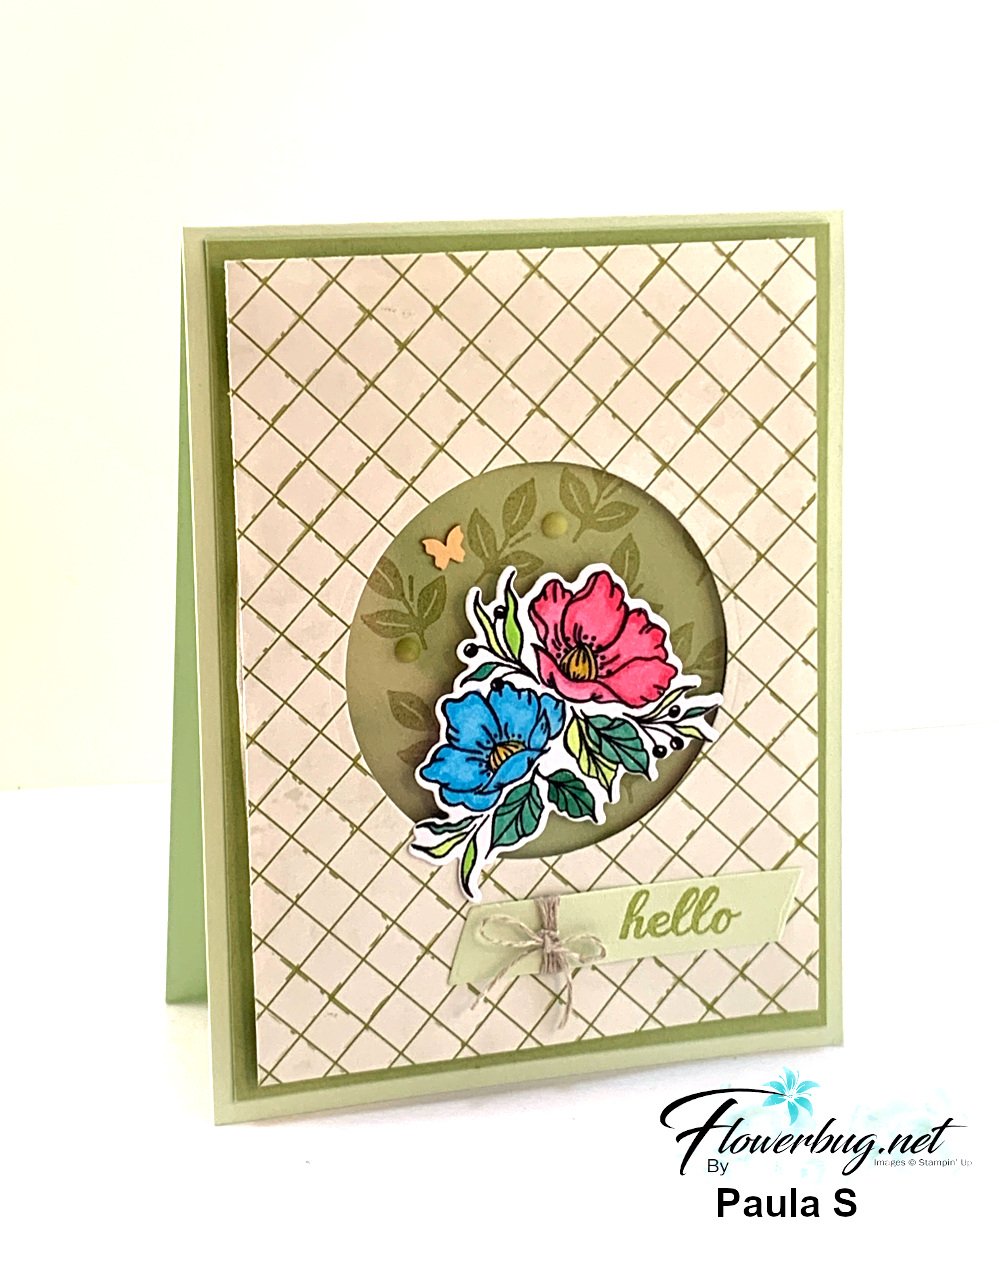
The Designer Paper is called Design a Daydream; it's in the annual catalog and is a big 48 pack for just $18.  You can earn it once your order is over $150 with host benefits. 

I love her wrap of linen thread with a tiny little bow as accent. 

Measurements:

  • Soft Sea Foam card base 4 1/4" X 11" scored at 5 1/2"
  • Pear Pizzazz 4" X 5 1/4"
  • DSP 3 3/4" X 5"
  • Window sheet 3" for the circle opening which is 2 1/2" 

~~~

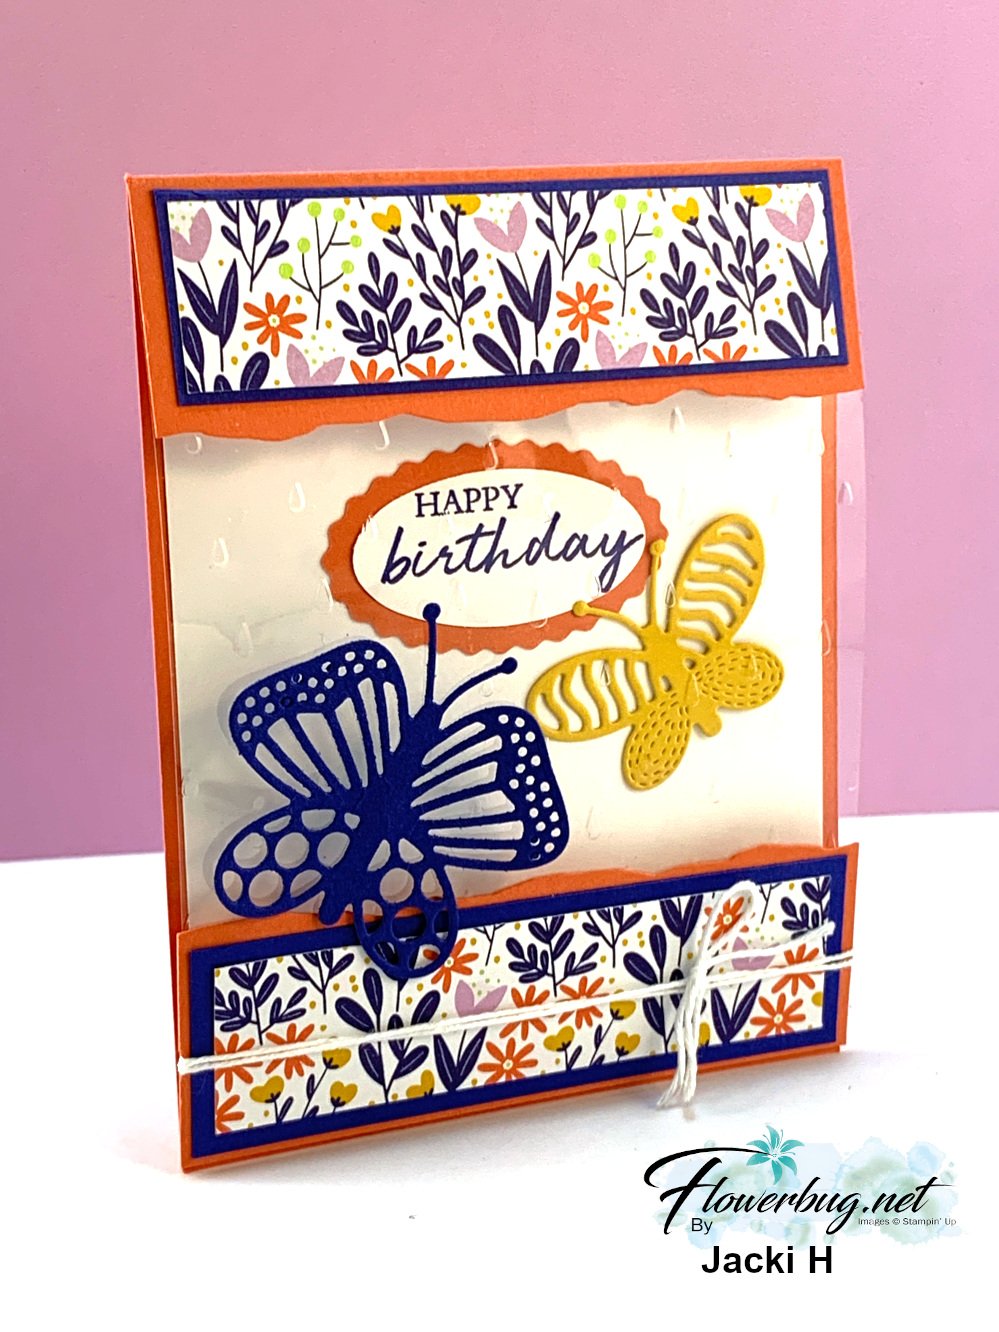
Next is a cute & colorful card that really shows off our Window Sheets! 

Jackie made a type of bridge card where the window sheet allows you to see the inside layer from the front.  
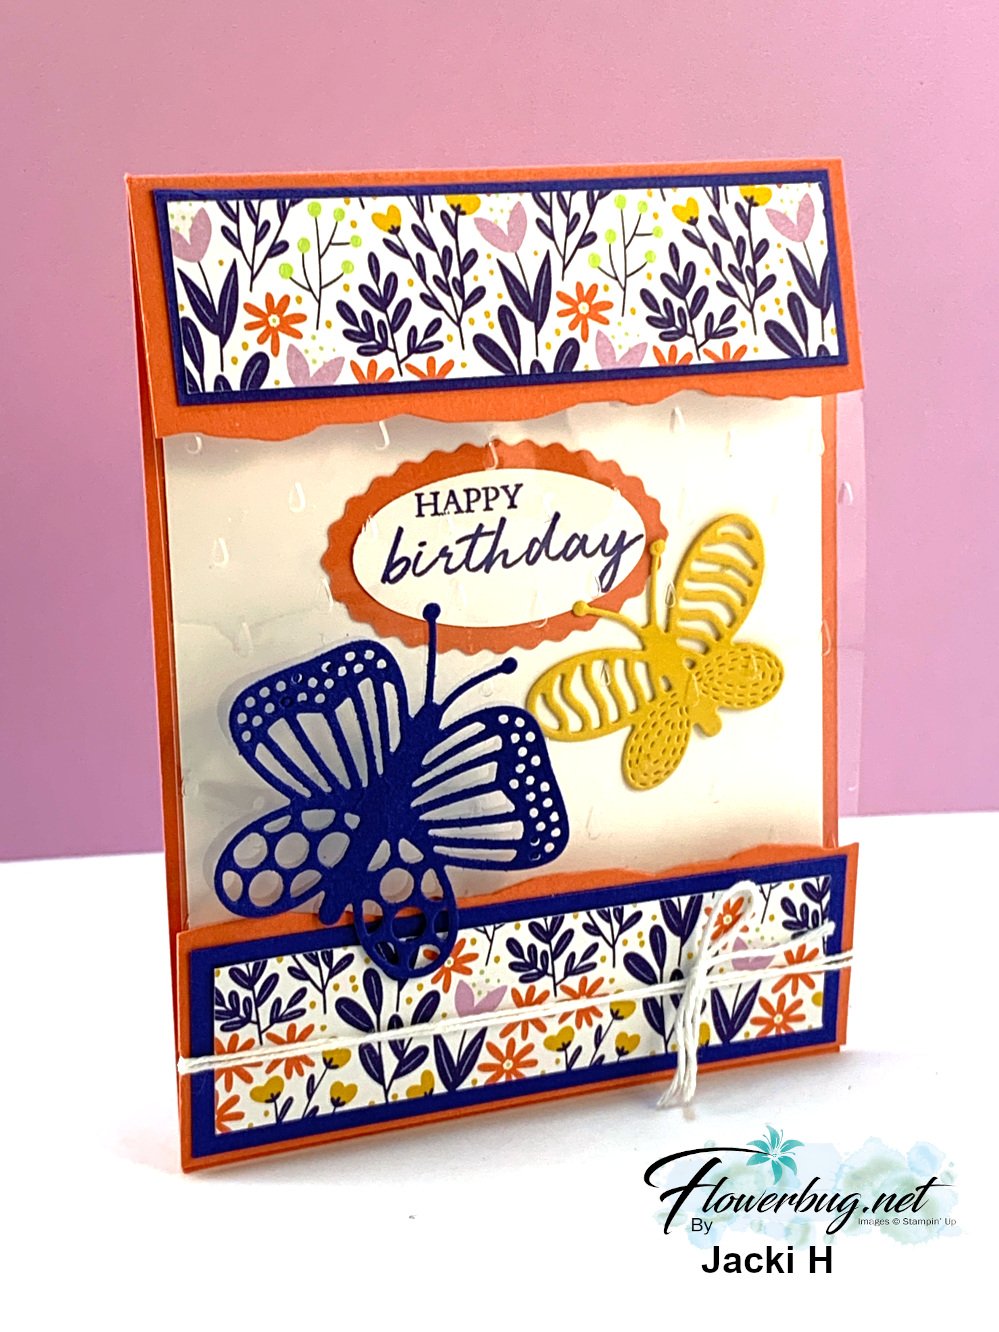
She is featuring the Butterfly Kisses suite here – the Butterfly Kisses 6" DSP and the Build a Butterfly dies. 

Her window sheet is 4 1/4" X 5 1/2" and she textured it with the Raindrops embossing folder from the Spring Catalog.  The lower layers are added to the base. 

Her colors include Calypso Coral, Starry Sky & Crushed Curry. The curvy borders are done with the Seaside Bay dies. Neat effect!  
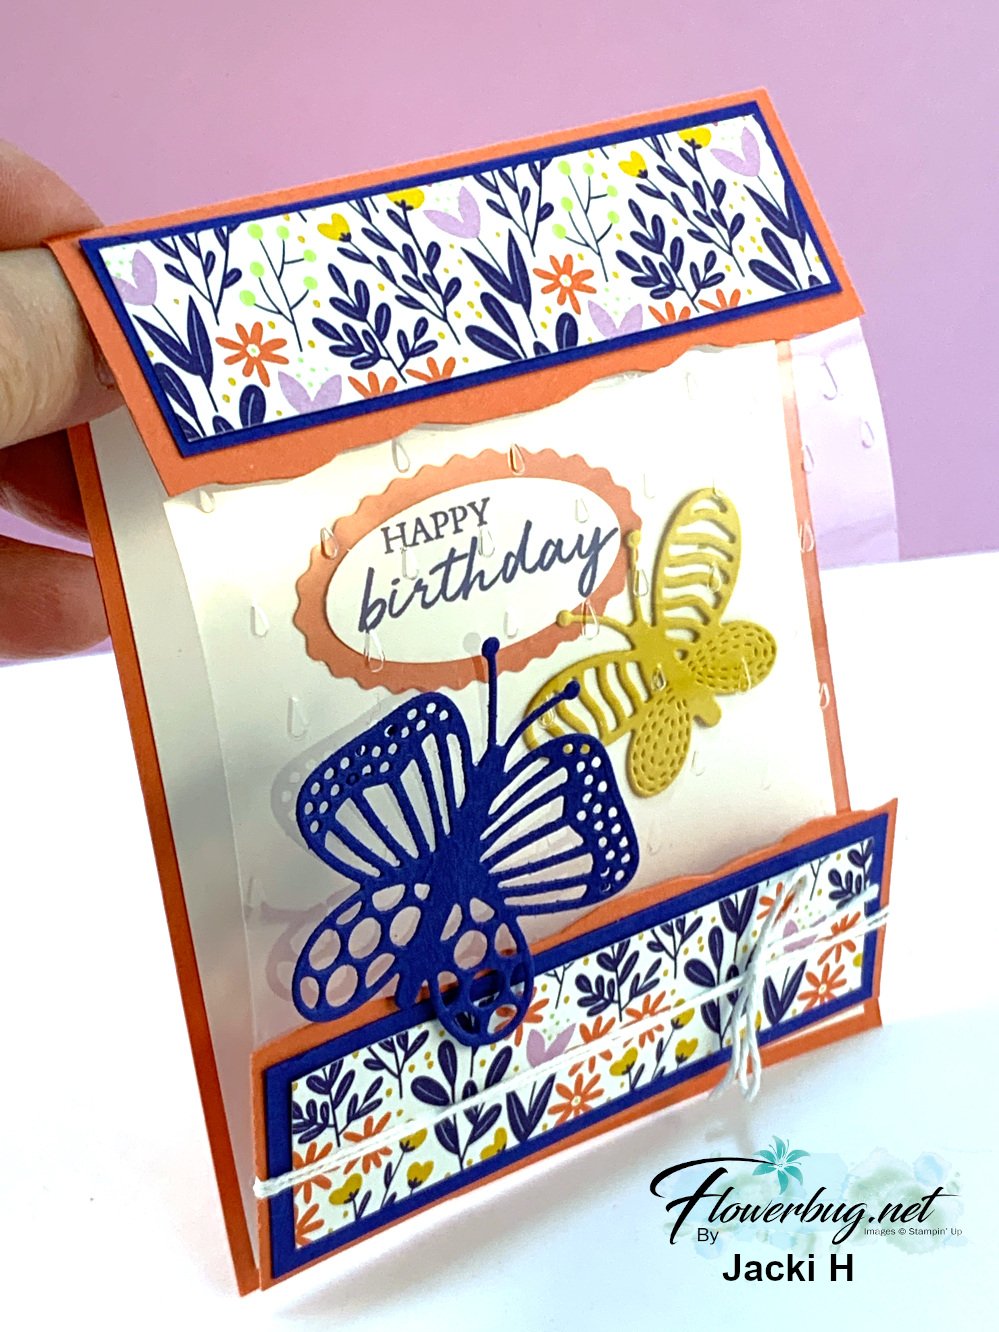
She added the greeting inside the card with the Double Oval punch seen here; it's a big favorite of mine that I had wished for.  

Measurements:

  • Card base 4 1/4" X 7", scored at 5 1/2".  Second Calypso Coral layer for the bottom front is 4 1/4" X 1 1/2"
  • DSP layers are 3 7/8" X 1"
  • Starry Night layers are 4 1/8" X 1 1/4" 

Stay tuned for more swaps soon! 

~~~

February specials:

February Host code links:

  CNV2VCBT or 7EUM6NB9 

Get free Pastel Sequins with online orders over $55 when using the host code above!

 Earn free products with my loyalty rewards! 
Click here to download yours and earn a $50 shopping spree!

~~~

Best Deal Ever on the Starter kit here!

Choose $175 in products for just $129 plus the new mini machine!

Or choose $175 for $99 without a new Mini.  AMAZING!

All Posts

  • Two more card kits & tutorial are now available for pre-order!


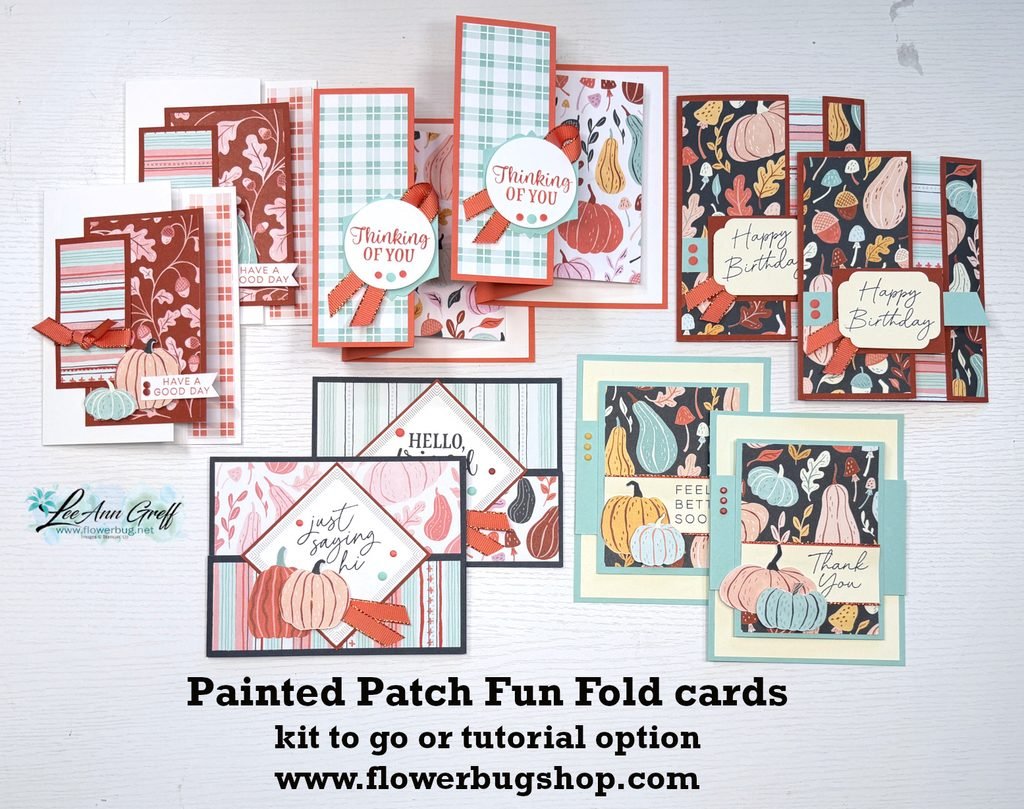
    I chose the Painted Patch designer series paper for one of my October card kits & tutorials (I have 3 this month!). The colors are incredible together and the patterns are fresh & fun. Look at these Fun Fold cards!

    This card kit includes 5 sets of cards and you’ll make 2 of each one. This kit is all unique fun fold layouts.

    I paired the Painted Patch DSP with the Painted Patch gems and the Calypso Coral & Copper ribbon. You’ll get a share of each of these products along with the 10 pre-cut cards and the PDF tutorial. Everything is pre-cut for you except the package of DSP. You’ll use the directions in the tutorial to cut your new paper. It’s so easy to create these cards when it’s all ready to go.

    I create my kits so you do not need a specific stamp set to finish them. All you need are some greeting images and a few inks.

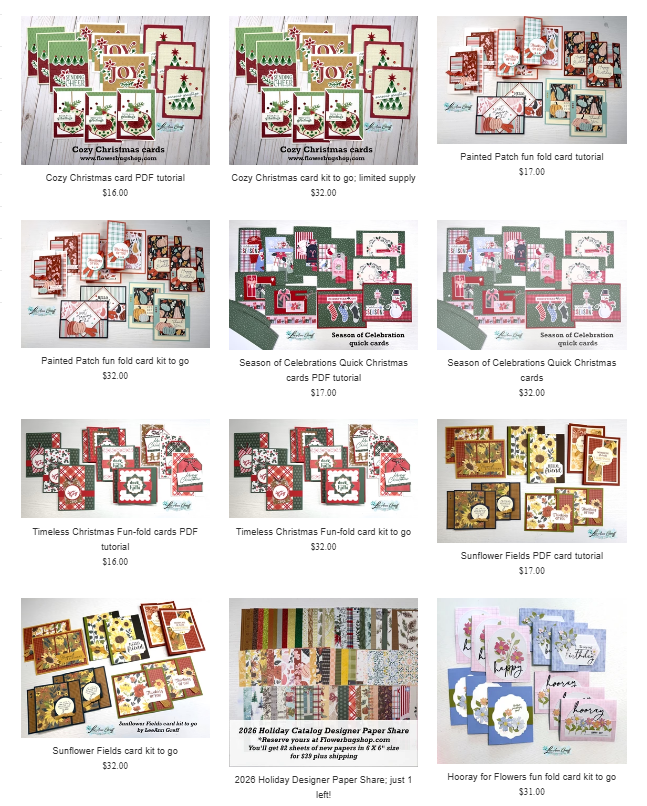
    This kit can be seen here. It’s $32 plus shipping (order more than one to save $$). There is also a PDF tutorial available for $17. See that here.

    The tutorials are emailed to you immediately after payment. The pre-cut kits are mailed out at the end of October.

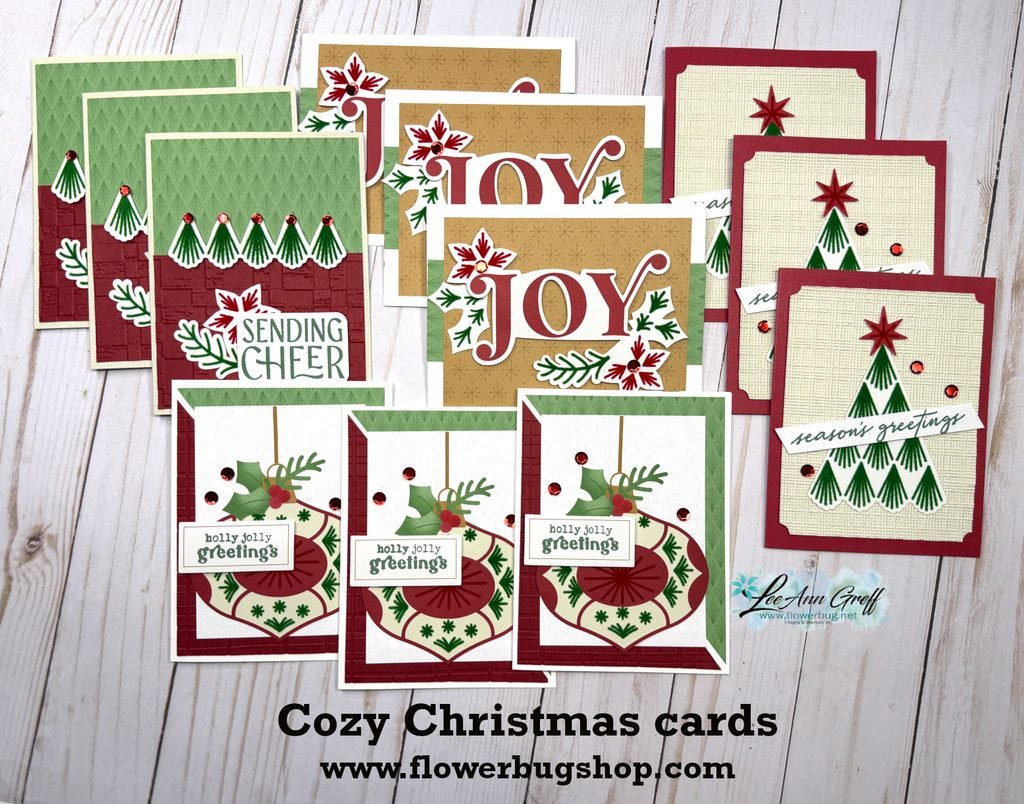
    I’ll share the third card kit tomorrow; it’s a Christmas card kit! Here’s a sneak peek:

    You can see it here on my Shop.

    Leave a Reply

    Your email address will not be published. Required fields are marked *

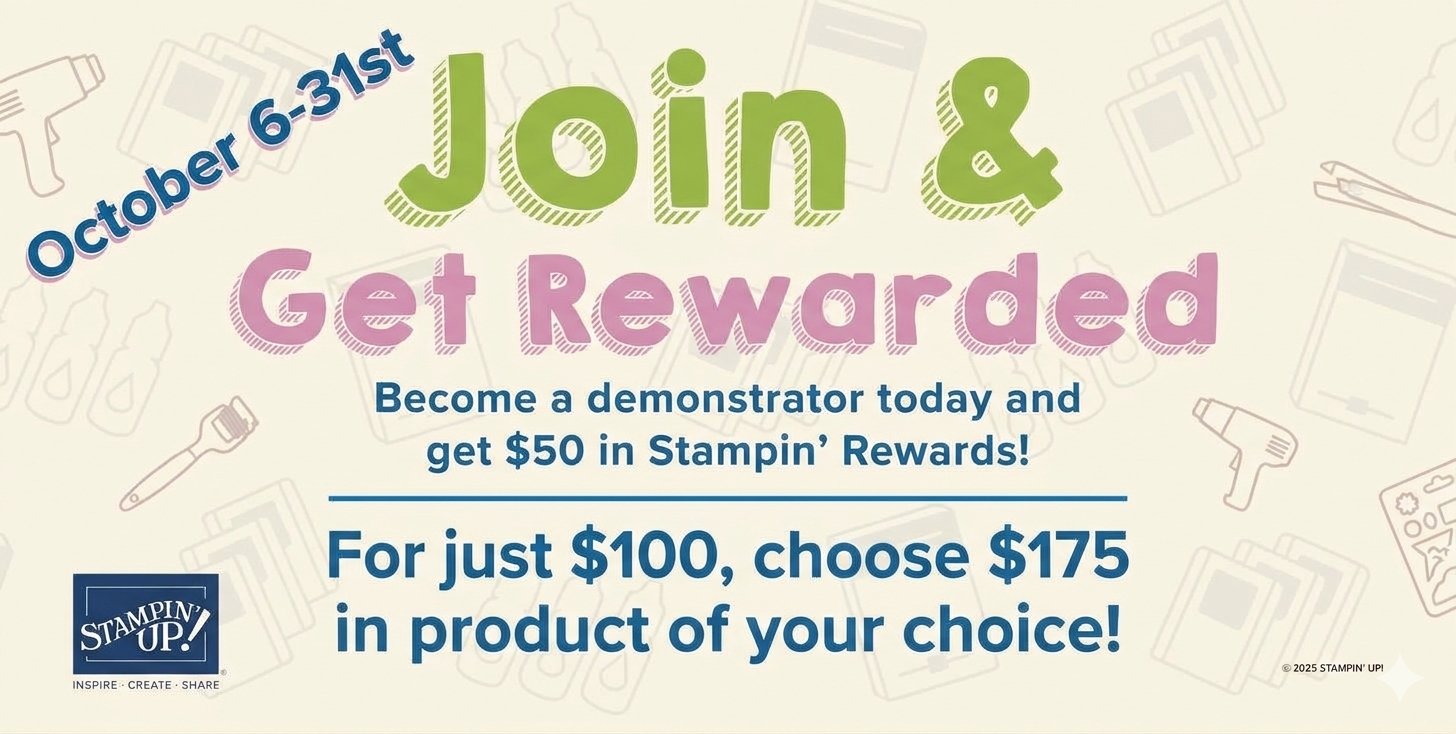
  • Bonus! Pick out $175 in product of your choice for just $100!


    Yay!! Stampin’ Up! is offering EXTRA free stuff in the starter kits in October. Starting today you can pick out $175 in products of your choice for just $100!

    The Stampin’ Up! demonstrator opportunity is always an amazing deal. New demonstrators already get a $125 USD coupon code and for our first-time demonstrators only, a Welcome Box filled with goodies and tools to help them get started. With this join offer, we’re piling on the perks by extending their shopping power with an additional $50 USD in Stampin’ Rewards!

    I hope you’ll consider joining my Flowerbug’s Team this month! We have an amazing group of both Hobby & Business minded demos. I can assure you that you’ll not regret it! Click here to get yours!

    Details:

    • New team members who join between October 6–31 will receive $50 USD in Stampin’ Rewards in their Stampin’ Up! account immediately after signing up as a demonstrator.  These rewards are only available for three months after their sign-up date.
    • New demonstrators who submit their Independent Demonstrator Agreement (IDA) before October 6 or after October 31 will not be eligible for this offer.
    • The new Welcome Box is exclusive to first-time demonstrators.

    As part of the new join process, we’re introducing an elevated onboarding experience. All first-time demonstrators (beginning July 1, 2026) will receive a surprise Welcome Box—a gesture of appreciation and a warm welcome into the global Stampin’ Up! creative community.

    What’s Inside the Welcome Box

    • A handwritten welcome letter from Sara
    • Stampin’ Up!-branded swag:
      • Pen
      • Pop-up pencil case
      • Pop-up waste basket
    • An exclusive card kit including:
      • Kit-sized stamp set
      • Full-size clear block
      • Classic Stampin’ Spot
      • Supplies to create eight “hello” cards

    Here’s how it works.

    Step 1: Join

    New demonstrators will:

    1. choose a team leader (choose me!).
    2. accept required agreements.
    3. enter a few personal details.
    4. pay $100 USD.
    5. click submit.

    What’s included for my $100 USD?

    You’ll receive the Get Started Bundle, which includes:

    • a coupon code valued at $125 USD.
    • an 8-pack of catalogs.

    About the Coupon Code

    • Coupon code can be applied to any demonstrator order.
    • Order can exceed the coupon code value.
    • Any amount above the coupon code value:
      • receives the demonstrator discount.
      • counts toward the quarterly sales minimum.
      • earns Stampin’ Rewards if it meets the qualifying purchase amount.

    Step 2: Shop

    Once their information has been reviewed and approved (usually very quickly), their Welcome Box ships, and the new demonstrator receives an email with:

    • their demonstrator ID.
    • a coupon code to begin shopping.

    Leave a Reply

    Your email address will not be published. Required fields are marked *

  • Quick & easy card layout to make multiples of; with measurements & free project sheet


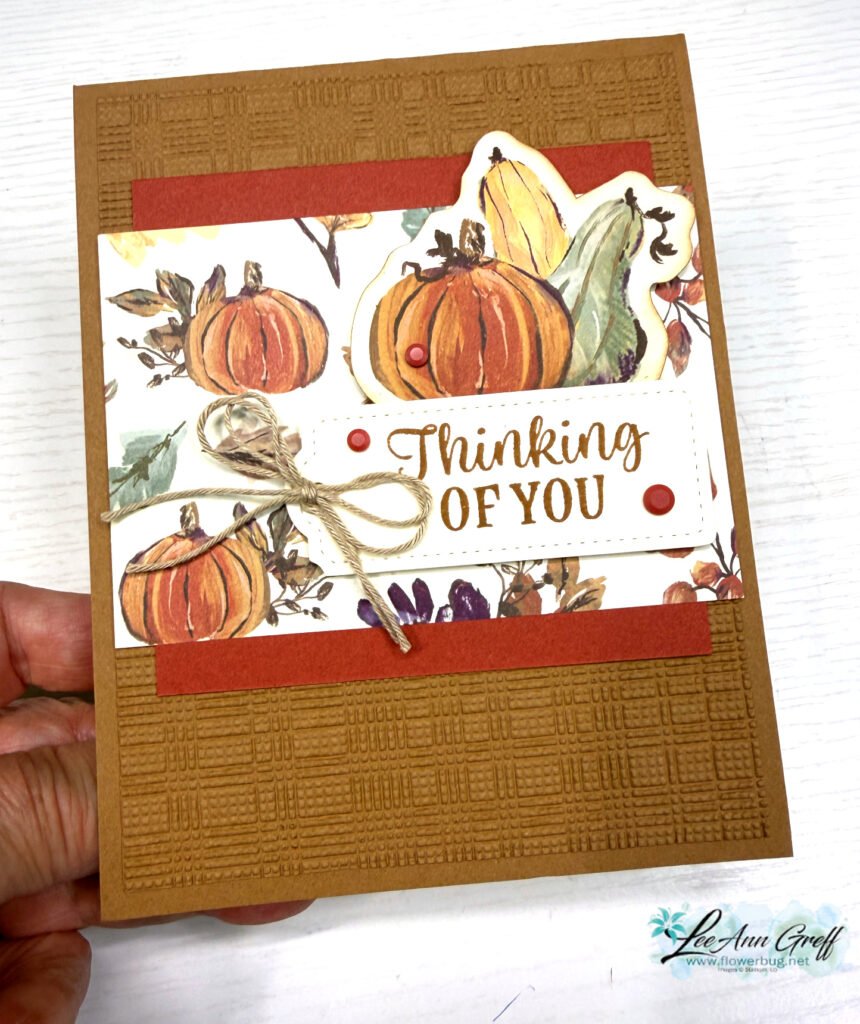
    I shared multiple cards using this neat layout on last week’s video. I was inspired by a card I received from my friend & team member Judith.

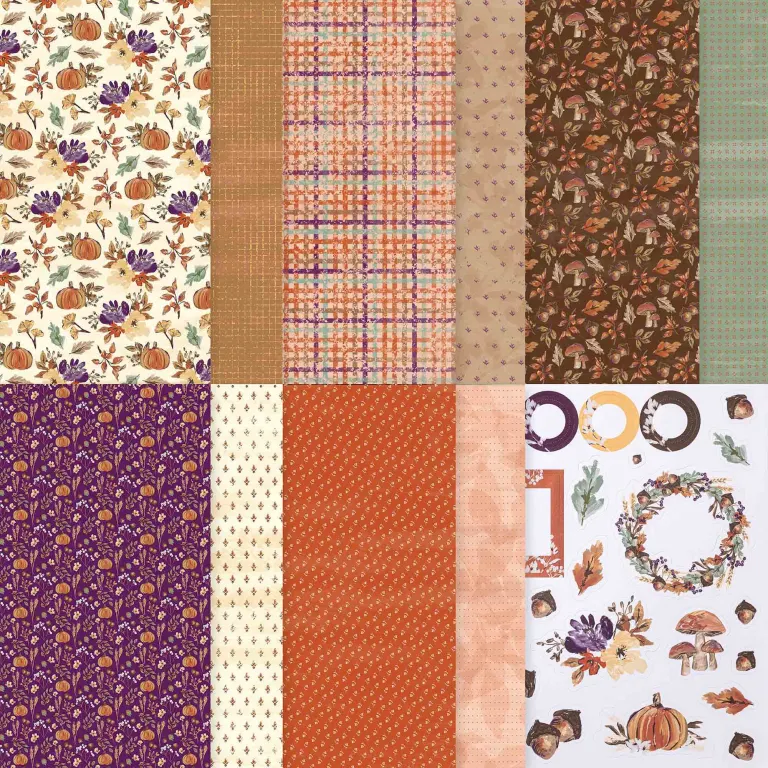
    The designer paper is called Autumn Opulence and can be seen here. This specialty pack includes two pages of coordinating printed die-cuts.

    I think this layout is a great way to use your designer paper. You can get lots from each sheet and make multiple cards quickly.

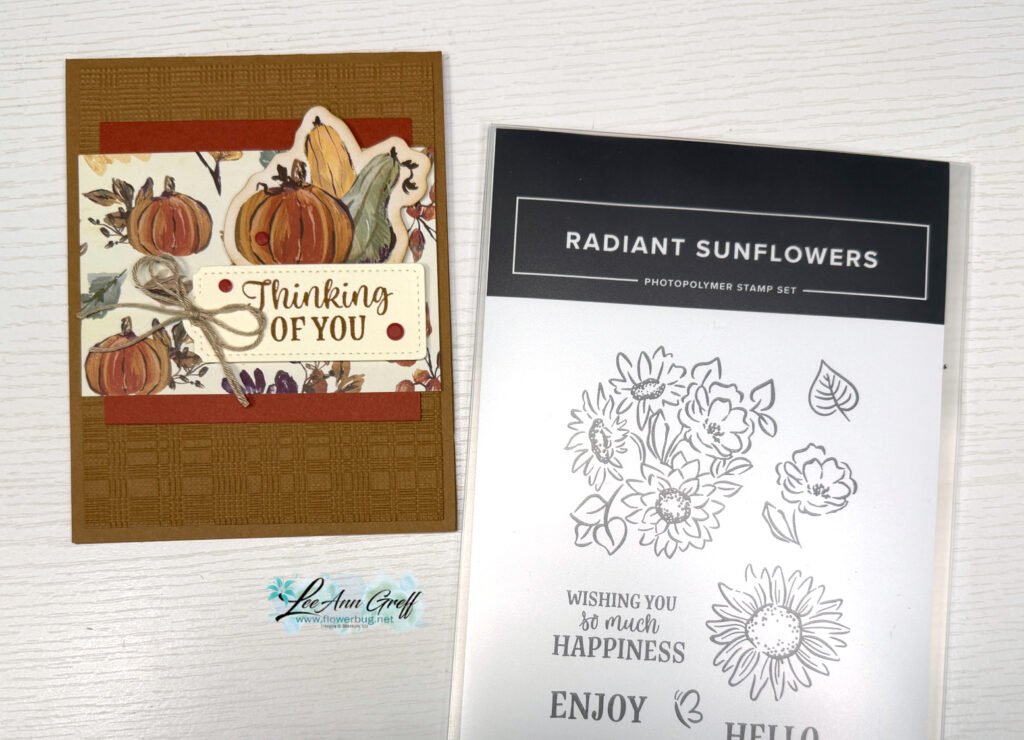
    The greeting is from the Radiant Sunflowers stamp set.

    I used Pecan Pie, Cajun Craze and Vanilla for my colors. That textured layer is made with the Softly Woven embossing folder seen here.

    I created a free project sheet for this card; it includes measurements, supplies list and directions. Click here to download or print it.

    Below is the video tutorial for this card. I’ll share the other two cards soon.

    Leave a Reply

    Your email address will not be published. Required fields are marked *


Notice: LeeAnn Greff, Independent Stampin’ Up! Demonstrator, Manager. The content of this website is my sole responsibility as an independent Stampin’ Up! demonstrator and the use of, and content of, the classes, services, or products offered on this website is not endorsed by Stampin’ Up! Copyright 2025