/


Latest Post

From the North Pole bonus card; so cute! Refills are available!


I had time to play with the latest Paper Pumpkin kit this weekend – From the North Pole.  From the hint they gave us beforehand I knew the tags would be cute! 

If you don't like or need tags, they can easily be changed into Christmas cards.  This kit is available in a refill for just $11 while supplies last. The refill kit does not include the stamp set or ink spot and is only available to current Paper Pumpkin subscribers.  Here's a link to it.  

Each month I send my subscribers AND my Team alternate projects using elements in the latest Paper Pumpkin kit.  I share lots of ideas for bonus cards or scrapbook ideas.  

Here's one of my projects using the 'From the North Pole' kit:  

I always enjoy stamping my own background; the candy cane & dot are stamps from the kit.  I used Sweet Sorbet and White Craft ink. I added the card base and the two card stock strips – the Mint layer is textured with the Gingham embossing folder.  Everything else is from the kit. 

Another bonus product available to current PP subscribers are these awesome Good Things cards and envelopes seen here:

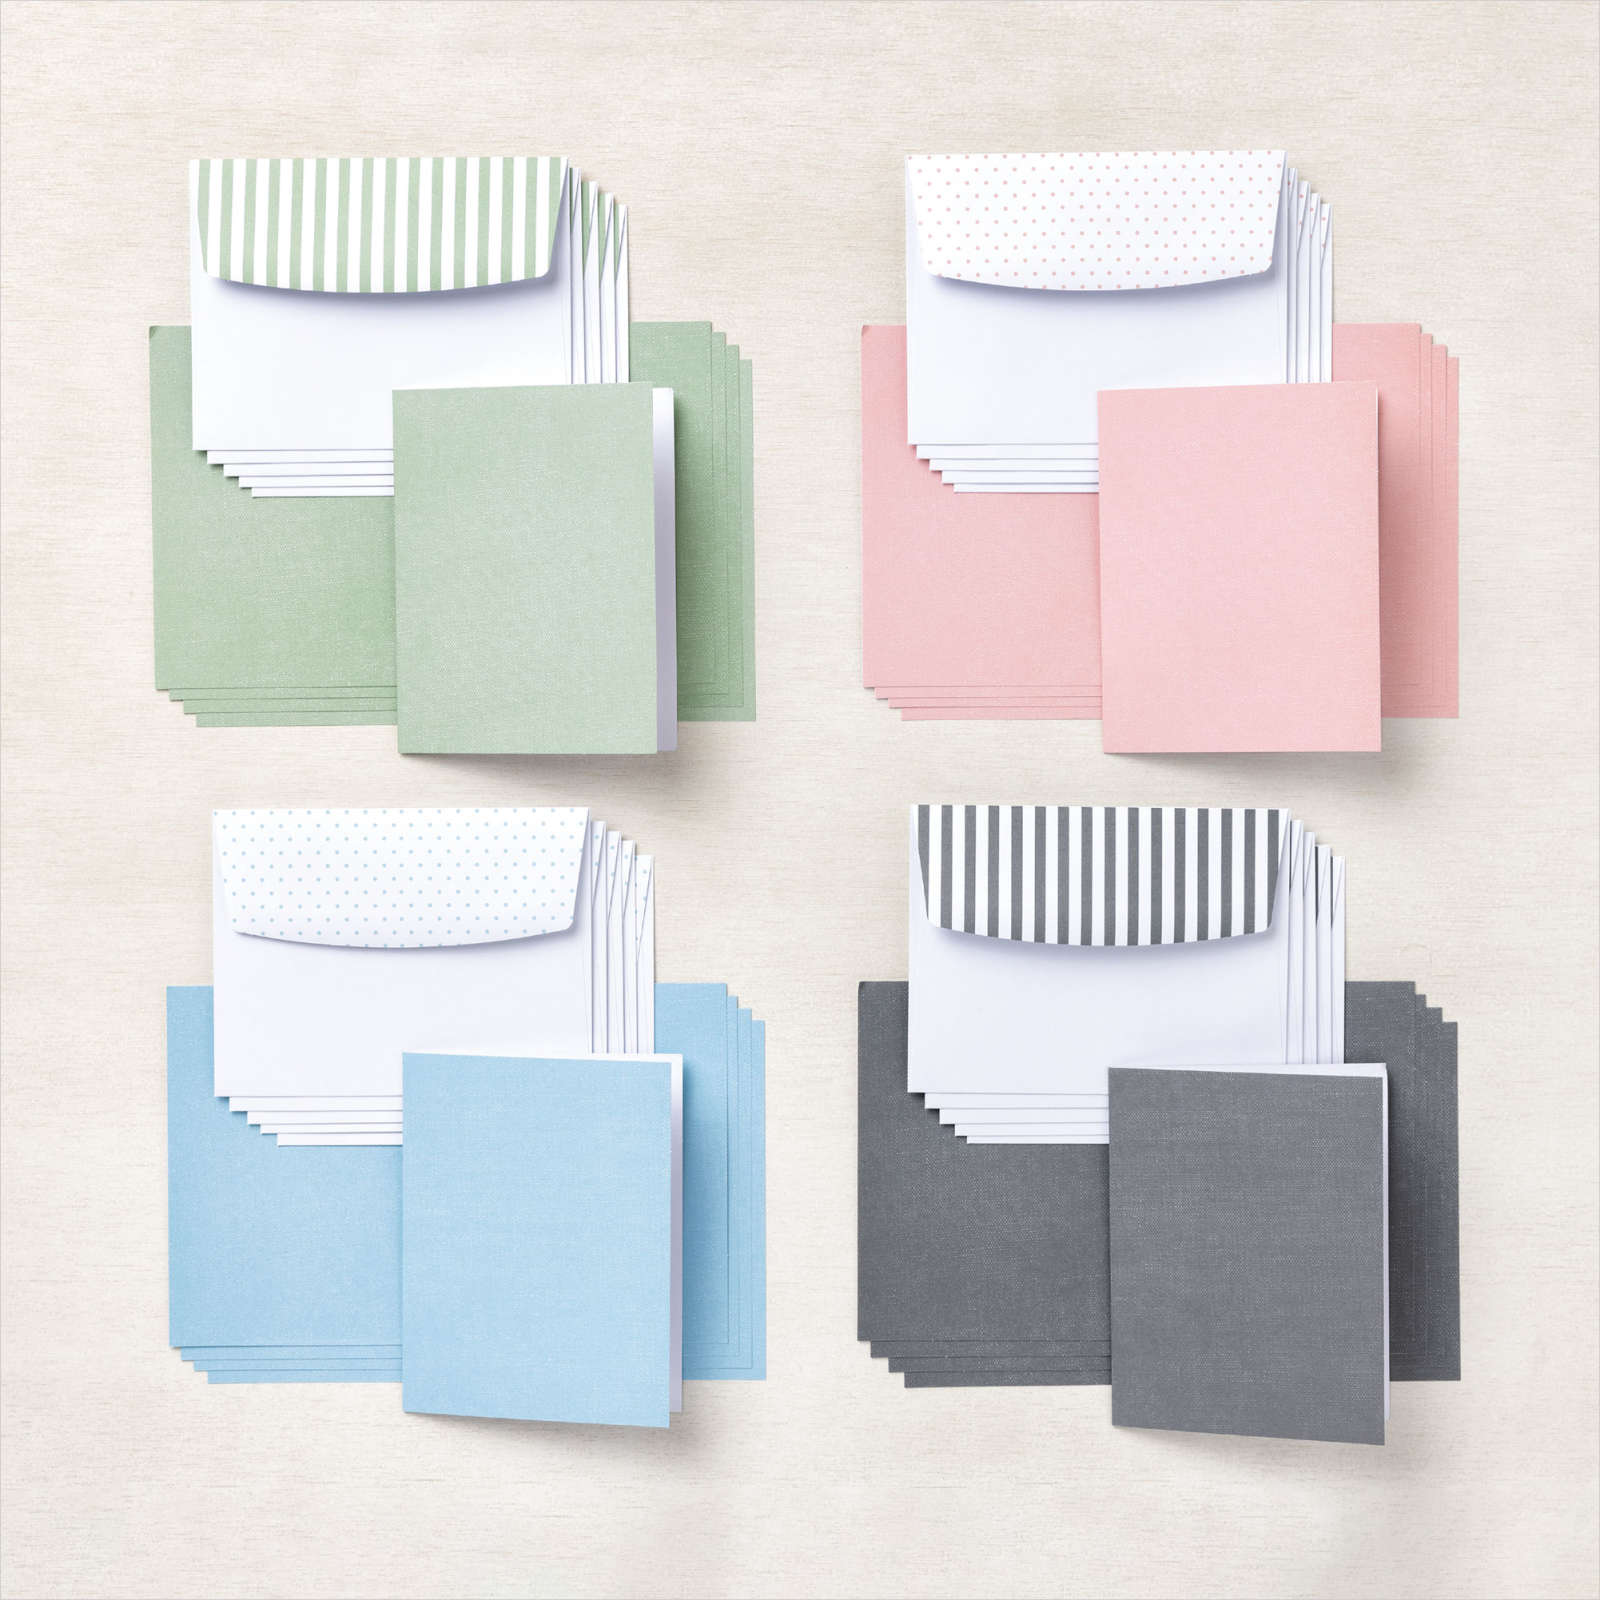
It includes 20 cards, 5 each of 4 designs &20 matching envelopes – all for just $10!  You must be a current subscriber to get these.  There are perks to subscribing!  These coordinate with the upcoming Good Things come in Small Packages kit – it's filled with gift card boxes.  Cut off date to receive this kit is December 10th. 


Click here to get a pre-paid subscription or click here to subscribe and get one monthly. 

Paper Pumpkin facts: did you know? 

  • You are in full control of which kits you receive as a subscriber.  They announce what the upcoming kit consists of – the theme and if it's cards or not.  You can log into your account and skip a month any time before the 10th of the month.  
  • Even with a pre-paid subscription you can skip or pause your kits. 
  • You can give a gift of a subscription too!  What a wonderful Christmas gift for someone crafty.  
  • These kits are all inclusive (except the refills).  They include stamps, ink, adhesives (usually glue dots & dimensionals) and other pre-cut elements. 
  • To activate a pre-paid subscription and begin receiving the monthly kit, the subscription code must first be redeemed at paperpumpkin.com.  You'll receive this in an email after purchase. 
  • Join the Paper Pumpkin Fan Club group for more ideas.  

~~~

Clearance Rack Refresh!

Last Chance list is here!  

Order online using the links below:

Host code link: DXYW7GV3

Free Card Class in December: 

Get a FREE card class from me with online orders over $55 when using either host code above!

 Earn free products with my loyalty rewards! 

Click here to download yours and earn a $50 shopping spree!

All Posts

  • Gift Wrapped Fun Fold card!


    Look at this super cute Fun Fold card featuring the Gift Wrapped bundle seen here! 

    I LOVE the bright, eye-catching colors she choose; Granny Apple Green & Poppy Parade.  Can you see that she used both the Light & Dark colors in these Blends markers?  

    She also used the Wink of Stella on the punched bow and 'ribbon' on the front. See that cute baby tag?  That's part of the punch too! 

    Can you see how the front flap catches on the greeting on the left?  Love this! 

    Measurements: 

    • Granny Apple Green 4 1/4" X 8 1/4" and 3" X 6" scored at 3" and two 1/2" X 2 3/4" strips and a 1" X 1 1/4" piece for the greeting layer
    • Poppy Parade 2 3/4" square
    • Whisper White 4" X 5 1/4" plus a 2 3/4" square for inside the smaller flip area and scraps for the Tasteful Labels die-cut, and ribbon punches. 

    ~~~

    October Specials!

    Current Host code is MJK7R2CU

    Designer Paper Sale; click here!

    Get a free package of Adhesive Backed Snowflakes in October with an

    online order over $45. 


    All online orders will receive my Tutorial of the Month featuring the Poinsettia Petals suite!

    Leave a Reply

    Your email address will not be published. Required fields are marked *

  • Clear Block Stamping; a fun & easy background for quick cards!


    Have you ever tried Block Stamping?  If you have a clear block and ink pads you can do this!  

    I shared these cards on Facebook Live last week Tuesday.  You can watch the replay below.  Remember every Tuesday morning at 11 am CT I'm Live on FB here. 

    I chose a few different stamp sets and inks for the cards I made.  I also have a few tips for you when doing this technique. 

    The above card features Soft Seafoam and In The Pines stamp set.  The White layer is 4 3/4" X 3 1/2".  I inked the 'H' block in Soft Seafoam ink and spritzed it with a mixture of rubbing alcohol and Champagne Shimmer Paint. 

    You can use water but that takes longer to dry and I wanted a bit of shimmer. Shimmer Paint mixes well with rubbing alcohol. I added random strips of Shaded Spruce CS across the card.  Quick & easy! 

    This card features Calypso Coral (2" X 5 1/2"), Petal Pink and the Queen Anne's Lace stamp set. The textured layer is from the set of Wrapped in Texture embossing folders.

    Can you see the marbling effect here? I inked the block in Seaside Spray ink and then added a few swirls of Misty Moonlight with a Stampin' Write marker. *Watch the video below. 

    I used the Snowflake Wishes set on this card and the Flowers for Every Season ribbon/twine combo pack.  The colors are Seaside Spray & Misty Moonlight.  The White layer is 3 1/2" X 4 3/4" and the Misty Moonlight is 3 3/4" square – a scrap I had. 

    Tips on the Clear Block Technique:

    • Use a light color of ink
    • Choose a block that fits on your card stock
    • Ink it and spritz with either water or rubbing alcohol until it almost starts to puddle.
    • Add a swirl of darker color with a marker after inking the block and before spritzing. 
    • Alcohol dries faster than water 
    • Add a bit of Shimmer Paint to your alcohol for additionals glitz! 
    • Whisper White card stock works just fine; no need for thicker papers


    ~~~

    October Specials!

    Current Host code is MJK7R2CU

    Designer Paper Sale; click here!

    Get a free package of Adhesive Backed Snowflakes in October with an

    online order over $45. 


    All online orders will receive my Tutorial of the Month featuring the Poinsettia Petals suite!

    Leave a Reply

    Your email address will not be published. Required fields are marked *

  • Christmas themed fun-fold swaps


    Last Friday I started sharing last month's fun fold cards made by my talented Flowerbug's Team members. Here are a few more 

    Jacki created this one using the Brightly Gleaming Specialty Designer paper and the Beautiful Autumn stamp set. It's a latch card!

    Once you add the layers to the card front you'll use the Classic Label punch to create the window for the latch to catch into.  

    Measurements:

    • Night of Navy card base 4 1/4" X 9" scored at 5 1/2"
    • DSP 3 3/4" square on the front; 1 1/4" X 4" on the inside right edge
    • Pretty Peacock 4" square ont he front and a thin strip on the right inside edge
    • Latch – Navy 2" X 3 1/2" scored at 1/2"
    • Vanilla latch 1 3/4" X 2 3/4", inside is 4" X 5 1/4"

    Here's another card made by Paula featuring the Little Treat Box dies and the Wrapped in Christmas stamp set.  

    She cut the treat box dies into separate pieces (Garden Green & Vanilla) for her card front.  It also opens up to reveal a gift card holder inside. Lots of texture with the Winter Snow embossing folder too!  

    Measurements:

    • Garden Green card base 5 1/2" X 4 1/4"
    • Very Vanilla 5 3/8" X 4 1/8" 
    • Real Red 4 1/2" X 10 3/4" scored at 3/4", 4" and 7 1/4" 
    • Poinsettia Place DSP 4 1/4" X 3" 

    Stop back again for more Fun Fold cards!  I have lots more to share! 

    ~~~

    October Specials!

    Current Host code is MJK7R2CU

    Designer Paper Sale; click here!

    Get a free package of Adhesive Backed Snowflakes in October with an

    online order over $45. 


    All online orders will receive my Tutorial of the Month featuring the Poinsettia Petals suite!

    Leave a Reply

    Your email address will not be published. Required fields are marked *


Notice: LeeAnn Greff, Independent Stampin’ Up! Demonstrator, Manager. The content of this website is my sole responsibility as an independent Stampin’ Up! demonstrator and the use of, and content of, the classes, services, or products offered on this website is not endorsed by Stampin’ Up! Copyright 2025