/
Latest Post
Free Project Sheets
All Posts
-
Unique ideas with the Oh So Ombre designer paper; Promo ends Sunday!
Here are a few more ideas with the gorgeous Oh So Ombre designer paper. It has been my favorite Sale-a-Bration item this year!
Playing with strips has always been fun for me. On this first card I started with one sheet of DSP and cut it first at 4 1/2" long. Then I cut strips off of the main piece at random angles.
Next I laid these strips on my grid paper and stamped the leaves from Forever Fern stamp set on them using Granny Apple Green ink.
I then glued these strips to a 3 3/4" X 5" piece of White CS leaving a thin 1/16" gap between. I didn't worry about the edges at all. After I was done I trimmed them off even with the main White CS.

Next is a fun card playing with the Playful Alphabet and 1/2" strips of this pretty Ombre paper. I adhered the letters to the end of the paper strip with rolled up mini glue dots and trimmed any excess off that showed around the letter.

The 'birthday' greeting is from Vine Design and the bottom edge is punched with the Postage Punch.
Below are more cards I shared in a video you can see here.

~~~
February Specials:
Get the best deal during Sale-a-Bration with purchase of the Starter Kit! Get $125 in products of your choice for just $99 and FREE shipping too!
Plus you get 5 packs of NEW 6" Designer Paper FREE.


~~~
Current Host code is CGSK9YDR
All online orders receive both a Hydrangea Hill and Sand & Sea projects PDF!


~~~
Get a package of 150 Resin Hearts from me with an online order over $50 using the host code above. They're adorable and so tiny!
*If your order is over $150 do not use the code; you'll still receive a gift!

Below are the Multipurpose Glue stands we're making. They're $6 each and available in my Shop here.

-
More ideas with the Oh So Ombre DSP & A Touch of Ink stamp set; both FREE for just 5 more days!
The end of Sale-a-Bration is nearing and I had to get one more play in with these two amazing products. A Touch of Ink stamp set & Oh So Ombre Designer Paper. Both of these are free with a qualifying order through February 28th.
This sliding latch card is quite unique and fun too. My friend Karen shared it with us at a recent Team meeting and I had to learn how to make it. She found the idea from Chris Slogar. It's so cool!

You need the Classic Label punch, Designer paper and a few punched or die-cut images for the front and inside.
I chose to use the flower and hummingbird images in this set. I stamped the flower using both the outline and solid images. For the hummingbird I stamped the outline image on a scrap of White CS and colored it in with Blends markers. Then I fussy cut it out and added to the circles.

This card is so neat! But you'll definitely want to watch the video below to catch the important 'how to' tips.
~~~
Next is a fun card with a neat masking tip using the leaves in this set. I stamped them in a 'round' to create a loose wreath.

I chose to use the Granny Apple Green and Bermuda Bay papers and inks here. Watch the video below to catch my matching tip to connect the four stamped leaf images perfectly.

Click on the video below to see how I made these and one more Fun Fold card!
Get your free Sale-a-Bration items by February 28th here.
~~~
February Specials:
Get the best deal during Sale-a-Bration with purchase of the Starter Kit! Get $125 in products of your choice for just $99 and FREE shipping too!
Plus you get 5 packs of NEW 6" Designer Paper FREE.

Get a free 10 cards kit when you redeem the Berry Delightful bundle from me by Sunday, February 28th. Sale-a-Bration ends that day!
~~~
Current Host code is CGSK9YDR
All online orders receive both a Hydrangea Hill and Sand & Sea projects PDF!
~~~
Get a package of 150 Resin Hearts from me with an online order over $50 using the host code above. They're adorable and so tiny!
*If your order is over $150 do not use the code; you'll still receive a gift!
Below are the Multipurpose Glue stands we're making. They're $6 each and available in my Shop here.
Leave a Reply
-
A Touch of Ink Fun Fold card with Oh So Ombre; quick & easy!
We made these pretty fun fold cards at my February card clubs! I think the A Touch of Ink stamp set is incredibly versatile! There was an option for everyone's needs.

I shared this card on my FB Live yesterday plus two others with this paper & stamp set. You can see it here.

Aren't they pretty?! I feel like these two Sale-a-Bration choices go together perfectly. The Ombre DSP lets the stamp shine though. You can get either or both free with an order through February 28th. Sale-a-Bration ends then and there won't be anymore 'free' with purchase options.
Go here to see the A Touch of Ink stamp set and here to see the Oh So Ombre DSP.

I added some of our new Black Matte gems and the pretty Black Glittered ribbon too. That neat stitched die-cut is from the Stitched Nested Label dies seen here.


Measurements:
- Black 5 ½” X 8 ½” score at 1 ½” and 4 ¼”
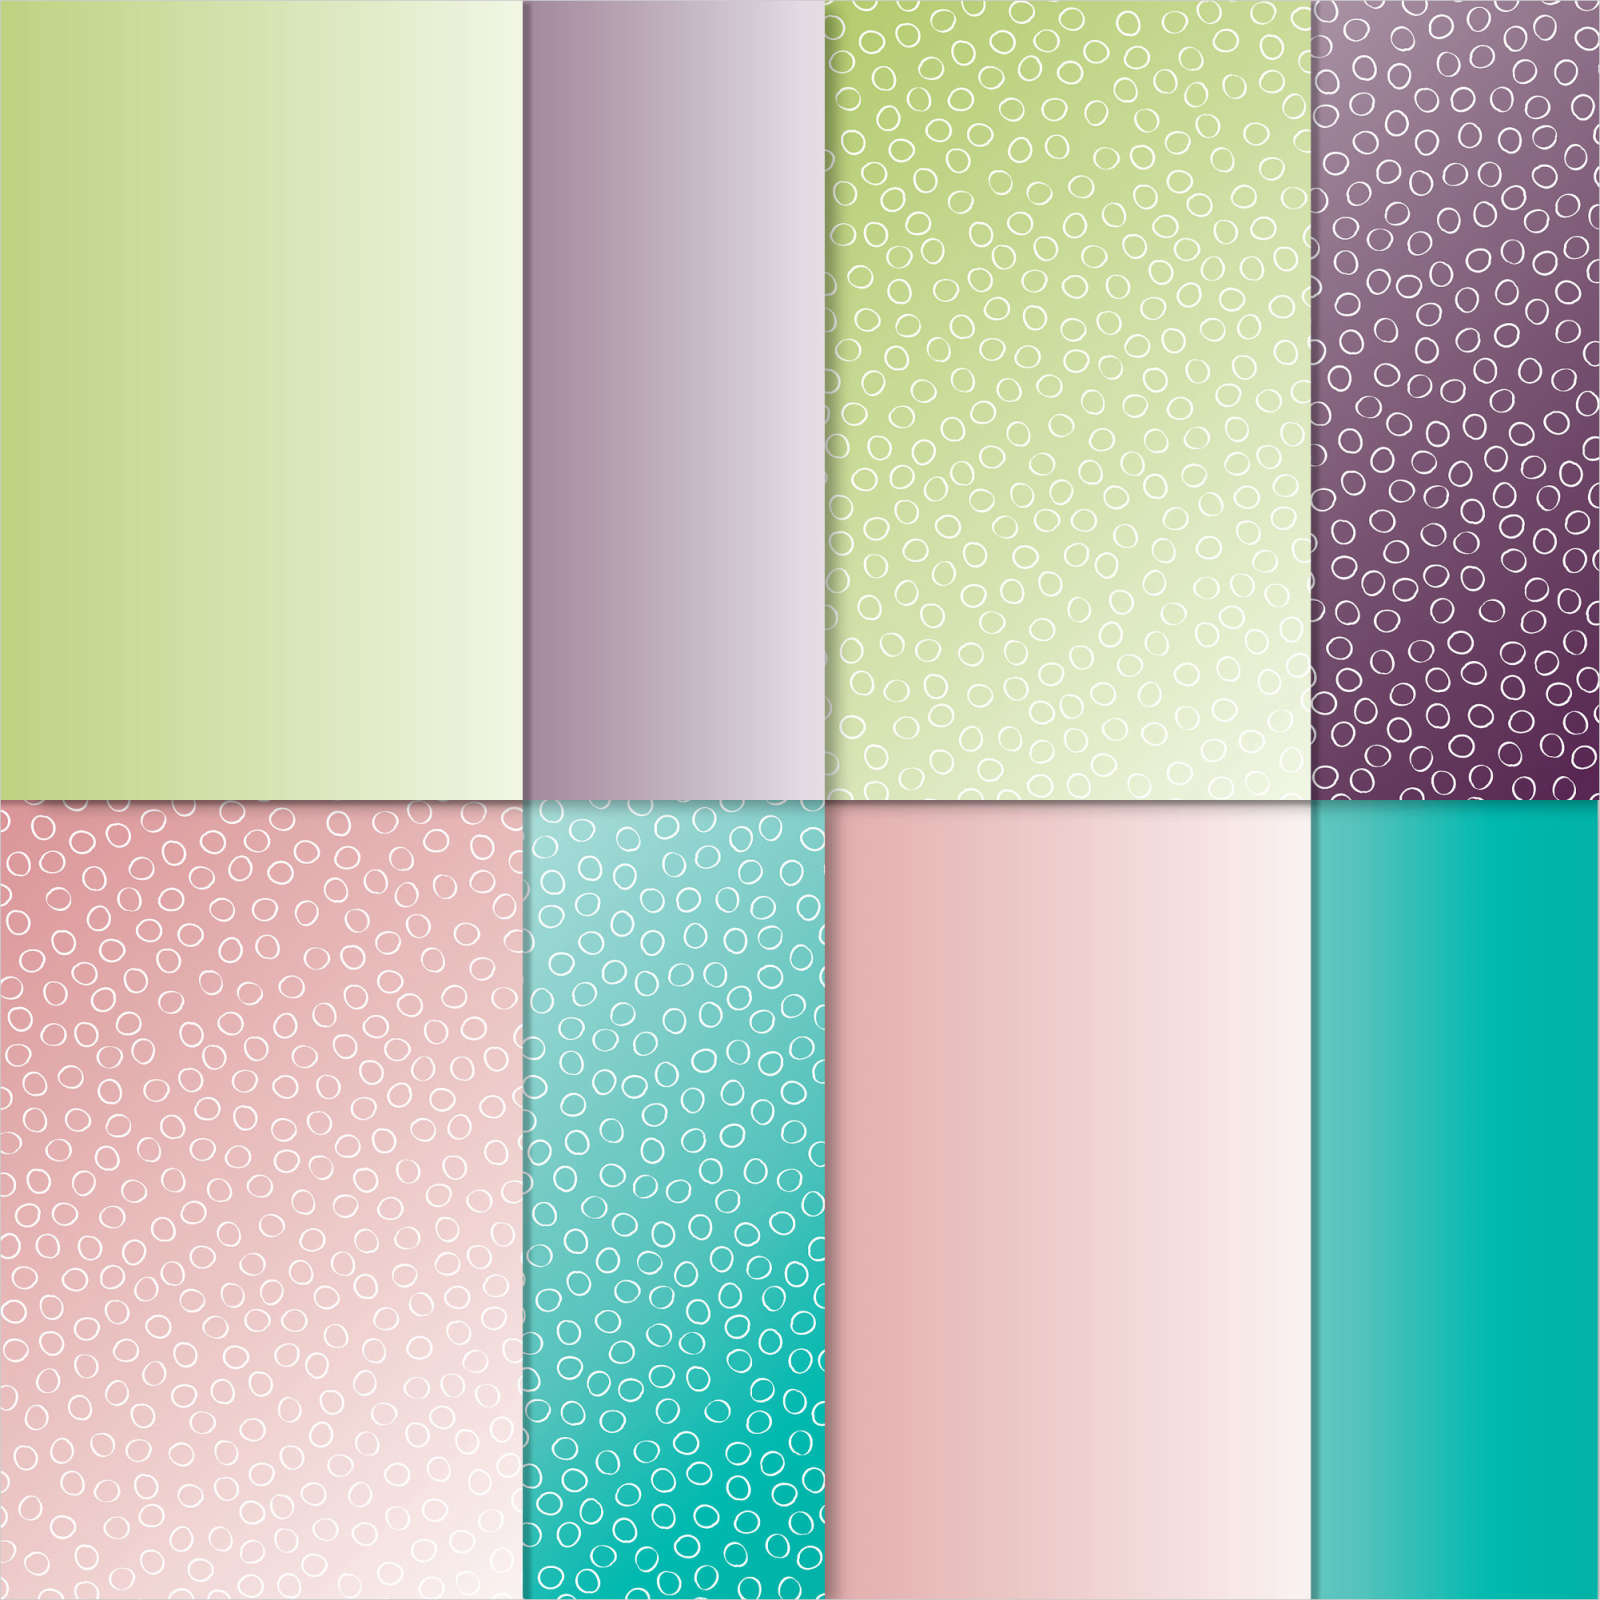
- Designer Paper – 5 1/2" X 6". Cut in order from left to right so the pattern matches making sure the 6" side is along the top. 2 ¾” X 5 ¼”, 1 1/8” X 5 ¼”, 2 1/8” X 5 ¼”. Plus the last piece on the right is 1 3/4" X 5 1/4"
- White inside 2 3/4" X 3 1/2", die-cut is 2" X 3 3/4"
- Black strip 1" X 2 3/4"
~~~
February Specials:
There's just 5 days left of Sale-a-Bration and the Starter Kit promotion!
Get over $200 in product for just $99 and free shipping. The current bonus is 5 packs of NEW 6" Designer Paper FREE.
~~~
Current Host code is CGSK9YDR
All online orders receive both a Hydrangea Hill and Sand & Sea projects PDF!
Get a package of 150 Resin Hearts from me with an online order over $50 using the host code above. They're adorable and so tiny!
*If your order is over $150 do not use the code; you'll still receive a gift!
Below are the Multipurpose Glue stands we're making. They're $6 each and available in my Shop here.
Leave a Reply


- 2025 Annual Catalog (47)
- Blends Markers (63)
- Card Club Projects (114)
- Card Ideas (1,396)
- Card Sketches & Color Combos (23)
- Designer Paper ideas (449)
- Die-Cut projects (375)
- Facebook Live (506)
- free project sheet (221)
- Fun Folds (548)
- Gifts & 3-d projects (97)
- Holiday projects (214)
- Kits to Go (279)
- Online Exclusives (218)
- Paper Pumpkin (53)
- Scrapbooking (13)
- Spring Catalog (136)
- Stampin' Up! Specials (510)
- Summer catalog (5)
- Swaps (275)
- Tools & Techniques (365)
- Tutorials (523)
- Uncategorized (17)
- Videos (644)

- Gorgeous Scenic Coast card kit to go or tutorial
- New Mystery Boxes available now!
- May Specials! It all starts today!!
- Springtime Scenes diagonal fold – 2 ways!
- Flash Sale on select products; one day only!
- Lovely & Beautiful fancy fold card swap with measurements
- Three pretty swap cards with great layouts
- New Catalog Open House & BOGO is Saturday! NEW product shares are up!
- A set of fun fold cards with NEW designer paper! Free project sheet & video too
- Artistic Sketched Garden fun fold card with free project sheet & video
- A new catalog sneak peek!
- New Catalog designer paper share; coming soon!
- NEW color & bundle in this fun fold card with free project sheet & video
- Beautiful & Soft Barely Blush In Color fun fold card
- Springtime Scenes easy fun fold card
- Double Reward Points today through Friday only! Combine with Last Chance list for big savings!
- Card ideas for the Box & Cards; free project sheet with video tutorial
- You’ll want to make this easy box for cards. Grab the free tutorial!
- Lovely Florals card kit to go with PDF & video tutorial
- Hello Spring card kit to go; so pretty!


Notice: LeeAnn Greff, Independent Stampin’ Up! Demonstrator, Manager. The content of this website is my sole responsibility as an independent Stampin’ Up! demonstrator and the use of, and content of, the classes, services, or products offered on this website is not endorsed by Stampin’ Up! Copyright 2025
Leave a Reply