/


Latest Post

Frames & Flowers card kit to go or choose the PDF tutorial. Limited quantity available!


I was so excited when I saw the Frames & Flowers designer paper in the new catalog. It has multiple sheets of pre-cut elements that coordinate with the paper.  This makes it so easy to create with as you don't have to stamp or die-cut additional pieces. 

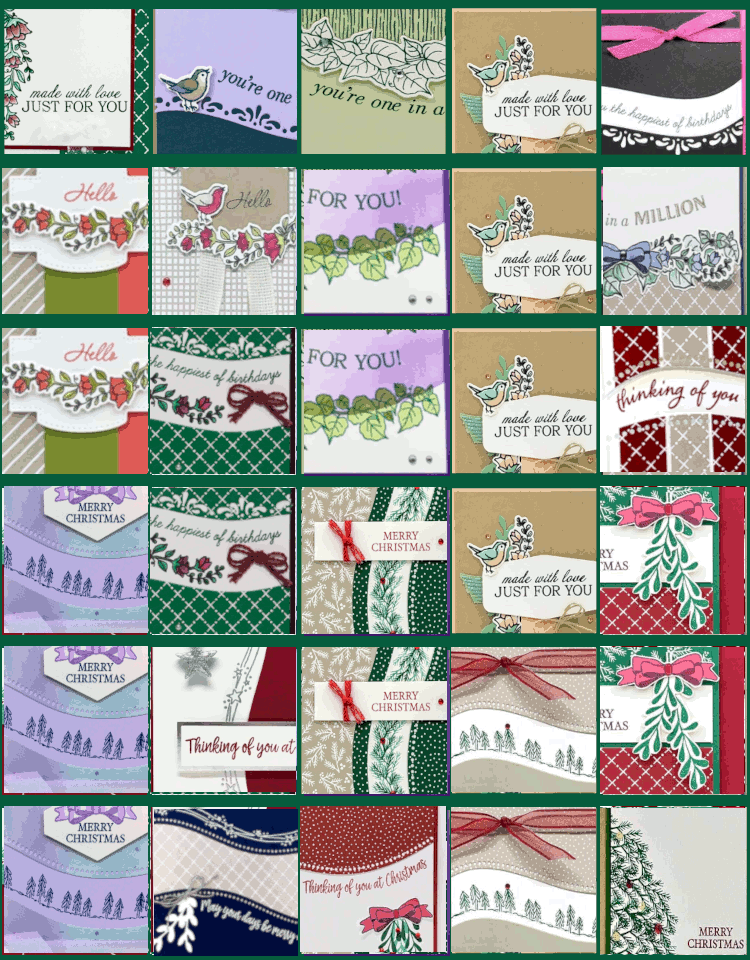
Here are the pretty cards included in the pre-cut kit for June: 
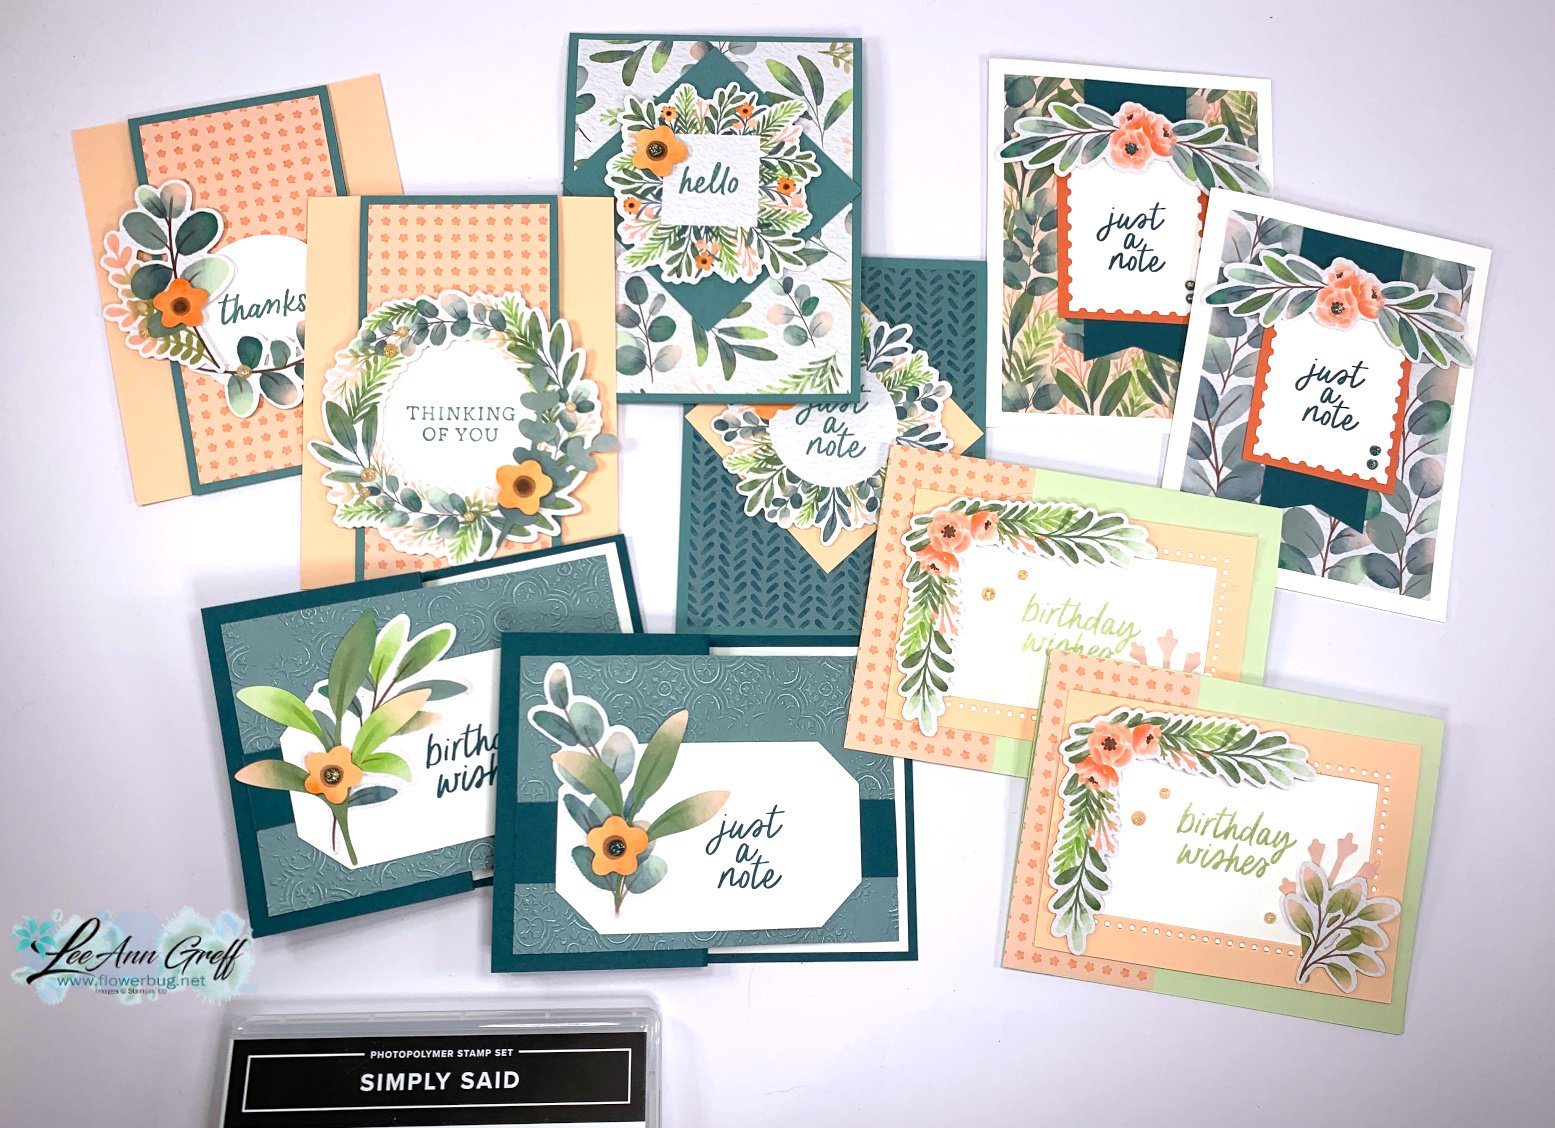
I design my kits around the paper so all you need to add are stamped greetings. I chose to use the new Simply Said set this time; which you can add on at a discount. I cut everything for you but the designer paper.  The PDF tutorial includes measurements so you can easily accomplish that. 

Opt in for the card kit to go by June 18th; supplies may be limited. The PDF tutorial will be emailed to you immediately after payment; check your spam folder. The pre-cut kit is mailed at the end of June. 

This kit includes the following:

  • All pre-cut supplies for 10 cards including card stock layers & die-cut elements
  • a share of Frames & Flowers designer paper  
  • a share of Petal Pink & Pretty Peacock gems & envelopes
  • the free PDF tutorial which has step by step directions, photos, measurements & a supplies list

*It does not include stamped images, textured layers or adhesives.  You will need greeting images, a few colors of ink, adhesives and a paper trimmer to cut your new designer paper. 

Reserve yourpre-cut card kit here. It's $29 plus shipping.  Or choose the PDF tutorial option for $15  here.

Add on the Simply Said stamp set at an extra 10% off. Message me here for a price quote. 

The best deal is to add on another kit to save on shipping. See them all here. 

*This is the kit my subscribers will receive in June.  If you're interested in getting a pre-cut kit each month with $20 in product  click here to opt in. You get an extra surprise in your package now and then & can cancel, skip or opt out at any time. It's $38 with Priority shipping. 


Make sure you check out the other June kit; combining saves $$ on shipping!

~~~

June Specials:

All Stamp & Die bundles are 20% off in June!

*current host code links: FERX3EKC or GF24T6XG

~~~

All online orders receive my free tutorial of the month & if your order is over $55 you'll also receive a free gift from me


All Posts

  • Order your 2021 Coaster Calendar this week!


    Happy Veterans Day! 

    We have a ton of family and friends who have sacrificed to keep us all free and safe. I want to sincerely thank everyone who has served our country, both past and present. And today let's be sure to thank them, honor them and also those who've passed on. 

    ~~~

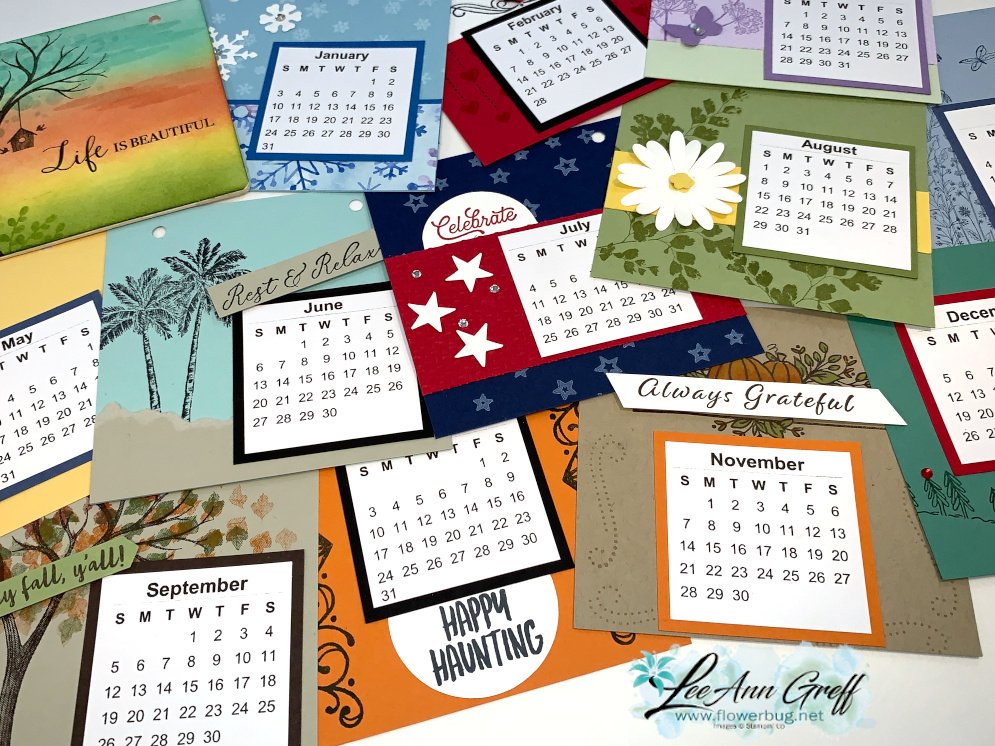
    My new 2021 Coaster Calendar is ready!  

    I wanted to get these out in time for Christmas gifts.  They're perfect for those people who don't need a thing!  Everyone uses a calendar!  And when each page is hand stamped for the month or season they're extra special.  

    I had to use my Life is Beautiful stamp set on the cover!! Below you can see the variety of months included in this flip style, easel calendar. Each page is 4 X 4" square and on 1" metal rings.  

    How does this kit to go work?  Here's what you'll receive:

    • the PDF tutorial with photos, directions, products and measurements
    • Pre-cut card stock including punched or die-cut pieces
    • pre-cut, printed calendars for each page
    • Two 4" coasters for the front and back and two metal rings

    What it does not include are stamped images, gems or adhesive.  To finish the calendar you will need a variety of stamps, inks, gems and adhesives. 

    You have two options here; order the pre-cut kit here or order the PDF tutorial here. 

    The kits will be mailed out at the end of November.  The tutorial is emailed to you immediately and includes both 2021 and 2022 calendars!!

    **They're $15 each but add on shipping for the kit.  Be sure to order your kit by November 19th to get one. 


    You can add on any of my other pre-cut card kits and I can combine shipping.  Email me at lagreff60@gmail.com  

    ~~~

    November Specials!

    Current Host code is JRZFR4QU


    All online orders receive my FREE Curvy Celebrations 22 project PDF Tutorial! 

    Leave a Reply

    Your email address will not be published. Required fields are marked *

  • All Around Wreath for Christmas


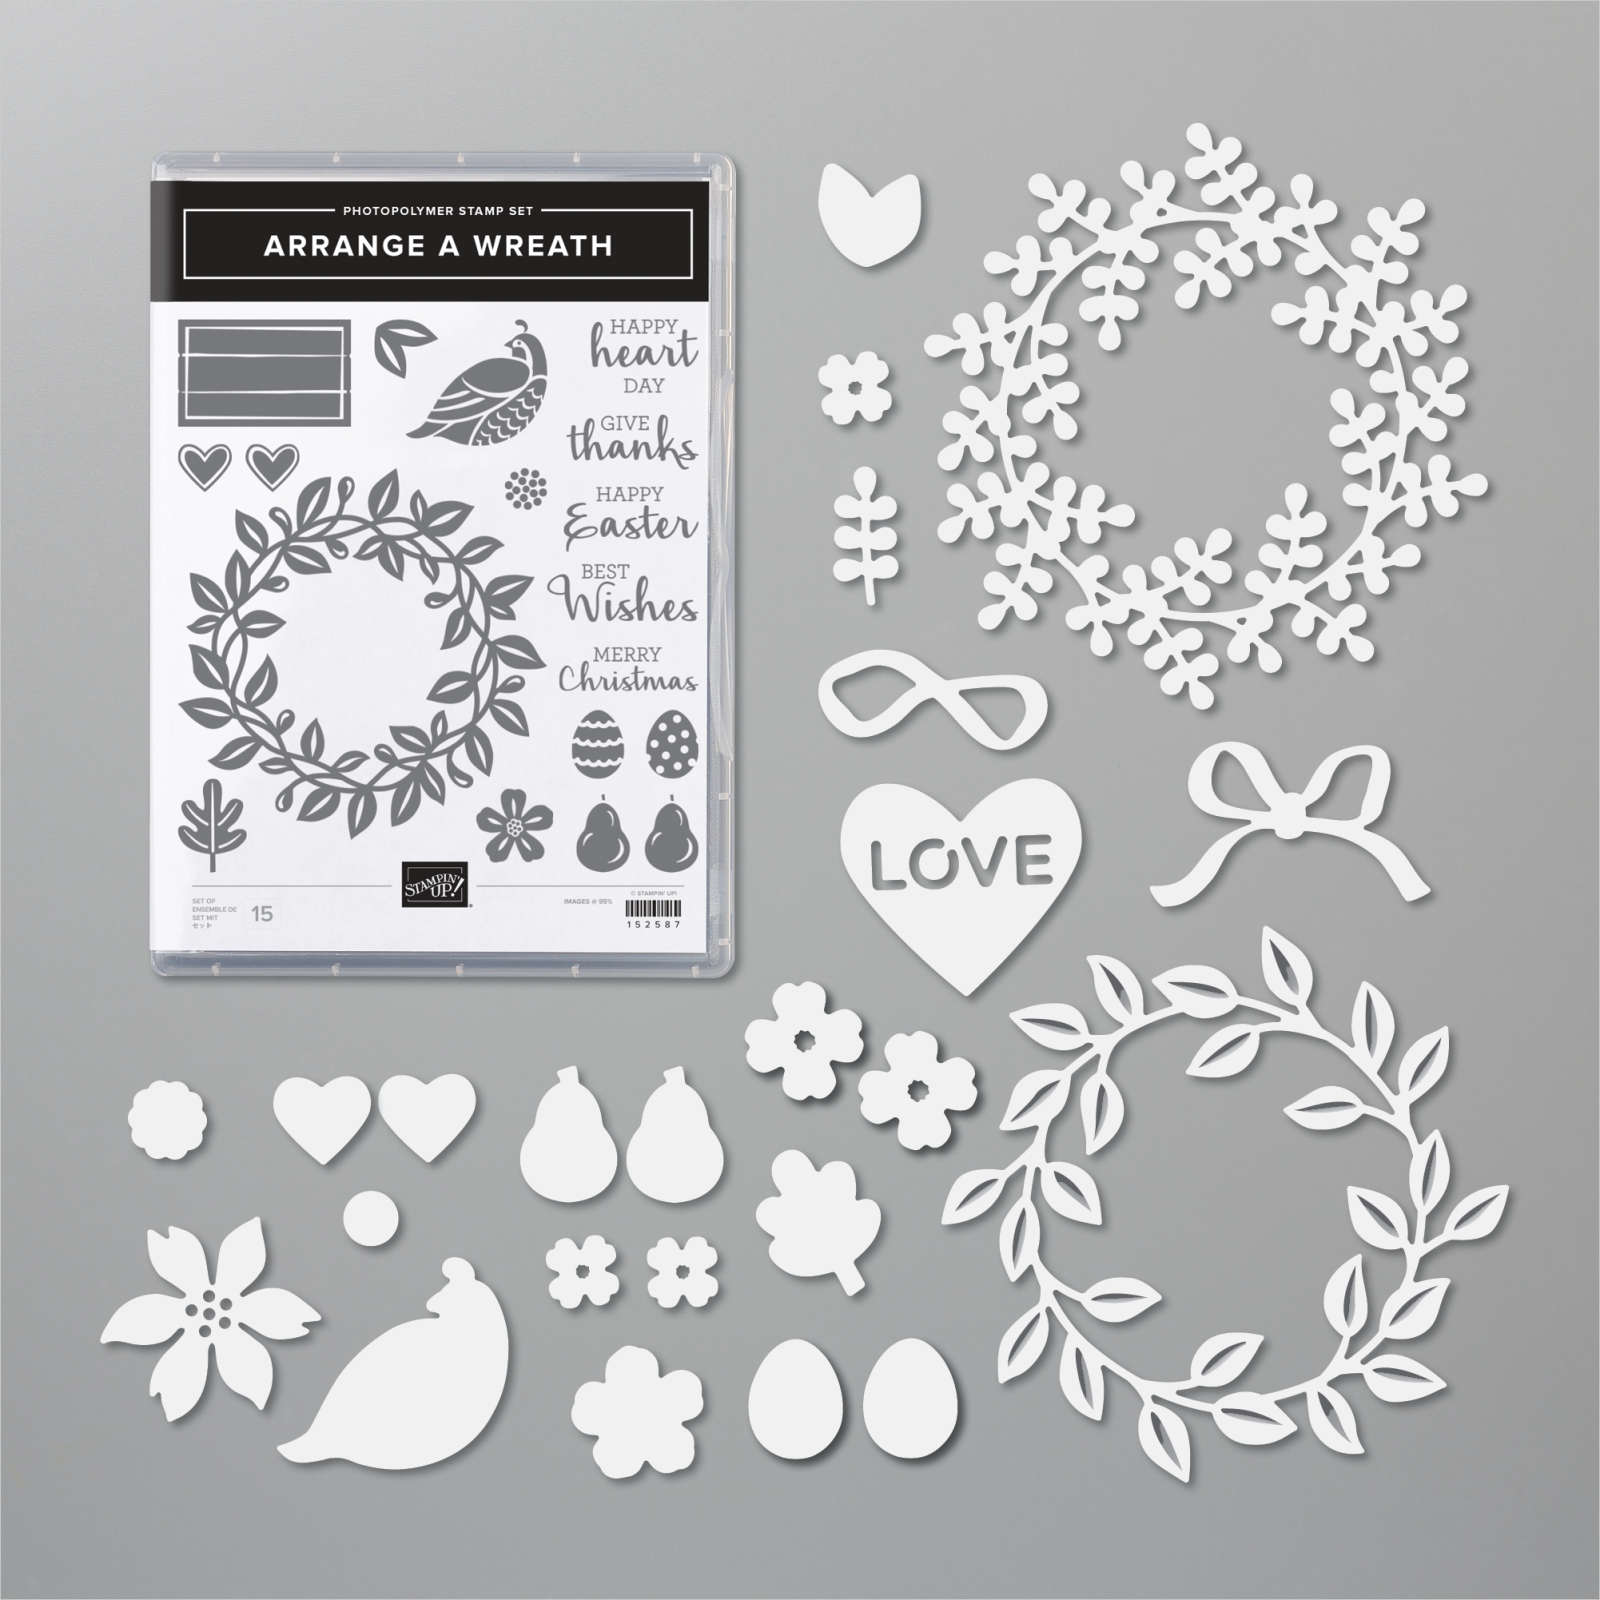
    Have you noticed the All Around Wreath bundle in the annual catalog? Click here; it's quite the gem!  So many occasions are covered in the greetings and die-cuts.  

    Marilyn made this pretty Christmas themed wreath for our Team Christmas card swap. 

    She chose to use two shades of green here; Mossy Meadow with Pear Pizzazz along with a few touches of Gold.  The pears are heat embossed in Gold powder as well as the shimmery thread.  

    Other details:

    • The greeting is die-cut with the Hippo & Friends dies seen here
    • The Vanilla layer is textured with the Pinewood Planks embossing folder
    • She used the same wreath die-cut but in two colors, separating them slightly on the card. 

    ~~~

    November Specials!

    Current Host code is GRC9VVUU


    All online orders receive my FREE Curvy Celebrations 22 project PDF Tutorial! 


    Leave a Reply

    Your email address will not be published. Required fields are marked *

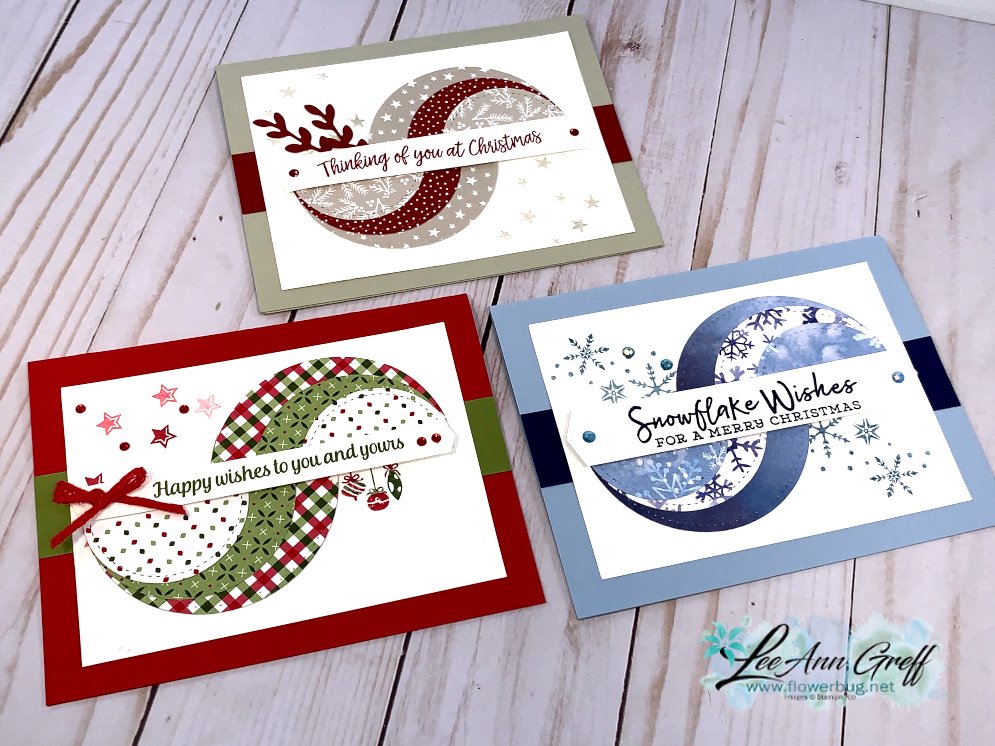
  • Retro style circles layout; super easy! Catch the Live video tonight!


    Tonight at 7:30 pm Central Time I'm sharing how to make these retro style circle cards on Facebook Live.  Click here to join me.   You can also see this video below!

    Basically you need three sizes of circle dies or punches for the start of this layout.  Cut them in half and layer together with the edges meeting on one side. Adhere and add a long greeting between the two. 

    Watch how on my FB Live replay!

    Measurements:

    • 5 1/2" X 8 1/2" card base
    • 3 1/2" X 4 3/4" Whisper White; the greeting strip is about 5" long and either 1/2" or 3/4" wide depending on your greeting image.
    • 1" X 5 1/2" horizontal strip
    • Circles from the Stitched Shapes dies are the largest three circles. 

    You'll want ink, stamps and embellishments that coordinate with your Designer Paper.  Remember you could use card stock instead of DSP. 


    Products used:

    • Designer papers – Heartwarming Hugs, new Classic Christmas & Snowflake Splendor
    • Stamps – Tree Angle, Snowflake Wishes & Curvy Christmas
    • Colors – Real Red & Olive, Seaside Spray & Night of Navy, Sahara Sand & Cherry Cobbler  
    • Other: Stitched Shapes dies, Curvy Dies & Pick a Banner punch

    ~~~

    November Specials!

    Current Host code is GRC9VVUU


    All online orders receive my FREE Curvy Celebrations 22 project PDF Tutorial! 

    Leave a Reply

    Your email address will not be published. Required fields are marked *


Notice: LeeAnn Greff, Independent Stampin’ Up! Demonstrator, Manager. The content of this website is my sole responsibility as an independent Stampin’ Up! demonstrator and the use of, and content of, the classes, services, or products offered on this website is not endorsed by Stampin’ Up! Copyright 2025