/


Latest Post

Forever Forest – beautiful mountains & trees


I created this card for an online swap I'd joined last month.  It shows off the gorgeous mountain dies in the Forever Forest bundle. 

I knew I had to get this bundle with the many trees, that gorgeous mountain die and the other options.  It's a fabulous scene builder set!  See the bundle here.

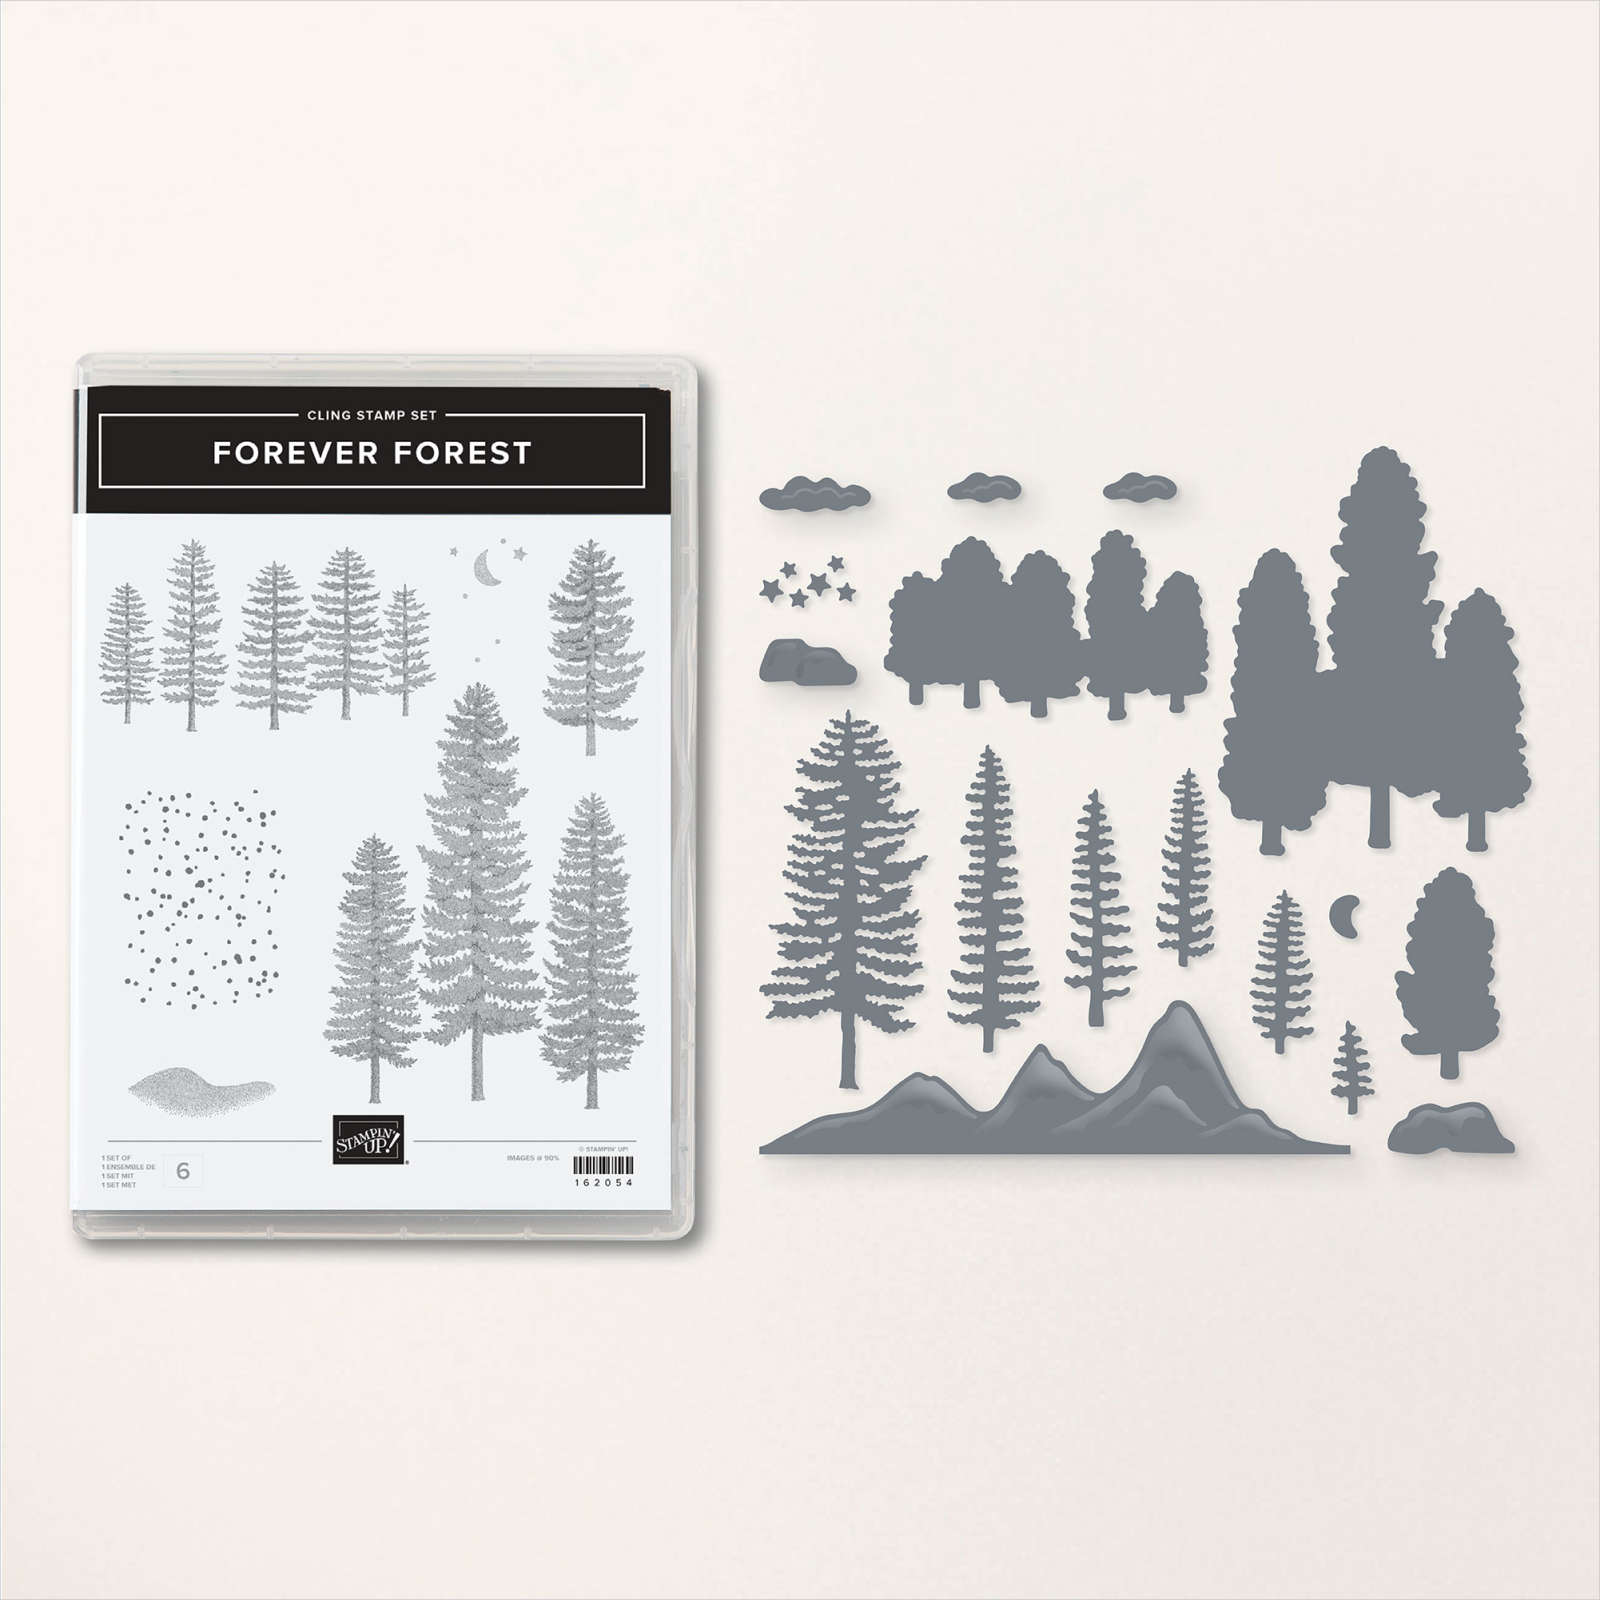
I used Shaded Spruce ink to stamp the trio of trees image, adding a second image without reinking.  Then I added 5 die-cut trees from Shaded Spruce card stock over the stamped trees.   

I wanted to create a soft sky above the trees so I lightly added Balmy Blue ink with a Blending Brush.  I then inked the 'cloud' image in the same Balmy Blue, stamped off once and stamped in the sky.  

The 'Winter Wishes' is from the Magical Meadow stamp set seen here.  

I die-cut two mountains in White for each card, adding them in different positions on the bottom of the stamped White layer.  After I added them I trimmed off the excess on the sides before adhering the layer to the card base. 

What do you think?  

~~~

September Specials: 

 *current host code: Z9BRPPWA or MYF6MXAG

Reserve your Holiday catalog designer paper share:

$37 with shipping to you; message me here

(There may be a delay due to a few papers being unavailable for a bit)

*Get a free 6 card kit with orders over $55 (Includes card bases, coordinating envelopes, Memories & More cards, gems & more) 

~~~

NEW Designer papers released September 6th!  While supplies last!

All Posts

  • All Aflutter envelope-flap style card with free project sheet & video


    This neat fun fold card was created for my June card clubs. I call it an envelope flap closure.

    My colors include Darling Duckling, Blueberry Bushel with White. Wonderfully bright for summer! I used quite a few products here so I’ll list them for you.

    • All Aflutter stamp and dies bundle seen here
    • Darling Duckling 12 X 12″ Two-toned card stock
    • Irresistible specialty designer paper seen here
    • Lazy Daisy & Floral Spray 3D embossing folders
    • 1 3/4″ and 2″ circle punches
    • Blending Brushes
    • a sanding block

    The Irresistible designer paper is cut into a 3 3/4″ square and scored in the center diagonally. It’s adhered to the back of the Blueberry Bushel card base before that is adhered to the larger Darling Duckling CS.

    There are three patterns in this specialty Irresistible designer paper you can see here. When you add ink to this specialty paper it reveals the white shiny pattern.

    You can see the two patterns I used on my card here.

    And here’s the other version. Note both the blue Irresistible patterns and the embossing folders.

    After we textured the 2-toned Darling Duckling card stock we sanded it with a sanding block (from my husband’s shop) to reveal more of the White core.

    You can see the All Aflutter bundle here. I love having butterfly images with a coordinating punch! See it here.

    I created a free project sheet for this card with measurements, photos and supplies list. Click here to see it.

    Below is the video tutorial for this card and one other made with the cute All Aflutter bundle.

    I’ll share the second card with the free project sheet tomorrow.

    Leave a Reply

    Your email address will not be published. Required fields are marked *

  • How to use our Flip Flaps


    Whether you scrapbook or make cards these Flip Flaps are super fun! A great way to add hidden layers in a surprising way.

    Stampin’ Up! created a picture tutorial on how to use them with additional ideas as well. Click here to see it.

    Here’s the link to see our Flip Flaps in the online store.

    Here’s the latest product of the month – Wild Bunch stamp set – just $5 with a $75 online order. Click here

    Leave a Reply

    Your email address will not be published. Required fields are marked *

  • Last Chance List is updated!


    Check out the updated Last Chance list here.
    There are tons of products with some at 60% off regular price. They’re available while supplies last.

    You can see it all by scrolling down a bit.

    Click on each item to see it in the store. Remember you can redeem a Product of the Month once you hit the $75 mark.

    Leave a Reply

    Your email address will not be published. Required fields are marked *


Notice: LeeAnn Greff, Independent Stampin’ Up! Demonstrator, Manager. The content of this website is my sole responsibility as an independent Stampin’ Up! demonstrator and the use of, and content of, the classes, services, or products offered on this website is not endorsed by Stampin’ Up! Copyright 2025