/


Latest Post

Forever Fern video; an easy trio of gorgeous cards


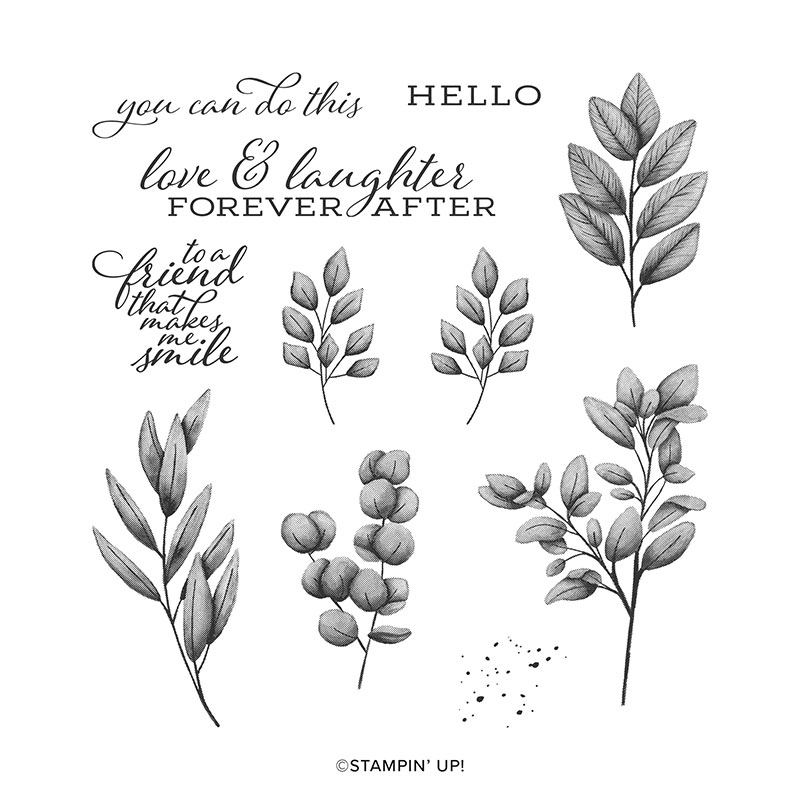
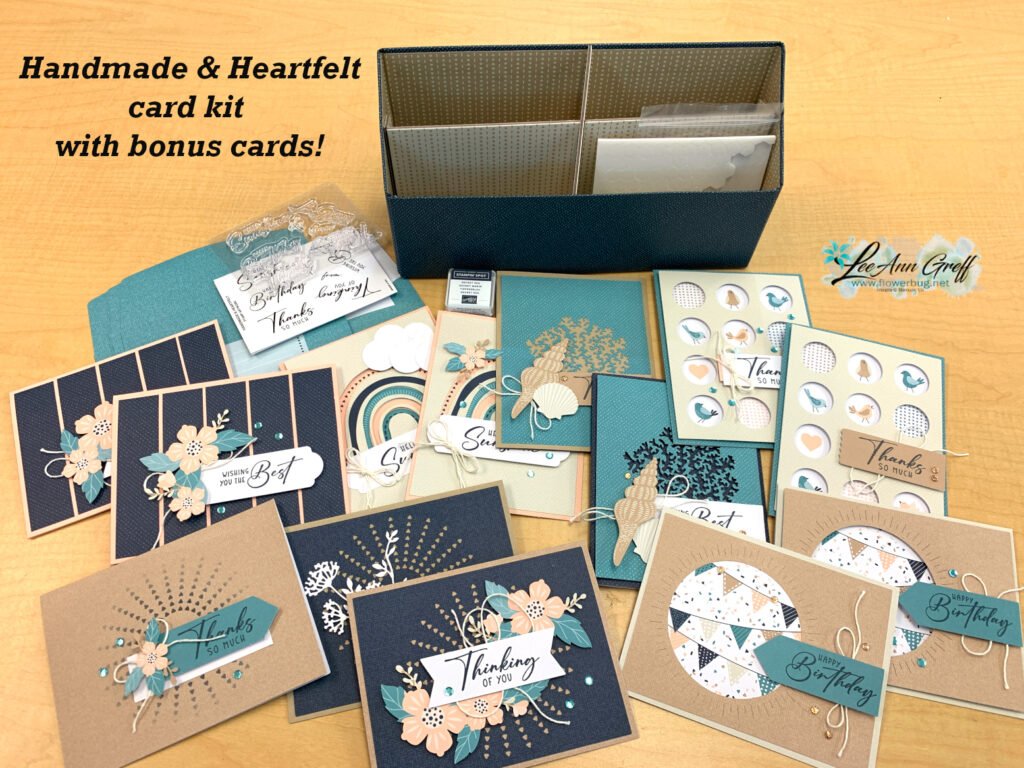
I can't stop playing with the Forever Fern stamp set!  It's so easy to make beautiful cards with and with some of my favorite 'go to' color combos.

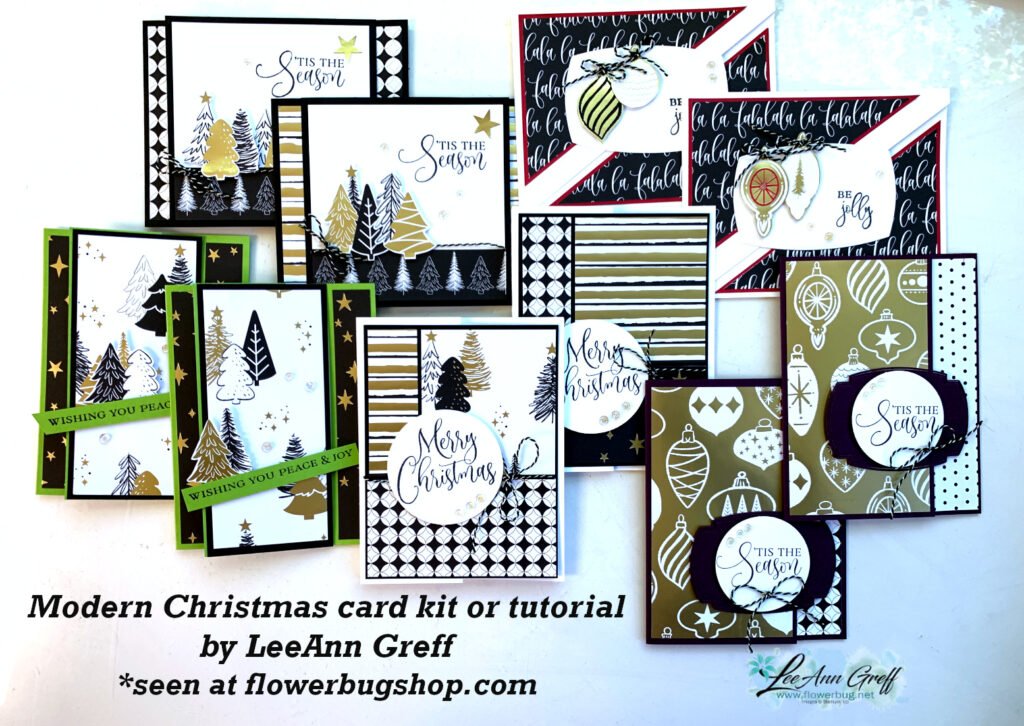
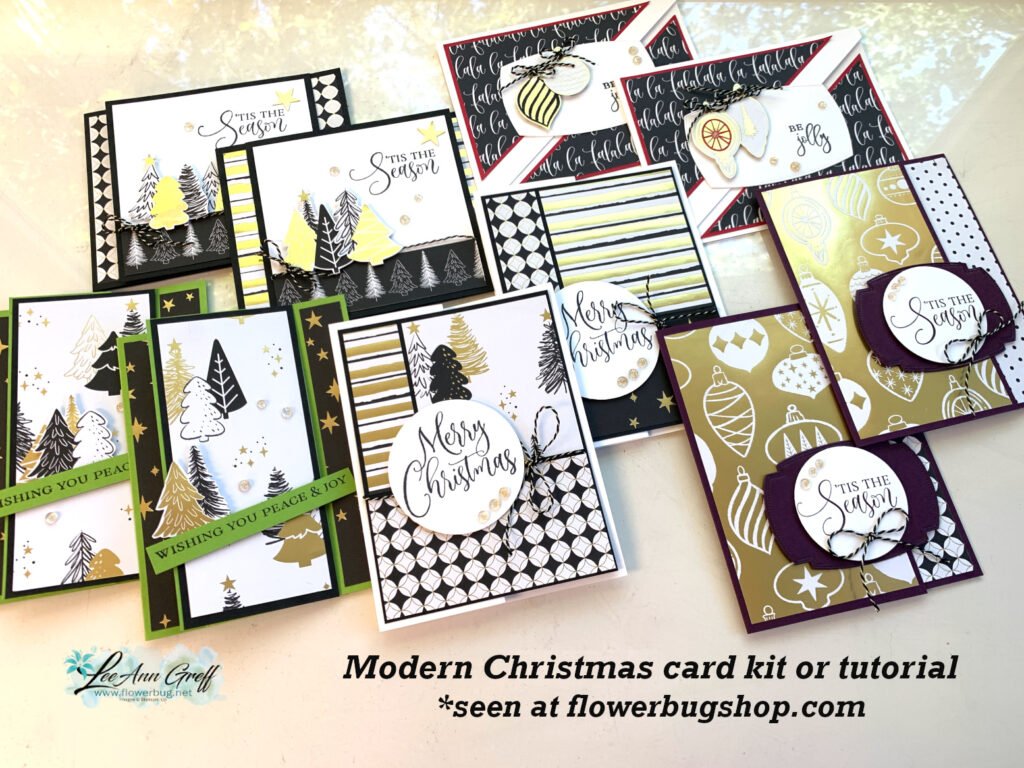
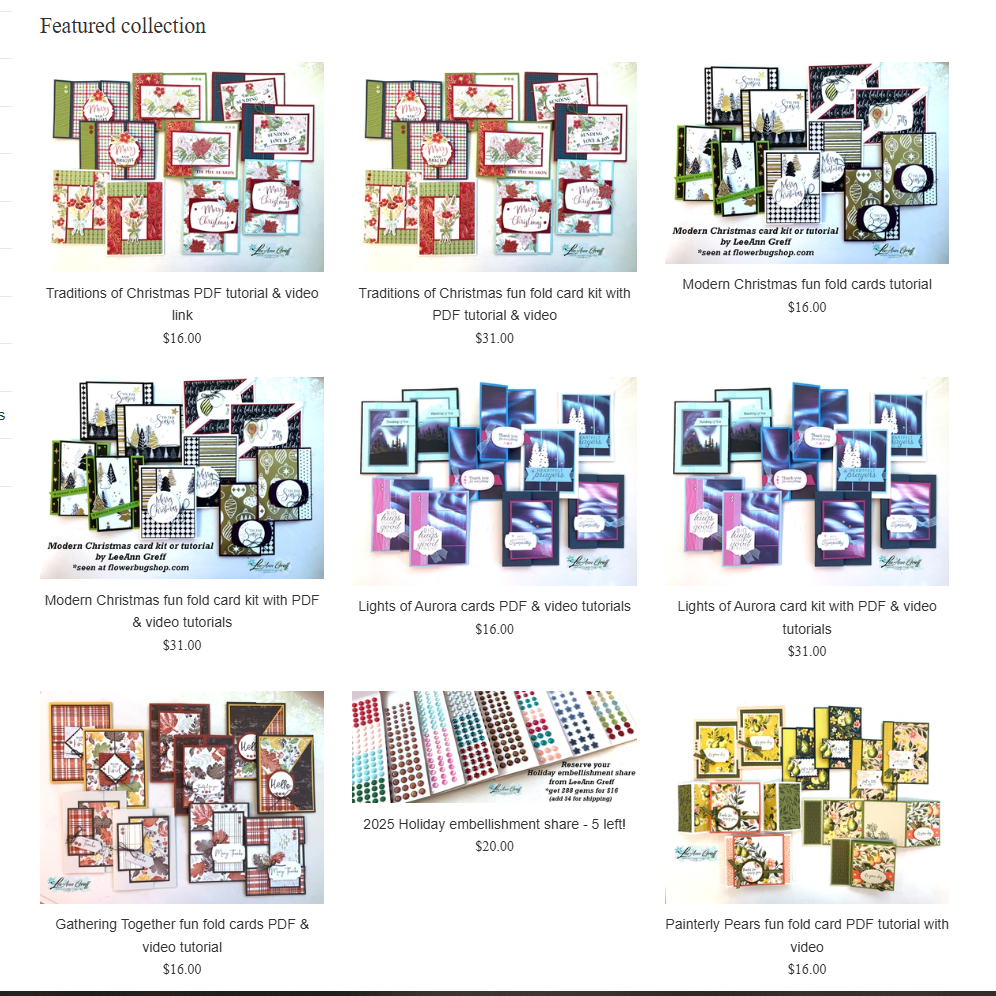
If you like this set of cards check out another stunning set here; it has a kit to go option while supplies last! And a project tutorial available here. 

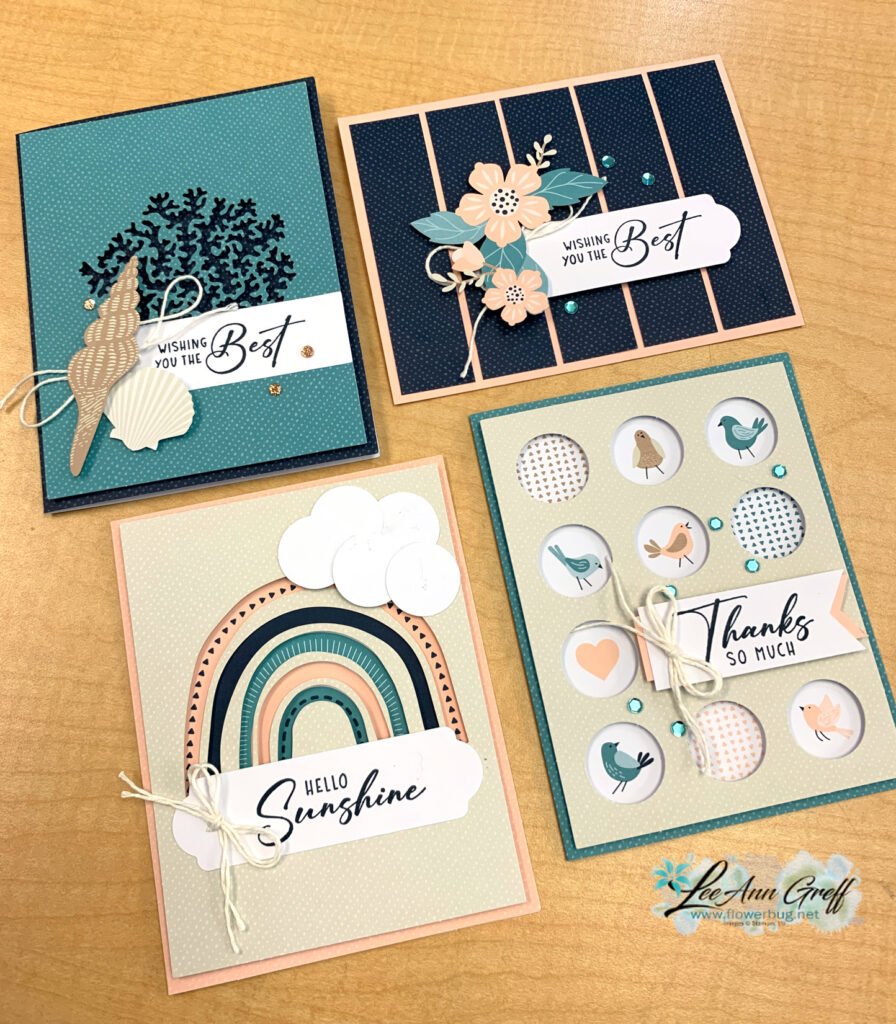
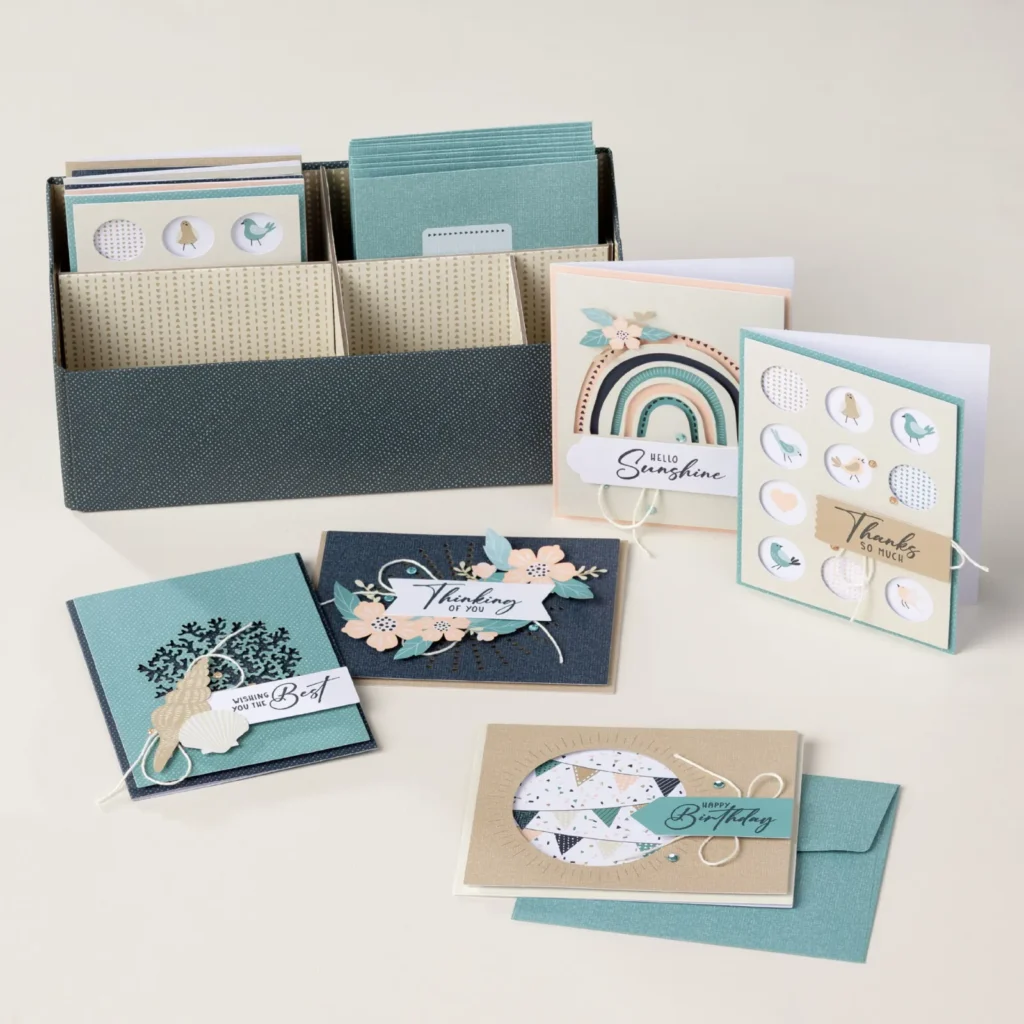
I made these cards and recorded it on video so you could see how fast they can be.  There are three different card layouts all using the same three colors.  Granny Apple Green, Gorgeous Grape and Bermuda Bay inks with these same card stock colors plus Coastal Cabana and Whisper White.  

The White greeting die is from the Tasteful Labels dies.  I hand cut the larger one. 

Measurements for this card:

  • Granny Apple Green 5 1/2" X 8 1/2" card base
  • Gorgeous  Grape  3 3/4" X 5"
  • Whisper White 3 pieces at 3 1/2" X 1 1/2"

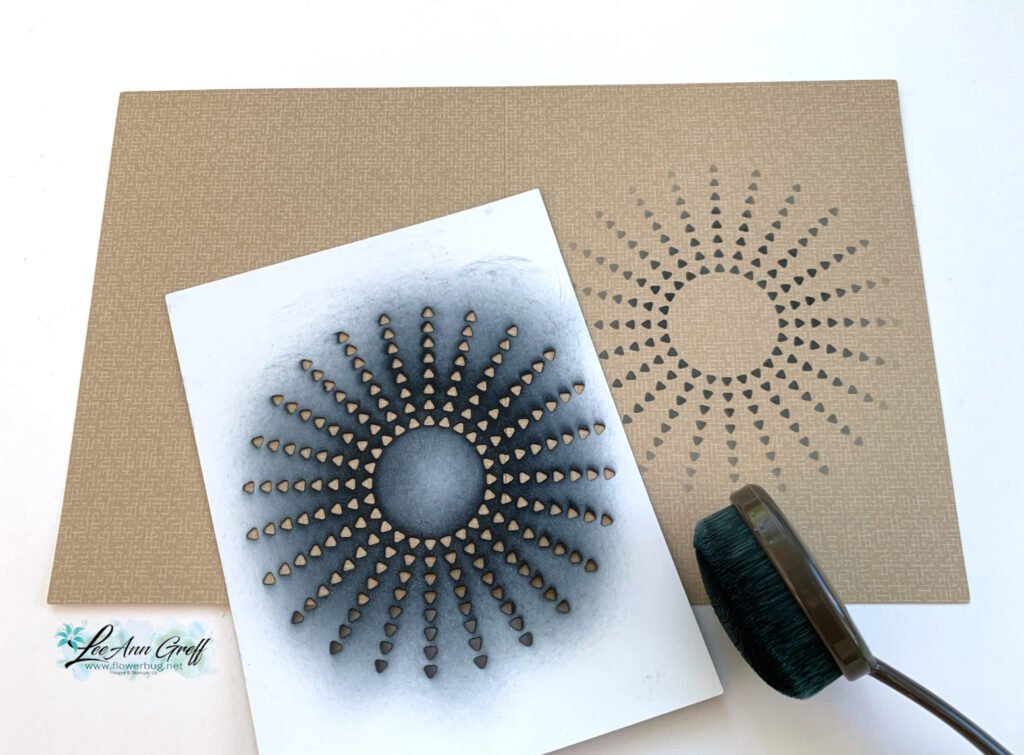
I used a masking & sponging technique here and added a die-cut from the Flourishing Fern dies too.

Measurements:

  • Coastal Cabana card base 5 1/2" X 8 1/2"
  • White 3 1/2" X 4 3/4"
  • Gorgeous Grape 3 5/8" X 4 7/8"

A simple card base of Gorgeous Grape 5 1/2" X 8 1/2" and White at 5 1/4" X 4".  Did you catch that I sponged the corner of the left one?  Which do you prefer? 

~~~

June Specials

The new catalog is here!!!  


Get my Lovely You pdf tutorial free with any online order in June

It includes directions, photos and measurements for 10 cards!


June Host code is 7H2FW9FG

Get a free pkg. of Elegant Faceted Gems from me if your order is over $55. 

Order online here

All Posts

  • An easy card with Prairie Grass & Thoughtful Journey


    Here’s the last card I shared on last week’s video – all three featured the beautiful Prairie Grass stamp set seen here.  Unfortunately it is now out of stock but you can add your email to be informed when it’s available. 

    I stamped it onto a piece of Thoughtful Journey designer series paper. Then I cut it into 3/4″ strips before adhering it onto the Black CS layer and then the White card base. 

    You might wonder where the layered greeting shape is from. I used the To the Point punch with a 3/4″ strip of DSP like this: 

    Tip: Insert your paper through the back of the punch like you see above.  Notice it’s not through the side; but inserted into the back area.  Once you do both ends and you’re happy with the length of it, adhere it to a Black strip 1″ wide and punch both ends to layer evenly.  

    Here’s the free project sheet for this card. Print or download it by clicking on this link: Download Prairie Grass scene

    And here’s the video below where I share how to create this gorgeous card and two other cards featuring this amazing Prairie Grass stamp set. 

    ~~~

    July Specials:


    New Online Exclusives are here!  Click here

    ~~~

    Get my Turtle-y Cute PDF tutorial free with any online order in July!

    Leave a Reply

    Your email address will not be published. Required fields are marked *

  • Stunning Prairie Grass sunset scene with a masked moon & video tutorial


    I'm thrilled to share this amazing card with you today.  We made it at my July card clubs. 

    I created a beautiful sunset with stamps, ink and a 'moon mask'.  I used Blending Brushes with Secret Sea, Darling Duckling and Timid Tiger inks.  

    It features the beautiful Prairie Grass stamp set seen here.  Since I'm from North Dakota where we have tons of 'prairie' this set was a must have!  *Unfortunately it is now out of stock but you can add your email to be informed when it's available. It should be back around August 11th. 

    After stamping the grassy image we added a post-it note mask made from a circle punch. Then we blended the inks on little by little.  It's important to use less ink and more time to get this pretty soft effect. 

    See the flap on the left side of the card above?  That flap holds down the front of the card.  So simple but a fun technique. Notice the light sponging on the greeting inside?  

    I created a free project sheet for this card.  You can print or download it by clicking on the following link: Download Prarie Grass July 2025

    And here's the video below where I share how to create this gorgeous card and two other cards featuring this amazing Prairie Grass stamp set. 

    ~~~

    July Specials:


    New Online Exclusives are here!  Click here

    ~~~

    Get my Turtle-y Cute PDF tutorial free with any online order in July!

    Leave a Reply

    Your email address will not be published. Required fields are marked *

  • Gorgeous Prairie Grass Joy Fold card with video & free project sheet


    I shared this pretty card on last week's Live video.  

    Isn't it pretty?  The colors include Fresh Freesia with Black accents. All of my projects featured the brand new Prairie Grass stamp set seen here.  

    I also used the amazing Thoughtful Journey DSP seen here.  It's absolutely perfect for scene builder stamps like this one and has some of the best and easiest backgrounds to start with.  

    This card is called a 'Joy Fold' – who knows why but it's actually one fold name I haven't forgotten. Basically it has two flaps that overlap each other. It gives you multiple opportunities to use your Designer Papers or textured layers.  

    The embossing folder here is called Glass & Gardens seen here.  It's unavailable right now but you can add yourself to the list to be notified when it's back in stock.  

    Here's the free project sheet for this card with measurements, directions and supplies.  Click on the following link to print or download it.  Download Prairie Grass JoyFold card

    And here's the video below where I share two other cards featuring this amazing Prairie Grass stamp set. 

    ~~~

    July Specials:


    New Online Exclusives are here!  Click here

    ~~~

    Get my Turtle-y Cute PDF tutorial free with any online order in July!

    Leave a Reply

    Your email address will not be published. Required fields are marked *


Notice: LeeAnn Greff, Independent Stampin’ Up! Demonstrator, Manager. The content of this website is my sole responsibility as an independent Stampin’ Up! demonstrator and the use of, and content of, the classes, services, or products offered on this website is not endorsed by Stampin’ Up! Copyright 2025