Stampin’ Up! has created a new Stampin’ Positioner for us! Since they had to take the Stamparatus off the market we’ve been waiting for a new tool for perfect stamping. Well, it’s now here!
As you can see in the photo above it’s a brand new design. It has two clear plates, easy to use magnets and a brand new ‘press’ type mechanism.
Right now for those who are a Demonstrator, it’s available to pre-order until February 2nd for $49. After that, the new Stampin’ Positioner will be added to the Starter Kit FREE in February!
The cost of the Starter Kit is $99 and includes $125 in product of your choice. But in February, they’ll add in the new Stampin’ Positioner to ALL Demo’s starter kits!
This is super exciting for us Demo’s now and also for those that join in February!
It sounds like the general population will have to wait to get theirs…. but they promise it will be available sometime later this year to everyone.
All Posts
Pretty Window card
Later today the Retired List will be out for the 2019 Annual Catalog! Items will be available while supplies last. Rococo Rose card stock is already sold out. Stay tuned; I'll post it as soon as it's out! Or click here after 2 pm Central Time.
My colors are Balmy Blue, Black & White here. That pretty flower is fussy cut from the True Love Designer Series paper seen here and colored with Balmy Blue Blends. It's my very favorite paper!
I textured the Balmy Blue CS before I die-cut the window; cutting them both at the same time.
See the other products used here; click on each to see it in my store:
Audrey, on my Flowerbug's Team is an expert at coloring and she gave me a few samples made with this set. *All I had to do was layer it and create a finished card with her beautiful colored image! Love that!
3 Fun Projects & Video with the Circle Celebration stamp set
I tried not to order the Circle Celebration stamp set but it kept calling out 'Order me!' So I caved….and am so glad I did! The images seem like they're almost 'retro' style which I love. I do enjoy creating my own stamped background and these are perfect for that.
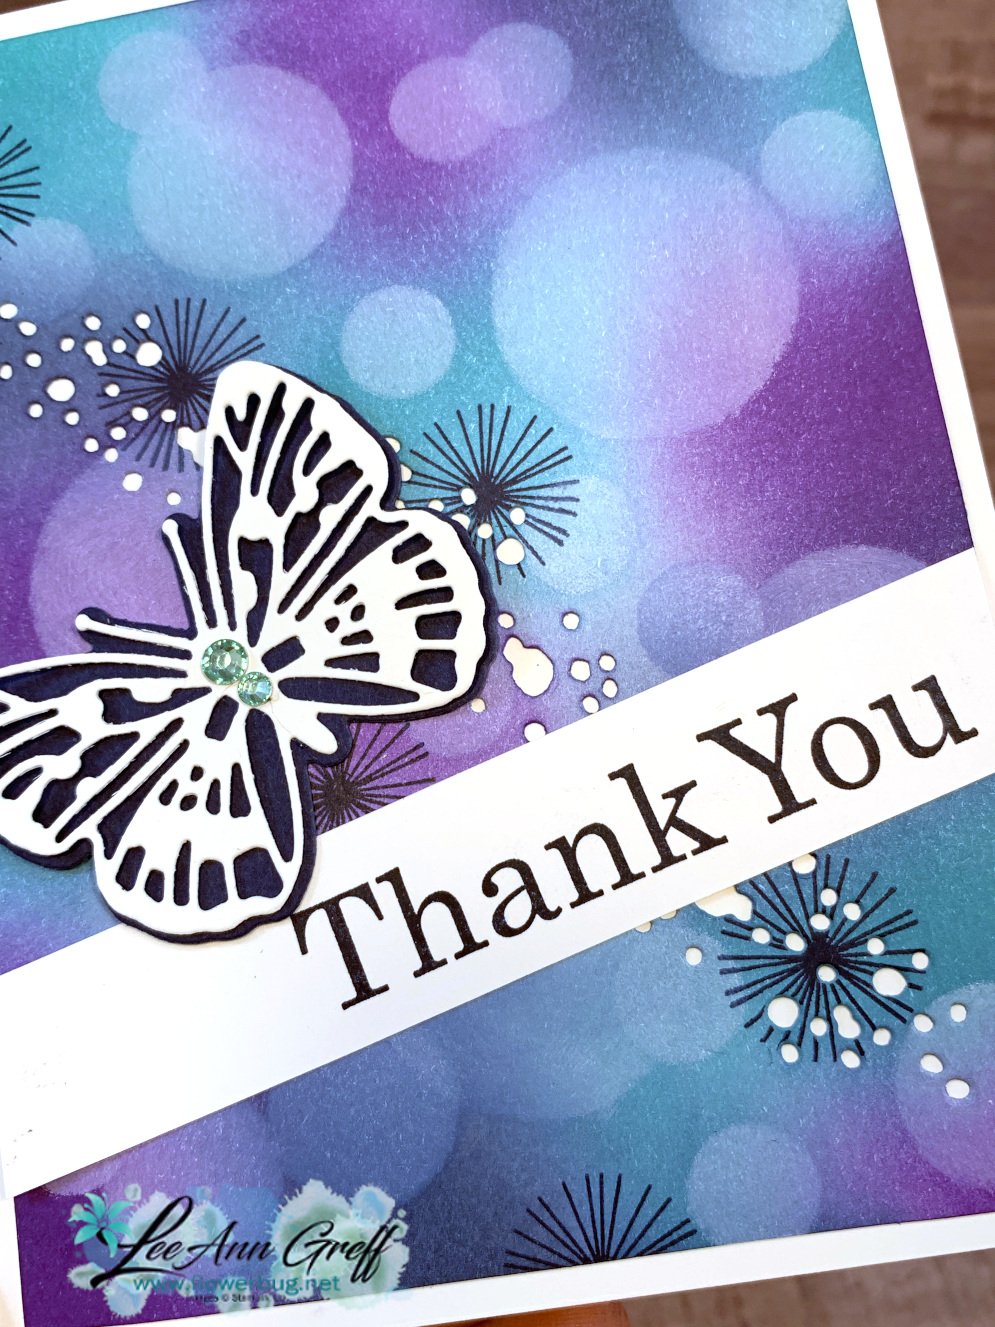
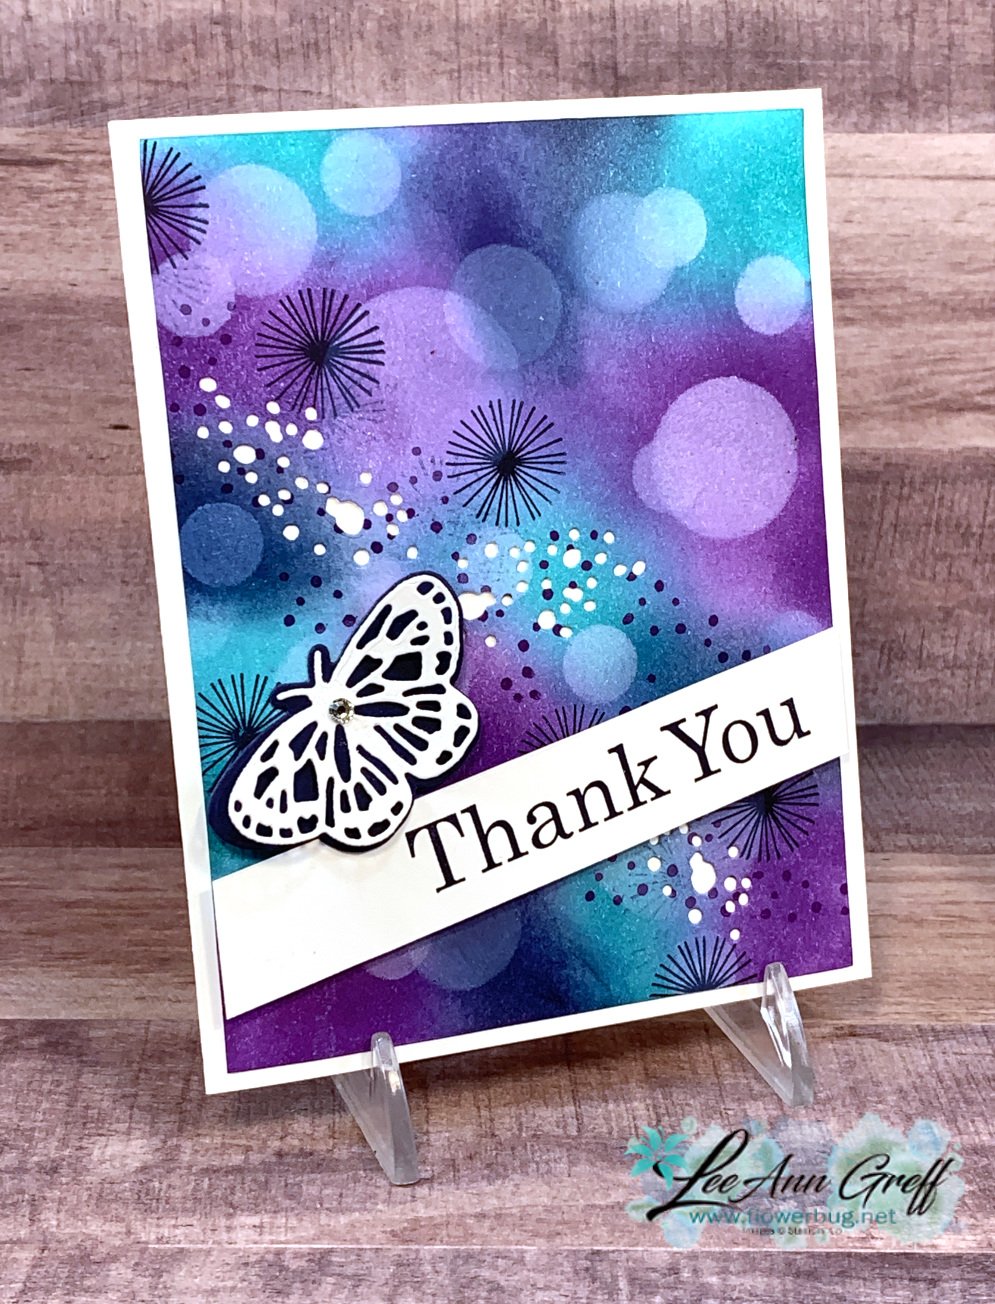
You start out with a sponged background. I used our new Blending Brushes that are awesome! They are currently out of stocks but should be back at the end of March.
Randomly sponge ink colors onto our Basic White CS. Choose colors that somewhat coordinate if possible. this can be difficult for some who struggle with color combos. I choose colors that when mixed do not make mud. How do I know which colors don't mix? Trial and error of course! Here I used Night of Navy, Bermuda Bay and Gorgeous Grape. Aren't these colors gorgeous together?!!!
*Another combo I might pick are yellows, oranges & reds. Or greens & blues!
Once you're done you add sponged circles using White Craft ink. I made my own stencils by punching circles out of card stock. I share tips on using and re-inking our White Craft ink in the video below.
The greeting is from the Best Year stamp set in the Annual Catalog and the butterflies AND white dotted die-cut 'holes' are from the new Brilliant Wings bundle seen here.
Here is the video; I hope you watch it to see how to make these fun projects!
Stop in here for tonight's Stamp with Me Facebook Live at 7:30 pm Central Time! We're making these paper quilting cards:
Notice: LeeAnn Greff, Independent Stampin’ Up! Demonstrator, Manager. The content of this website is my sole responsibility as an independent Stampin’ Up! demonstrator and the use of, and content of, the classes, services, or products offered on this website is not endorsed by Stampin’ Up! Copyright 2025


Leave a Reply