/


Latest Post

Finally! We’re getting a new Stampin’ Positioner!


Stampin’ Up! has created a new Stampin’ Positioner for us! Since they had to take the Stamparatus off the market we’ve been waiting for a new tool for perfect stamping. Well, it’s now here!

As you can see in the photo above it’s a brand new design. It has two clear plates, easy to use magnets and a brand new ‘press’ type mechanism.

Right now for those who are a Demonstrator, it’s available to pre-order until February 2nd for $49. After that, the new Stampin’ Positioner will be added to the Starter Kit FREE in February!

The cost of the Starter Kit is $99 and includes $125 in product of your choice. But in February, they’ll add in the new Stampin’ Positioner to ALL Demo’s starter kits!

This is super exciting for us Demo’s now and also for those that join in February!

It sounds like the general population will have to wait to get theirs…. but they promise it will be available sometime later this year to everyone.

All Posts

  • One Day Only of FREE SHIPPING! Plus a special Hydrangea Hill Fun Fold Window card


    Tomorrow is St. Patrick's Day and both Stampin' Up! and I have an ordering special! 


    Plus I'm giving you 5 free cards with an online order over $30 through Sunday! 

    Win win; it's your lucky day!  Get your wish list together and place that order tomorrow on March 17th!  You'll get even more!  Scroll down to the bottom to see what else you'll receive! 

      Order online here. 

    ~~~

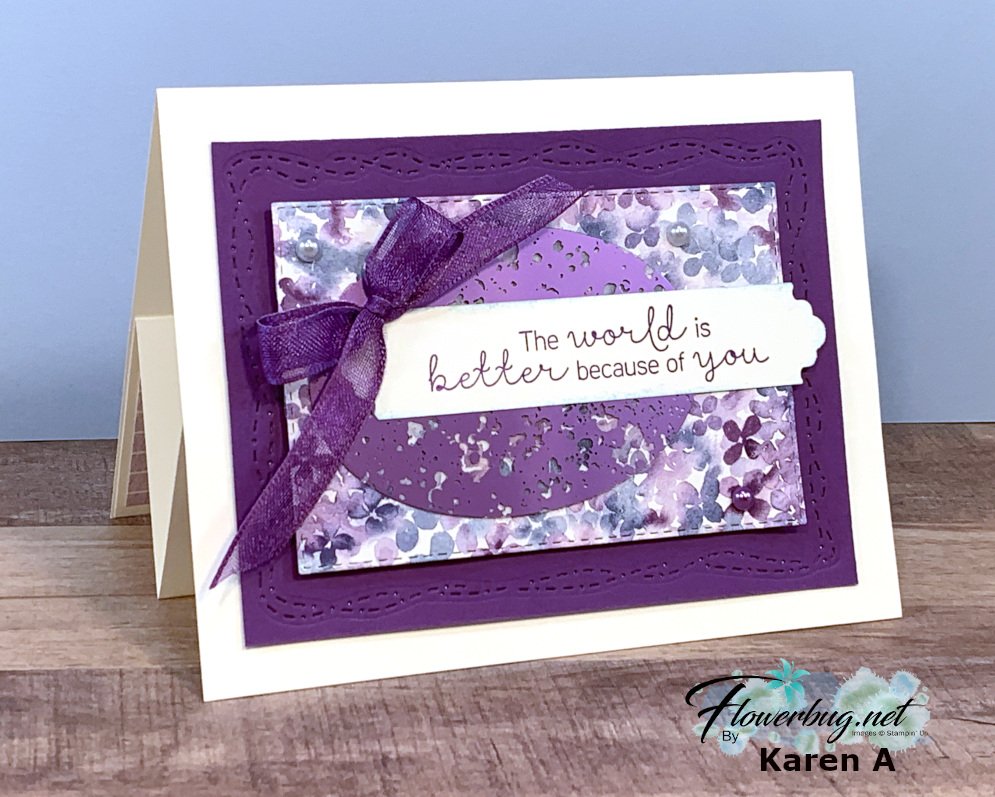
    And now I want to share Karen's amazing fun fold card featuring the Hydrangea Hill suite of products.  It's one more in a series of window cards from our Flowerbug's Team swap on Saturday. 

    Look!                                                                      

    Her colors are Gorgeous Grape & White along with the beautiful Hydrangea Hill designer paper and the Mercury Glass acetate.  See this suite of products here. 

    Other items she used here are the Stitched with Whimsy, Stitched Rectangle, Oval dies and the Lovely Labels Pick a Punch.

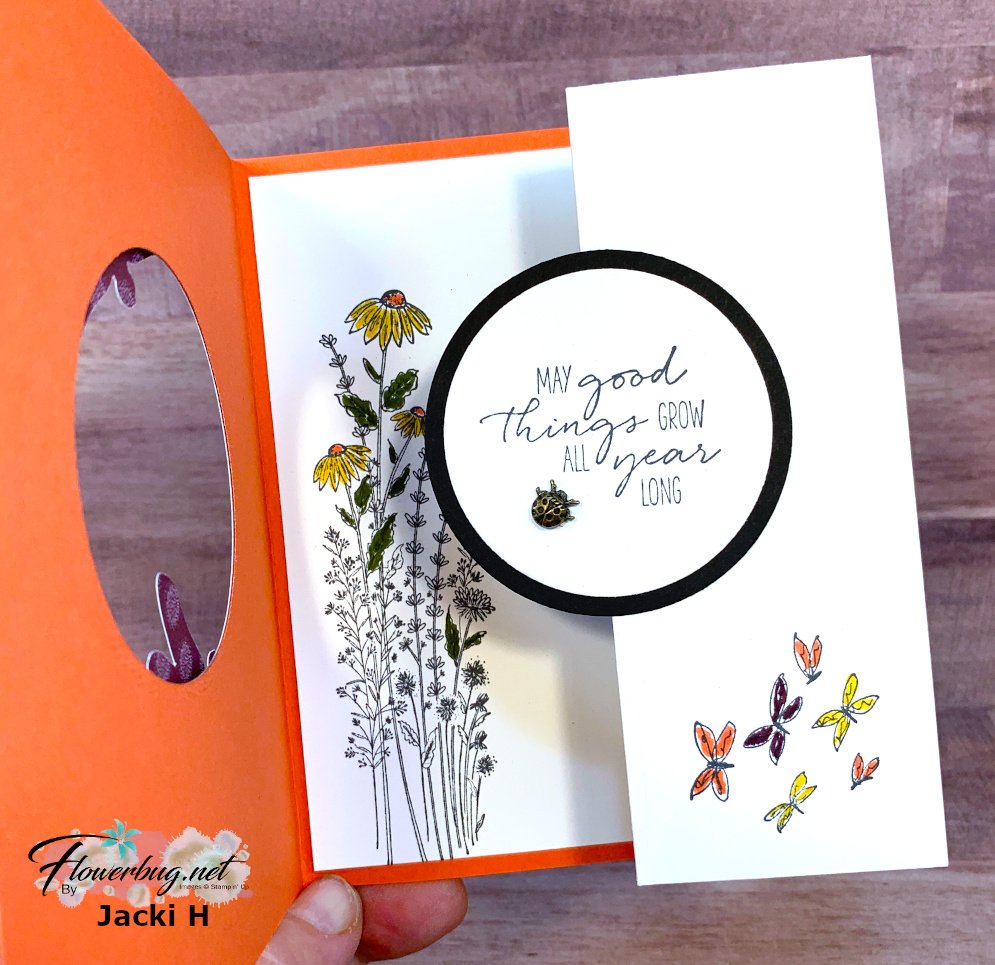
    She used the Hydrangea Haven stamp set to finish off the inside. Below are the measurements if you'd like to make a card like this beauty.

    Measurements:

    • White card base 5 1/2" X 8 1/2" scored at 4 1/4"
    • Inside White card stock 5 3/8" X 8 1/2". Score it at 2 1/8", 4 1/4" and 6 3/8". Die-cut a 2 1/2" X 3 1/2" oval from the center.
    • Gorgeous Grape CS 3 1/2" X 4 3/4"
    • Designer Paper front is 2 5/8" X 4" (stitched rectangle die) inside 1 7/8" X 5 1/4"
    • Oval Mercury Glass Acetate 2 1/8" X 3" 

    ~~~

    Lots of March Specials!


    Get 5 free cards with a $30 online order through March 20th!

    Current Host code is 39A9QQZP

    Order online here

    And if your order is over $50 you'll also receive a free adhesive package from me 3 sheets of Dimensionals and 1 for die-cuts!

    *If your order is over $150 do not use the code; you'll still receive the gifts! 

    All online orders receive a free PDF of the new Butterfly Bouquet bundle

    with 15 projects!

    Below are the Multipurpose Glue stands we're making. They're $6 each and available in my Shop here.  

    Leave a Reply

    Your email address will not be published. Required fields are marked *

  • A WOW fun fold card with Dragonfly Dreams!


    This weekend my Flowerbug's Team held our monthly card swap & Team gathering.  Our theme was window cards and I'll be sharing them all week long!

    Check out this special Z fold card Jacki made!  

    Her colors are Terracotta Tile, Black & White and the Dandy Garden Designer paper seen here.  Did you know that the Dragonfly Punch coordinates with this Designer Paper?  She punched her dragonflies directly out of the paper!  No stamping for these at all! See the Dragonfly Garden bundle here. 

    Check out the whole suite of products here. 

    This card features almost two full card bases with just a few score lines. It looks a lot harder than it is.  

    • Terracotta Tile – 5 1/2" X 8 1/2" scored at 4 1/4"
    • Whisper White – front is 4" X 5 1/4", inside fold is 5 1/4" X 8" scored on the long edge at 4" X 6". 
    • Designer paper – 1 3/4" X 5" 

    Her 'window' in the front is 2 3/8" and the black circle on the inside fold is the same.  The White greeting circle is 2 1/8".  All of these circles are cut with the Circle dies in the Annual Catalog. 

    Steps to assemble this card:

    • You'll adhere the White front to the main card base and then cut your window. 
    • Stamp on the inside White card before adhering to the inside of the main card.
    • Add the Designer paper to the inside fold.
    • Die-cut the greeting circles and adhere together. 
    • Fold the card closed and add the circle to the inside fold 'through' the front window.  Perfect placement!   

    More window cards posted tomorrow and all week long! 

    ~~~

    Current Host code is 39A9QQZP

    Order online here

    All online orders receive a free PDF of the new Butterfly Bouquet bundle

    with 15 projects!


    ~~~

    Get a free adhesive package from me with an online order over $50 using the host code above. 3 sheets of Dimensionals and 1 for die-cuts!

    *If your order is over $150 do not use the code; you'll still receive a gift! 

    Below are the Multipurpose Glue stands we're making. They're $6 each and available in my Shop here.  

    Leave a Reply

    Your email address will not be published. Required fields are marked *

  • Create gorgeous backgrounds with just a few common stamping items! Video tutorial!


    On Tuesday's FB live I shared a fun and easy technique for gorgeous backgrounds.  Once you create them you can use them to create stunning, beautiful cards like these:

    This was my first try at this technique this week.  Honestly it's not a new technique at all but I hadn't done it for years! The stamp set is called Soar Confidently (seen here) and I hadn't used it yet.  I think it works wonderfully with a pretty background. 

    I used Highland Heather, Gorgeous Grape, Bermuda Bay and Pacific Point Stampin' Write markers on an E block and spritzed with plain water.  Then 'stamp' on our Basic White CS and let dry with the block on it (this prevents warping).  Then stamp on it with any black ink.  

    Here are a few more samples I shared: 

    The left card above features the Dragonfly Garden stamp set and the right is the Floating & Fluttering set. 

    See what I mean?  And it's fun too!  Each time you do it they turn out differently so it's kind of addicting!  Watch the video below to see how easy it can be.  

    ~~~

    Current Host code is 39A9QQZP

    Order online here

    All online orders receive a free PDF of the new Butterfly Bouquet bundle

    with 15 projects!


    ~~~

    Get a free adhesive package from me with an online order over $50 using the host code above. 3 sheets of Dimensionals and 1 for die-cuts!

    *If your order is over $150 do not use the code; you'll still receive a gift! 

    Below are the Multipurpose Glue stands we're making. They're $6 each and available in my Shop here.  

    Leave a Reply

    Your email address will not be published. Required fields are marked *


Notice: LeeAnn Greff, Independent Stampin’ Up! Demonstrator, Manager. The content of this website is my sole responsibility as an independent Stampin’ Up! demonstrator and the use of, and content of, the classes, services, or products offered on this website is not endorsed by Stampin’ Up! Copyright 2025