Stampin’ Up! has created a new Stampin’ Positioner for us! Since they had to take the Stamparatus off the market we’ve been waiting for a new tool for perfect stamping. Well, it’s now here!
As you can see in the photo above it’s a brand new design. It has two clear plates, easy to use magnets and a brand new ‘press’ type mechanism.
Right now for those who are a Demonstrator, it’s available to pre-order until February 2nd for $49. After that, the new Stampin’ Positioner will be added to the Starter Kit FREE in February!
The cost of the Starter Kit is $99 and includes $125 in product of your choice. But in February, they’ll add in the new Stampin’ Positioner to ALL Demo’s starter kits!
This is super exciting for us Demo’s now and also for those that join in February!
It sounds like the general population will have to wait to get theirs…. but they promise it will be available sometime later this year to everyone.
All Posts
The last of my 10 amazing card ideas for Paper Strips!
Today I'm sharing the last of the 10 cards I made on my Facebook Live video. If you aren't following me on Facebook yet click here. I host a video each Tuesday morning at 11 am CT and twice a month on Monday evenings as well.
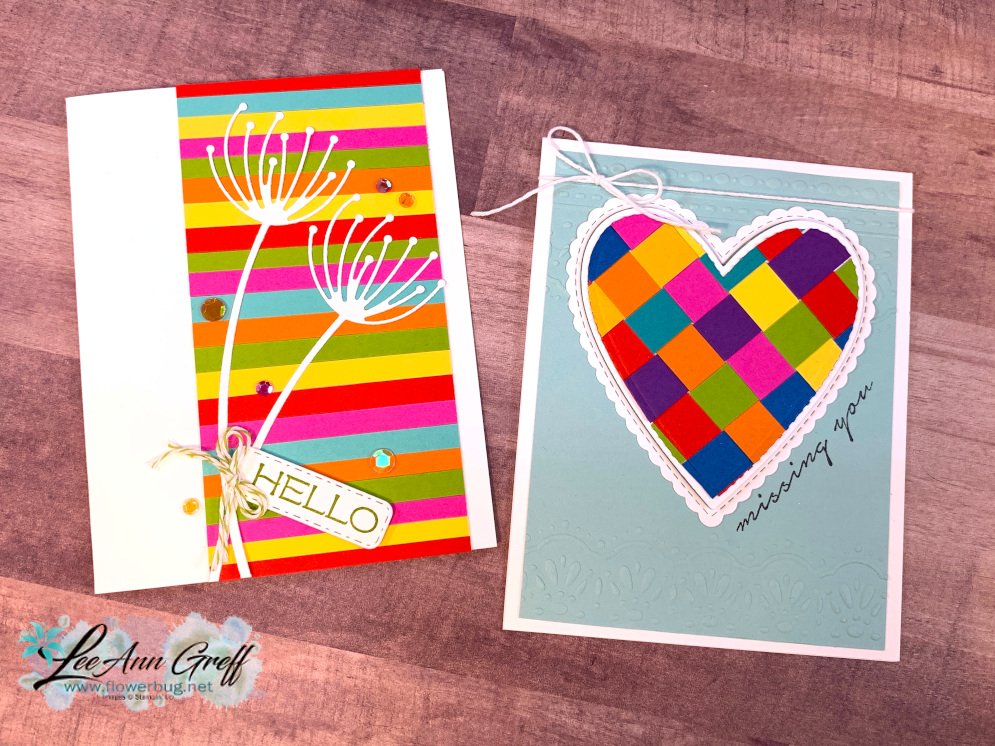
I had a bunch of paper strips leftover from cutting out for cards and kits and created some fun & unique cards with them. We're calling them 'Stripper Cards'!
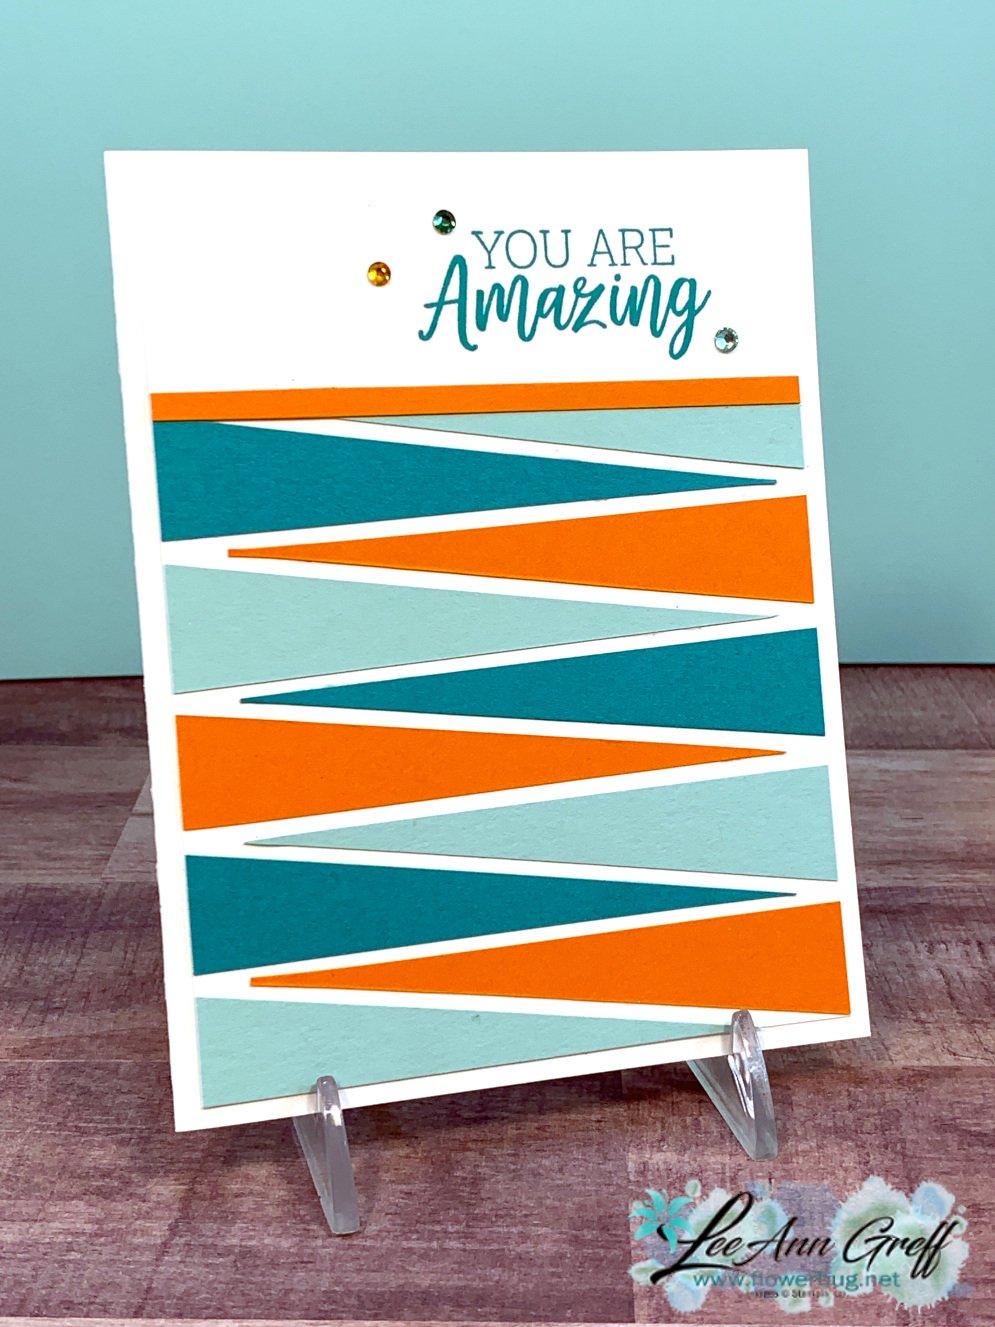
I started out with a 4" X 5 1/4" piece of White CS. Starting at the bottom I added a strip and alternated colors and directions each time. I focused on keeping the tips at the same area and left the excess 'wide' end hang over the edge.
I had to leave enough space to stamp the greeting (You Are Amazing set seen here) so I stopped about 1 1/2" up. The last piece may need to be trimmed before you add that skinny little edge strip. A few Holiday rhinestones finish it off.
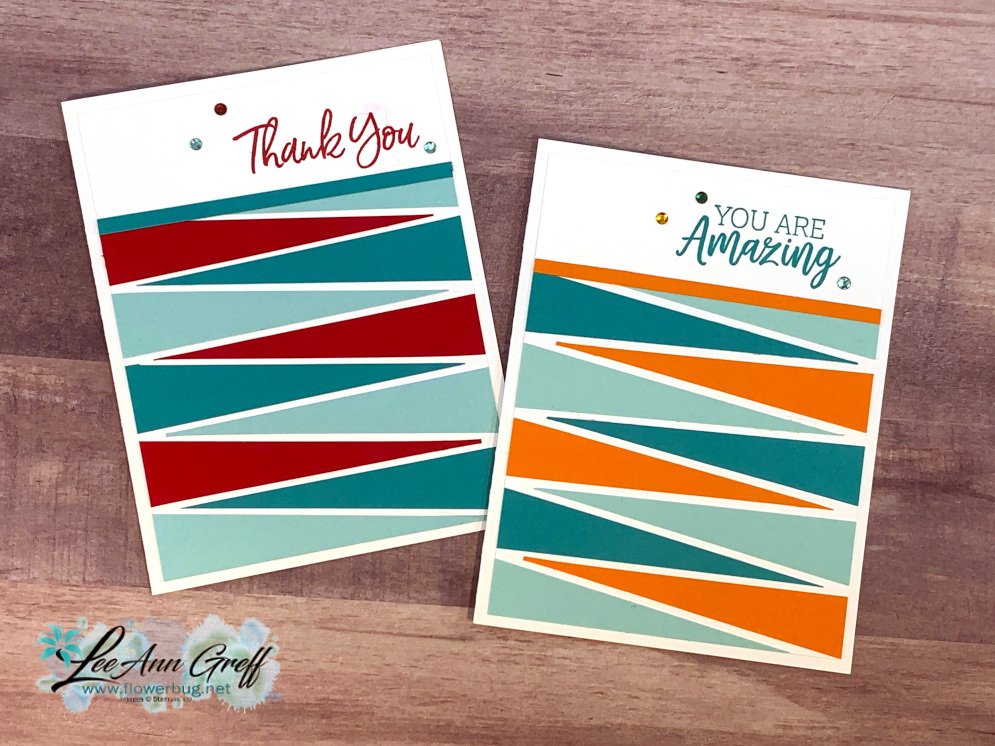
On my video (scroll down) I used Real Red with the Pool Party & Bermuda Bay. Which do you prefer?
I cut random lengths of 1/4" strips and adhered them to a 4" X 5 1/4" piece of Black card stock. The greeting is from the Sweet Ice Cream set stamped on a 1" X 4 3/4" strip of White CS. Add this and trim the ends off before you add it to the main Coastal Cabana card base.
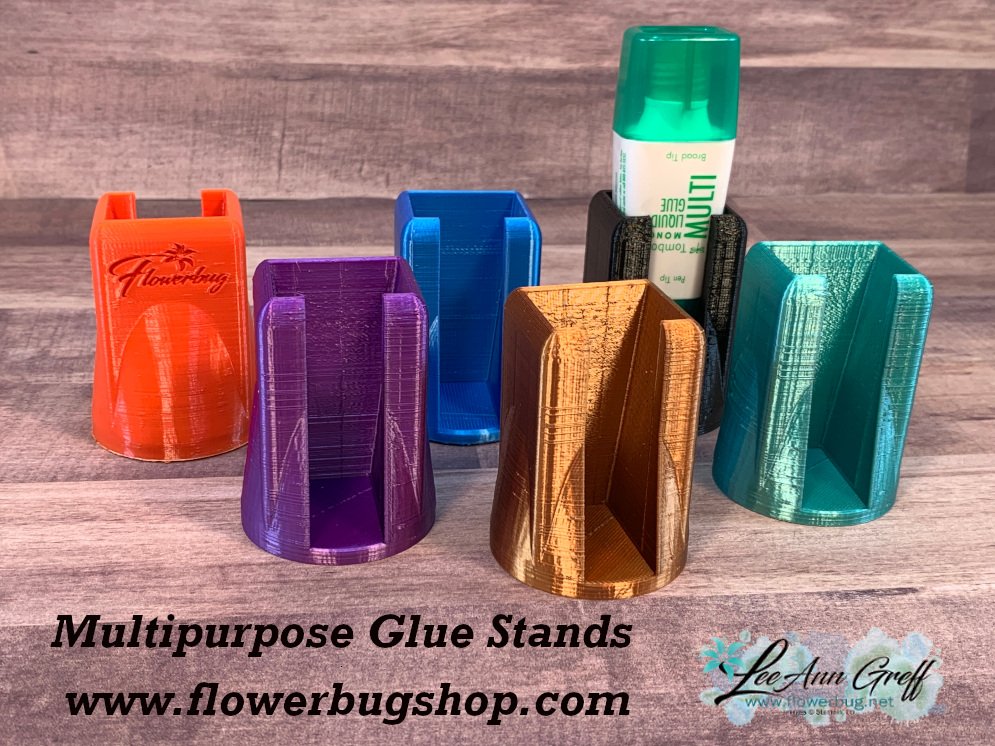
Get a free multipurpose glue stand with an online order over $60 using the host code above. You'll receive a color of my choice unless you let me know your preference. *if you'd rather have gems; let me know.
*If your order is over $150 do not use the code; you'll still receive a gift!
After I had the White piece covered with strips I trimmed off the excess on the edges and added it to the White card base. Then I added the pretty dandelion White die-cuts (from the Dandy Wishes dies here). That stitched greeting tag is from the Hydrangea Dies seen here. Artistry Blooms adhesive-backed sequins finish it off as well as a twine bow.
~~~
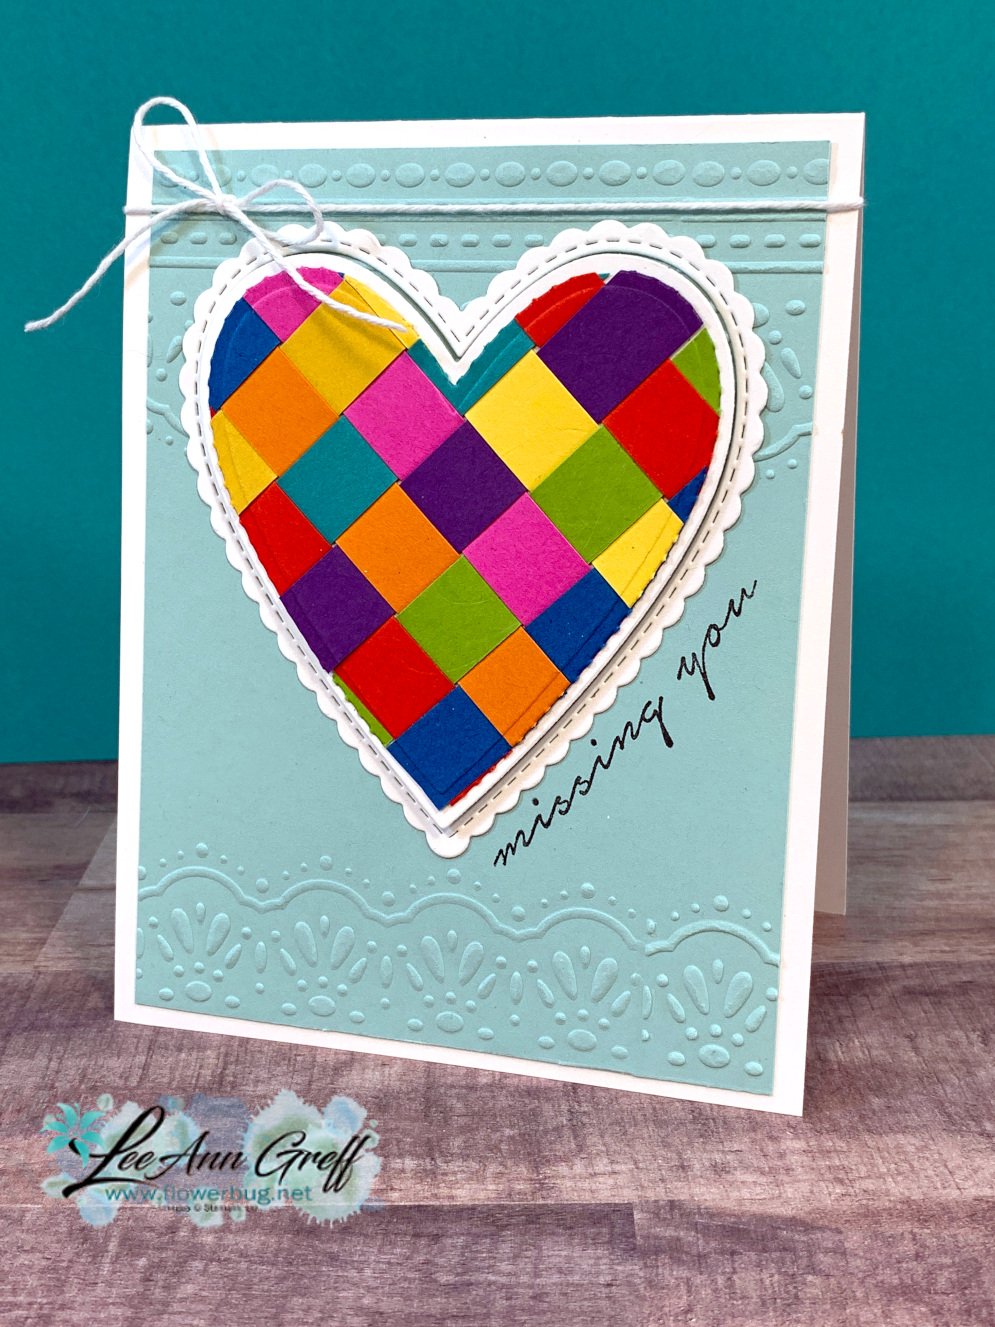
Next is a card with a woven heart. I think it's pretty neat! And it looks difficult but it's just a few extra steps to die-cut the shape. *Watch the video below to catch my tips on paper weaving.
I share a good demo on this technique in the video below. The strips are 1/2" and the heart shape is die-cut with the retiring Stitched Be Mine dies seen here. There are 16 dies with lots of heart shapes & borders in many sizes.
The pretty textures are from the Little Details embossing folders seen here. It's just $3.20 right now; while supplies last!
Here's the video for all 10 of my paper strips projects!
Get a free multipurpose glue stand with an online order over $60 using the host code above. You'll receive a color of my choice unless you let me know your preference. *if you'd rather have gems; let me know.
*If your order is over $150 do not use the code; you'll still receive a gift!
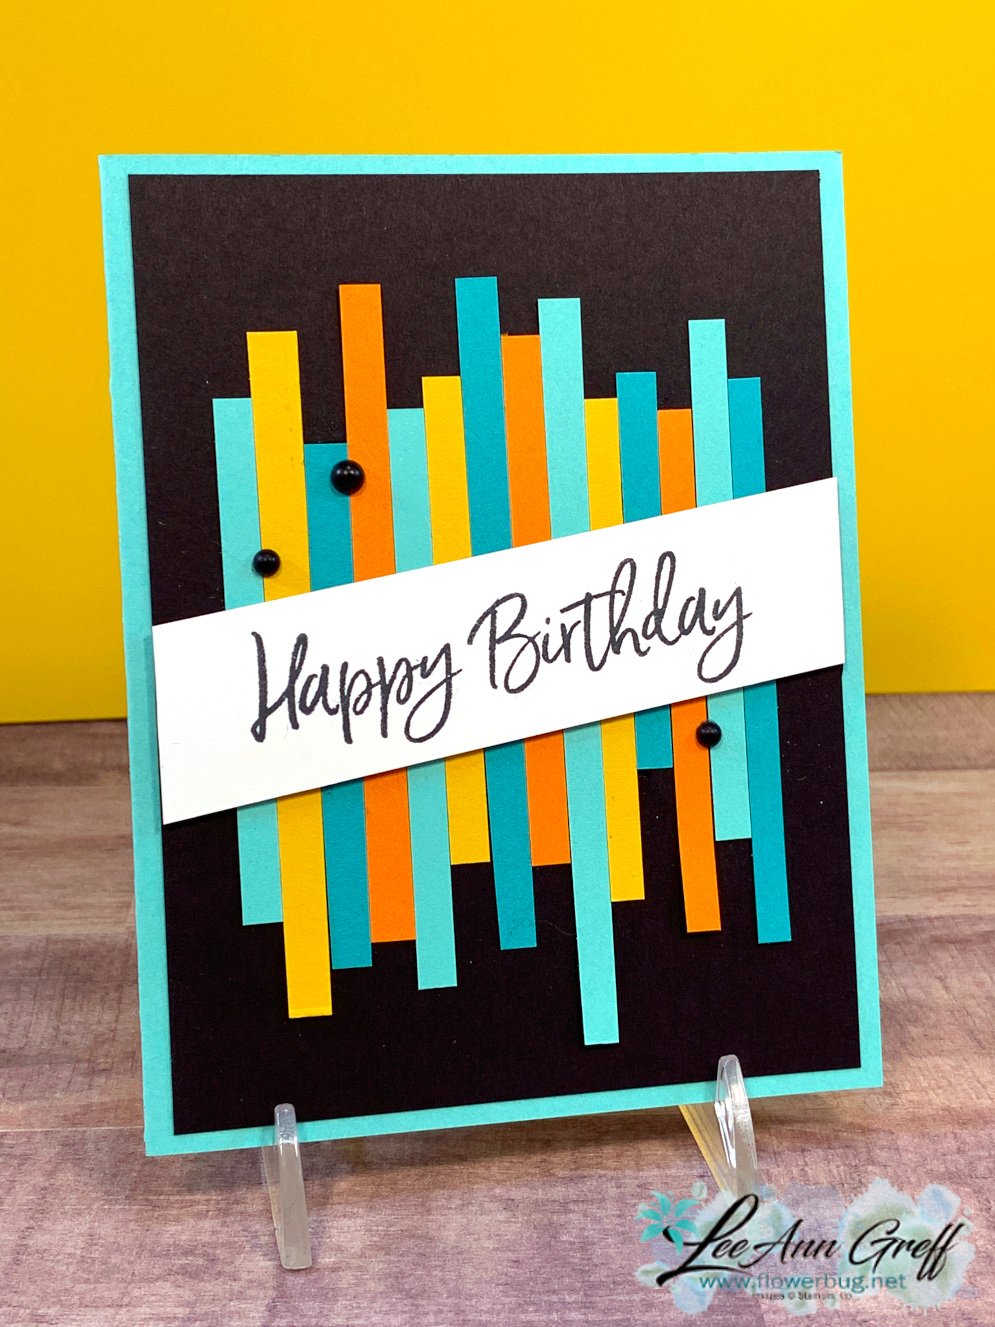
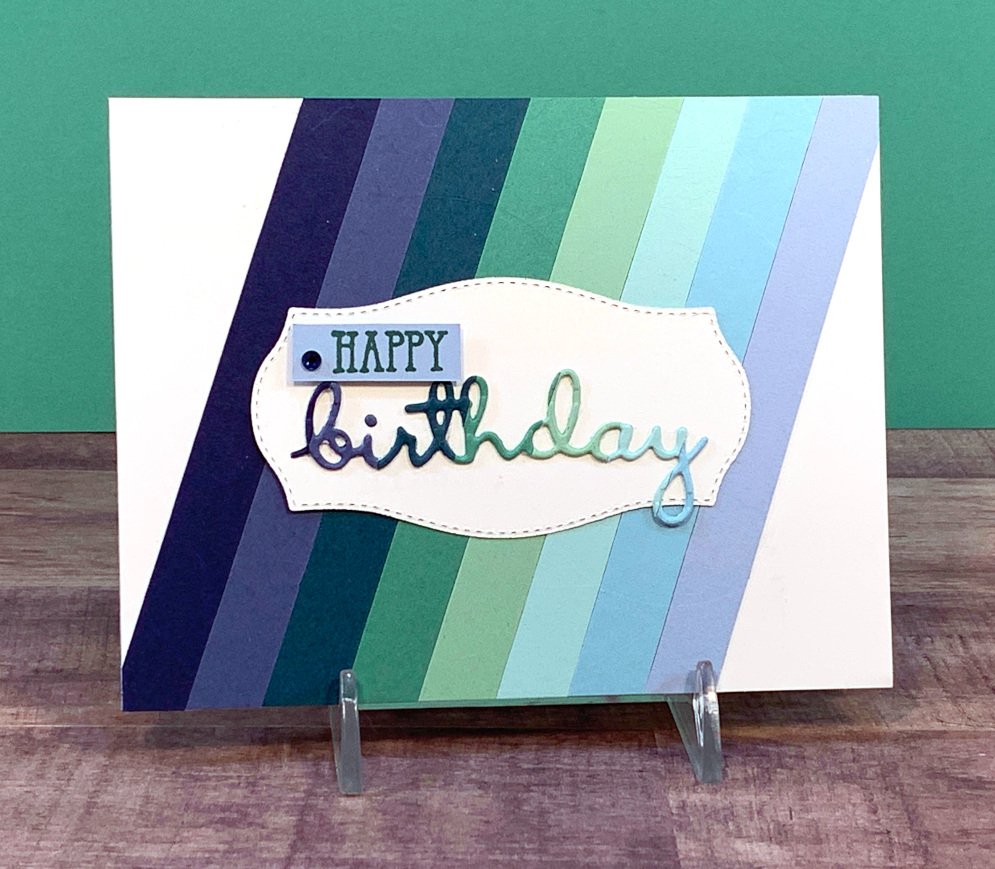
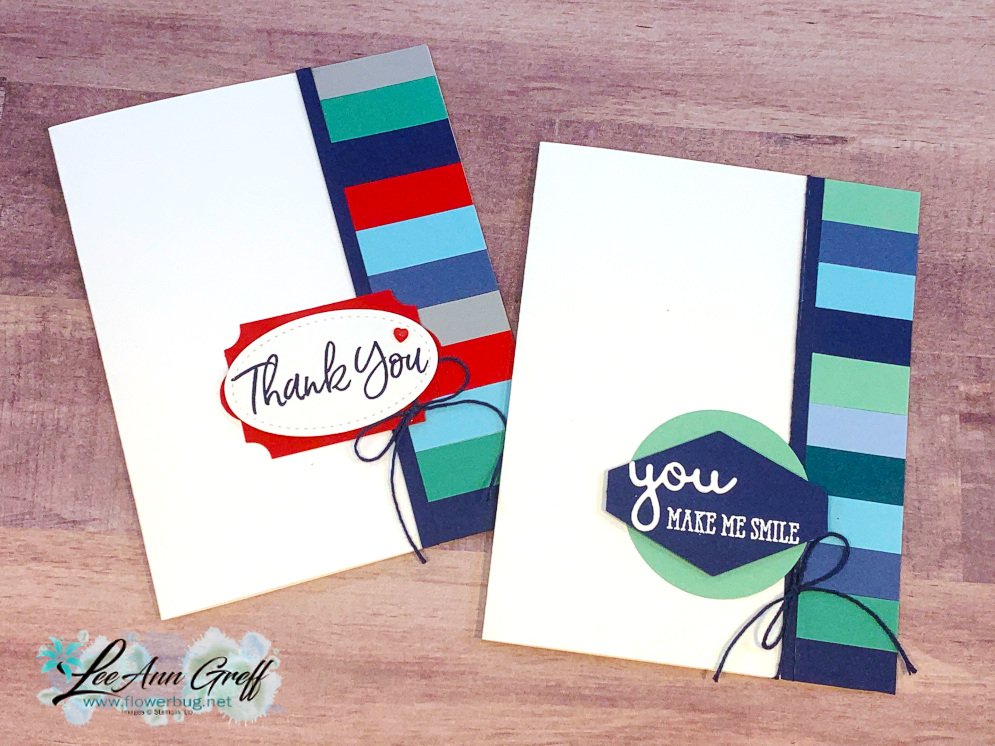
I thought paper strips were a perfect way to create cards for men. So I chose some 1/2" strips of blues and greens and adhered them to a piece of White 4 1/4" X 5 1/2" card stock at an angle.
Add them at an angle, graduating colors as you go if you wish. Once you're added strips trim off the excess on the edges.
Next I used the retiring Well Written 'birthday' dies seen here and cut it out of the stripes piece. I wanted the greeting to reflect the same colors in the background. So easy!
I adhered it to the Tasteful Labels die-cut with Multipurpose Glue. I stamped 'Happy' from the coordinating stamp set Well Said seen here and fussy cut it to add to the card.
~~~
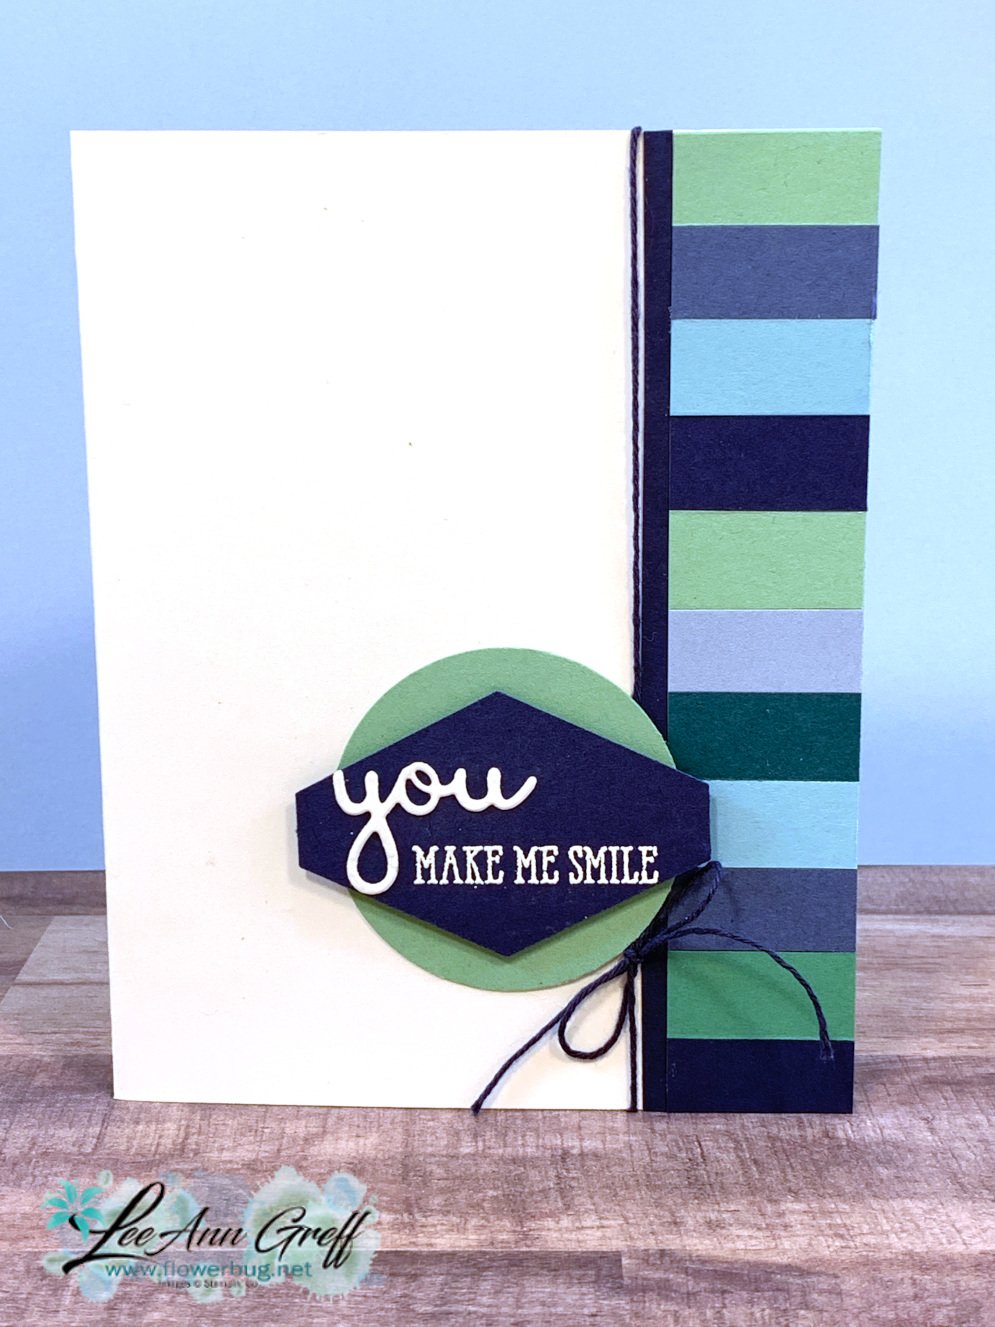
Next is another card with the exact same colors but totally different. I adhered 1/2" strips to the edge of a White card base. I didn't worry about the outer edge until I was done; trimming it off afterwards. I focused on the left edge being even.
I added a skinny 1/8" strip of Night of Navy to cover up any unevenness on my left edge. A length of Navy twine wrapped around and into a bow finishes it off.
The 'you' is from the Well Written dies and the 'make me smile' is rom the Well Said stamp set (heat embossed in White) on a Navy Tailored Tag punch.
Get a free multipurpose glue stand with an online order over $60 using the host code above. You'll receive a color of my choice unless you let me know your preference. *if you'd rather have gems; let me know.
*If your order is over $150 do not use the code; you'll still receive a gift!
Notice: LeeAnn Greff, Independent Stampin’ Up! Demonstrator, Manager. The content of this website is my sole responsibility as an independent Stampin’ Up! demonstrator and the use of, and content of, the classes, services, or products offered on this website is not endorsed by Stampin’ Up! Copyright 2025


Leave a Reply