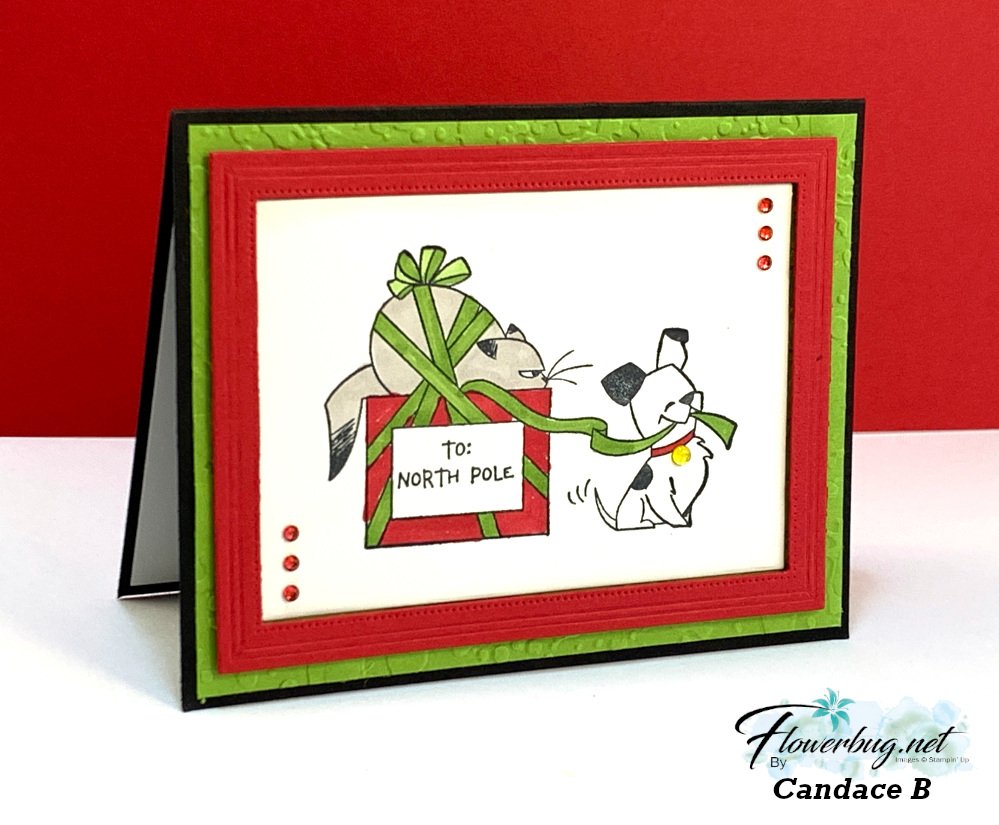
I love the Red frame she added to the card; it's from the Fabulous Frames dies seen here. She used Blends markers to color the images and added Red Rhinestones to set off the scene.
Next is a fun card made by Annette who featured the Penguin Place stamp set & Penguin Builder punch. These products are returning favorites from last year and many were super happy about it since the punch ran out of stock last year before some could grab it.
I absolutely love the scene she achieved using the Layering Diorama dies seen here! She used Starry Sky CS on the back, stamping the stars using White Craft ink. Then she added a layer of Orchid Oasis behind the penguin that looks like water. So smart!
I also like the way she used the Pearlized Enamel effects basics for her tree ornaments. The stamped blue snowflakes in the sky finish the scene off perfectly!
Stay tuned for more amazing swap cards by my Team.
*Love swapping? Or maybe you like discounted products? Consider joining my Flowerbug's Team! The Starter Kit has bonus free dollars this month! Check it out below:
~~~
October Specials
Starter Kit special! Get $155 in product for just $99
Use your scraps with the Double Twisted Ribbon technique; live class tonight!
If you like using up those paper scraps I have a fun technique to share. It's called the Double Twisted Ribbon technique.
I'll be demonstrating it on tonight's Stamp with Me Live on Facebook. It's at 7:30 pm Central time on the last Monday of the month and it's a free class! See the replay here
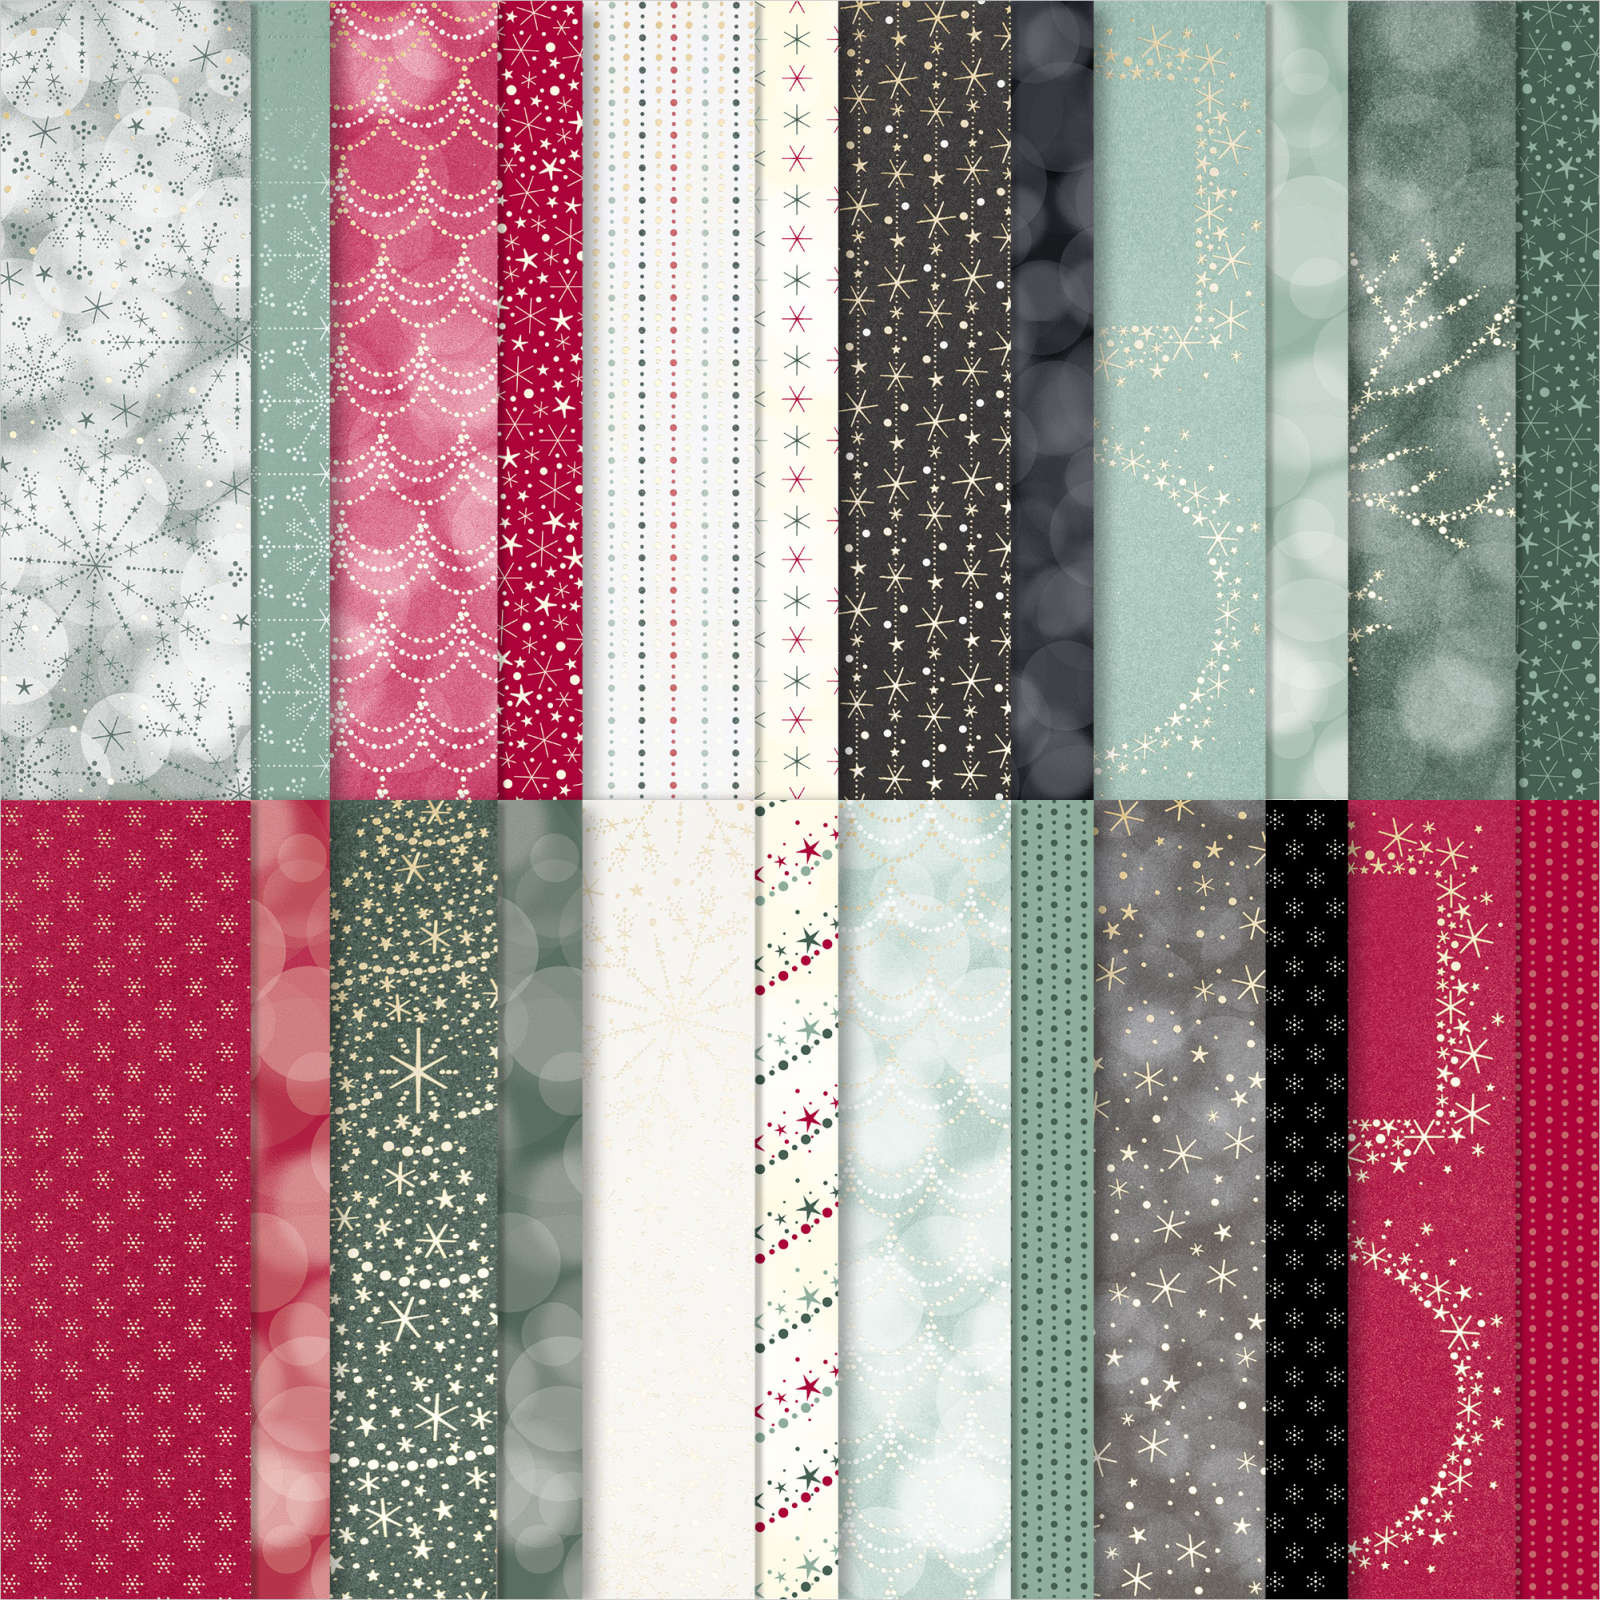
I chose to use the Lights Aglow specialty designer paper seen here for my card samples. It's so pretty with the gold foil accents and fine patterns.
Tips:
You'll need 6 strips of two different patterns; you can also use card stock for them. I cut them into 1/2" X 4" strips.
The strips are adhered to a White piece measuring 2 1/2" X 5 1/4". This is scored every 1" from the top down. These score lines help you when adhering your strips.
Once your strips are adhered you will add it to a layer measuring 2 3/4" X 5 1/2". I recommend you use a color that coordinates with a color in your DSP.
For this card I chose to use the Holly Berry diesfor the leaves & berries. The greeting die-cut is from the All That dies.
My card base is Evening Evergreen. The greeting is from the upcoming Framed & Festive stamp set. It's new and available to Demonstrators in October, but will be out for customers in November.
For this next card I stamped the greeting (also from the Framed & Festive stamp set) onto a die-cut circle from the Stylish Shapes dies.
That pretty gold leaf die-cut is from the upcoming Framed Floret dies – also coming out in November for customers. I added a few Festive Pearls for berries.
Click on the photo below to watch the video:
Which one is your favorite?
~~~
October Specials
Starter Kit special! Get $155 in product for just $99
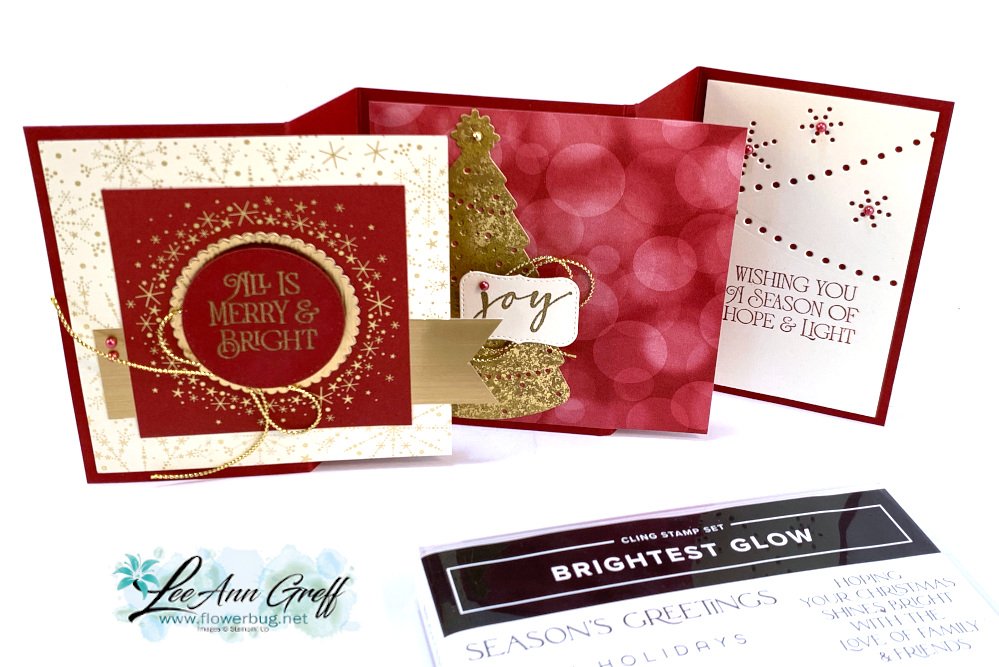
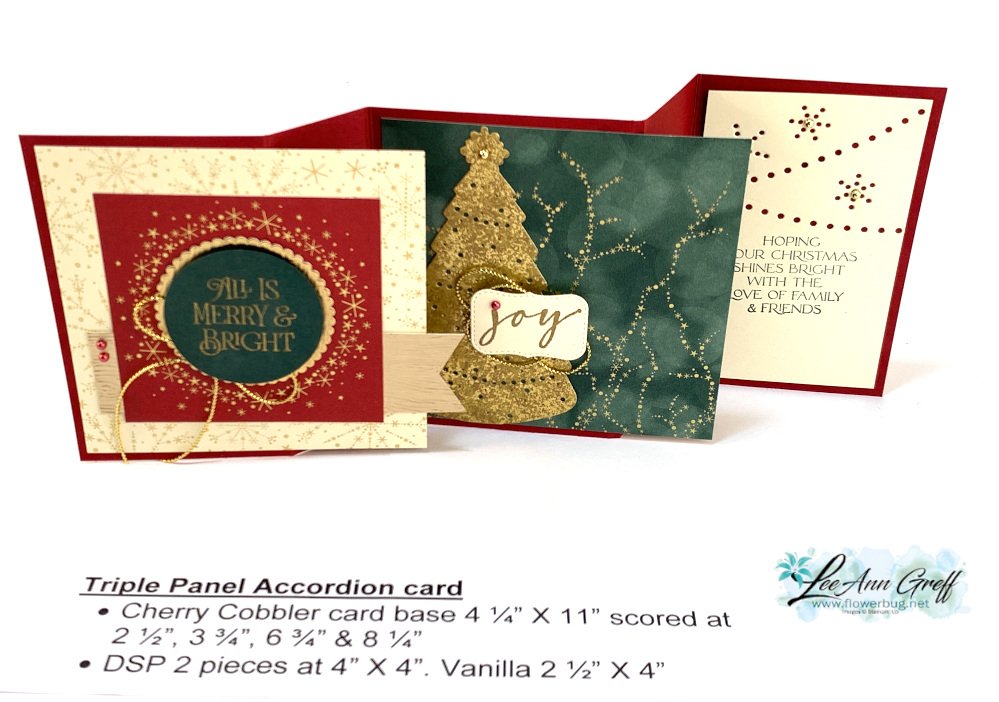
Triple Accordion fun fold card with Lights Aglow DSP; easy but WOW!
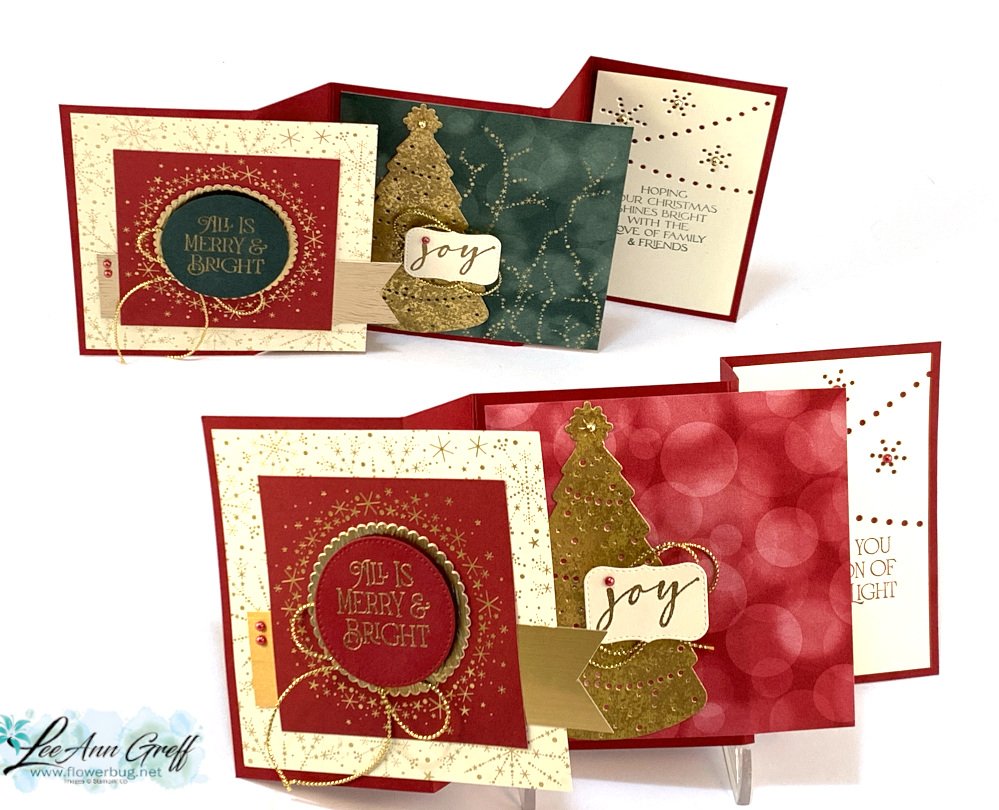
I love this unique fun fold card; I'm calling it a triple accordion card. I demonstrated it on this week's FB Live video. See it here on my YouTube channel.
I featured the Lights Aglow specialty designer paper seen here. It's so beautiful in Cherry Cobbler, Soft Succulent, Black, Evening Evergreen and pretty gold foil accents. Luckily it's back in stock right now.
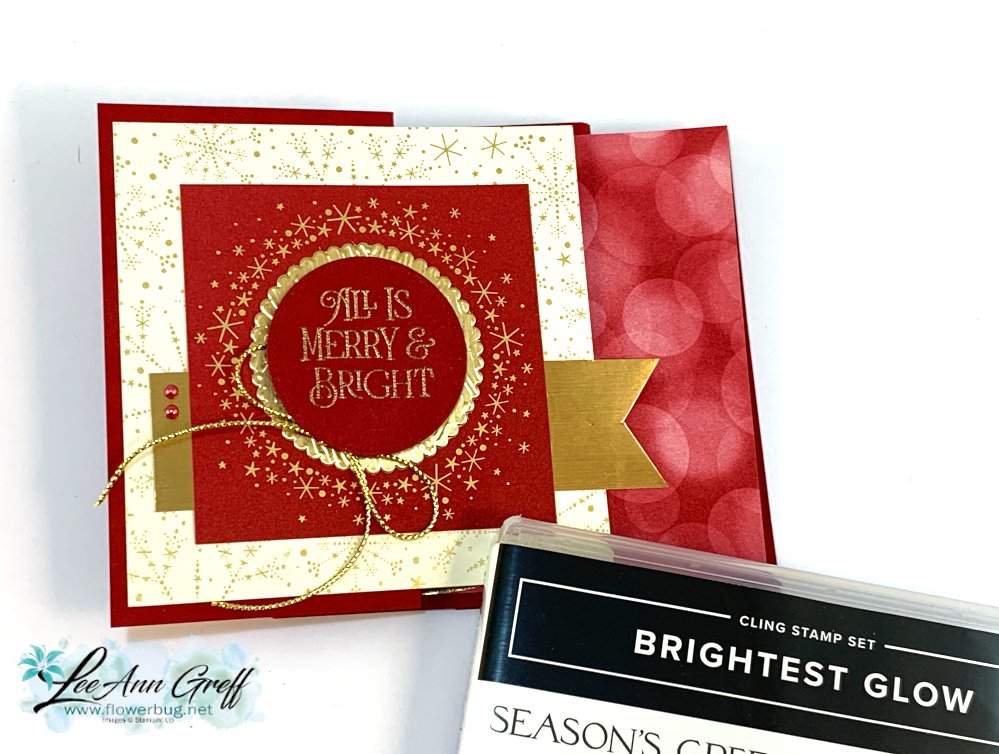
Here's what the card looks like folded flat. It shows off multiple sheets of the designer paper and fits in a standard A2 envelope, measuring 5 1/2" X 4 1/4".
I used a few other products here; especially gold themed items.
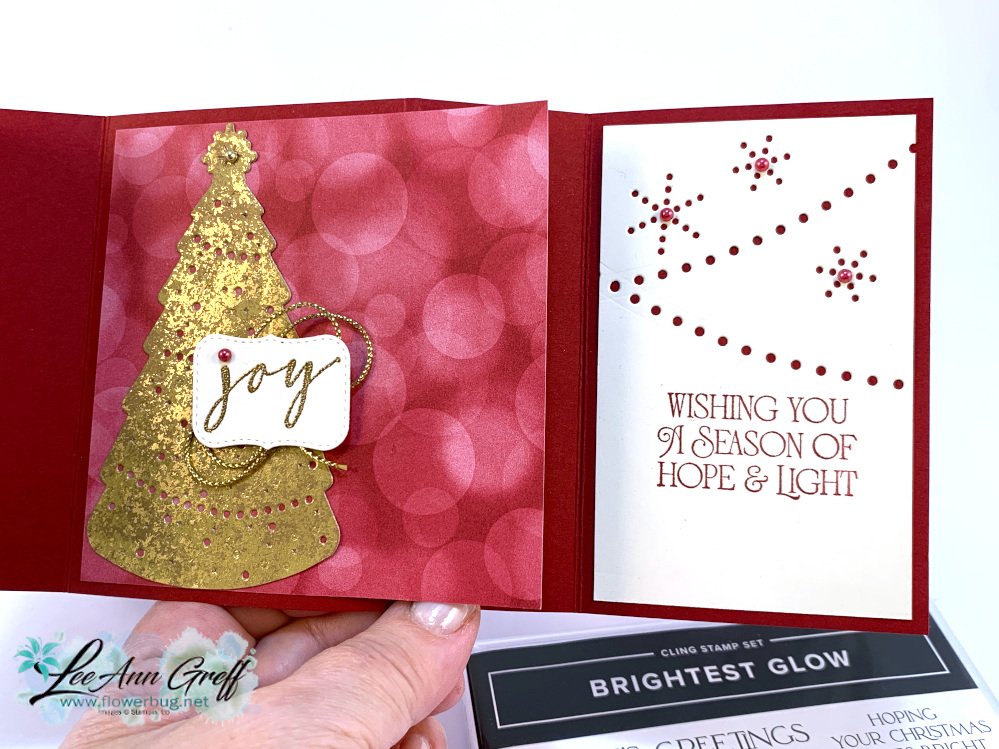
Gold foil and Gold Distressed paper, Elegant Metallic trim, Gold embossing powder & Festive Pearls. I also used the Twinkling Lights and Layering Circle dies and the Brightest Glow stamp set.
For variety I added some Evening Evergreen to the next card.
Cherry Cobbler card base 4 ¼” X 11” scored at 2 ½”, 3 ¾”, 6 ¾” & 8 ¼”
DSP 2 pieces at 4” X 4”, the center Cherry square is 3". Vanilla 2 ½” X 4”
Below you can see the gold tree & dotted die-cut snowflakes & garland from the Twinkling Lights dies here. Again, the greetings are all from the Brightest Glow stamp set seen here.
The greeting die-cut for the 'joy' is from the Potted Succulents dies; a few loops of gold cord are added underneath it.
Notice: LeeAnn Greff, Independent Stampin’ Up! Demonstrator, Manager. The content of this website is my sole responsibility as an independent Stampin’ Up! demonstrator and the use of, and content of, the classes, services, or products offered on this website is not endorsed by Stampin’ Up! Copyright 2025


Leave a Reply