/


Latest Post

Favored Flowers and Beautifully Happy – lots of ideas to inspire you!


Today I'm featuring the Favored Flowers and Beautifully Happy Sale-a-Bration choices.  This awesome promotion ends tomorrow!  Do you have everything you want yet?  

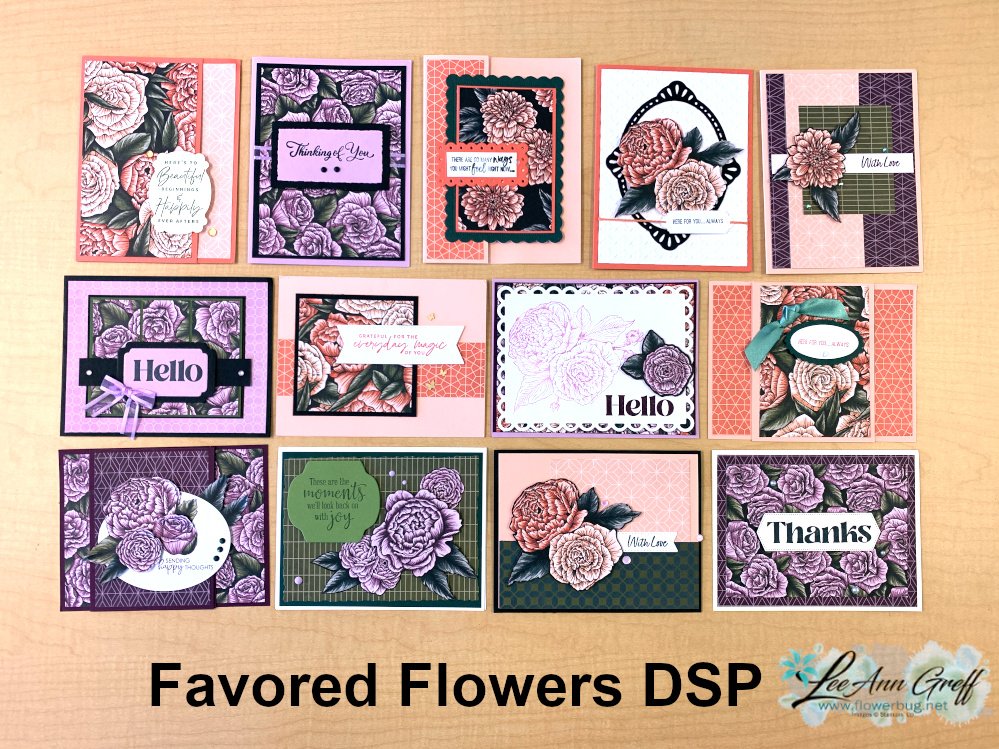
The Favored Flowers 12 X 12" DSP is filled with gorgeous florals and patterns.  You can see it here.  

Some people are fussy cutting these pretty flowers out but you can use the DSP as is too.  It features these colors: Basic Black, Blackberry Bliss, Calypso Coral, Evening Evergreen, Fresh Freesia, Petal Pink, 

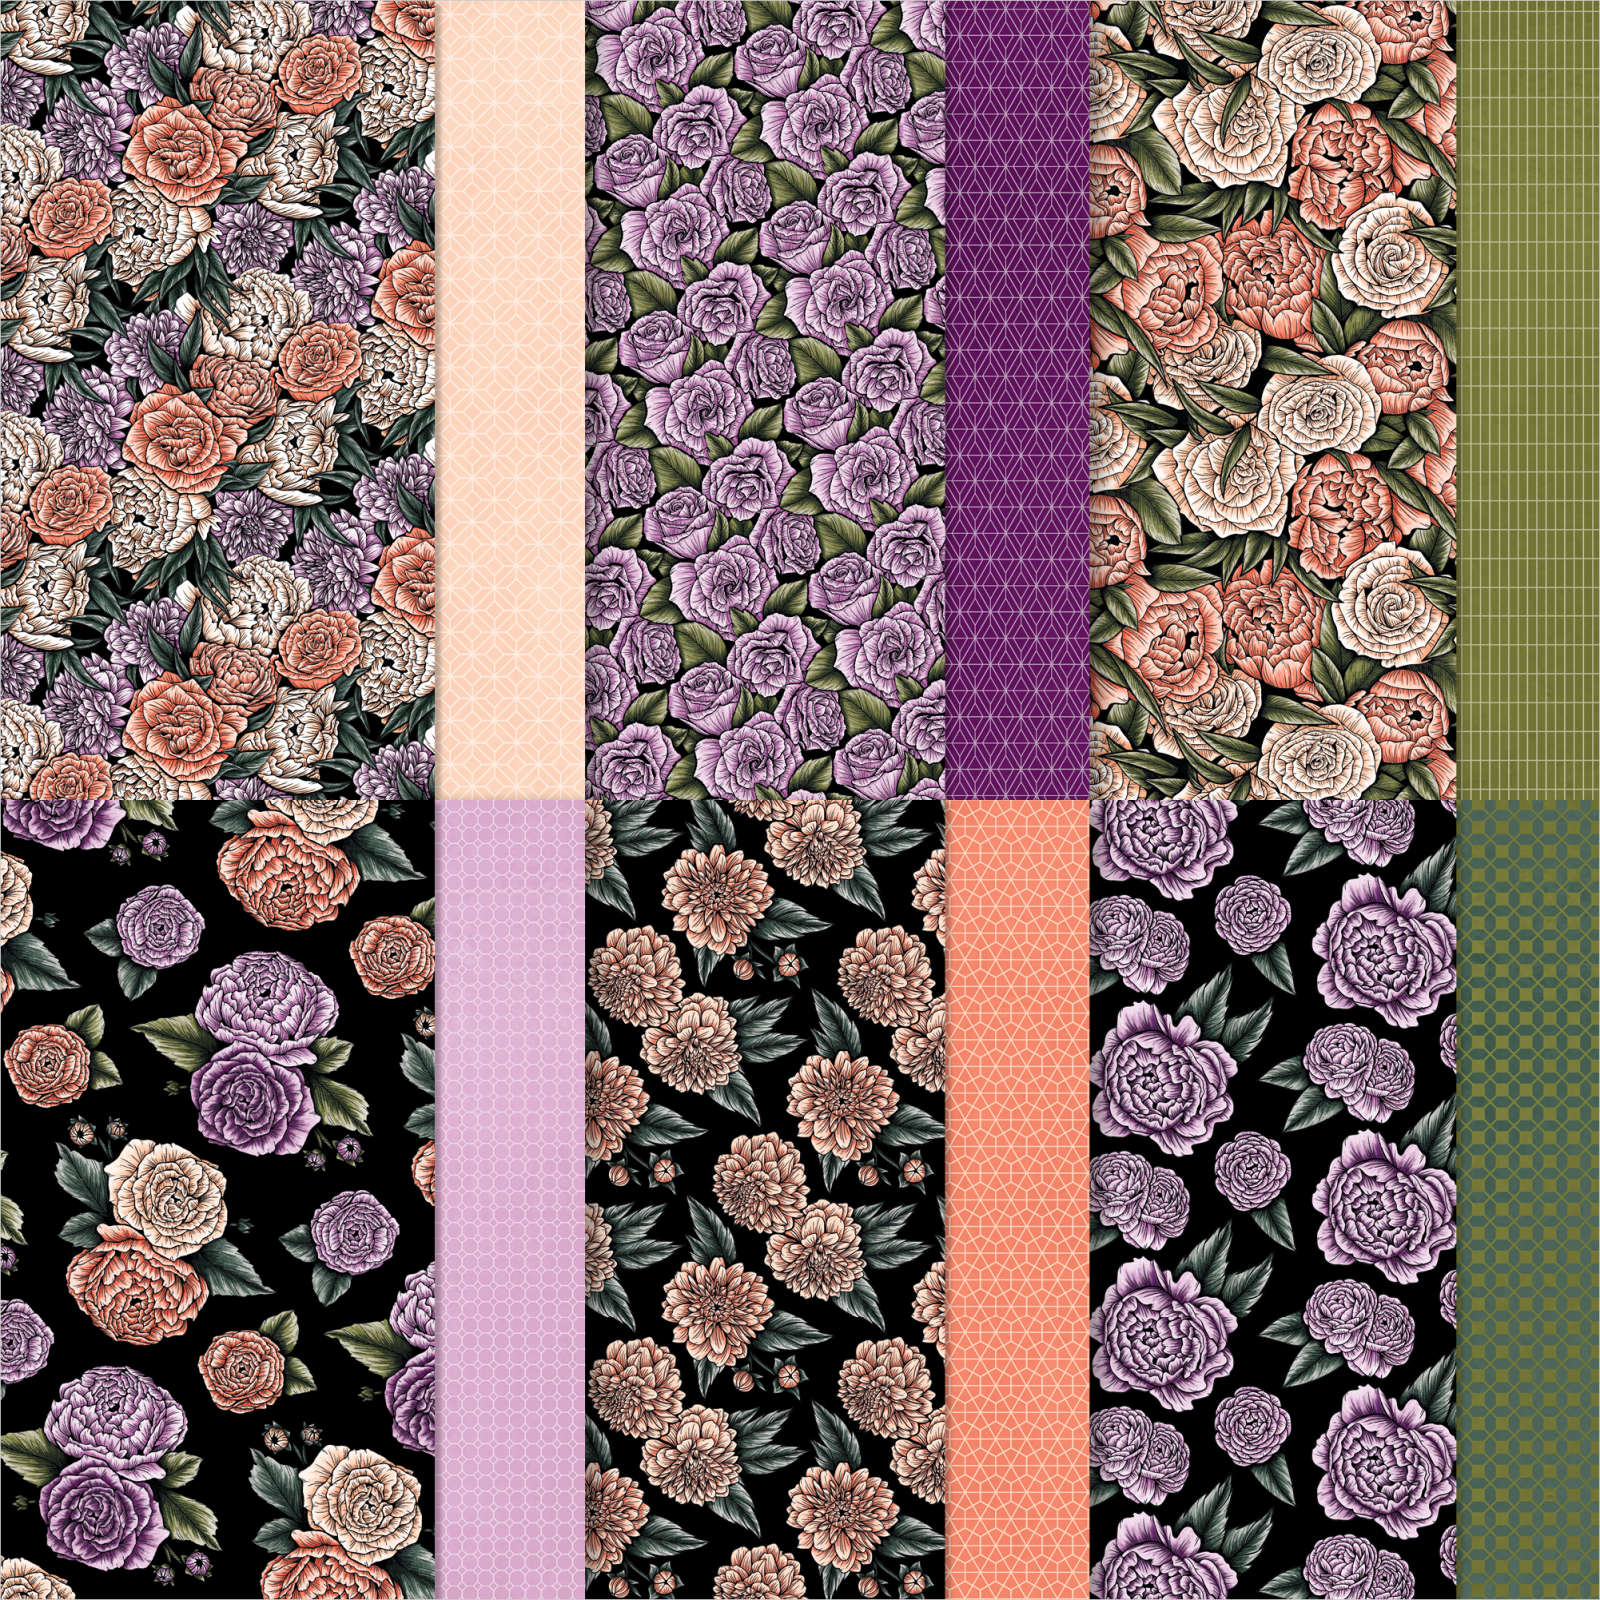
I am a little surprised it's still available.  The Dainty Flowers DSP sold out and I thought this one would be next.  

Next I'm featuring my favorite stamp set in the Sale-a-Bration catalog – the Beautifully Happy set.  

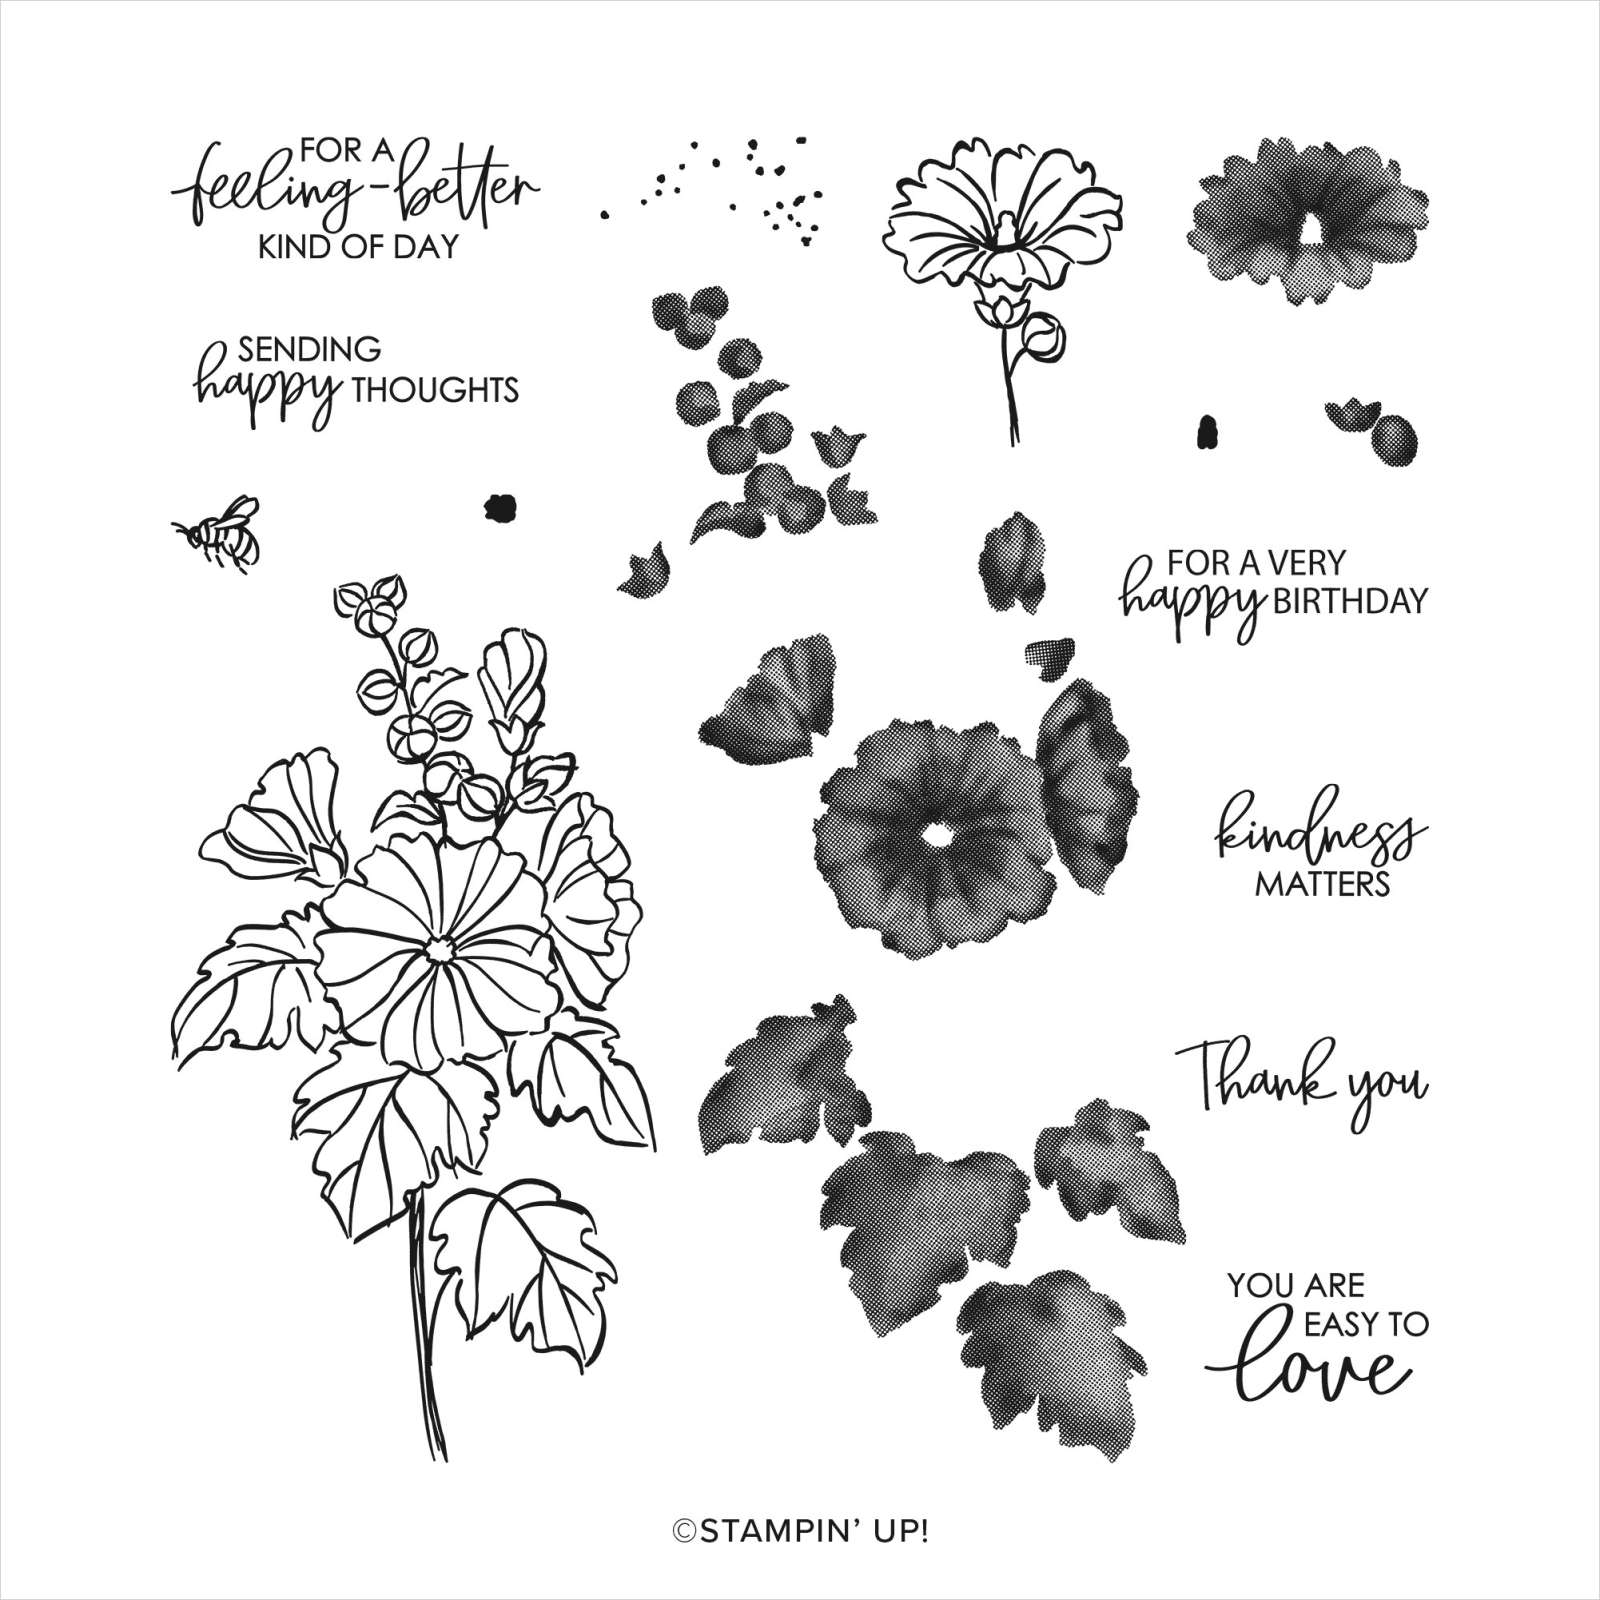
There are three main reasons it's a favorite:

  1. It's Distinktive and a 2-step set!  Distinktive means it gives two or more hues of color with one stamping.  Love these! 
  2. It's flowers!  Botanical sets tend to be among my faves. 
  3. The greetings are wonderful; I especially like the mixed font.  
  4. Okay; here's a 4th reason – it doesn't have to be colored in.  The solid stamps do it for you! 

One of my favorite cards: 


It's just a fabulous set!  And it's free with any $100 purchase through Tuesday, February 28th.  See it here. 

I hope you find some inspiration among these samples.  

More Sale-a-Bration samples shown tomorrow! 

~~~

Best Deal Ever on the Starter kit here!

Choose $175 in products for just $129 plus the new mini machine!

Or choose $175 for $99 without a new Mini.  AMAZING!

~~~

February Host code:

TMJXFR2T

Get free Pastel Sequins with online orders over $55 when using the host code above!

 Earn free products with my loyalty rewards! 

Click here to download yours and earn a $50 shopping spree!


All Posts

  • Best Tips for successful Shaker Cards with video tutorial!


    Who wouldn't like to receive a shaker card?!  They're fun, shakable and hard to resist playing with. 

    I made a bunch of these for our July Team card swap featuring 'window sheets'. I love the fact that I could get multiple, colorful die-cut flowers with the Extraordinary Floral Washi Tape and the coordinating die-cut. Just add it to another piece of cardstock and die-cut. So fast & EASY! 

    Notice the sponged green designer paper above. That is the Irresistible Designs 12" DSP seen here.  I added Olive ink to it with a Blending Brush; the printed embossed designs 'resist' the ink.  Pretty cool! 

    I used the Paper Tags stamp set – stamping the greeting directly onto the window sheet with Black Stazon ink. Then I turned it over to add a bit of Flirty Flamingo blends marker on the 'celebrate' part.  

    My colors include Flirty Flamingo, Old Olive and White for a fresh floral card design. Want to know the steps to achieve a shaker card?  Best to grab the free project sheet below or watch the video tutorial. 

    Here's the free project sheet with measurements for you. Click on the following link to print or download it.  Download Paper Tags Shaker Card


    Below is the video tutorial for this neat shaker card.  Watch to get the tips for success on making one plus another pretty card featuring the Extraordinary Floral washi tape. 

    ~~~

    July Specials:


    New Online Exclusives are here!  Click here

    ~~~

    Get my Turtle-y Cute PDF tutorial free with any online order in July!

    Leave a Reply

    Your email address will not be published. Required fields are marked *

  • Another ‘WOW’ card swap with the Beautiful Butterflies stained glass technique


    Today I have another stunning Team card swap made by Tracey featuring Window Sheets. She featured the Beautiful Butterflies bundle seen here:

    Her colors include Shy Shamrock with Petunia Pop, Black, White & Gold embossing. 

    Here's how she made this card:

    1. Texture the White layer with the Hybrid embossing folder; add to the Petunia layer and the card base. 
    2. Ink the butterfly image in Versamark and stamp on the Window sheet. Heat emboss with Gold embossing powder. Die-cut with the coordinating die.  *she did say some of the embossing powder on the edge frayed off when it went through the die-cut.  
    3. Color the back of the butterfly with Blends markers.  Adhere to the White cardstock layer with Foam Strip adhesive in the center only. Add the center 'body' die-cut.
    4. Heat emboss the greeting onto the Black strip with White embossing powder.  Finish with gems. 

    Here's the full bundle that includes stamps, dies and a Hybrid embossing folder. What is a 'Hybrid Embossing folder?  It's where you can cut AND emboss/texture at the same time!

    And look how she finished the inside!  She used the Baby Wipe technique to achieve a multi-colored butterfly. 

    Thanks so much for your gorgeous card Tracey! 

    ~~~

    July Specials:

    New Online Exclusives are here!  

    ~~~

    Last Chance List has been updated!  see it all here. Don't miss out on the deals!

    ~~~

    Get my Turtle-y Cute PDF tutorial free with any online order in July!

    Leave a Reply

    Your email address will not be published. Required fields are marked *

  • Amazing Trusty Tools bridge card swap with window sheet technique; so cool!!


    Look at this incredible card Jacki made for our Team swap in July.  This month's theme was to feature window sheets.

    She used the Timeless Plaid and the Notes & Totes stamp set here.  Her colors include Black, Misty Moonlight, Silver Foil and Pecan Pie. 

    Here's the view when you flip the top layer up:

    She paid special attention to both sides of her bridge, adding the card stock & DSP layers to both the inside and the front!

    That dotted die-cut background is part of this bundle!  She really made the most of the dies here!  See the dies here and the coordinating stamp set here. 

    This is what it looks like fully opened. The inside greeting is from the With You in Mind stamp set. 

    Measurements:

    • Black card base 5 1/2" X 8 1/2" score at 4 1/4" – from the top, cut to the score line on both sides at 1 1/4"
    • Window sheet – 5 1/2" X 4 1/4"
    • Misty Moonlight – greeting strip 2 3/8" X 1 1/8", center is 2 3/4" X 4", 4 sides are 1 1/8" X 4", center is 2 3/4" X 4", inside back is 5 1/4" X 4"
    • White inside 2 7/8" X 3 3/4", dotted die-cut 2 1/2" X 3 3/4", greeting strip 3 1/4" X 1"
    • DSP strips 6 pieces at 1" X 3 3/4"


    I'm so impressed; this is definitely a 'WOW' card!  Thanks so much Jacki! 

    ~~~

    July Specials:

    New Online Exclusives are here!  

    ~~~

    Last Chance List has been updated!  see it all here. Don't miss out on the deals!

    ~~~

    Get my Turtle-y Cute PDF tutorial free with any online order in July!

    Leave a Reply

    Your email address will not be published. Required fields are marked *


Notice: LeeAnn Greff, Independent Stampin’ Up! Demonstrator, Manager. The content of this website is my sole responsibility as an independent Stampin’ Up! demonstrator and the use of, and content of, the classes, services, or products offered on this website is not endorsed by Stampin’ Up! Copyright 2025