/


Latest Post

Fancy Fold Accordion Heart Doilies!


I dreamed of doing this fun accordion fold with the Heart Doilies in my sleep.  I rarely do that!  Do you?  


I shared how in this week's Facebook Live yesterday.  My FB Live's are usually on Tuesdays at 11 am but I was out of town so switched to Wednesday this week.  It's so simple!  And you could do this with many of our dies too!  Click below to see it.

I also traced the flap of my envelope onto the From My Heart specialty designer paper to make this card extra, extra special!  

Details:

  • The pretty soft scallops on the edge of the DSP are from the new Braided Border punch.  I did one length of it and cut it in half for both cards. 
  • The greeting is stamped on a Timeless Label punch and added to another Heart Doily.  The stamps are from the Heart to Heart stamp set seen here. 
  • I used the new sparkly Faceted Gems from the From My Heart Suite.  See them here
  • You get 40 Heart doilies in one package for $5.50; a great deal at .14 cents each.

Cutting:

  • I cut a strip of the From My Heart designer paper at 3" X 12" and cut that into two pieces 3" X 5 1/2" long.  The hearts are the reverse side of the pretty foil double sided designer paper on the envelope.  When you use these measurements you can get 8 cards from one sheet!  It's a great way to use up the designer paper you may be 'hoarding'. 
  • The white layer inside is 3 1/2" X 4 3/4"; my favorite size for inside cards as you can get 5 from one sheet of 8 1/2" X 11".  

I folded each doily in half and glued each one to the next just on the outer curve.   I adhered the folded doilies to the card with either Tombo liquid adhesive or Tear & Tape; it's super strong!

~~~

Three January Specials just for you! 

  1. All January online orders will earn a ticket in the drawing for a free Little Ladybug stamp set!

Order online here

2. All online orders will receive a 10 cards pdf tutorial in an email.

3. And if your order is over $65 you'll get a free Coastal Weave embossing folder too!
January Host Code is GEEFZCZV
Order online here

All Posts

  • August specials include a free class with online orders!


    Happy August!

    This month I’m offering a free class with online orders over $55. It will include a 3 card kit featuring the Floral Impressions DSP seen here. All you’ll need are greetings, inks and adhesives.  

    • Everything is pre-cut and punched for you. Ribbon is included but embellishments are not. 
    • I’ll mail you the pre-cut kit including the printed project sheets!  All you need to do is place an order with me over $55 before tax and shipping. 

    Go here to order! 

    ~~~

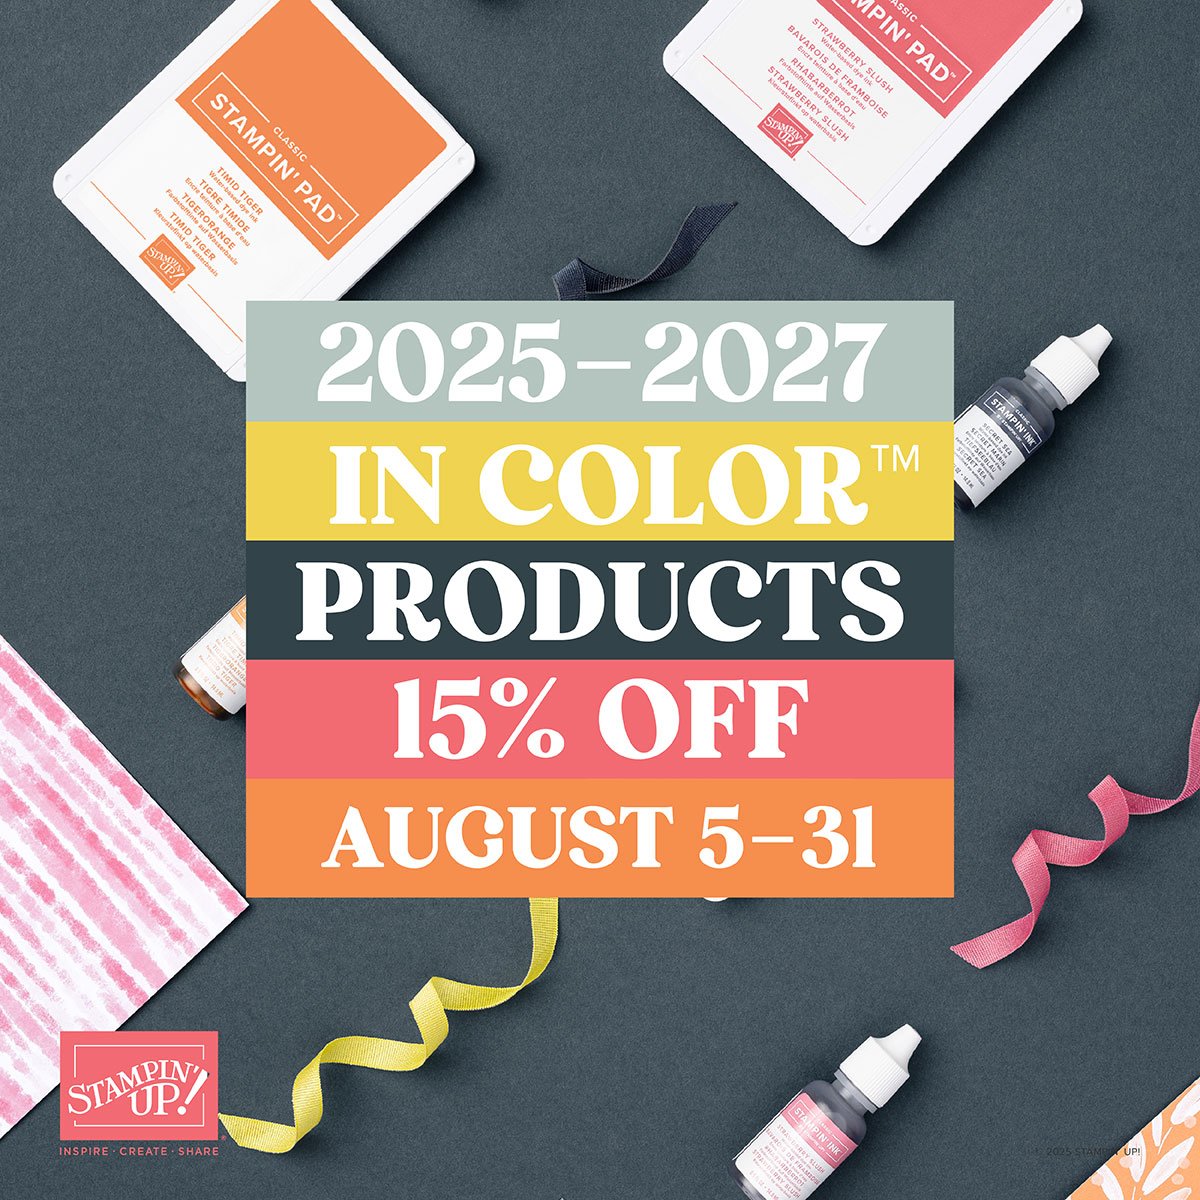
    Starting August 5th Stampin’ Up! is offering a discount on tons of 2025-27 In Color products!  This will include many DSP packages, embellishments, kits, inks, refills and Blends markers! 

    See everything that will be discounted 15% on Tuesday, August 5th here. 

    ~~~

    New products will be released to the Last Chance list on August 5th. Don’t miss out on the best deals that day!

    Go here to shop. 

    Leave a Reply

    Your email address will not be published. Required fields are marked *

  • An easy card with Prairie Grass & Thoughtful Journey


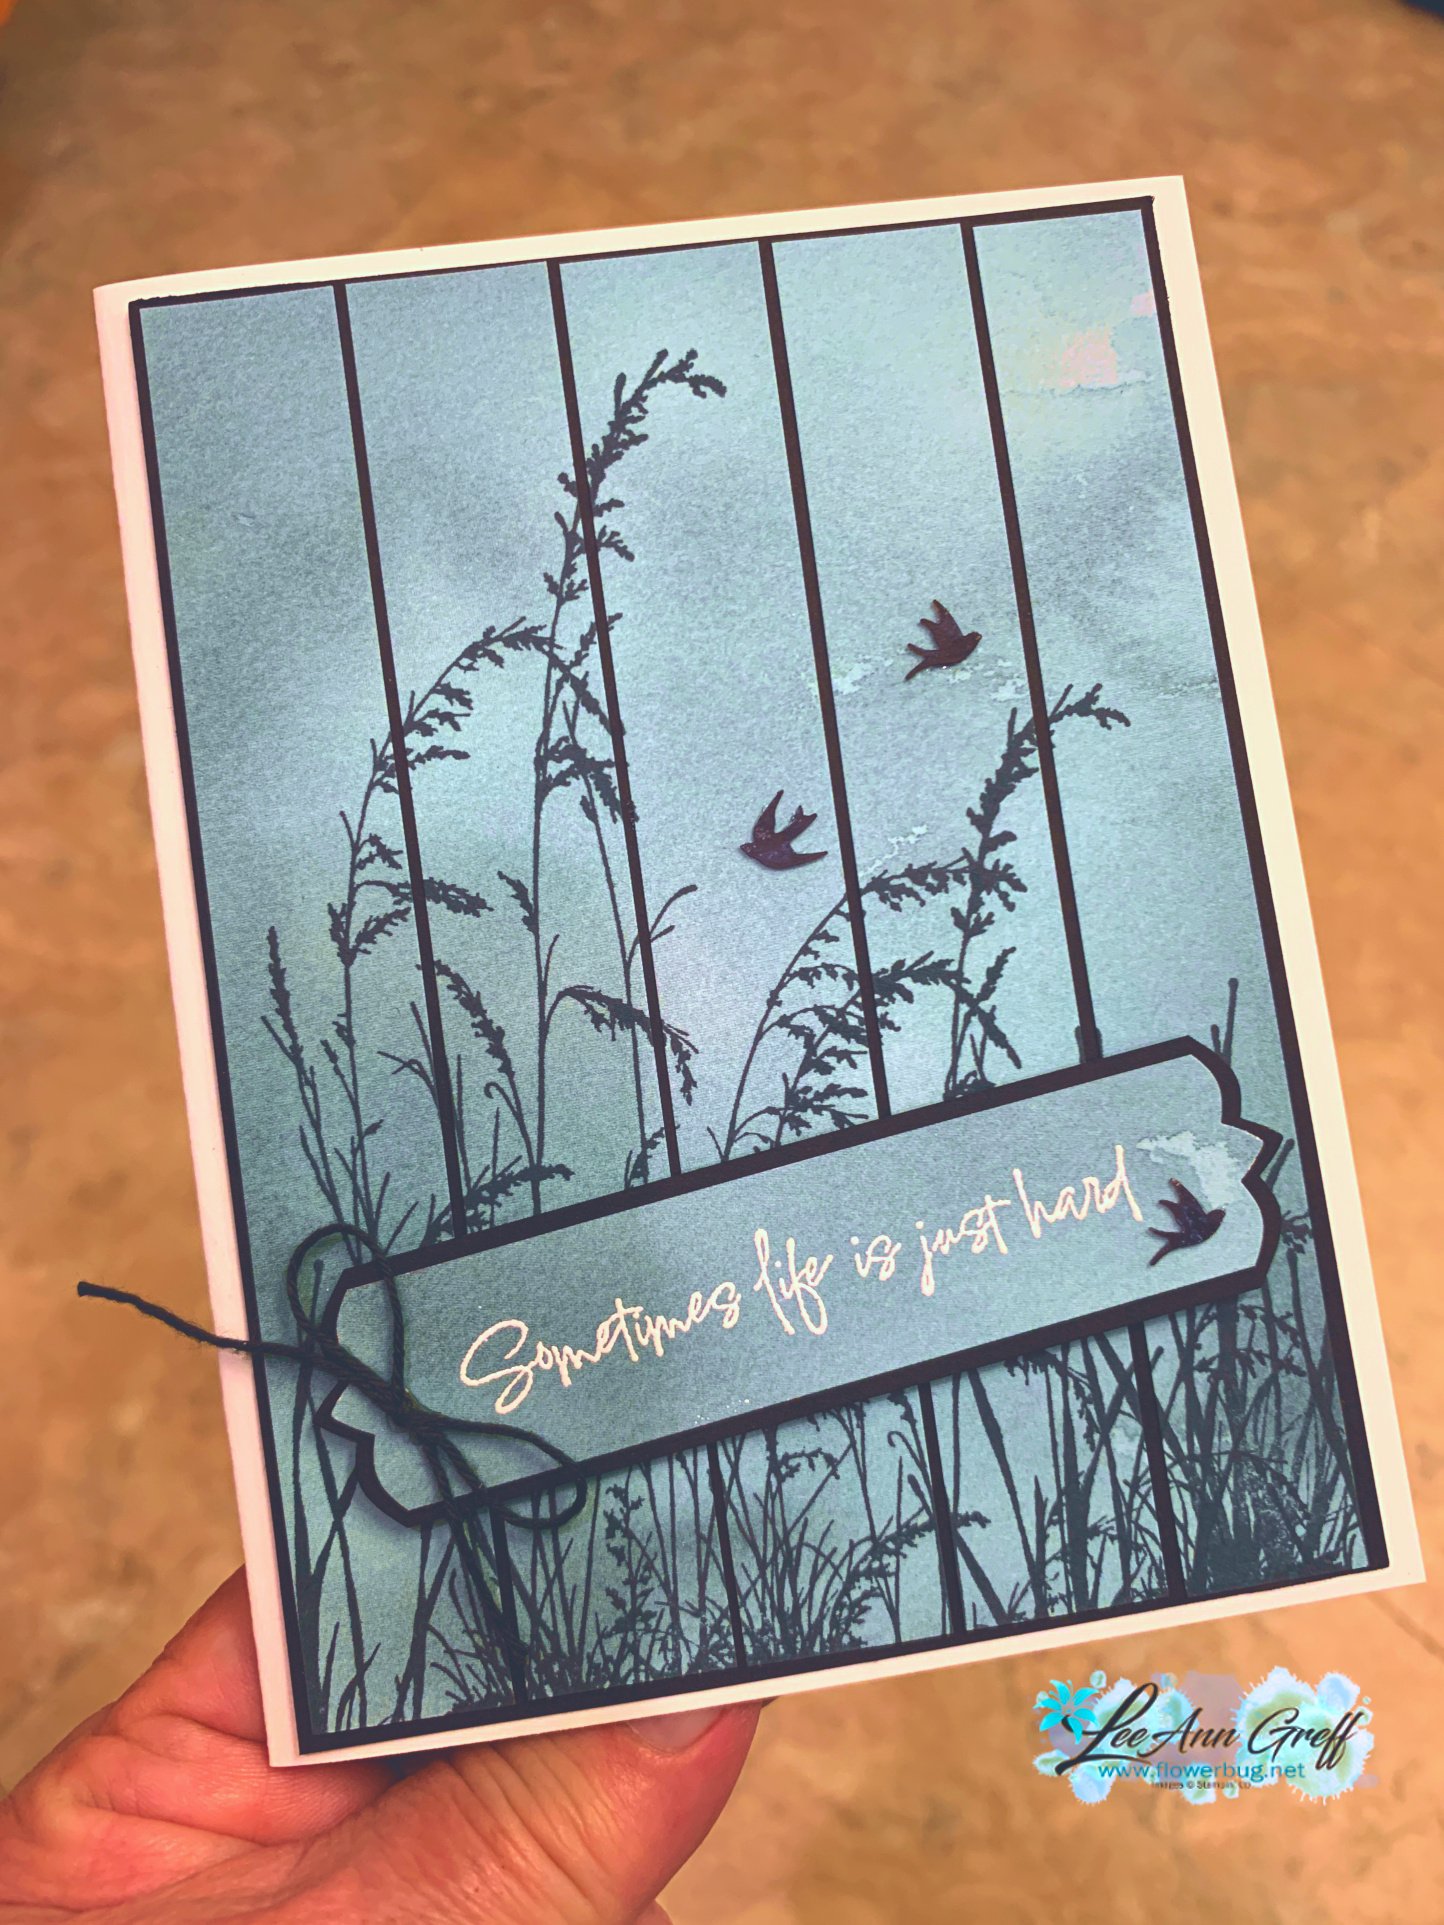
    Here’s the last card I shared on last week’s video – all three featured the beautiful Prairie Grass stamp set seen here.  Unfortunately it is now out of stock but you can add your email to be informed when it’s available. 

    I stamped it onto a piece of Thoughtful Journey designer series paper. Then I cut it into 3/4″ strips before adhering it onto the Black CS layer and then the White card base. 

    You might wonder where the layered greeting shape is from. I used the To the Point punch with a 3/4″ strip of DSP like this: 

    Tip: Insert your paper through the back of the punch like you see above.  Notice it’s not through the side; but inserted into the back area.  Once you do both ends and you’re happy with the length of it, adhere it to a Black strip 1″ wide and punch both ends to layer evenly.  

    Here’s the free project sheet for this card. Print or download it by clicking on this link: Download Prairie Grass scene

    And here’s the video below where I share how to create this gorgeous card and two other cards featuring this amazing Prairie Grass stamp set. 

    ~~~

    July Specials:


    New Online Exclusives are here!  Click here

    ~~~

    Get my Turtle-y Cute PDF tutorial free with any online order in July!

    Leave a Reply

    Your email address will not be published. Required fields are marked *

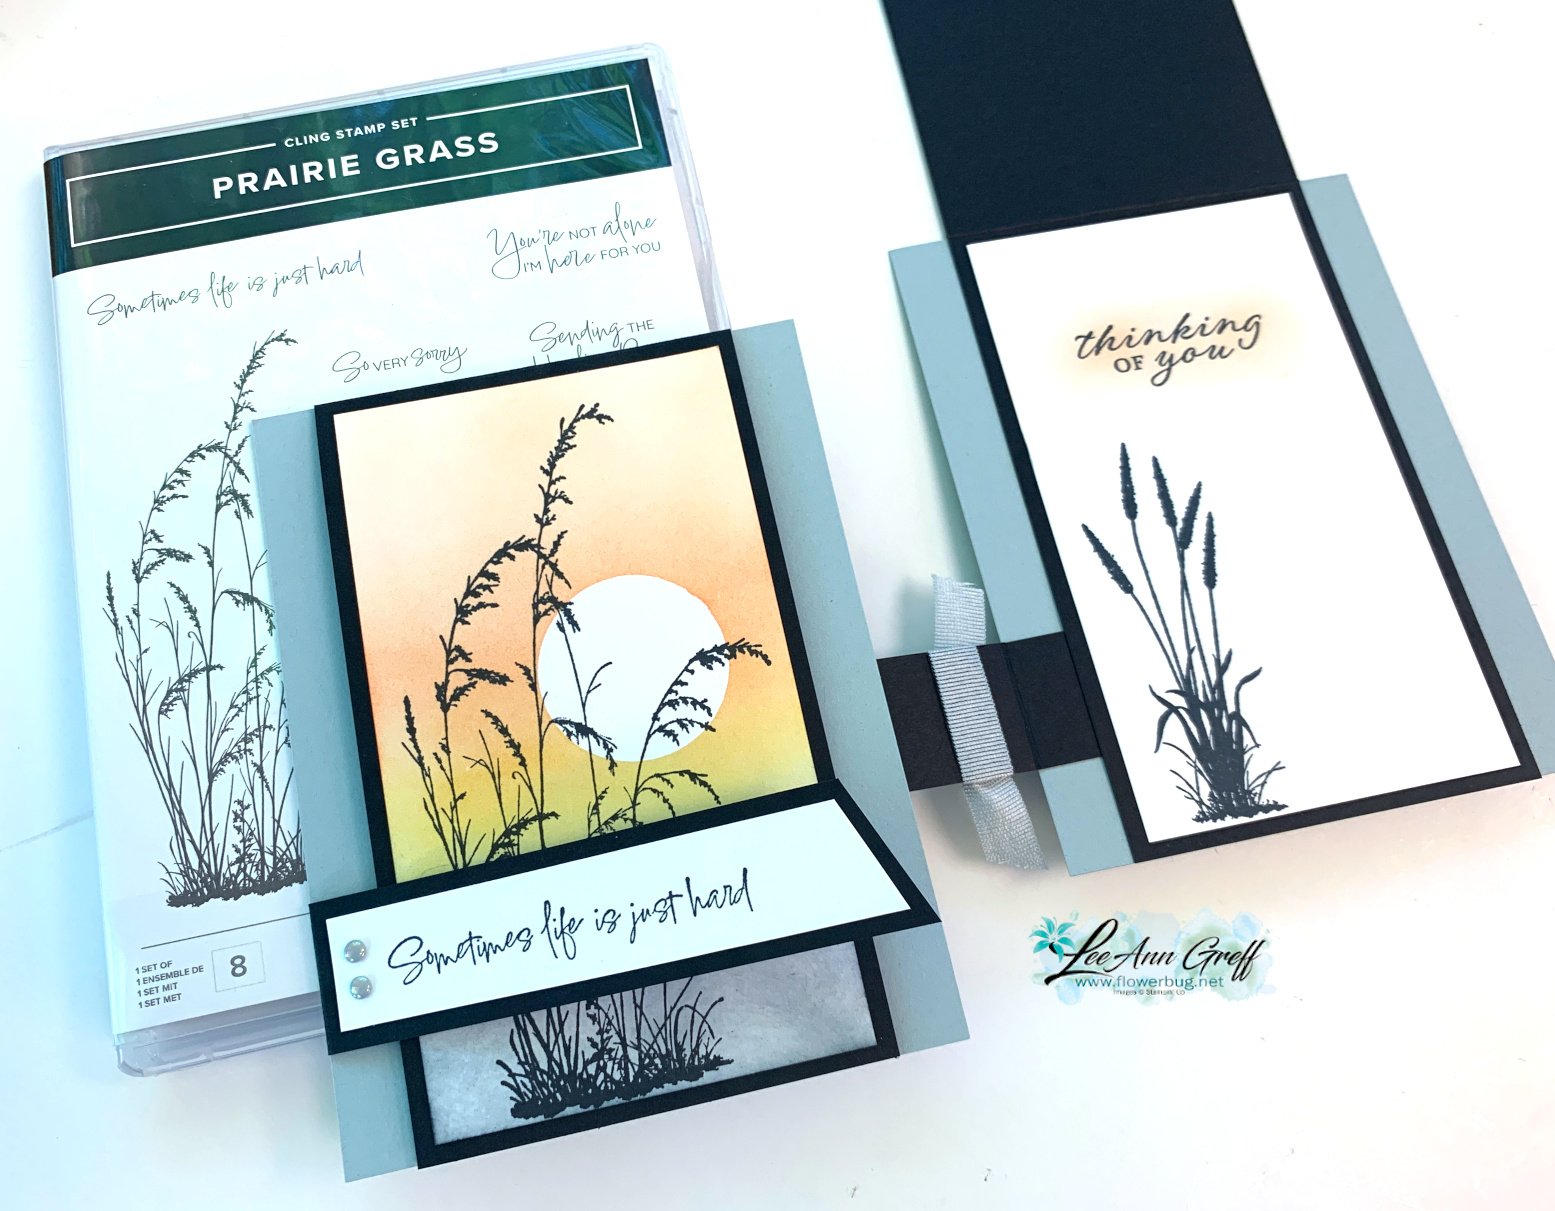
  • Stunning Prairie Grass sunset scene with a masked moon & video tutorial


    I'm thrilled to share this amazing card with you today.  We made it at my July card clubs. 

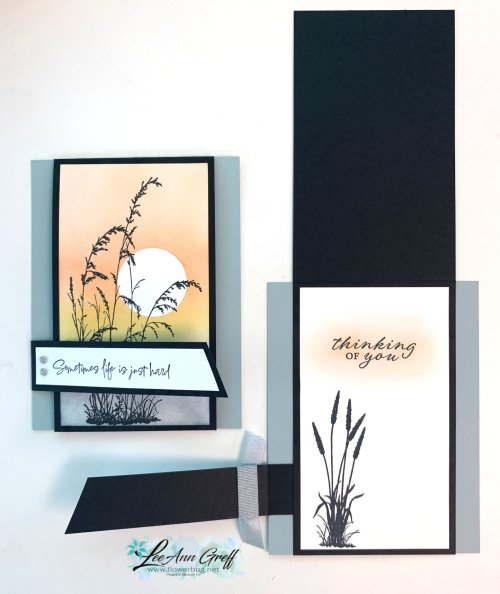
    I created a beautiful sunset with stamps, ink and a 'moon mask'.  I used Blending Brushes with Secret Sea, Darling Duckling and Timid Tiger inks.  

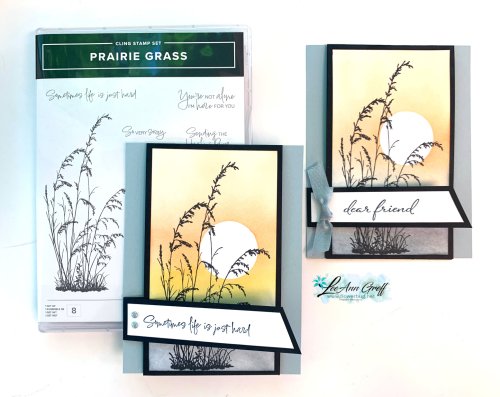
    It features the beautiful Prairie Grass stamp set seen here.  Since I'm from North Dakota where we have tons of 'prairie' this set was a must have!  *Unfortunately it is now out of stock but you can add your email to be informed when it's available. It should be back around August 11th. 

    After stamping the grassy image we added a post-it note mask made from a circle punch. Then we blended the inks on little by little.  It's important to use less ink and more time to get this pretty soft effect. 

    See the flap on the left side of the card above?  That flap holds down the front of the card.  So simple but a fun technique. Notice the light sponging on the greeting inside?  

    I created a free project sheet for this card.  You can print or download it by clicking on the following link: Download Prarie Grass July 2025

    And here's the video below where I share how to create this gorgeous card and two other cards featuring this amazing Prairie Grass stamp set. 

    ~~~

    July Specials:


    New Online Exclusives are here!  Click here

    ~~~

    Get my Turtle-y Cute PDF tutorial free with any online order in July!

    Leave a Reply

    Your email address will not be published. Required fields are marked *


Notice: LeeAnn Greff, Independent Stampin’ Up! Demonstrator, Manager. The content of this website is my sole responsibility as an independent Stampin’ Up! demonstrator and the use of, and content of, the classes, services, or products offered on this website is not endorsed by Stampin’ Up! Copyright 2025