/


Latest Post

Fabulous swaps by my Flowerbug’s Team using new Stampin’ Up! products


My Flowerbug's Team has optional swaps each month. This month we used new Spring or Sale-a-Bration catalog products.  You're going to love these cards!

Roxanne made this cool card using the 'Way to Grow' stamp set seen here.  I think it's a totally new style of images we haven't seen before by Stampin' Up!  She shows it off wonderfully!  
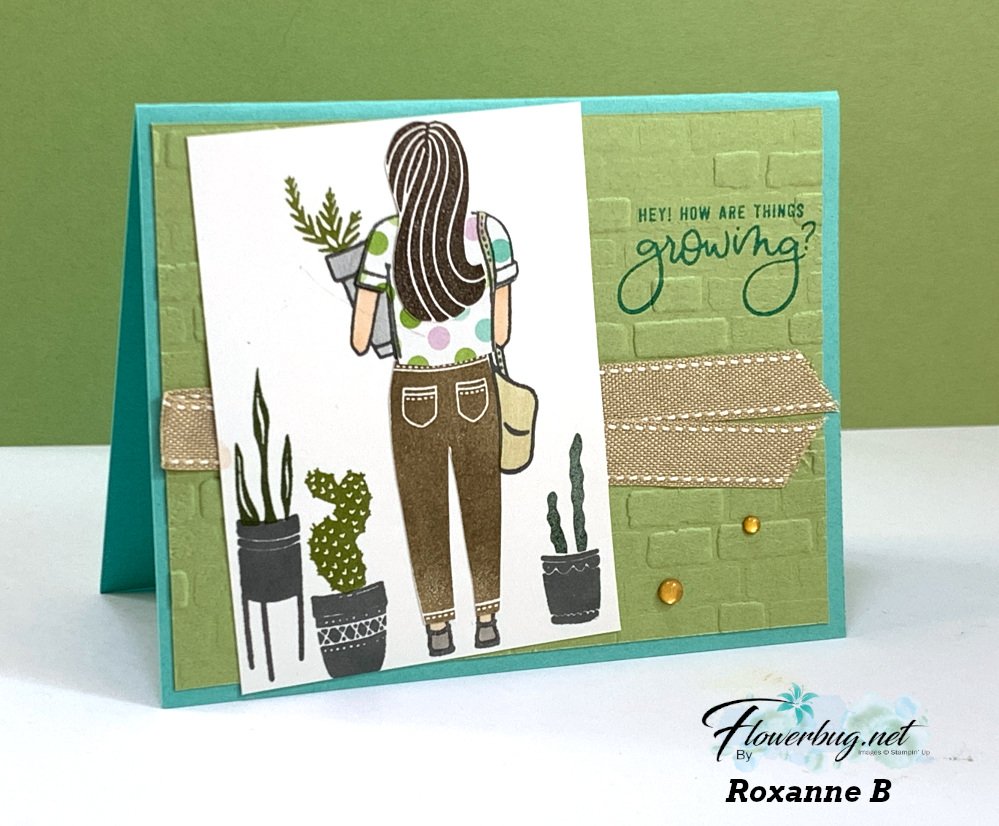
She did do a bit of fussy cutting – the hair, shirt and pants.  Notice the shirt is stamped on Dandy Designs paper from the SAB catalog!  So cute!  

Look at the card sample on page 38 of the Spring catalog; she cased the layout on the bottom.  This is a great reminder that we can use the catalog samples as inspiration.  

Her colors are Coastal Cabana, Pear Pizzazz with Crumb Cake in the ribbon.  The Pear Pizzazz layer is textured with the Brick & Mortar 3D folder.  

~~~

Next is a special card made by Annette.  She gives out calendar cards to her friends each year, so she made one for our swap participants too.  She orders these calendars online; there are several sites. Look on Amazon or Google for mini tear off calendars.  
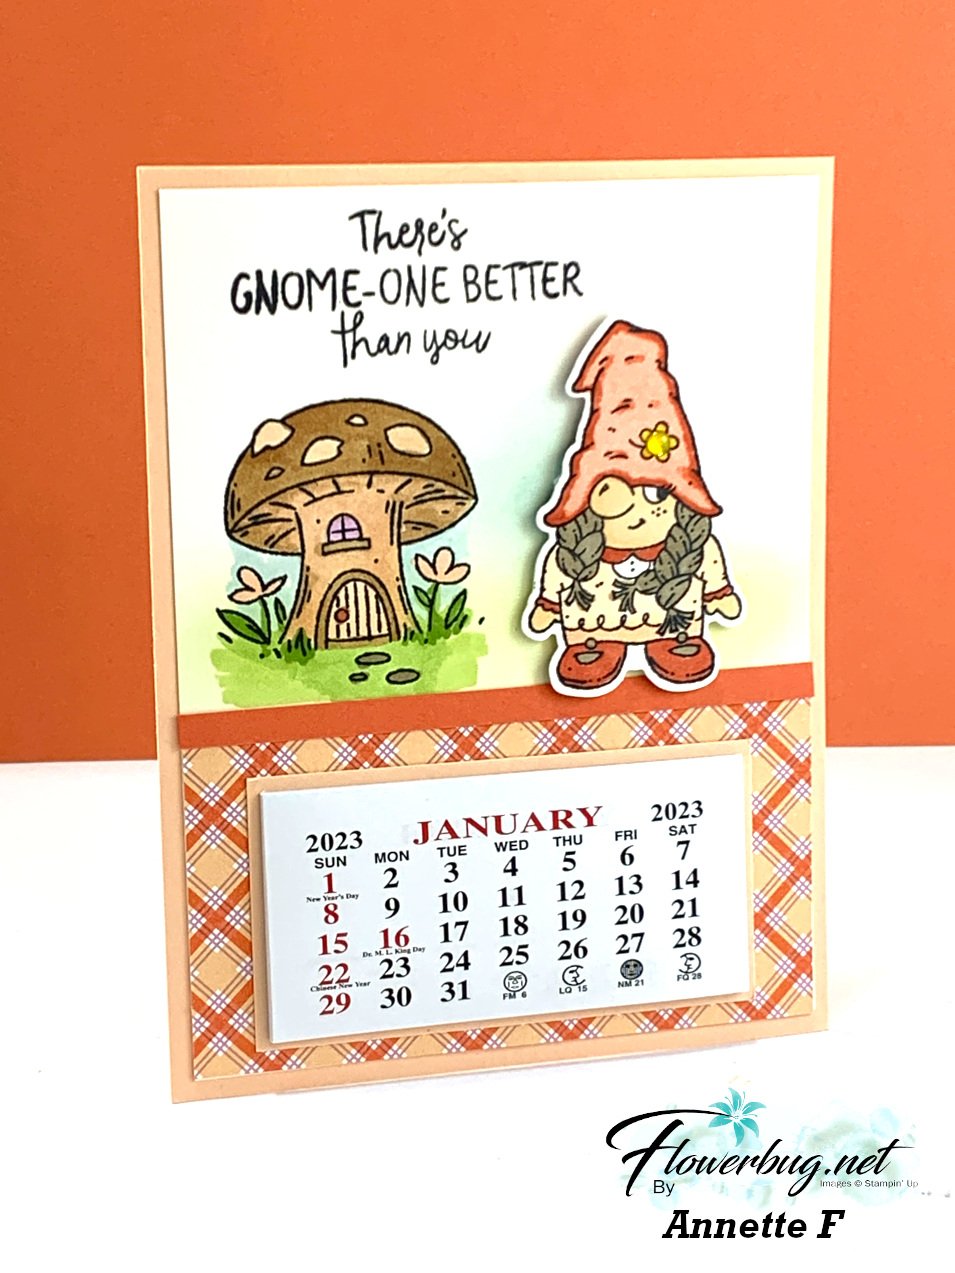
She featured the new Friendly Gnomes stamp set here.  Isn't the coloring and shading beautiful?  She used Blends markers to color and ink and blending brushed for the background.  The gnome is die-cut with the Gnomes dies – they carried over from the Holiday catalog through May 1st.  

The designer paper is from the Dandy Designs pack – from our Sale-a-Bration catalog.  It's a big pack of 48 sheets; free with any $100 order from Stampin' Up!  See it here.  

Next today is a cute Easter card made by Candy.  She used the Easter Bunny stamp set seen here.  It has a coordinating Easter Bunny punch too!  
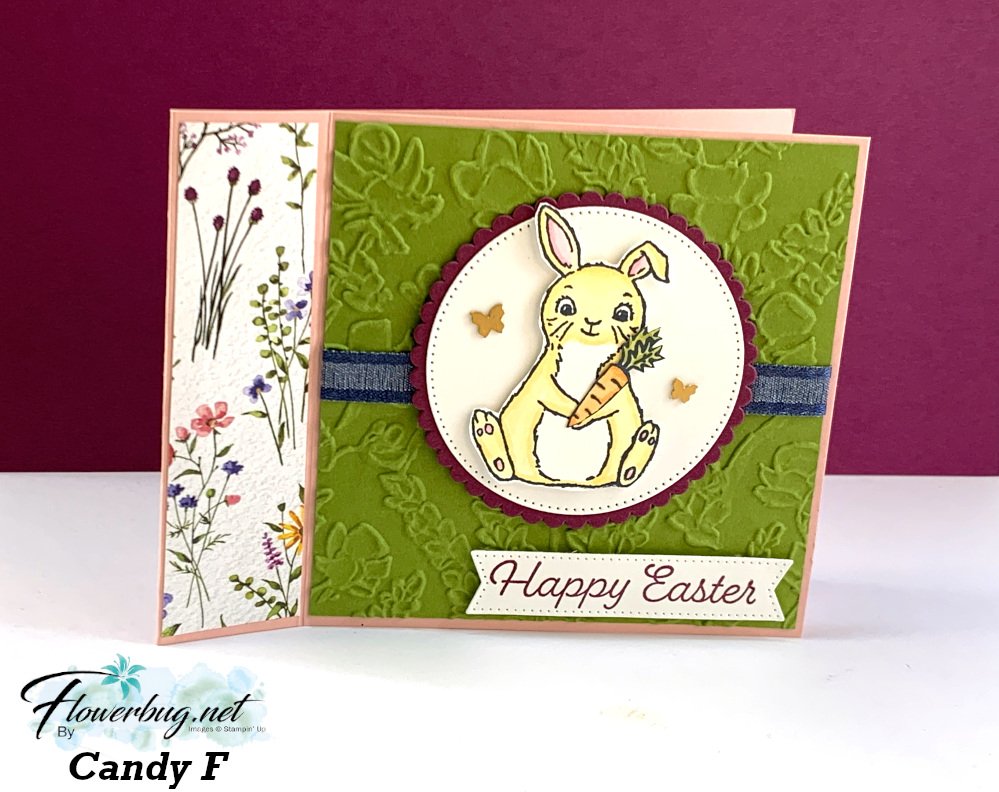
Her card is a fun fold – called a Book Binding card fold.  It starts out with a 4 1/4" X 11" card stock.  Score it at 4 1/4" and 5 1/2". The Dainty Flowers SAB DSP is 1 1/8" X 4".  The card stock layer is 4" square.  

She stamped and colored the bunny; then fussy cut it to pop up on the Stylish Shapes & Layering Circles dies.  Her embossing folder is the Pretty Flowers folder in the annual catalog.  Other additions are the Brushed Brass butterflies and Navy bordered ribbon.  

If you love to swap you'll love our Team swaps; consider joining our Flowerbug's Team! Or maybe you just want to be a part of a friendly stamping group!  It's a great time to choose the Starter Kit deal; details here or below. 

~~~

February specials:
February Host code links:

  CNV2VCBT or 7EUM6NB9 or N9YXCDAD 

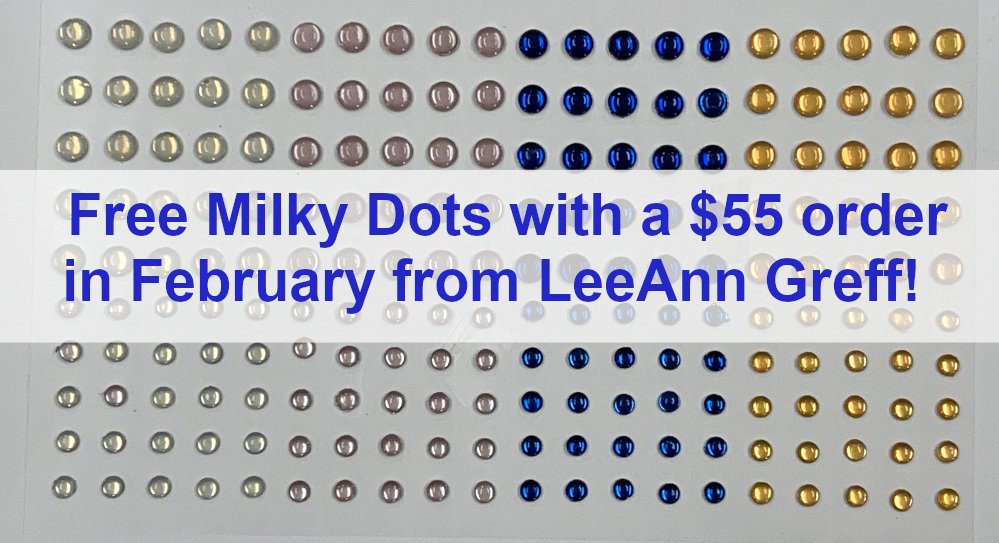
Get free Pastel Sequins with online orders over $55 when using the host code above!

 Earn free products with my loyalty rewards! 
Click here to download yours and earn a $50 shopping spree!

~~~

Best Deal Ever on the Starter kit here!

Choose $175 in products for just $129 plus the new mini machine!

Or choose $175 for $99 without a new Mini.  AMAZING!

All Posts

  • How to get more use of your Fragrant Forest stamp; cut it up!


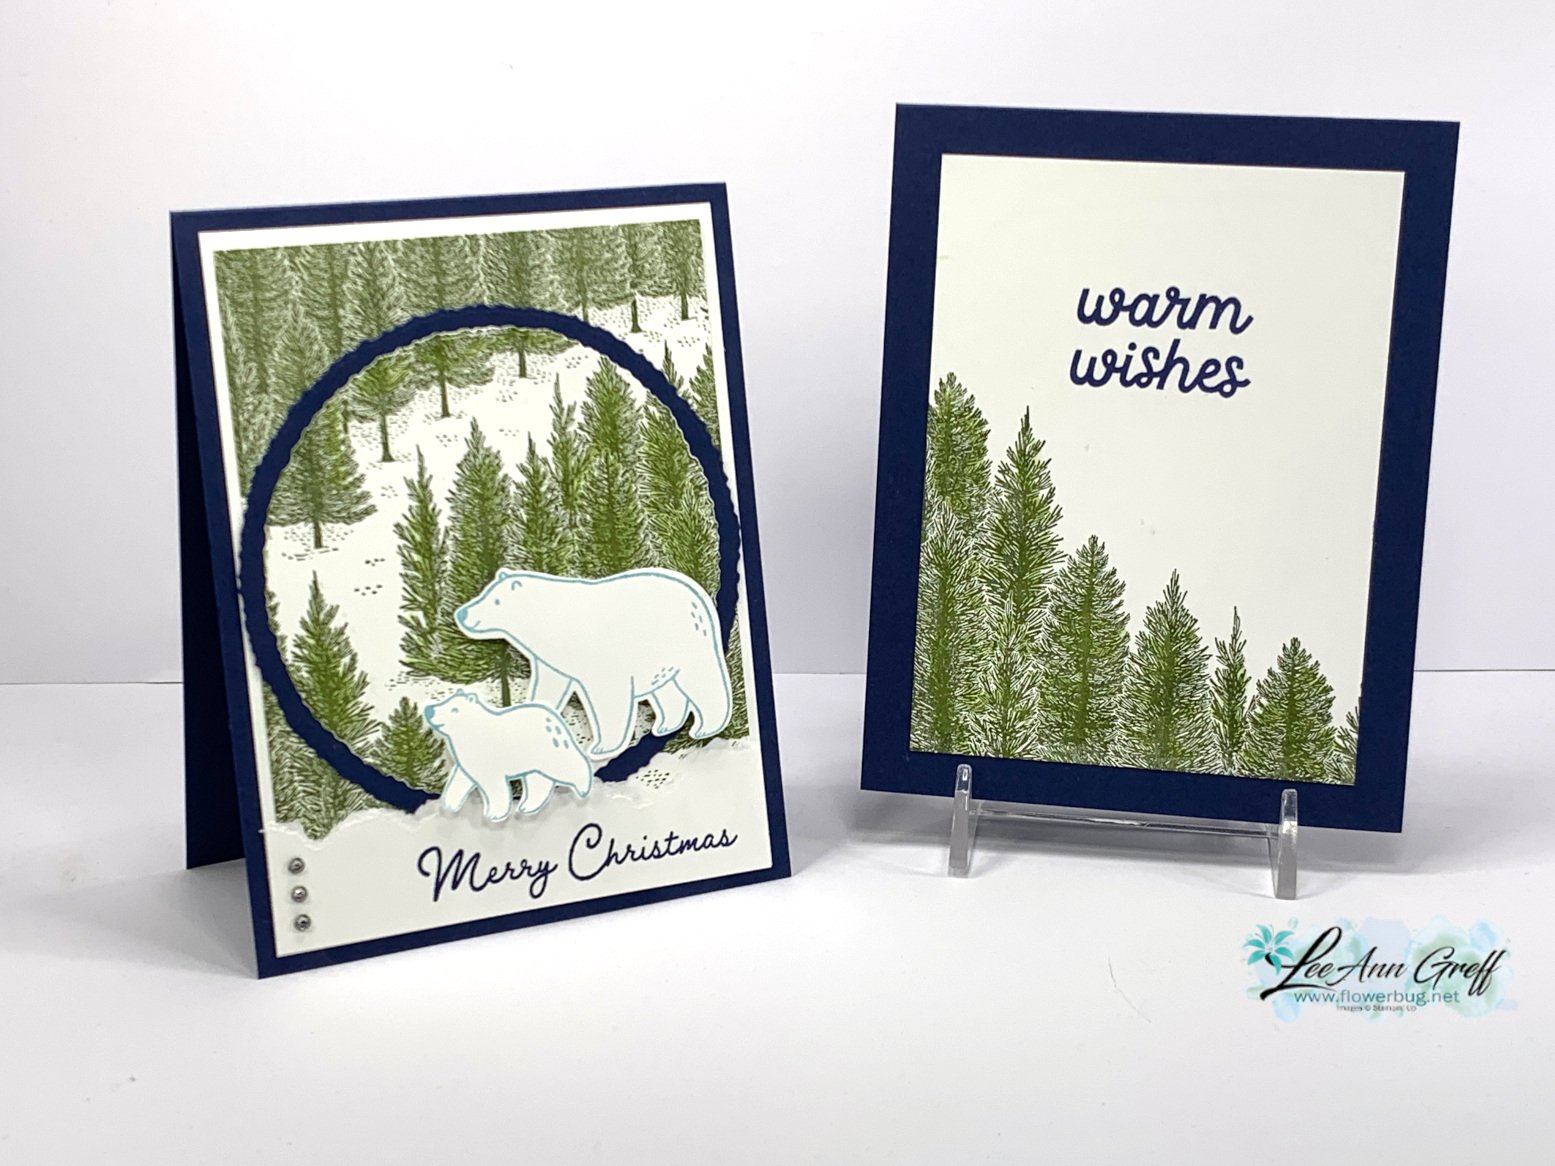
    I shared this pretty card in last week's Live video. I featured the Fragrant Forest background stamp set seen here in all 3 projects. 

    Today's card also features the Beary Cute stamp set & punch. It was available in a bundle but unfortunately the punch has sold out now.  But the stamp set is still available. 

    I used Night of Navy with Mossy Meadow here. I stamped the entire White layer with the background stamp (watch the video with tips on getting even coverage with a background stamp) then cut the circle using the new Deckled Circle dies. I added it to a larger Navy Deckled circle die-cut which covered up the die-cut line from the first circle cut. 

    The bears were stamped in Balmy Blue ink but in hindsight I'd like them in a dark gray ink on White.  The lower strip for the greeting is torn. 

    I created a free project sheet for this card; click on this link to see it. Download Fragrant Forest & Beary Cute card  *subscribe to my blog so you don't miss a thing and can access all of my project sheets in one place! 

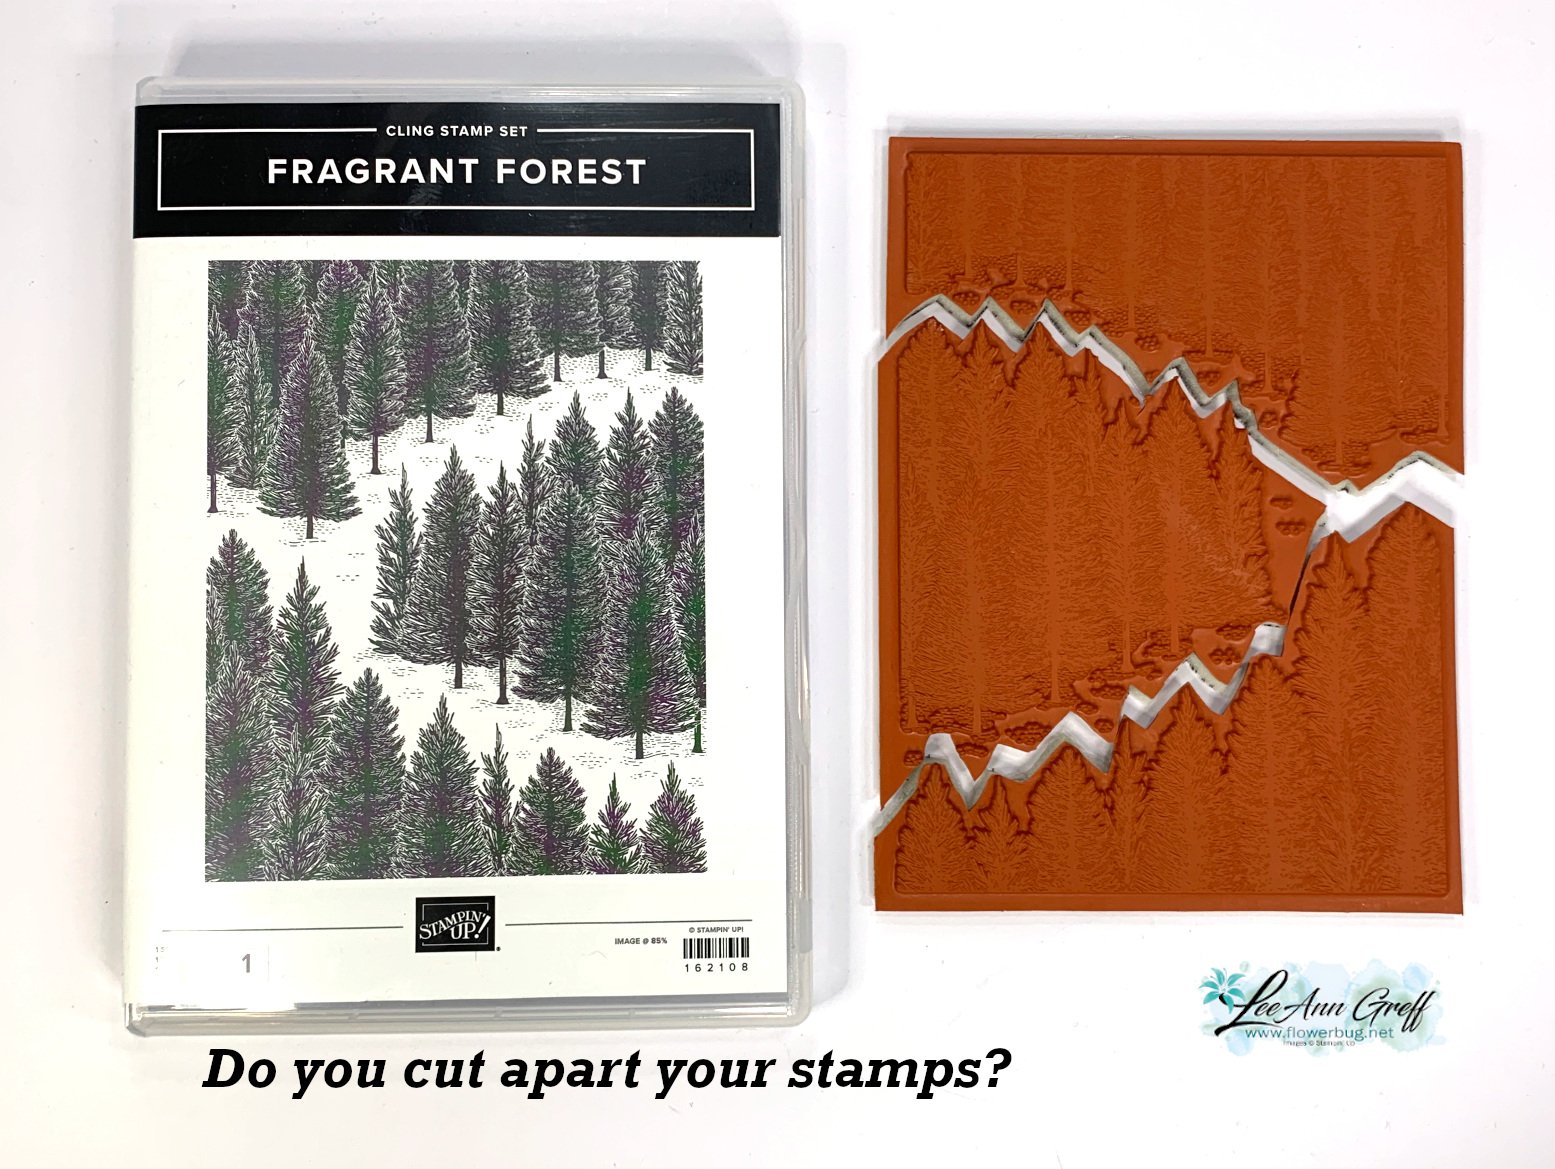
    Are you wondering how I achieved the inside trees image without inking the entire stamp? Here's how!

    I was trying to mask the stamp but it has lots of little pine needles between the tree layers.  It wasn't working so I thought, 'why aren't I trimming the stamp?'.  I have no problem doing it; it just isn't my first thought.  It works like a gem and makes it so much easier to use this pretty stamp set!

    Do you cut your stamps apart? I tend to do it with images that have a greeting with it. Or if I like part of a greeting and want to use it separately. Honestly they fit right back together when put onto your block.  It just makes sense!  I encourage you to try it. 

    Click here or on the photo below to watch my video.  Please subscribe to my YouTube channel too!  

    ~~~

    December Specials: 

    Get a free embellishment from the 2023 Holiday catalog with an

    online order over $50


    *current host codes:  PN2C7Z4E or 77277NNH

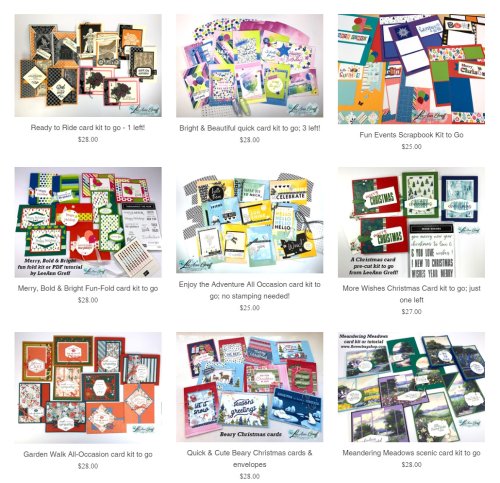
    Love kits?  Check out my pre-cut card kits to go here!

    I offer two new kits & tutorials each month!


    Leave a Reply

    Your email address will not be published. Required fields are marked *

  • Stunning Meandering Meadow card kit to go; or get the PDF tutorial


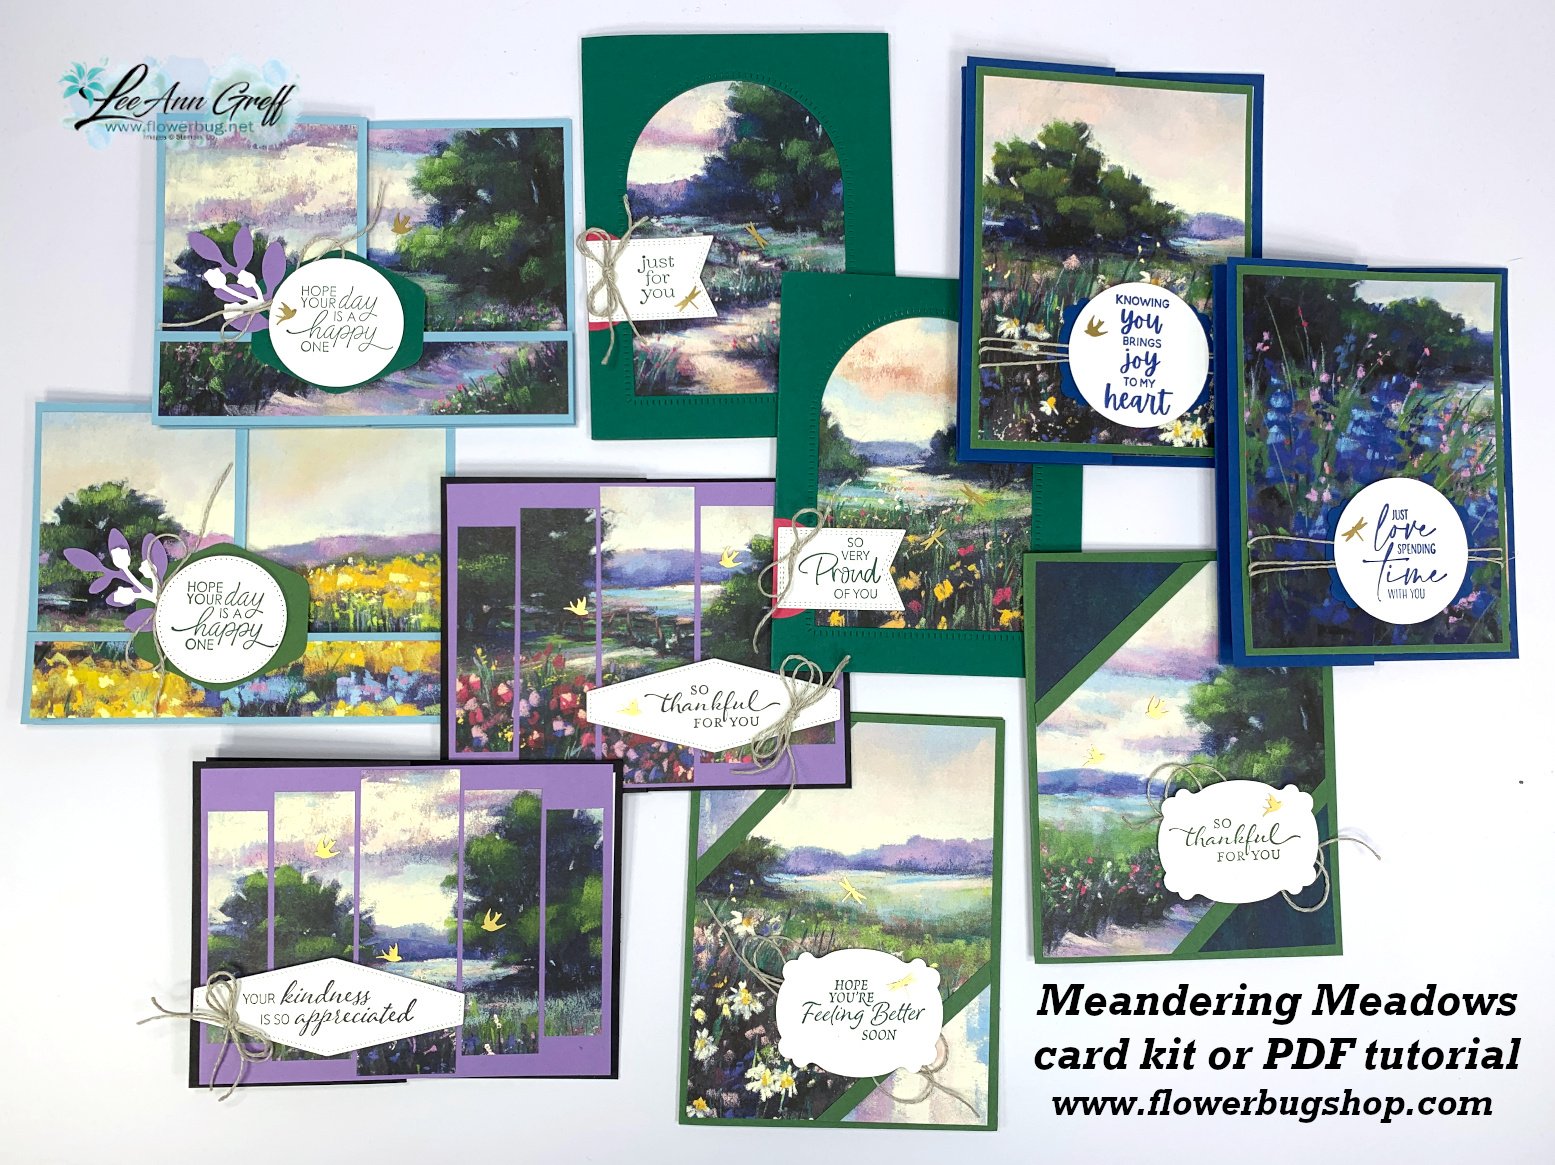
    Today I'm sharing another set of gorgeous cards in a pre-cut card kit to go in December.  The stunning water-colored Meandering Meadow designer paper sure makes it easy to create beautiful projects! 

    This designer paper is part of our Online Exclusives line and available while supplies last. See it here.  *I have a limited supply of these kits. 

    Three of the five designs feature fun fold layouts. Aren't they pretty?  Of course the photo does not do them justice! 

    This kit is $28 plus shipping & includes the following:

    • 10 pre-cut cards including punched pieces 
    • 1/2 pkg of Meandering Meadow 6 X 6" designer paper
    • a share of Linen Thread
    • a share of Adhesive-backed Dragonflies & Birds
    • the PDF tutorial

    Click here to reserve your kit to go. Click here to get the tutorial only.

    **If you'd like to get a card kit every month (with bonus product perks) click here. 

    The tutorial is emailed to you immediately after payment. The card kit is mailed out via Priority Mail at the end of December. 

    You will need stamps, ink, adhesives and a paper trimmer to cut your new designer paper.  I design my kits so you can easily substitute your own greetings.

    I posted another card kit available featuring the colorful Garden Walk designer paper. Click here to see all of my available kits. You'll save $$ on shipping by ordering more than one. 

    ~~~

    December Specials: 

    Get a free embellishment from the 2023 Holiday catalog with an

    online order over $50


    *current host codes:  PN2C7Z4E or 77277NNH

    Click on the image below to see the Holiday Last Chance items 

    Leave a Reply

    Your email address will not be published. Required fields are marked *

  • Garden Walk & Heartfelt Hexagons; a perfect match up for this kit to go!


    For one of my pre-cut card kits to go this month (December) I chose the Garden Walk 6 X 6" designer paper.  It includes a wide variety of beautiful patterns. The pretty designer paper provides a great start to these 10 eye catching cards; 2 are fun fold designs.  Each design has a second layout option – one is vertical and the other landscape. 

    I used the Heartfelt Hexagon punch bundle for my greetings. If you add it on I give it at a discount! *Message me here for a price quote.

    This kit is $28 plus shipping & includes the following:

    • 10 pre-cut cards including punched pieces (texturing is not included)
    • 1/2 pkg of Garden Walk 6 X 6" designer paper
    • a share of Calypso Coral 1/8" ribbon trim
    • a share of Blooming Pearls
    • 10 envelopes
    • the PDF tutorial

    Click here to reserve your kit to go. Click here to get the tutorial only.

    **This is the card kit my subscribers will receive. If you'd like to get a card kit every month (with bonus product perks) click here. 

    The tutorial is emailed to you immediately after payment. The card kit is mailed out via Priority Mail at the end of December. 

    You will need stamps, ink, adhesives and a paper trimmer to cut your new designer paper.  I design my kits so you can easily substitute your own greetings.


    I have a limited amount of these kits! 

    I will offer a second card kit available in December featuring the stunning Meandering Meadows designer paper. I'll share it Monday. Or click here to see all of my available kits. You'll save $$ on shipping by ordering more than one. 

    ~~~

    December Specials: 

    Get a free embellishment from the 2023 Holiday catalog with an

    online order over $50


    *current host codes:  PN2C7Z4E or 77277NNH

    Click on the image below to see the Holiday Last Chance items 

    Leave a Reply

    Your email address will not be published. Required fields are marked *


Notice: LeeAnn Greff, Independent Stampin’ Up! Demonstrator, Manager. The content of this website is my sole responsibility as an independent Stampin’ Up! demonstrator and the use of, and content of, the classes, services, or products offered on this website is not endorsed by Stampin’ Up! Copyright 2025