/


Latest Post

Fabulous Gone Fishing bundle swap cards


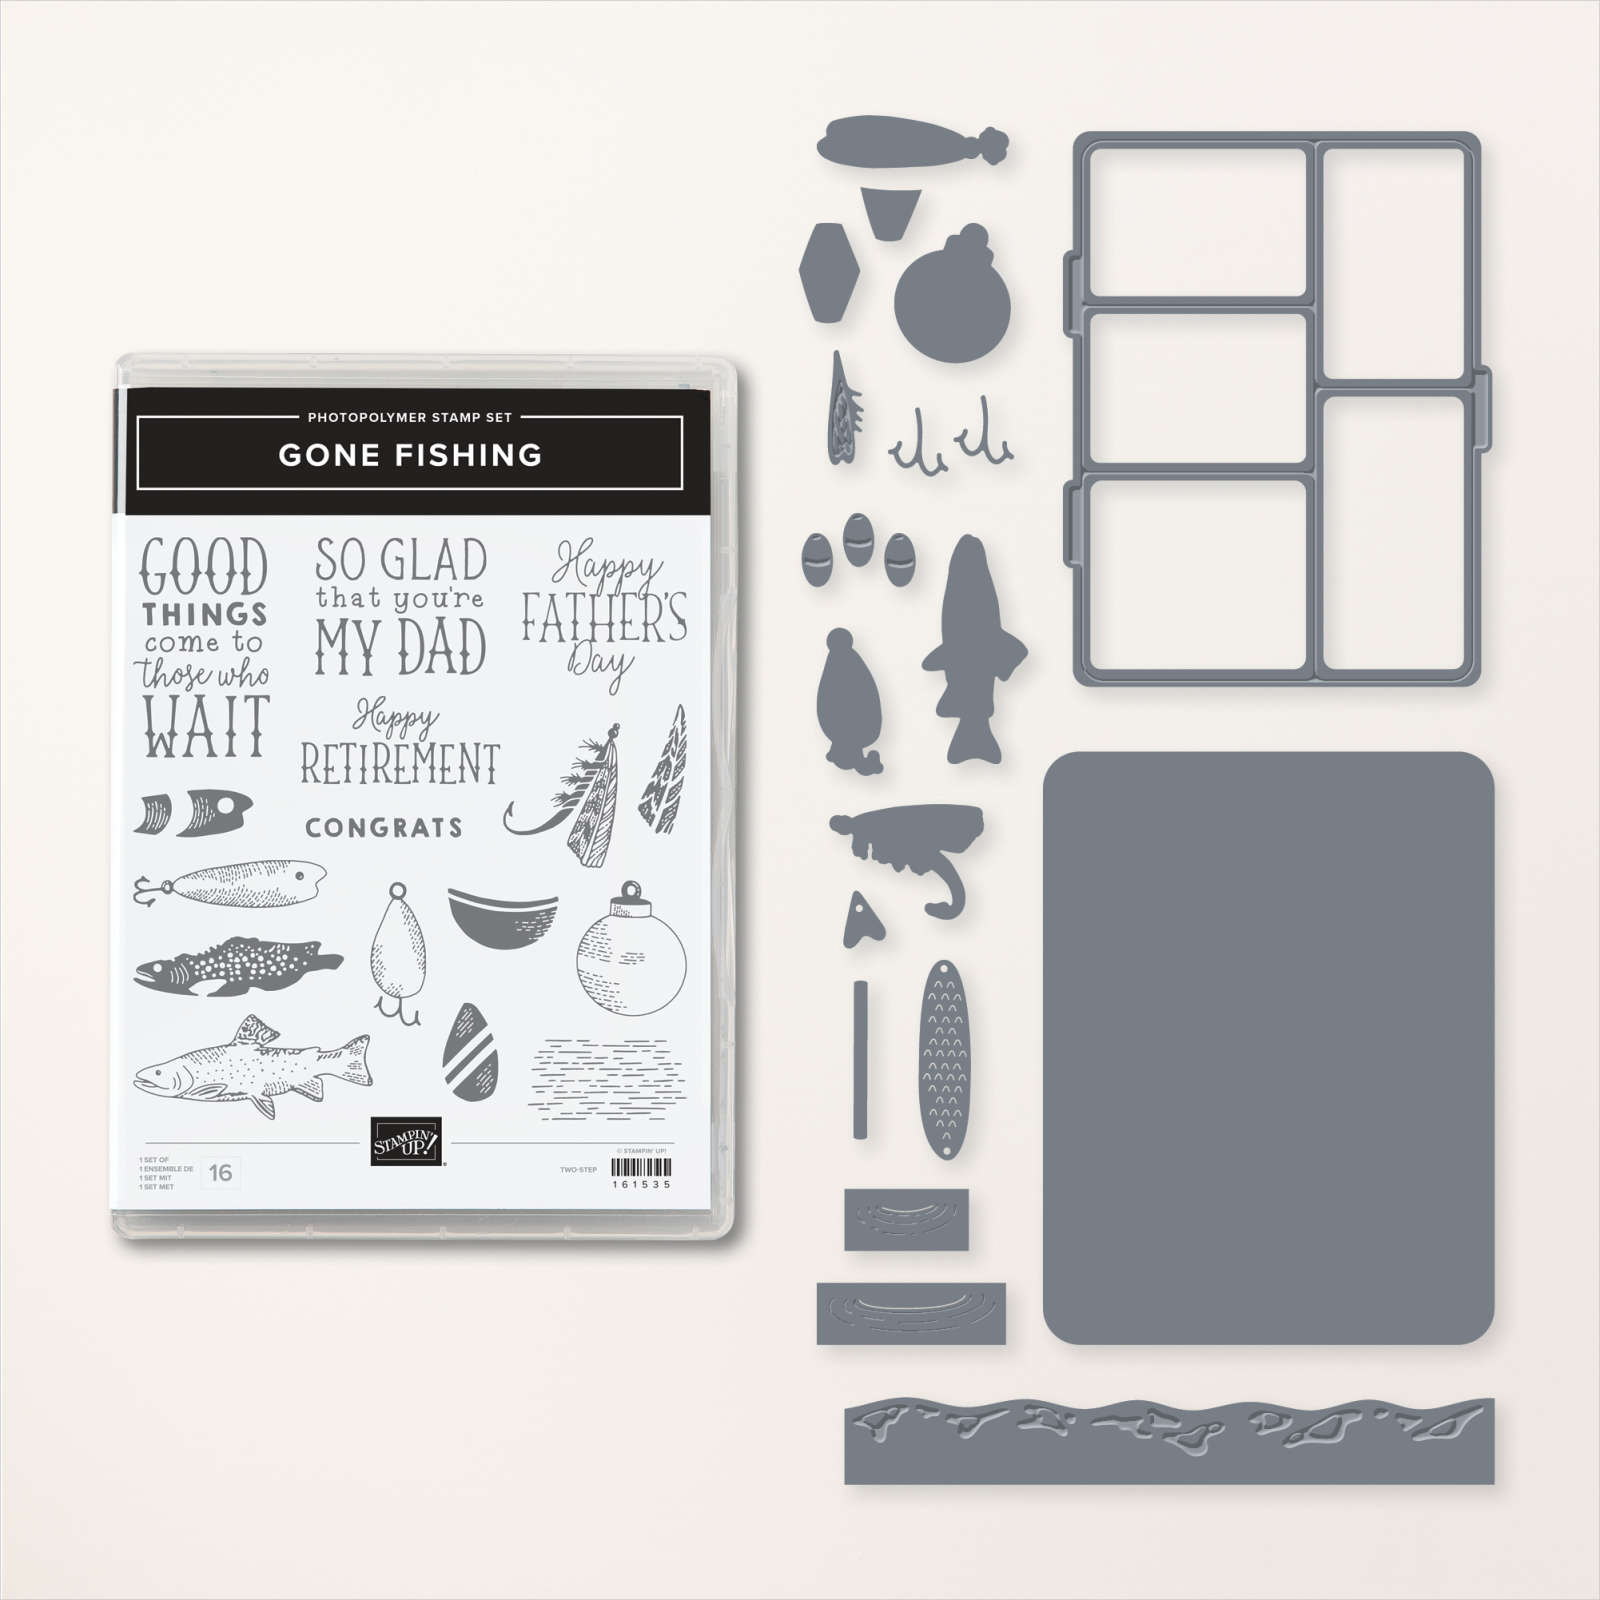
Father's Day is coming up Sunday and the Gone Fishing bundle is perfect for the occasion.  

I received two swap cards on the cruise and thought you'd like to see them.  First is my friend Susie Wood's card.  Her style is similar to mine and we often share cards with each other. My husband and I spent time with her and her husband Deke on the cruise; not enough but we both treasure our friendship so much! Check out her fabulous blog here.  She is super creative and a master at fun folds. 

Her colors are Night of Navy with Vanilla and Boho Blue. The tag is made with our Very Best Trio punch seen here. 

Next is a card I received from Janet Holmes. The curvy border die-cut shows off wonderfully here.  

Check out the Gone Fishing bundle here.  

I'll have lots more to share with this bundle soon!

~~~

June Specials:

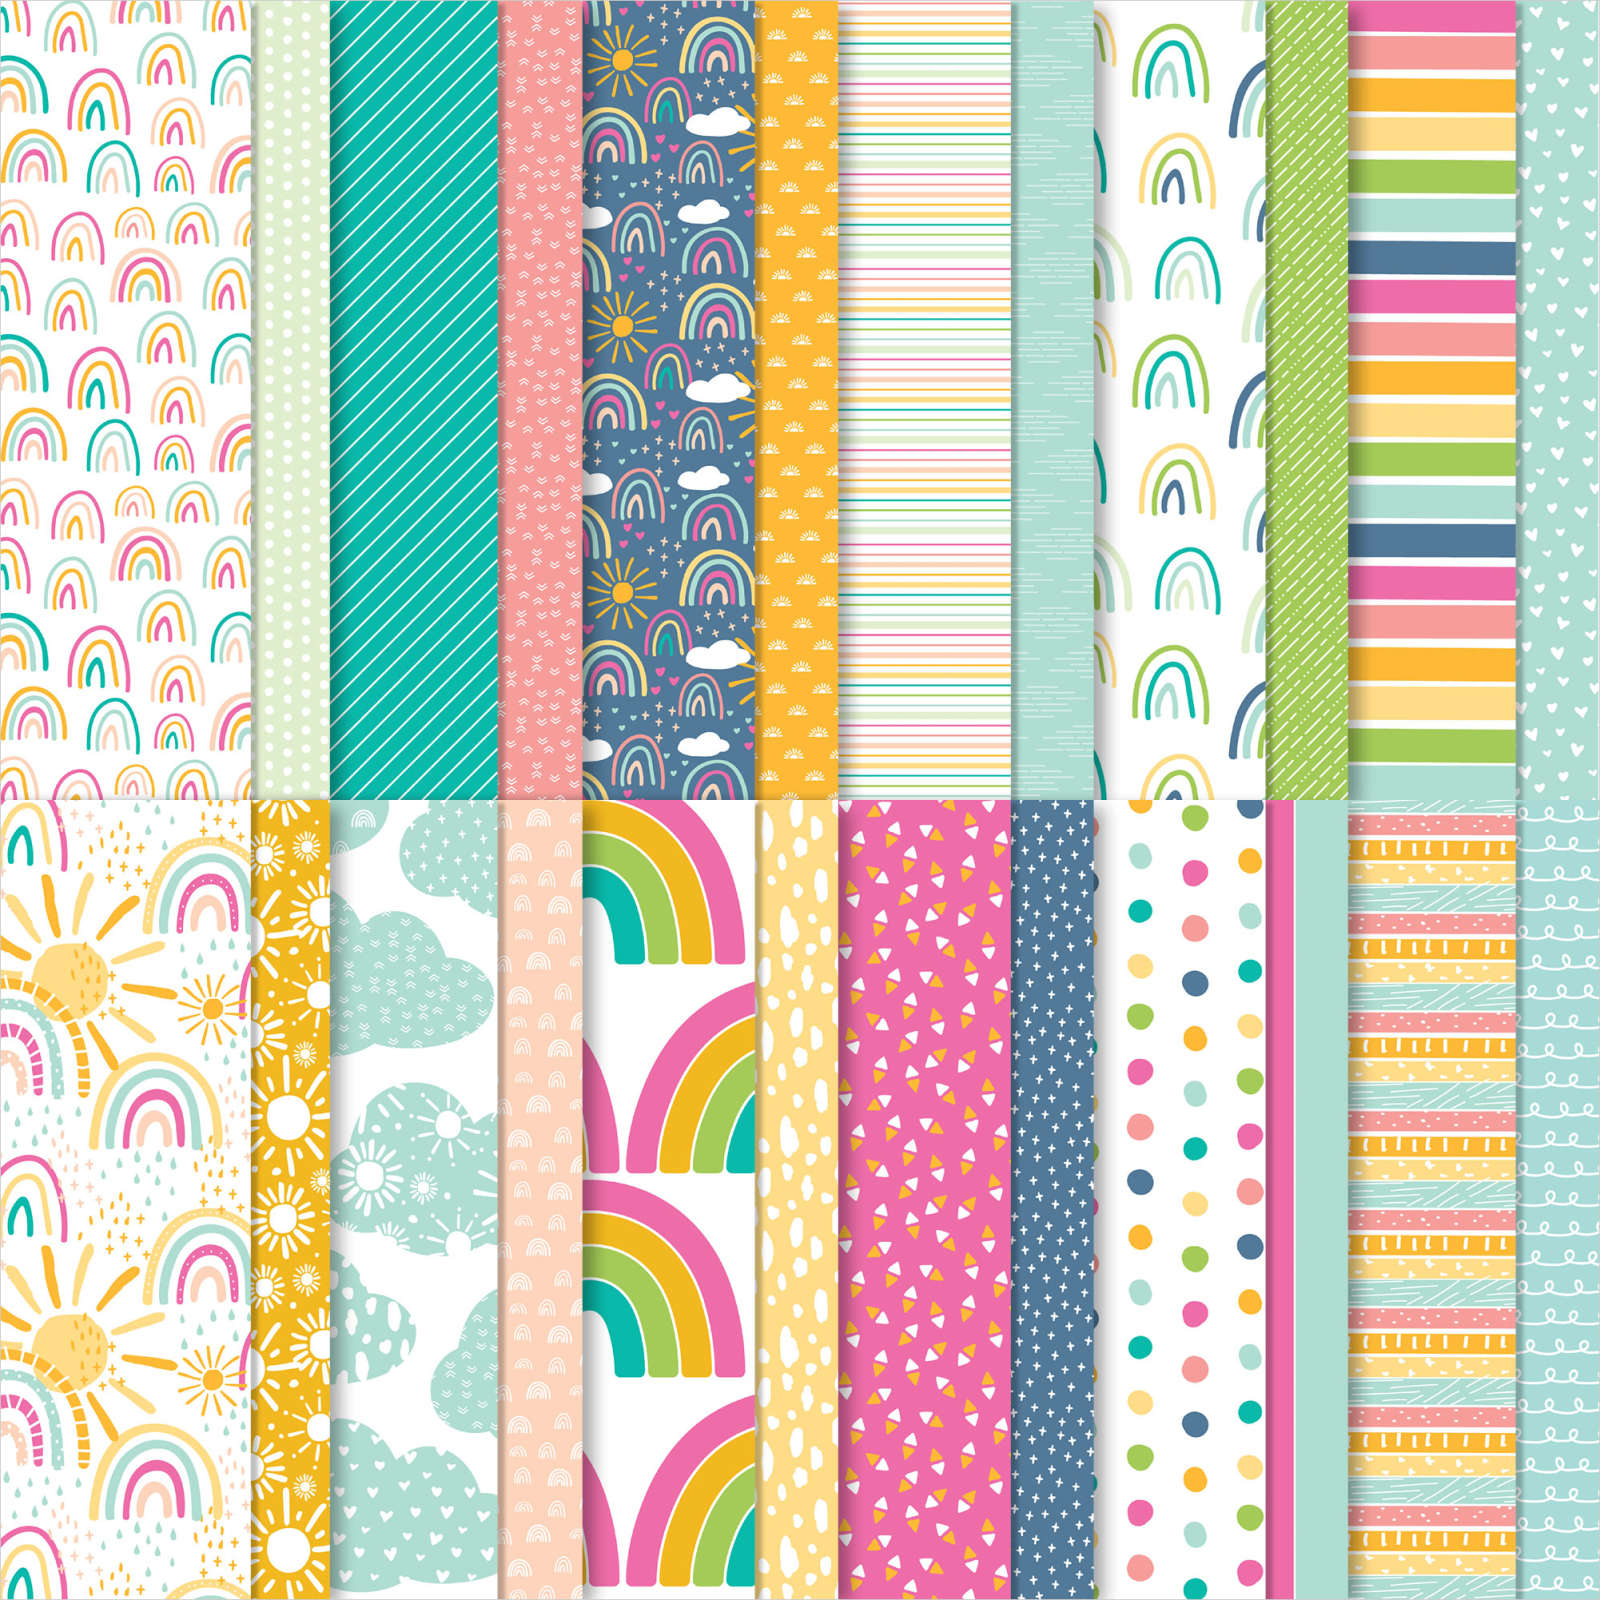
Designer Paper is 15% off in June!

WOW – get $155 in product for $99 with free shipping! click here!

Get a package of In Color pearls with online orders over $55 using a host code.

*current host codes: ZHZ6CPYU or AJVB3B3V 

 Earn free products with my loyalty rewards! 

Click here to download yours and earn a $50 shopping spree!

All Posts

  • Star & Snowflake Ornaments; so pretty!


    I had to give these gorgeous star projects a try!  Sara from Stampin' Up! made them for a tree topper but they were one sided.  I decided to turn her idea into ornaments by making them 2-sided.  

    They're made with our Stitched Stars dies seen here.  I used the largest and third smallest to make these. I used the Gingerbread & Peppermint DSP but unfortunately it was on the retired list and is sold out now. 

    You probably wonder where the snowflakes come from.  They are called 'Wonderful Snowflakes' and they also just sold out! The retiring list can be so hard; items you want can be gone in an instant! 

    You need a good stack of Dimensionals between each layer like this: 

    You can see why you need a smaller star inside; to support the stacks of Dimensionals. *There's a second stack under that smaller star.  You'll add a second large star on top of the dimensional stack seen above. 

    Tips:

    • I found a stack of 4 to work best.
    • I added a rolled up mini glue dot to the tip of each star point to secure them together.  It's not necessary but does finish if off so they stay closed. 
    • Add the cord with a glue dot to one of the star points. 

    They were so fun to make I couldn't stop! I plan to add these to my cookie trays or to Christmas presents instead of a traditional bow. 

    I thought this last one would look sort of ho hum in this pattern.  But once I added our Red Rhinestones to the snowflake it sure came to life!  

    Below is the video to see exactly how to make these pretty ornaments.  They're the third project I share. 

    ~~~

    December Specials:

    Host code:  6YCWV7QN

     *click here to order 

    Use the host code above & get a free card stock sampler ring with a $50 order in December! 

    See the last chance list here

    See the July-December catalog carry over list here

    Leave a Reply

    Your email address will not be published. Required fields are marked *

  • Origami Christmas Tree card; soooo easy!


    I make one of these trees almost every year.  Why? Because they are easy & fun and we always have new Designer Paper for me to play with. 

    All you need are four squares of DSP. No scoring or other measurements.  Watch the video here or below to see how it's done. 

    Here are the supplies:

    • Card stock – Old Olive & Mossy Meadow card bases, Real Red & Cherry Cobbler layers, White greeting strip & inside
    • Designer Paper – Heartwarming Hugs (out of stock now) and Sweet Stockings
    • Greeting image from the Christmas Cheer stamp set
    • Star topper from the Starlit punch
    • Embossing folder – Evergreen Forest (out of stock temporarily) 

    Measurements: 

    • Card base 5 ½” X 8 ½”
    • DSP – 4 square pieces at 1 ¼”, 1 ¾”, 2 ¼” & 2 ¾”
    • Textured front & White inside are 4” X 5 ¼”

    Below is the video for you. I share another special card project and some pretty star/snowflake ornaments as well.  

    ~~~

    December Specials:

    Host code:  6YCWV7QN

     *click here to order 

    Use the host code above & get a free card stock sampler ring with a $50 order in December! 

    See the last chance list here

    See the July-December catalog carry over list here

    Leave a Reply

    Your email address will not be published. Required fields are marked *

  • Easy Christmas Ornament card


    I think this is pretty clever & unique; it's a 'faux' Christmas ornament on a card. And it's quick & easy too!  

    It looks so real; like you could lift it off!  And you actually could if you use temporary adhesive; or add it to a pocket.  

    I shared this project on a FB Live last week.  It's the second project I made in this video.  

    Products used:

    • Merry Melody embossing folder on the White CS
    • The ornament is made with the largest smooth circle in our Circles dies. 
    • The DSP is called Painted Christmas and is in low inventory right now.  
    • Elegant Trim for the 'hanger'. 
    • Brushed Metallic specialty CS for the 'hanger'. 
    • Heat embossing for the greeting – from the Words of Cheer stamp set. 
    • CS is Real Red, White & Evening Evergreen 

    Here's a close-up of it. 

    I give a few hints in the video on achieving this.  Basically you want to stamp your greeting first and add it to your DSP.  THEN cut both pieces out at the same time with your circle die. 

    Below is the video for you. I share another special card project and some pretty star/snowflake ornaments as well.  

    ~~~

    December Specials:

    Host code:  6YCWV7QN

     *click here to order 

    Use the host code above & get a free card stock sampler ring with a $50 order in December! 

    See the last chance list here

    See the July-December catalog carry over list here

    Leave a Reply

    Your email address will not be published. Required fields are marked *


Notice: LeeAnn Greff, Independent Stampin’ Up! Demonstrator, Manager. The content of this website is my sole responsibility as an independent Stampin’ Up! demonstrator and the use of, and content of, the classes, services, or products offered on this website is not endorsed by Stampin’ Up! Copyright 2025