/


Latest Post

Dressed to Impress Best Dressed Triple Fold card


The retired list will be out this afternoon.

Stop back in to see it or click here to see it all in my store.

Here's the Best Dressed fun fold card I promised you yesterday.  (See the Ornate Garden cards here.) 
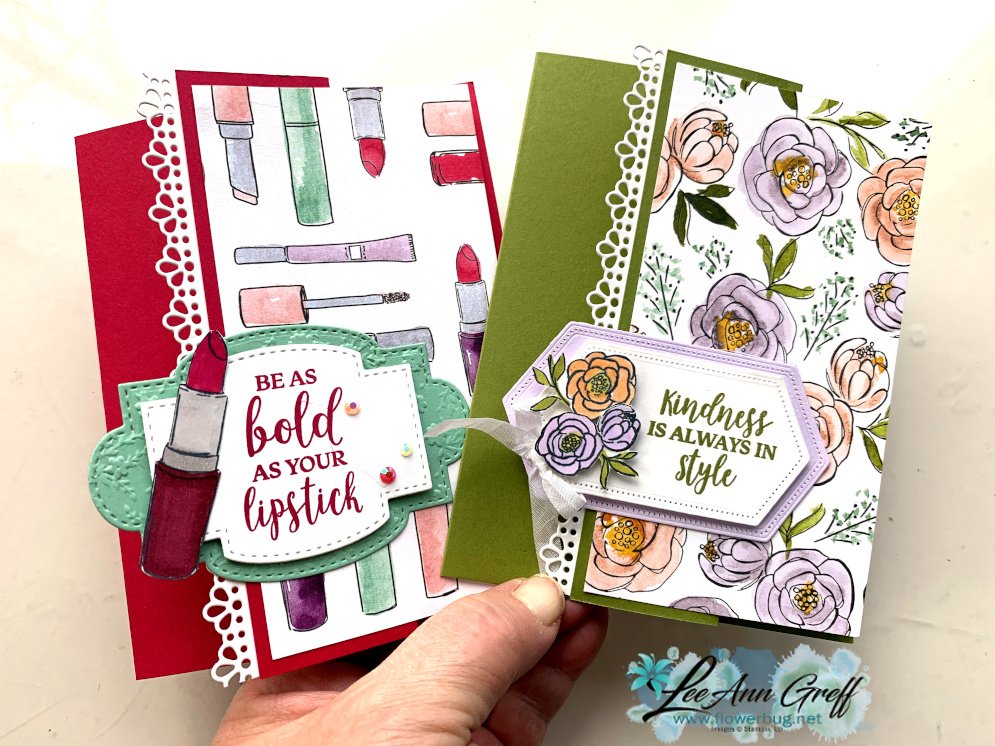
Look at this cute fun fold card!  See how the paper matches up across the three panels?  So clever! **Watch the video here on Facebook. 

This card is standard 5 1/2" X 8 1/2" but you score it at 1 1/2" and 4 1/4" to get the triple fold. 
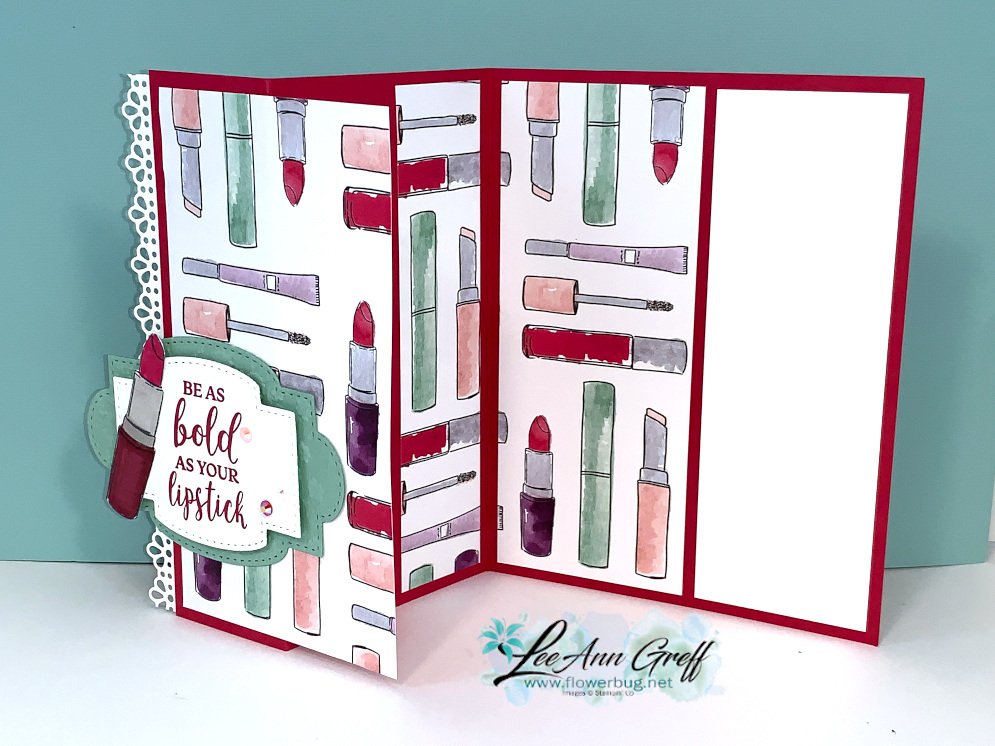

The best part of this fun fold card is how it makes the most of your designer paper!  Each card uses one piece measuring 5 1/4" X 6".  Cut the Best Dressed paper into three pieces; the first (left) piece at 2 3/4" wide X 5 1/4" tall, the middle piece at 1 1/8" wide and the right (inside) piece at 2 1/8" X 5 1/4".

Those three pieces add up to 6" across!  What a great way to use your designer paper! You can make 4 cards from a 12" sheet! The white layer inside the card (for writing or stamping onto) is 5 1/4" X 1 3/4". 
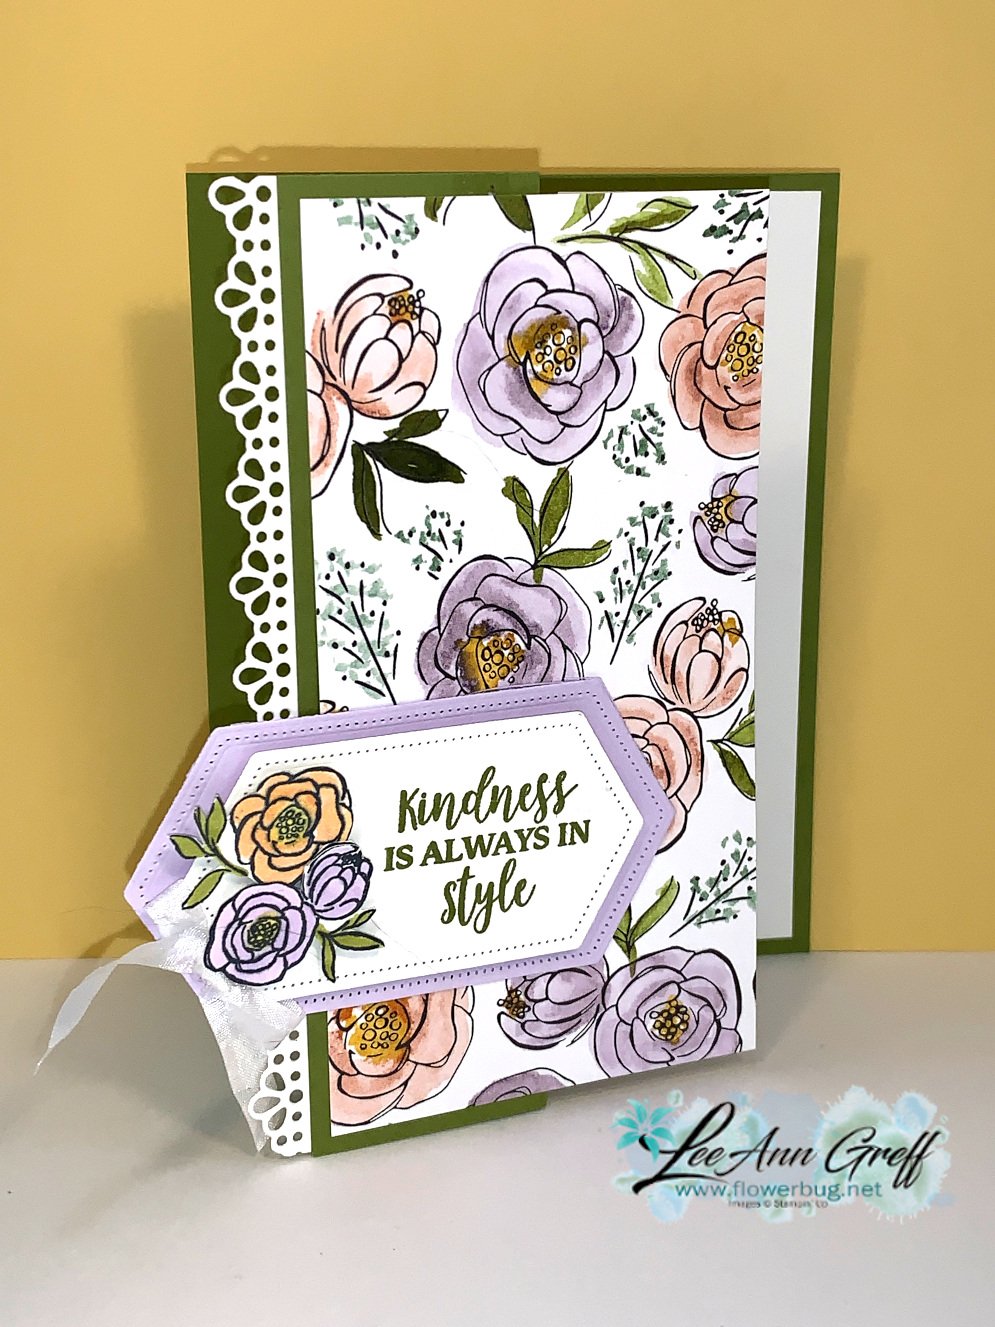
I added a pretty die-cut border cut from the Ornate Borders die; love the eyelet detail on it!  The set of dies are currently unavailable but should be back in stock in early May.
The greeting layers are cut using the Stitched Nested Labels and the flowers and leaves are stamped and fussy cut. The colors are Old Olive and Purple Posy. 

The stamps are all from the Dressed to Impress stamp set seen here. 
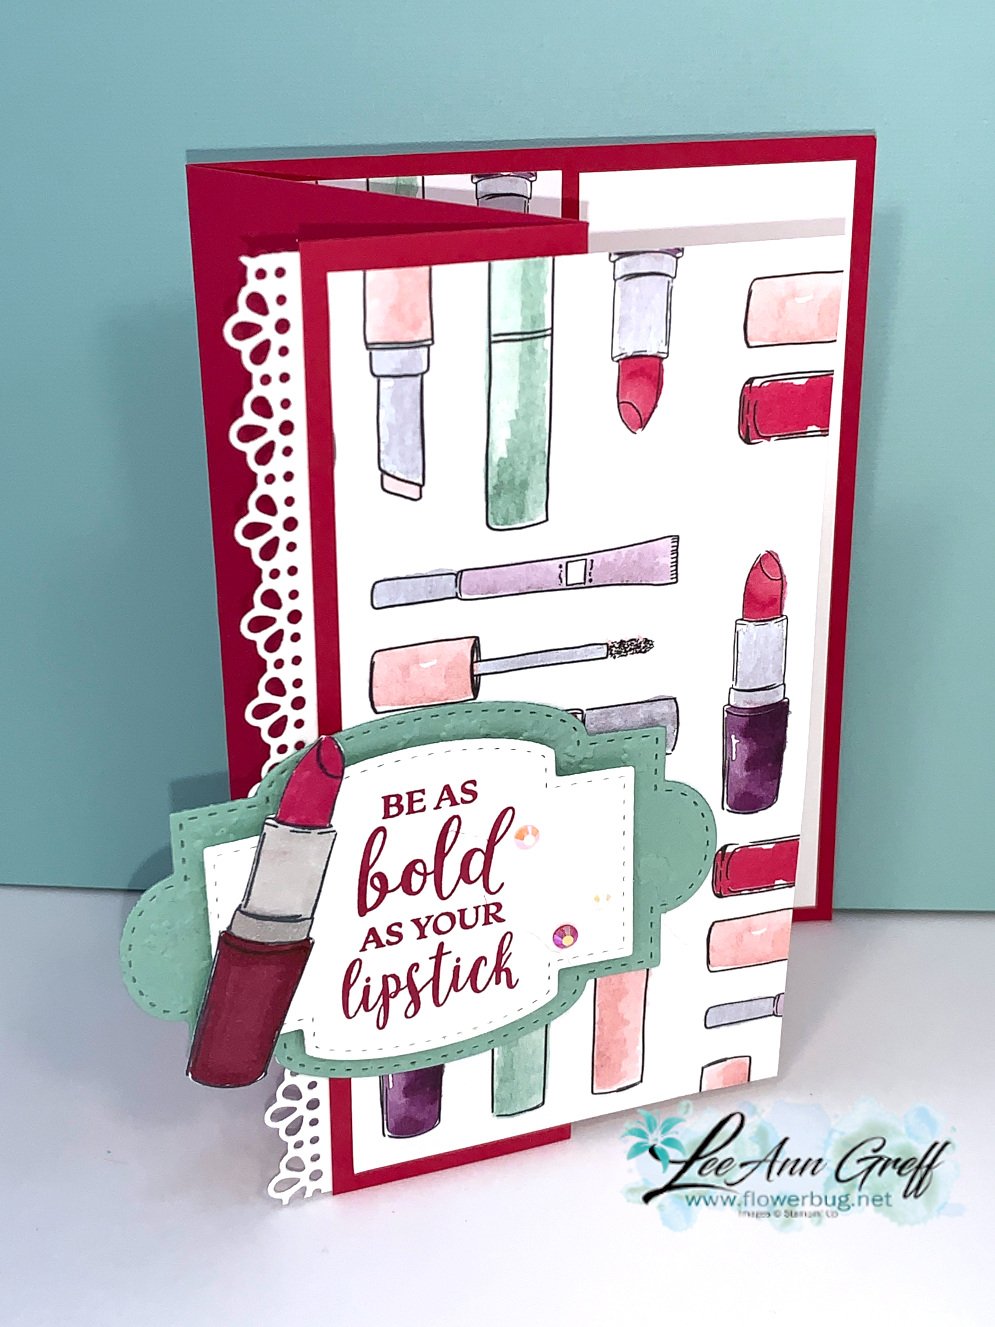


The die-cuts here are from the Stitched So Sweetly dies from the mini catalog; also currently out of stock and unavailable.  They should be back in next week. The colors here are Lovely Lipstick and Mint Macaron. 

See the entire Best Dressed suite of products here. 

~~~~

April ordering specials:

All online orders in April will receive my tutorial of the month; with 16 cards

featuring the Ornate Garden products seen here.

**Order either Ornate bundle from me and get a free 3 cards pre-cut kit! Order both and get a 6 cards kit with pdf tutorial! 

Orders between $55 and up will receive a free Simple Shammy! 

Use this host code for April: MMM4SXSB  (unless you're order is over $150; then don't use the code. You'll receive your own host benefits). 
All Posts

  • Look at this Amazing Gift!


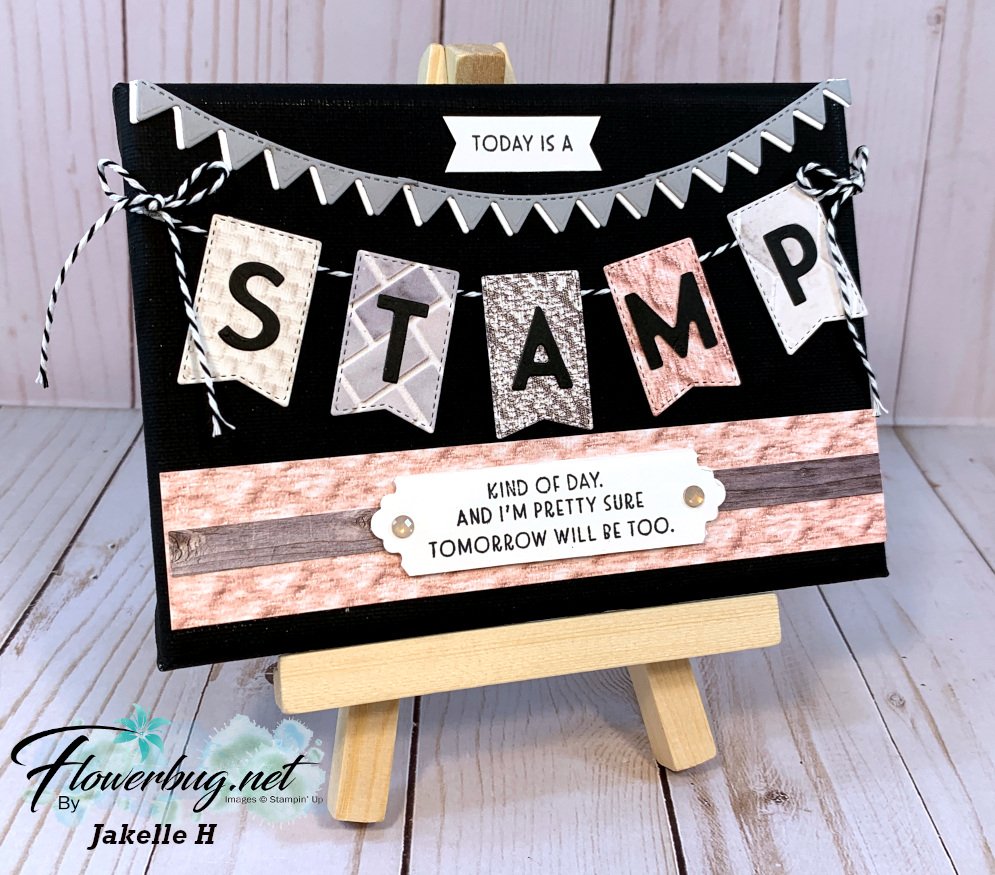
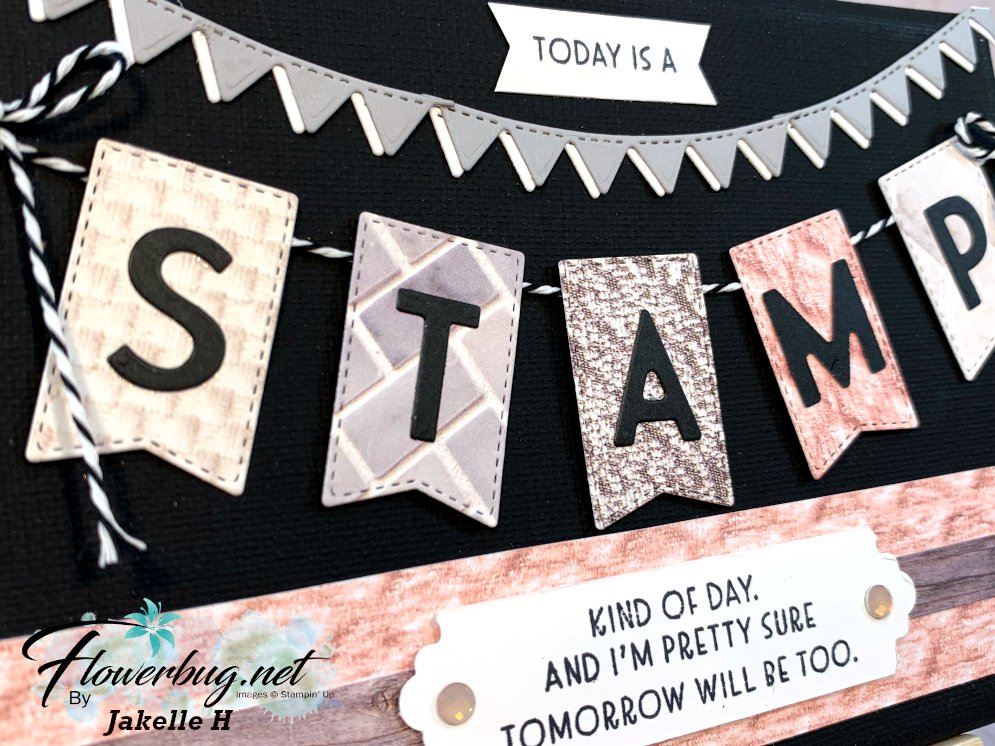
    I received quite a wonderful surprise in the mail last week from Jakelle; a demonstrator in eastern North Dakota.  Look at what she made me!  

    It's a 5 X 7" board on an easel and her craftmanship is incredible! She used sooo many different dies & products to complete it. 

    • Tasteful Labels, Playful Alphabet & So Much Happy dies
    • Lovely Labels Pick a Punch
    • In Good Taste Designer Series Paper
    • Nothing's Better Than stamp set

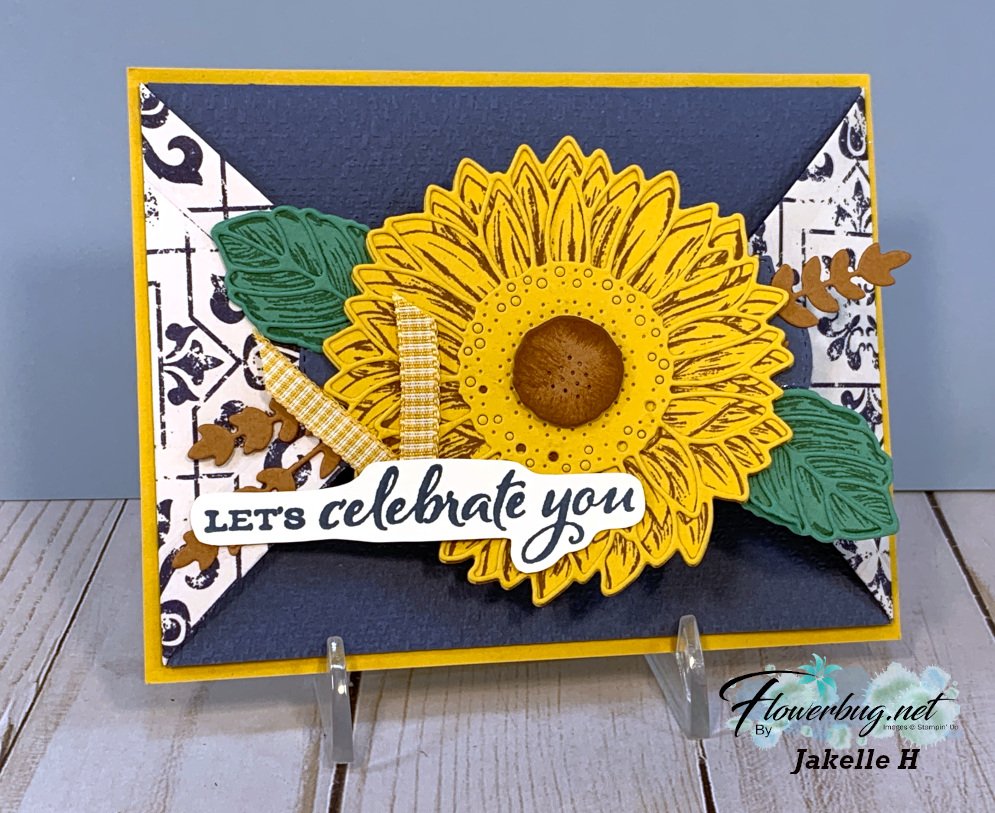
    She sent this gorgeous card too, congratulating me on my Million Dollar in Sales achievement.  

    Isn't it beautiful?  She used the Celebrate Sunflowers stamp set and dies bundle and the In Good Taste DSP.  If you want to know how to make this Double-point fun fold card here's a link to a video I made.  

    I am so grateful for the fabulous friends I've made; both online and in person.  I would say I have the best job ever; but it doesn't feel like a job!  I'm loving it.  And like my stamp set says, Life is Beautiful!

    ~~~

    Current Host code is 7VPEDARH

    Get a free package of All the Trimming embellishments in September with an

    online order over $55. 

    *Remember that if your order is over $150 do not use the host code above.  You'll get your own host benefits!  

    And if it is over $99 I recommend you choose the Starter kit instead!  It just makes sense! 

    Order online here

     Get my Beautiful Autumn pdf tutorial free with any online order in September!


    It includes directions, photos and measurements for 13 cards!

    Leave a Reply

    Your email address will not be published. Required fields are marked *

  • Life is Beautiful Apple Tree; get the secret to easy apples!


    Here's one more card with my Life is Beautiful stamp set. We made this one at my August Card Clubs.  

    The colors are the new In Color Just Jade with Early Espresso & Real Red.  See the tiny 'apples' on the tree?  Well I wanted just a few apples from the large bokeh dots image. I have a surprising way of stamping just a few of the stamp image.  I dare you to try it!  Watch the video below to see what I did! 

    That pretty stitched shape is from the Celebration Label dies seen here.  There are 5 sizes of this shape in the set! 


    I'm so happy with all of the projects people are making with this stamp set!  It's been fun to see how much everyone seems to like it!  

    Measurements: 

    • Just Jade card base 5 1/2" X 8 1/2"
      Very Vanilla 4 3/8" X 3 1/8" die-cut
      Early Espresso 2" X 4 1/4"
      Real Red 1" X 5 1/2"


    ~~~

    Current Host code is 7VPEDARH

    Get a free package of All the Trimming embellishments in September with an

    online order over $55. 

    *Remember that if your order is over $150 do not use the host code above.  You'll get your own host benefits!  

    And if it is over $99 I recommend you choose the Starter kit instead!  It just makes sense! 

    Order online here

     Get my Beautiful Autumn pdf tutorial free with any online order in September!


    It includes directions, photos and measurements for 13 cards!


    Leave a Reply

    Your email address will not be published. Required fields are marked *

  • Cool technique with the Wink of Stella pen!


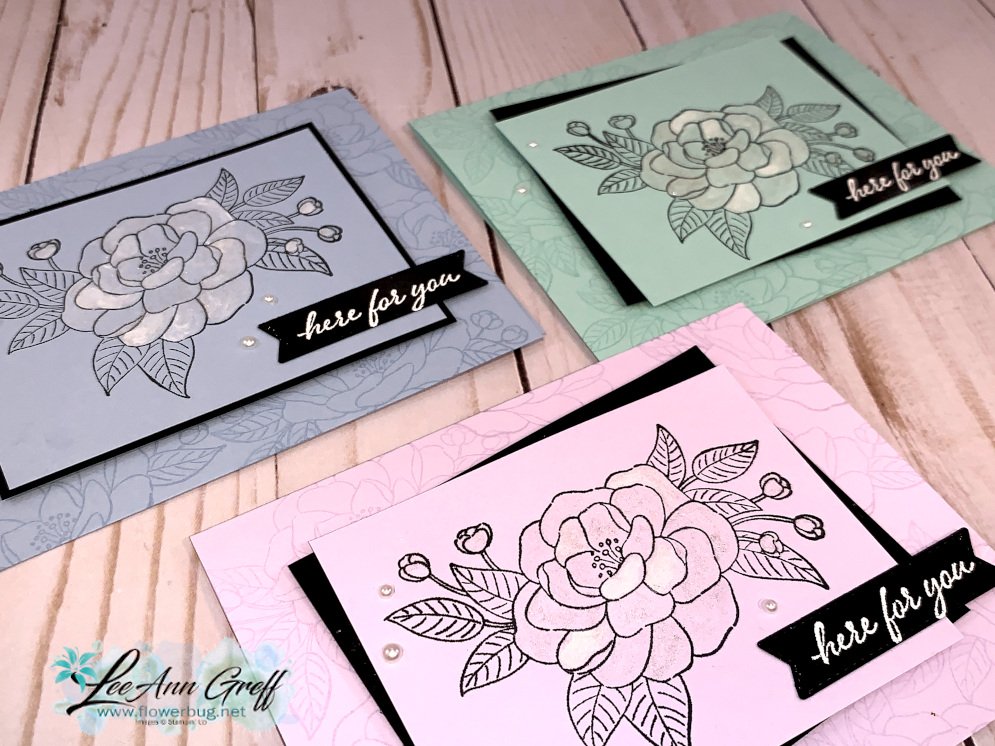
    There are times I like to color and others that I don't. I came up with this cool technique using the Wink of Stella pen and White Craft ink to highlight my main image. 

    I pressed a clear block directly onto my White Craft ink pad and used that to pick up the ink with my Wink of Stella pen. You sure don't have to use a clear block but I didn't want to get Wink of Stella in my ink pad. You could use a paper plate or any other non porous surface.   

    I used Purple Posy, Pool Party and Seaside Spray on the cards below. 

    Technique tips:

    • Light colored card stock works best here; the White ink can obscure the stamped image on dark card stock.
    • Squeeze out a bit of the Wink of Stella liquid to make a small puddle to mix with the White ink for easier painting. 
    • Paint the image once and go back and highlight parts of it if you want more 'lightness'. 
    • Black Memento ink works fine to stamp your image
    • This should work nicely on a heat embossed image! 
    • You can use the White Craft ink refill instead of an ink pad but a little drop goes a long way! 

    I also used Versamark to create a background effect on the card base, stamping the main image multiple times. I love how soft a Versamark background is and I don't use it near enough.  This repetitive stamping could be very busy if done in black or a darker color.  

    Here's the video with 3 different coloring techniques! 

    Click on the photo below to get this stamp set and the Queen Anne's Lace set and an 8 cards pre-cut kit for each one; free! 

    ~~~

    Current Host code is 7VPEDARH

    Get a free package of All the Trimming embellishments in September with an

    online order over $55. 

    *Remember that if your order is over $150 do not use the host code above.  You'll get your own host benefits!  

    And if it is over $99 I recommend you choose the Starter kit instead!  It just makes sense! 

    Order online here

     Get my Beautiful Autumn pdf tutorial free with any online order in September!


    It includes directions, photos and measurements for 13 cards!

    Leave a Reply

    Your email address will not be published. Required fields are marked *


Notice: LeeAnn Greff, Independent Stampin’ Up! Demonstrator, Manager. The content of this website is my sole responsibility as an independent Stampin’ Up! demonstrator and the use of, and content of, the classes, services, or products offered on this website is not endorsed by Stampin’ Up! Copyright 2025