/


Latest Post

3 day Sale starts today!! Double Z-fold card with Meandering Meadow; free project sheet & video!


The Seasonal Sale started today!  It includes the items from the Annual 2023 listed below:

To see all the products go to the online store > Specials > Seasonal Sale
  • Ribbons & Trim
  • Paper: Cards and envelopes (including memories and more), Cardstock, Packaging, Patterned Paper, Specialty Paper, grid paper, masking paper watercolor paper
  • Ink: Ink Pads (including Classic, Versamark, Stazon, and Memento), Ink Refills, Ink Spots, Uninked Pads, Alcohol Markers, Stampin' Write Markers

*This sale ends Thursday; you can expect some items to go to unavailability status so don't delay. 

~~~

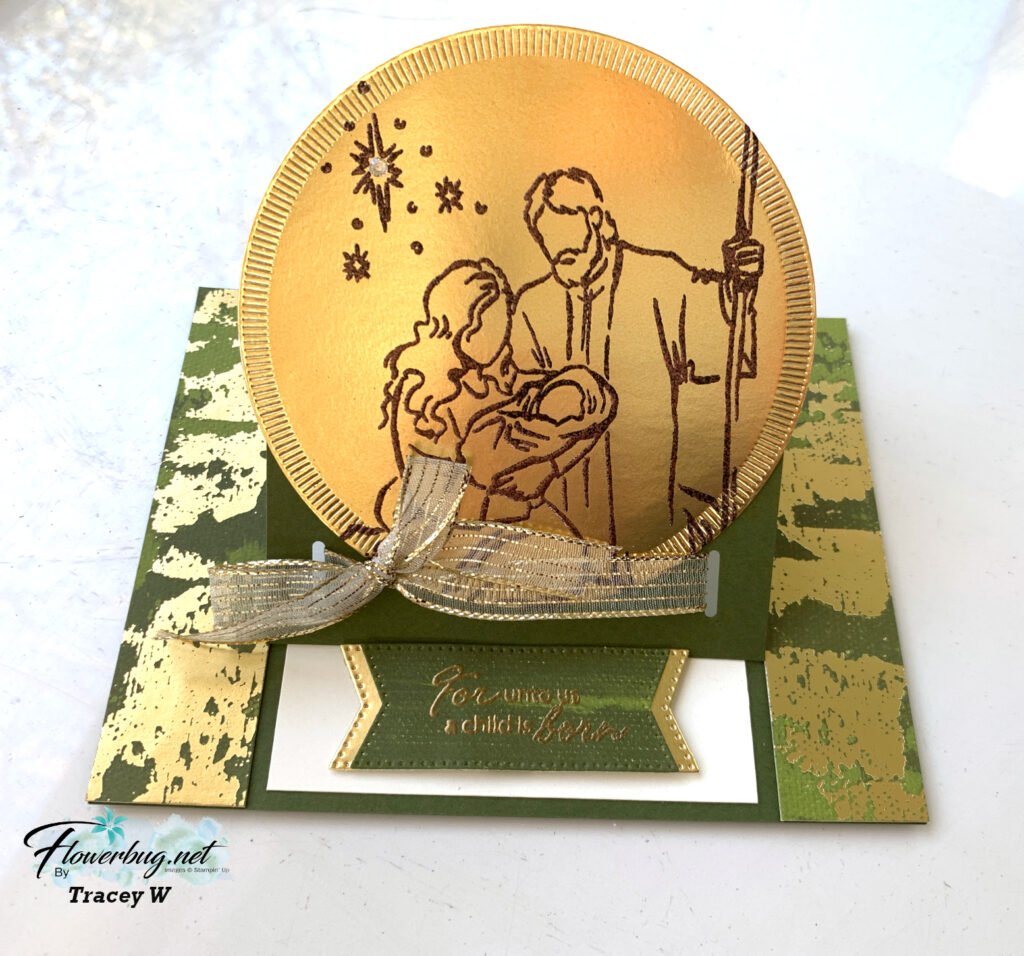
Have you ever made a double Z-fold card?  They look difficult but honestly they are quite simple!  I shared how in last week's video tutorial. I also have a free printable project sheet for you!

I featured the new Meandering Meadows 6" designer series paper from the Online Exclusives. It's stunning with 12 different watercolor scenes!  

I love how the printed strip on the bottom has the colorful stream; it matches the DSP on the card perfectly!  I sure do love this new paper!  I will be featuring it in a December card kit to go. And these cards may be included! 

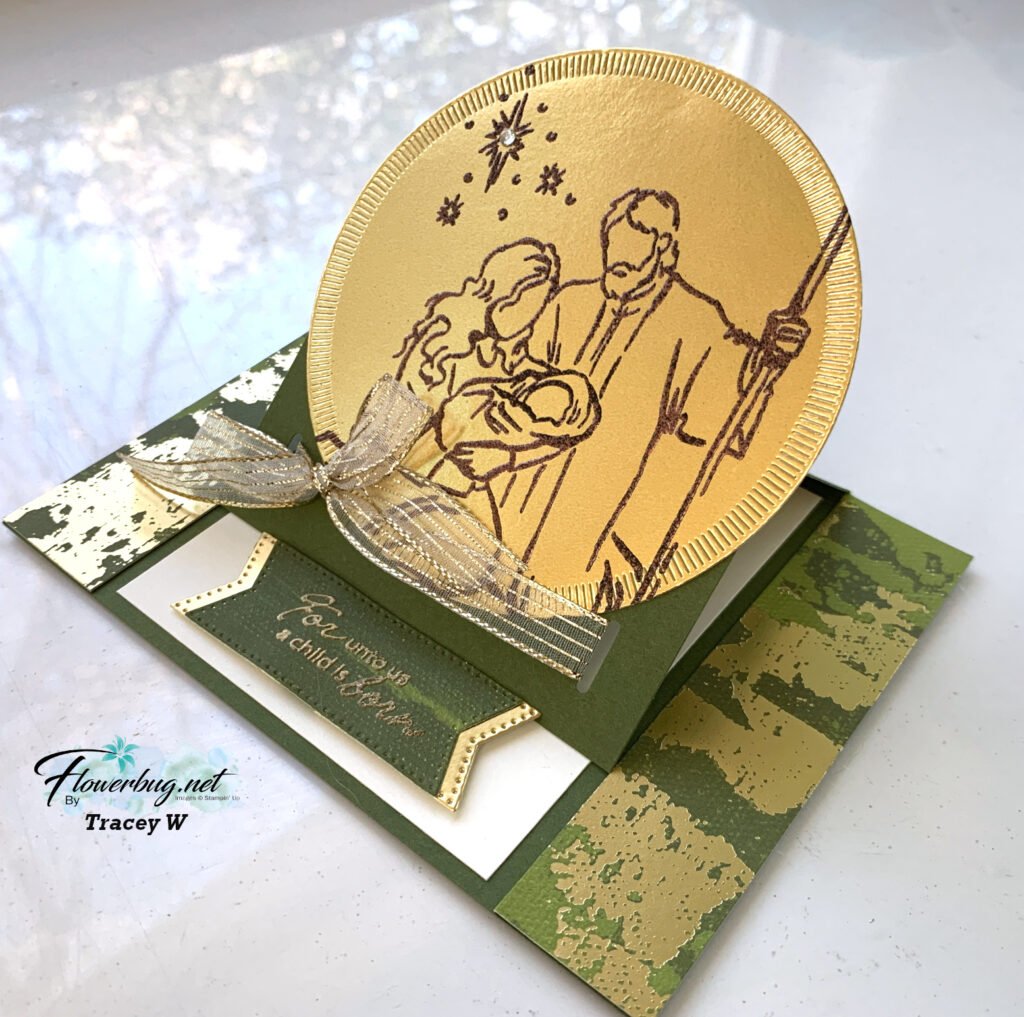
At first I was going to leave it quite simple on the left front, then I thought of the Bough punch and tried that.  I liked it so I added it to both cards which you can see below.

*Click here to download or print the free project sheet for these cards. Download Meandering Meadows Z-fold card They include the measurements, supplies, step by step directions and photos.  

I used Balmy Blue for both card layers and added Garden Green and a bit of Highland Heather with the punches. 

It's hard to tell but I used two different sheets of this pretty designer paper here.  One for the left two panels and another for the large one on the right. Then I was able to trim the bottom DSP layer off and use it for the 1" strips on the bottom layers. A perfect match! 

You can see a glimpse of each sheet in the photo below.  It's 6 X 6" in size and filled with watercolor scenes. This type of designer paper allows you to let the pretty scenes do the work for you. Click here to see it. 


You can see the video tutorial for this card and two more below and if you click here. 

~~~

November Specials: 

*current host code:  4GHXYSDQ or 4D2ZDS6Q

Click on the photo below to see all of the new online products


All Posts

  • The Black Friday sale starts today!! Nov 25th – Dec 1st!


    Grab deals on lots of Stampin’ Up! products during the big sale this week.
    From November 25th through December 1st you can save up to 40% off select products!

    It includes Stampin’ Blends, Paper Trimmer, Blades & Ink bundles at 40% off!

    Plus 25% off select adhesives and 15% off select card stock! I’m happy to save on products I purchase regularly.

    ~~~

    Leave a Reply

    Your email address will not be published. Required fields are marked *

  • A gorgeous card with the Joyful Tidings set


    This beautiful card has tons of Gold accents plus there are lots of neat tips you’ll appreciate. I made it during last week’s video.

    It was originally created for our November Team swap. The theme was to use foil or metallic heat embossing. I did both!

    Notice the background stamping on the right side; I used the Amber Autumn set with Versamark ink. The greeting is from the Ornamental Christmas set. The gold foil ‘wheat’ die-cuts are from the Amber Autumn dies
    The wreath stamp set is Joyful Tidings and can be seen here. I’ve always loved wreaths and used to collect them.

    Here I simply heat embossed the partial wreath in Gold embossing powder. It’s stamped on a die-cut from the Spotlight on Nature dies. See the pretty gold hoop? Those are available here and are applied with either mini glue dots or thin lines of Multipurpose Liquid Glue (which I did).

    My colors include Basic Beige, Mossy Meadow and Gold foil. I textured the Mossy Meadow layer with the Wreath 3D embossing folder. I also used the Labeled with Love punch to achieve the ‘ticket’ shaped corners.
    *look at your punches to see if you can use them in new ways!

    This card is a slightly different fold because the second layer is what opens. I created a free project sheet for this card for you. Click here to download or print it.

    I also have a video tutorial seen below for this beautiful card and one more beautiful card featuring the Joyful Tidings stamp set that I’ll share Wednesday.

    ~~~

    November Specials

    New Online products are available on November 4th.
    See them here.

    Get the Peaceful Garden suite tutorial FREE with any online order in November!

    Leave a Reply

    Your email address will not be published. Required fields are marked *

  • Beautiful Gold foil cards made with the Season of Elegance DSP


    Today I’m sharing two more beautiful swap cards by my Team. Out November theme was to feature either foil designer paper or metallic heat embossing.

    First up is Tracey’s stunning easel card:

    She featured the ‘A Child is Born’ stamp set and heat embossed it on a Gold foil die-cut from the Spotlight on Nature dies. There are tons of details on her gorgeous card; I’ll highlight a few:

    I think my favorite thing about her card is what she heat embossed the greeting with. Gold embossing powder wouldn’t show up very well so she mixed Copper and Black embossing powders and used that. Genius!

    Measurements:
    – Mossy Meadow card base 5 1/2″ X 8 1/2″ scored at 4 1/4″. Cut from the center score line down one side at 1″ and again at the other side at 1″. Now score that center piece at 2 1/8″
    – DSP strips are 1″ X 4 1/4″
    – Gold circle die-cut is approximately 3 7/8″
    – inside vanilla is 3 1/4″ X 4″
    – Greeting die-cuts are 2 1/2″ long X 7/8″ tall

    A stunning Christmas card Tracey!

    ~~~

    Next is a pretty card made by Lori who used a few of the same products on her card.

    She added lots of texture to her card with four different embossing folders. Those include the Sunflower 3D, Birchwood, Gathering Leaves & Soft Waves folders. These are in 1 1/4″ squares.

    Her colors include Mossy Meadow, Old Olive, Gold foil and Very Vanilla. The greeting is from the Prairie Grass stamp set.

    It’s quite a striking card Lori. Thank you!

    ~~~

    The kits below will ship out this week so you have plenty of time to finish them by December. And they’re quick & easy too!

    The Christmas Tags & More cards are easy because there isn’t any stamping. The greetings are from the gold foil ephemera pack included in the kit.

    This kit to go includes a share of the festive designer paper, the ribbon, the peppermint gems, the ephemera greetings, the PDF tutorial and video too. Plus the pre-cut 10 cards that are all fun folds. All for $30 plus shipping. It’s a fabulous deal!

    Don’t wait long; I have just a few left. Go here to get yours. *You will need to cut your new designer paper for the cards but my directions make that simple.

    ~~~

    The other kit I created this month is also easy but does require stamped greetings. But there is very little prep & just a little trimming of the card bases to create these beautiful wintery cards:

    These cards could be winter or holiday; it’s your choice when you stamp the greetings.

    This kit originated from a former Paper Pumpkin kit but I jazzed up the cards and added more to create 12 gorgeous cards. This kit includes 12 envelopes and a share of Peppermint gems plus the PDF tutorial.
    I have a few left so grab yours soon. This kit is $29 and you can see it here.

    **Remember to check out all of my kits to go and tutorials here at my shop; choosing more than one will save on shipping.

    ~~~

    ~~~

    November Specials

    New Online products are available on November 4th.
    See them here.

    Get the Peaceful Garden suite tutorial FREE with any online order in November!

    Leave a Reply

    Your email address will not be published. Required fields are marked *


Notice: LeeAnn Greff, Independent Stampin’ Up! Demonstrator, Manager. The content of this website is my sole responsibility as an independent Stampin’ Up! demonstrator and the use of, and content of, the classes, services, or products offered on this website is not endorsed by Stampin’ Up! Copyright 2025