/


Latest Post

Double Point cards with video


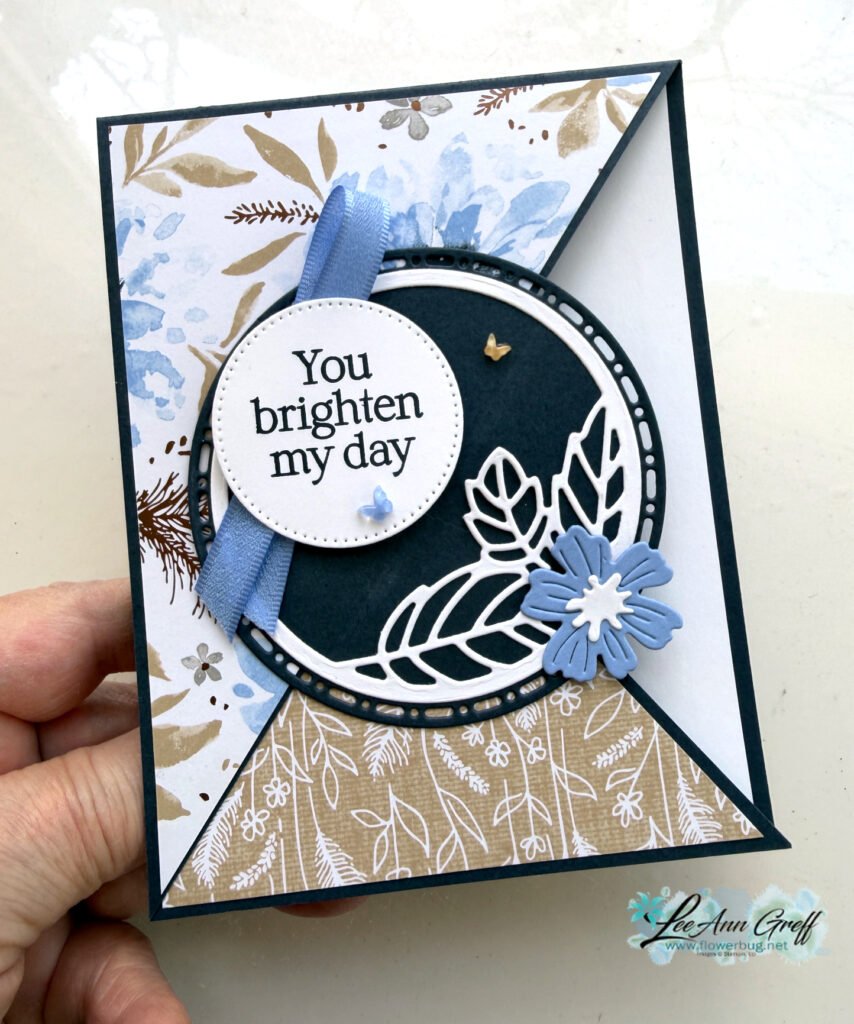
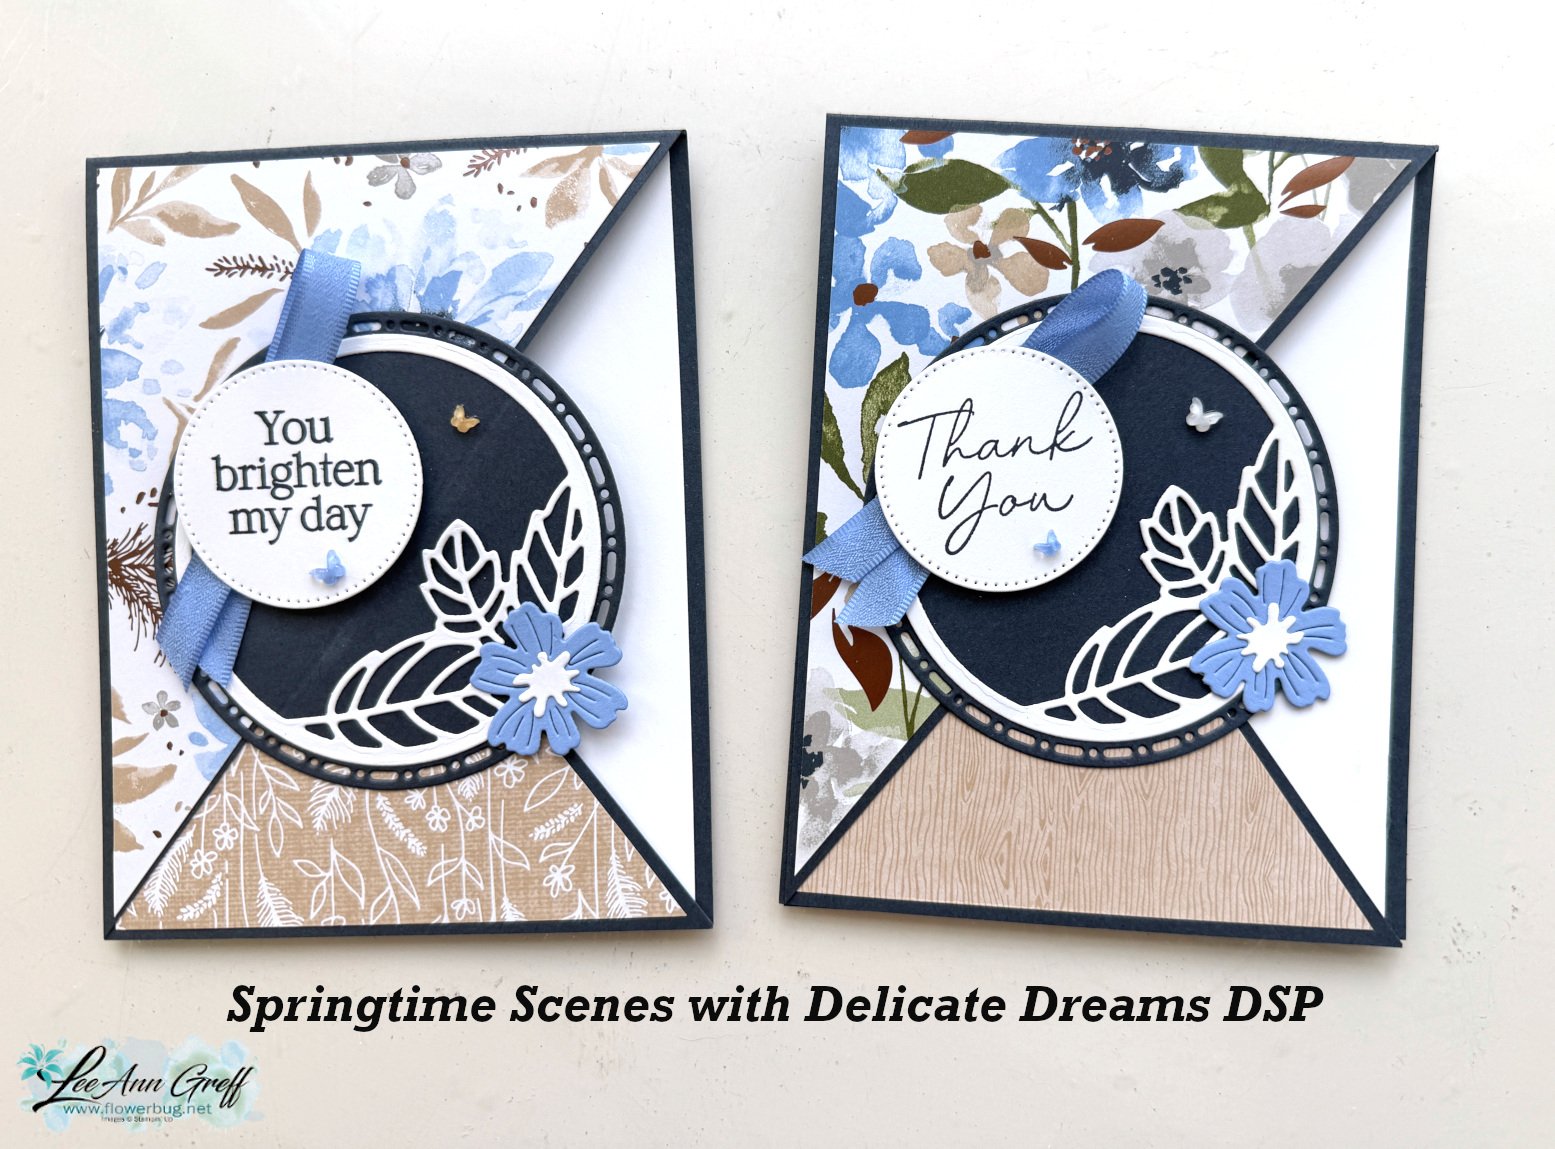
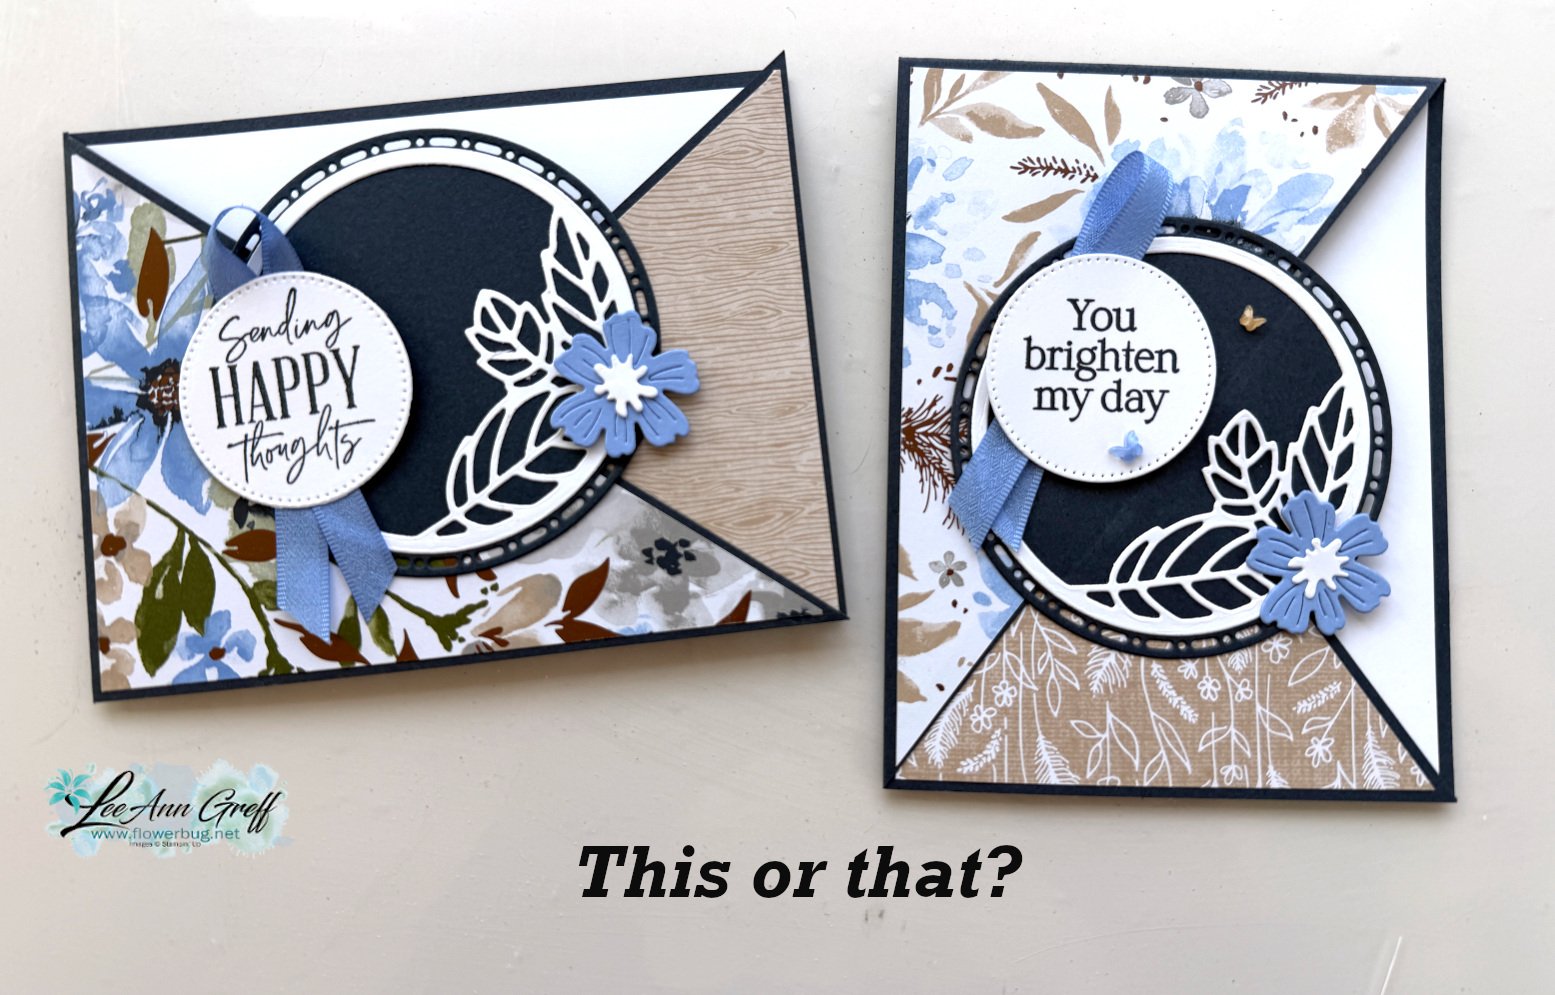
Have you tried making a Double Point fun fold card yet?  They are so easy! 

Bonus!  This unique fold truly makes the most of your 12 X 12" paper!  You can get 6 cards from one sheet! 

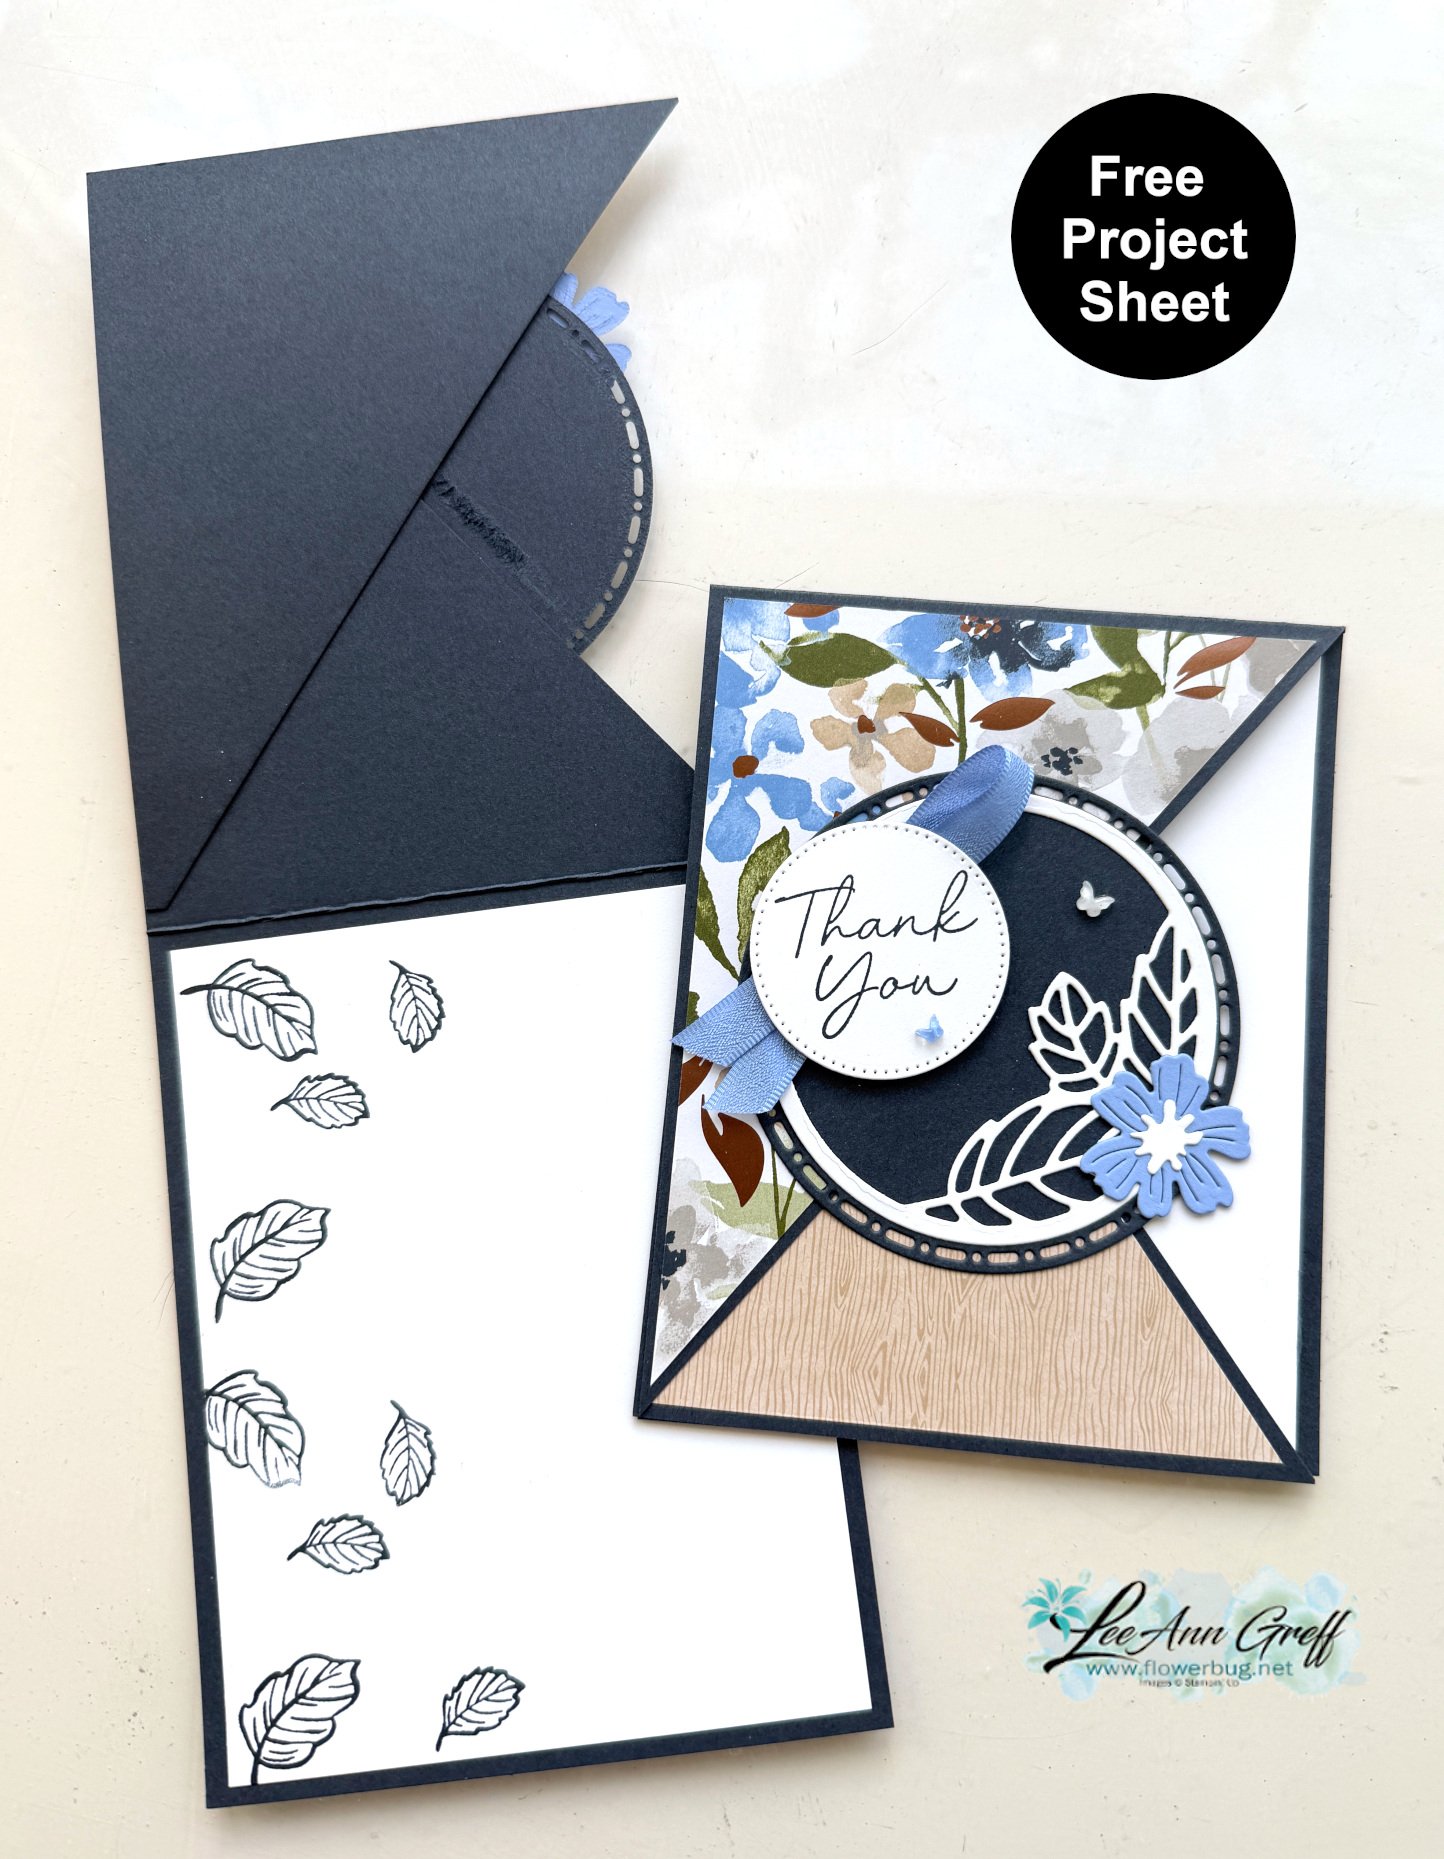
I chose to use the Flowers for Every Season designer paper and the Field of Flowers stamp set.  The dies are from the Hippo & Friends dies seen here.  I LOVE these label dies! 

Measurements:
Card base 4 1/4" X 5 1/2"
White inside 5 1/4" X 4"
DSP 3" X 4", scored at 1" on the long side
Label dies or punches to 'connect' the points
 
Products Used: 
Field Of Flowers Photopolymer Stamp Set [152589] – Price: $17.00 – see here
Ridiculously Awesome Cling Stamp Set [152512] – Price: $22.00 see here
Hippo & Friends Dies [153585] – Price: $36.00 – see here
Flowers For Every Season 6" X 6" (15.2 X 15.2 Cm) Designer Series Paper [152486] – Price: $11.50 – seen here
2020–2022 In Color Enamel Dots [152480] – Price: $8.00 – see here

If you want step by step instructions you can watch the video below.

~~~

Current Host code is 3MFE2KKP

Get a free 2020 card stock sampler with online orders over $60 that use the above host code.  This is so helpful to really know which color is which! 

Order online here

 Get my Tasteful Touches pdf tutorial free with any online order in July


It includes directions, photos and measurements for 10 cards!


All Posts

  • New Mystery Boxes available now!


    I recently held a BOGO event for my local customers, and I wanted to extend a similar offer to you.

    Here’s how it works: If you place an order over $100, I will send you a mystery box filled with Stampin’ Up! products for free. I’ll even pay the shipping to you! It’s an amazing deal!!

    Don’t wait to grab yours! I have a limited supply.

    Each box includes at least $200 in product value and includes these items:

    • 2 stamp bundles with either dies or punches
    • 1-2 stamp sets in photopolymer or red rubber
    • 1 thick bunch of 6 X 6″ designer paper
    • an embossing folder or set of dies
    • 2 ribbons or twines
    • 8 handmade cards
    • 2-3 hand-cut acrylic clear blocks
    • many will include the following – a Paper Pumpkin card kit, gems, ink, ephemera, cards & envelope pack or stencils

    This is a sample photo of what your box might include:

    Go here to shop; I still have some left! Before you order; message me to see if I have some left.

    Don’t forget to add on one of the Products of the Month for just $5!

    Remember; you can shop the NEW CATALOG, the new Online Exclusives, the Last Chance List or the new kits!

    Leave a Reply

    Your email address will not be published. Required fields are marked *

  • May Specials! It all starts today!!


    Shop from the new May-August 2026 catalog here!

    Get the 5 new magnetic ink pads FREE with purchase of the Stampin’ Up! Starter kit in May! Go here to get yours.

    Get my Tutorial of the Month FREE with any size online purchase

    The May Product of the Month (POM) is the Berry Botanical Vellum DSP. Redeem it for $5 once your order reaches the $75 mark.

    2 NEW & fabulous kits are available. Check them out here.

    Shop the new Online Exclusives here.

    Leave a Reply

    Your email address will not be published. Required fields are marked *

  • Springtime Scenes diagonal fold – 2 ways!


    I’m excited to share this neat card with you today. We made it at my April Card Clubs.

    Isn’t it beautiful? It features the Springtime Scenes bundle seen here and the Delicate Dreams DSP seen here. This DSP is so pretty they cannot keep it in stock! Be sure to add your email to the product so you get notified when it comes back in stock.

    This card might look like it’s difficult but it’s as simple as trimming off one half of the card front at a diagonal and flipping it over. Yup; that’s it! Watch my video below to see how it’s done.

    My colors include Secret Sea, Hydrangea Hue (new in color), White and Crumb Cake. The largest circle is from the Spotlight on Nature dies seen here. The small White circle is from Stylish Shapes dies.

    We tried this layout in both landscape & vertical position. Which do you prefer?

    I created a free project sheet for this card with measurements, directions, photos and supplies listed. Click here to download or print it.

    Below is the video tutorial with tips on assembly.

    Leave a Reply

    Your email address will not be published. Required fields are marked *


Notice: LeeAnn Greff, Independent Stampin’ Up! Demonstrator, Manager. The content of this website is my sole responsibility as an independent Stampin’ Up! demonstrator and the use of, and content of, the classes, services, or products offered on this website is not endorsed by Stampin’ Up! Copyright 2025