/


Latest Post

Cut once for two card fronts with the Border Basics dies; video tips & tutorial too


I shared one of the cards I made in last week's video and here's another one. Both feature the same three products: Masterfully Made designer paper, Wanted to Say dies and the Border Basics dies.  
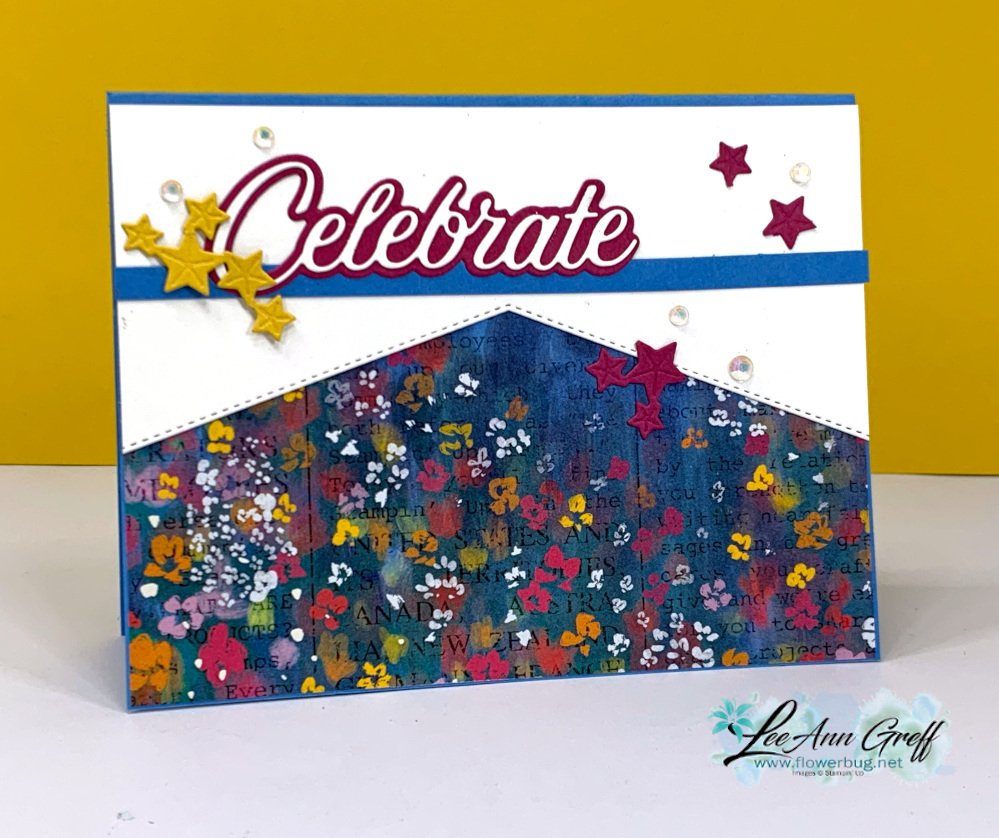
I used the White die-cut leftover from the card I shared yesterday on this card; basically getting two cards from one die-cut!

The Border Basics dies are wonderful and so versatile since they die-cut the stitched edge on both sides.  Below is a photo of the inside of the card: 
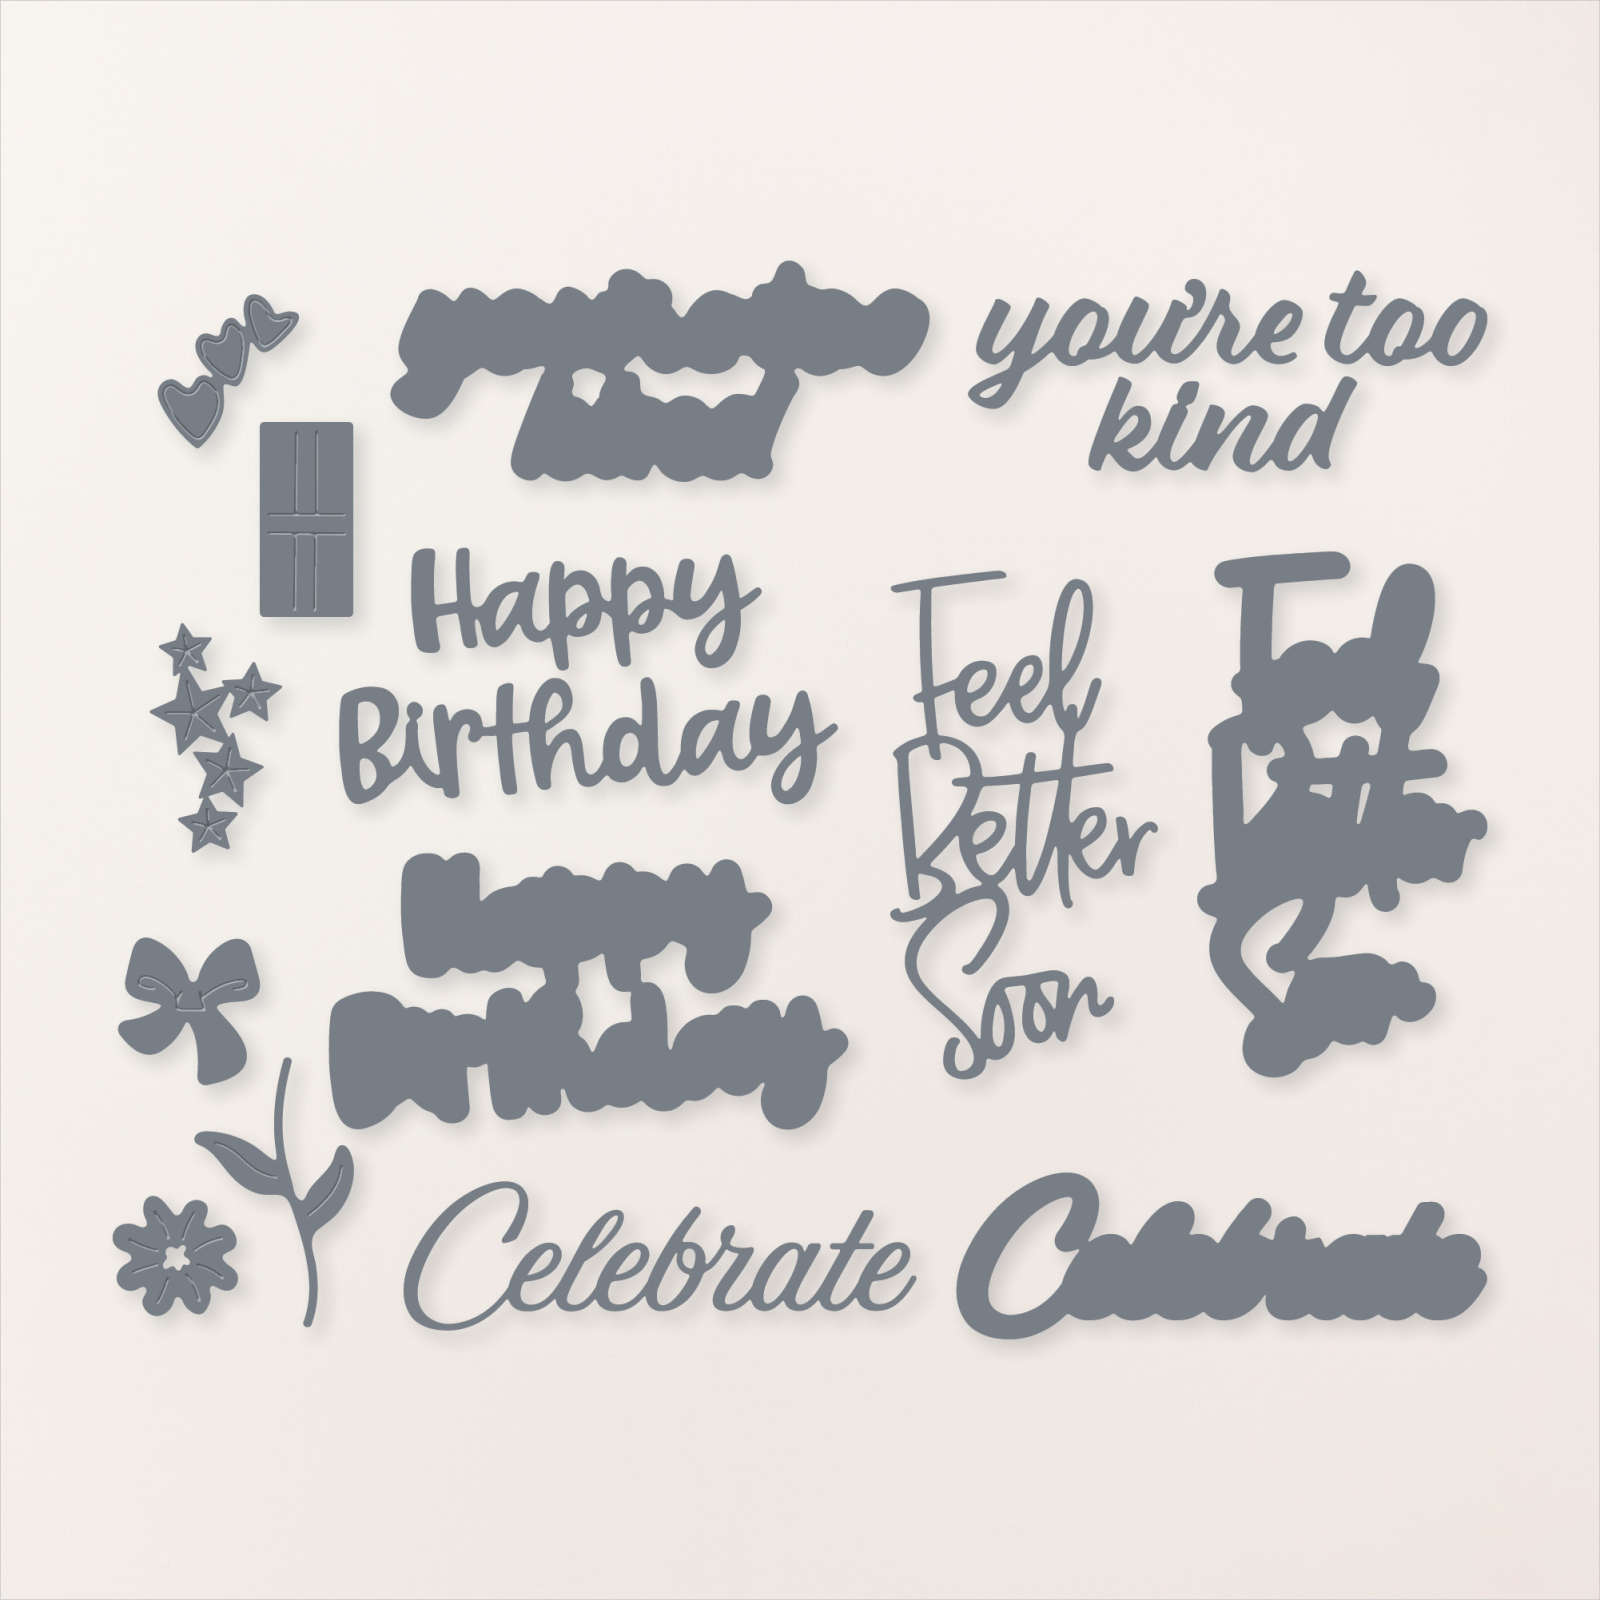
The Celebrate, Happy Birthday, stars and present die-cuts are all from the Wanted to Say dies seen here: 
Here are both cards I shared; each with a different piece of the Masterfully Made CS.  As you can see I added a thin line of card stock to rest the 'Celebrate' die-cut on. I love the effect!

You can see this beautiful designer paper here.  It's discounted in June; down to $10.62.
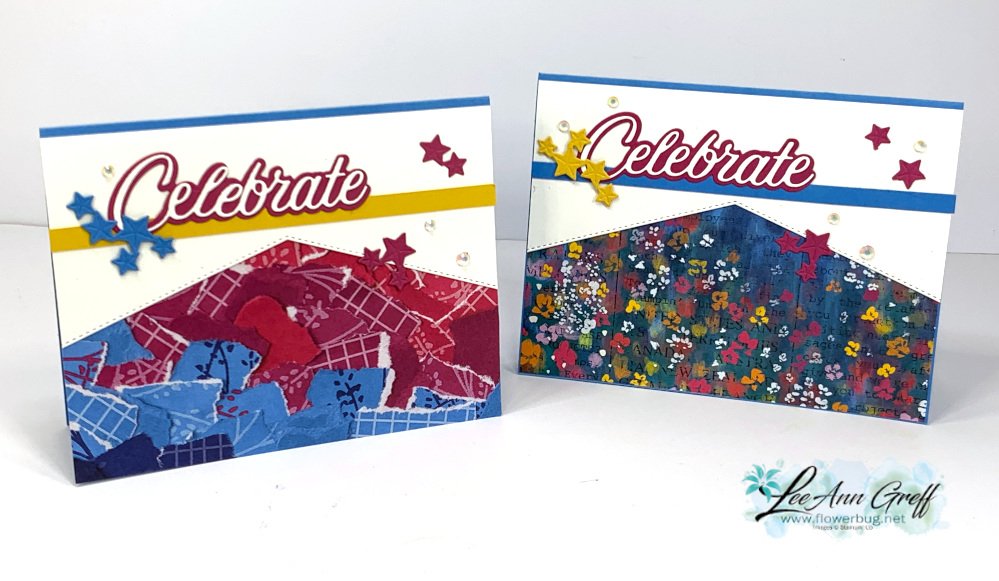
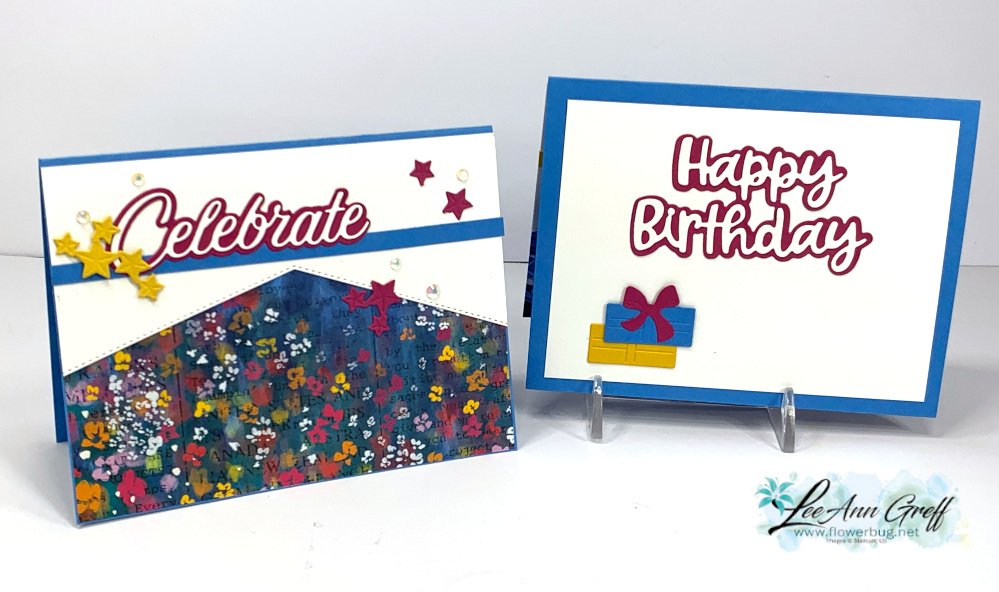
The photo below shows both cards; one cut for two card front! 

I cut the right side of the card front off (on the left card) and used that piece on the card on the right. Essentially I cut the card front in half and added it to the card on the right, adding DSP underneath to show off the angles.  One cut; two cards!  

You can see how I made this card on the video here.  Or click on the photo below to watch. Remember to follow me on Facebook here or on my YouTube channel here. 

~~~

June Specials:

Designer Paper is 15% off in June!
WOW – get $155 in product for $99 with free shipping! click here!

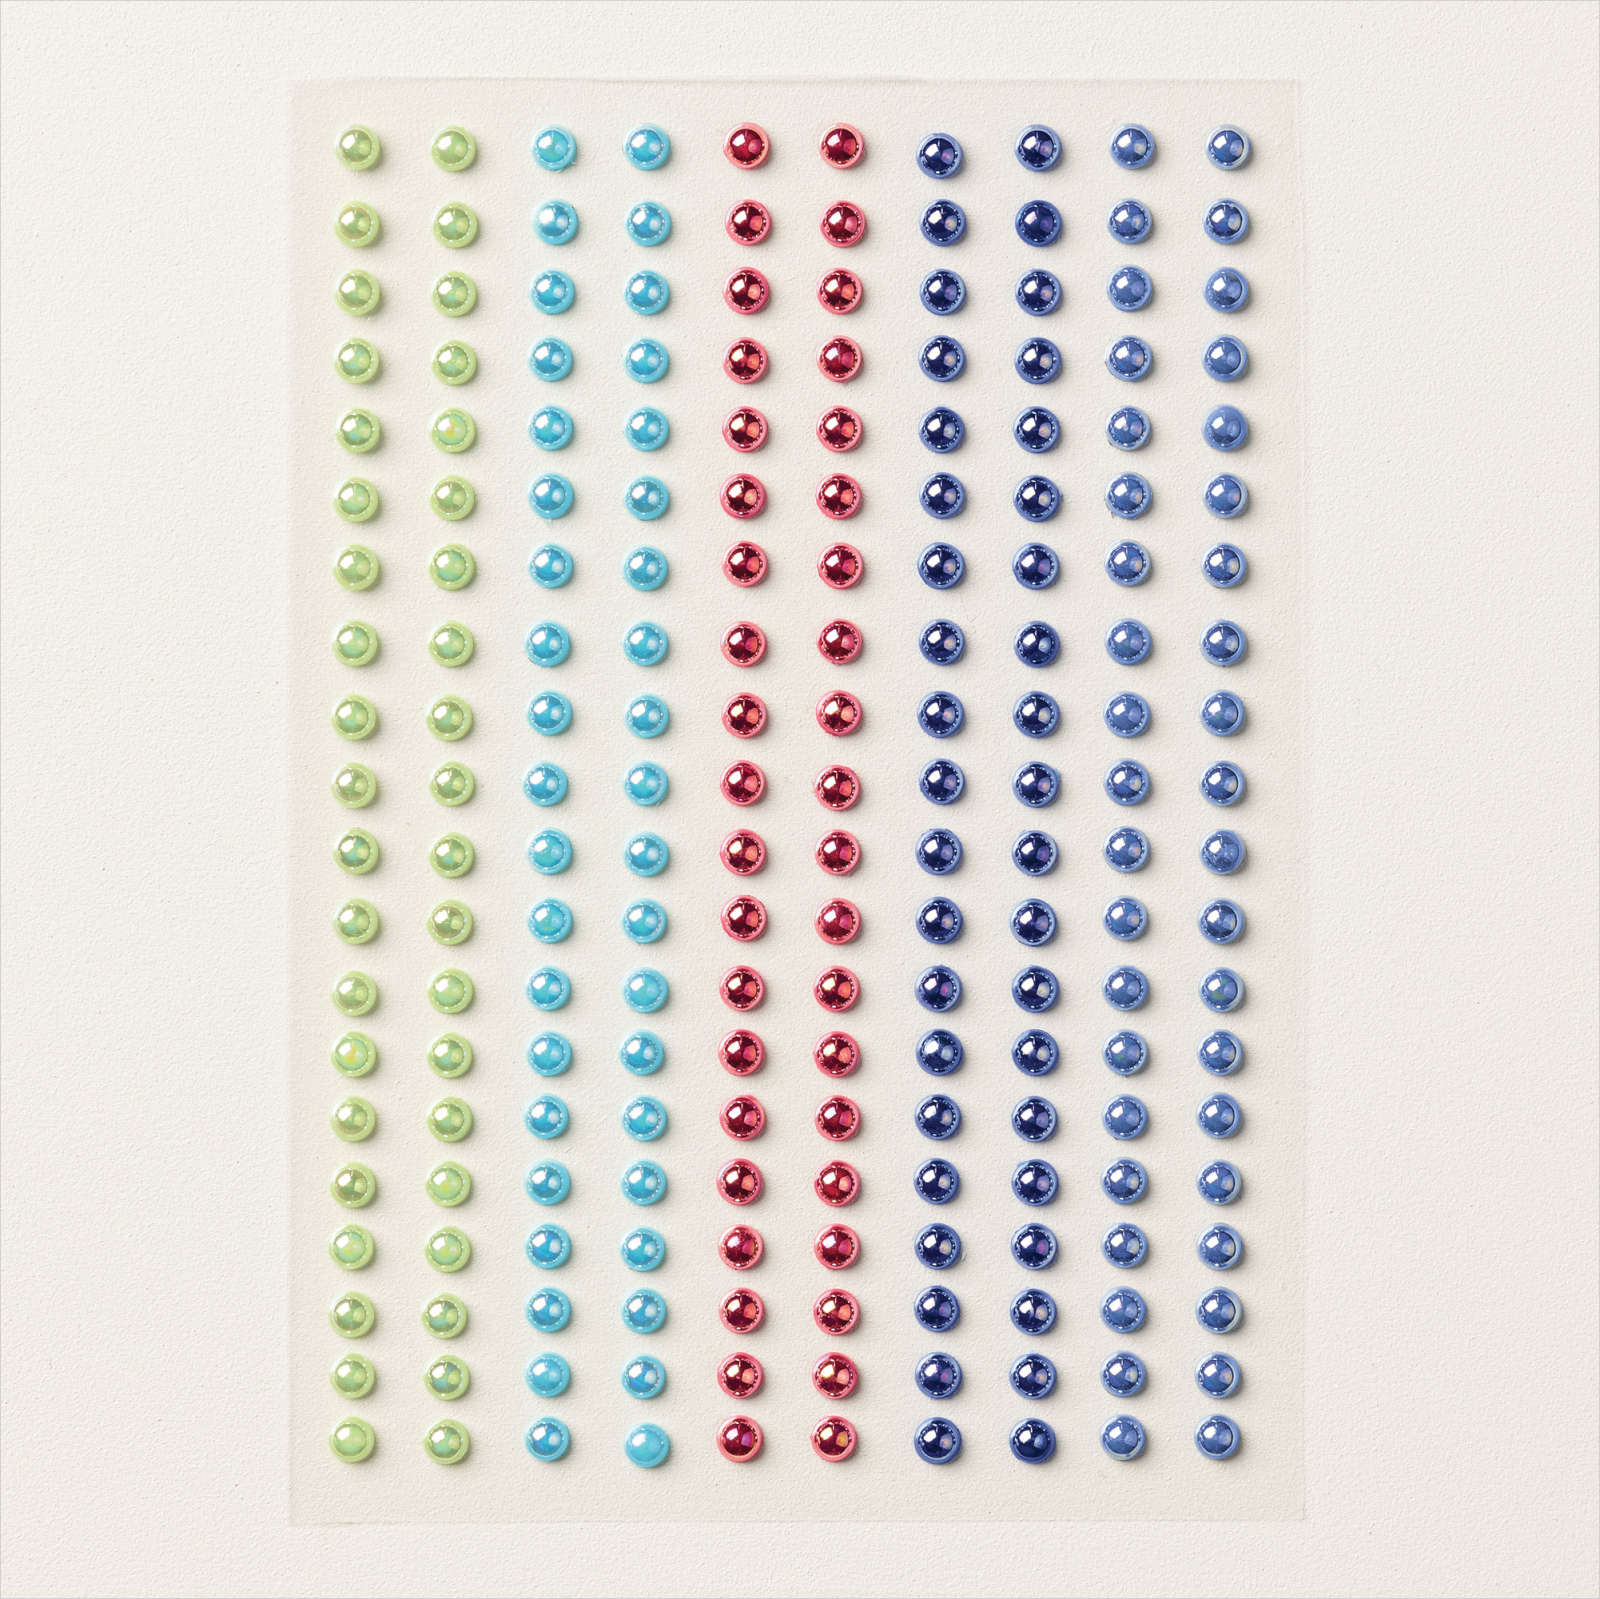
Get a package of In Color pearls with online orders over $55 using a host code.

*current host code: M7SCQSVS 
 Earn free products with my loyalty rewards! 

Click here to download yours and earn a $50 shopping spree!
All Posts

  • Wow; don’t miss these Fun Fold cards!


    Each day this week I'm sharing the Fun Fold card swaps made by my incredibly talented Flowerbug's!  We hold a card swap every month and many opt in to participate.  See the others here and here. 

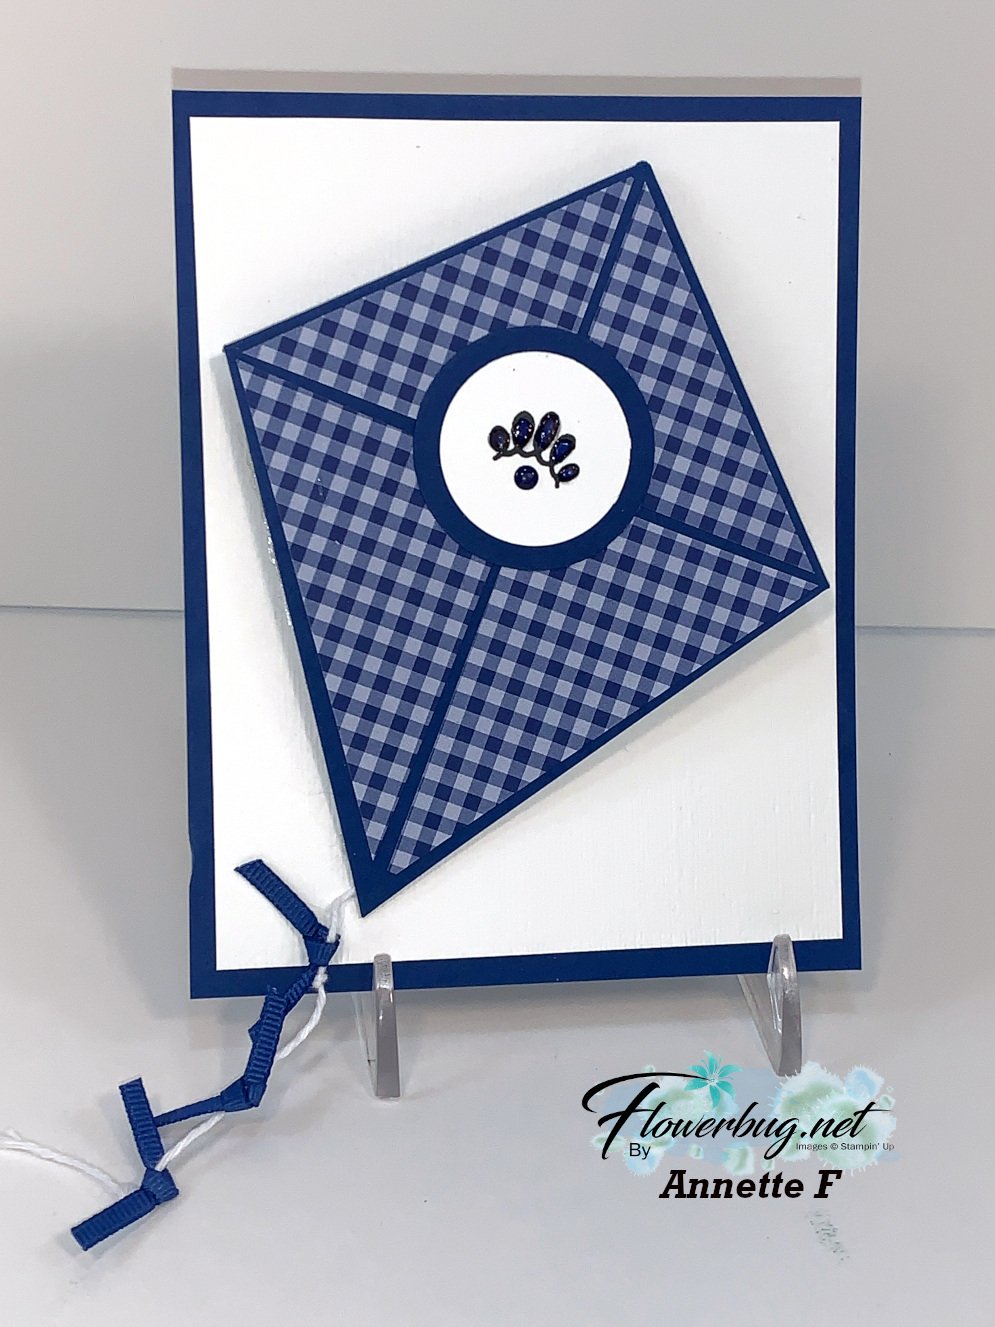
    First up is Annette's Kite Fold card!

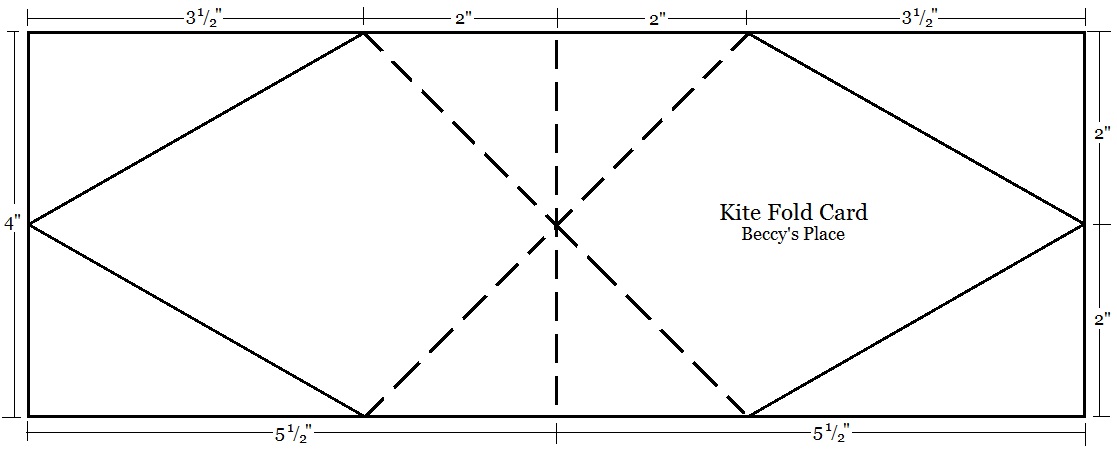
    I know many of you will want to know how to make it so I searched and found this template at Beccy's Place.  She has a tutorial for it here.  Her card is a full sized card where Annette's was placed on a layer of her card.  So the finished size may be different. 

    Annette adhered her kite to a base card of Blueberry Bushel at 5 1/2" X 4 1/4" and White at 5 1/4" X 4" .  She also added a velcro closure to keep the card closed securely.

    I think the tail of ribbon and twine finish it off like a kit perfectly!

    ~~~

    Karen made this adorable card with the Follow Your Art suite of products seen here!   I believe almost all of the products in this suite are retiring with many on sale; the stamps & dies, the designer paper (on sale for just $4.60 now!), the embellishment kit and the embossing folder too.  It's such a fun group of products; great for crafters! 

    The Follow Your Art embellishment kit comes with lots of fun accents including these stitched felt pieces!  Its on sale right now on the Last Chance list here. 

    Measurements:

    • Calypso Coral base 4 1/4" X 5 1/2"
    • Designer paper is 4" X 5 1/4"
    • White is 2 1/2" X 8 1/4" scored at 4 1/8"

    ~~~

    May Specials


    Get my 'ALL Fun Fold cards tutorial' free with any online order.

    It includes directions, photos and measurements for 18 fancy card folds!


    May Host code is EYDJ4MQN

    Get a free pkg. of Noble Peacock rhinestones from me if your order is over $55. 

    Order online here

    Leave a Reply

    Your email address will not be published. Required fields are marked *

  • Lots of Fun Fold cards!


    My Flowerbug's Team held a Fun Fold card swap this month and I'll be sharing their amazing cards this week.  I'll try my best to add details, products and measurements for them too. 

    Their cards are jaw dropping incredible; you're going to just love them!

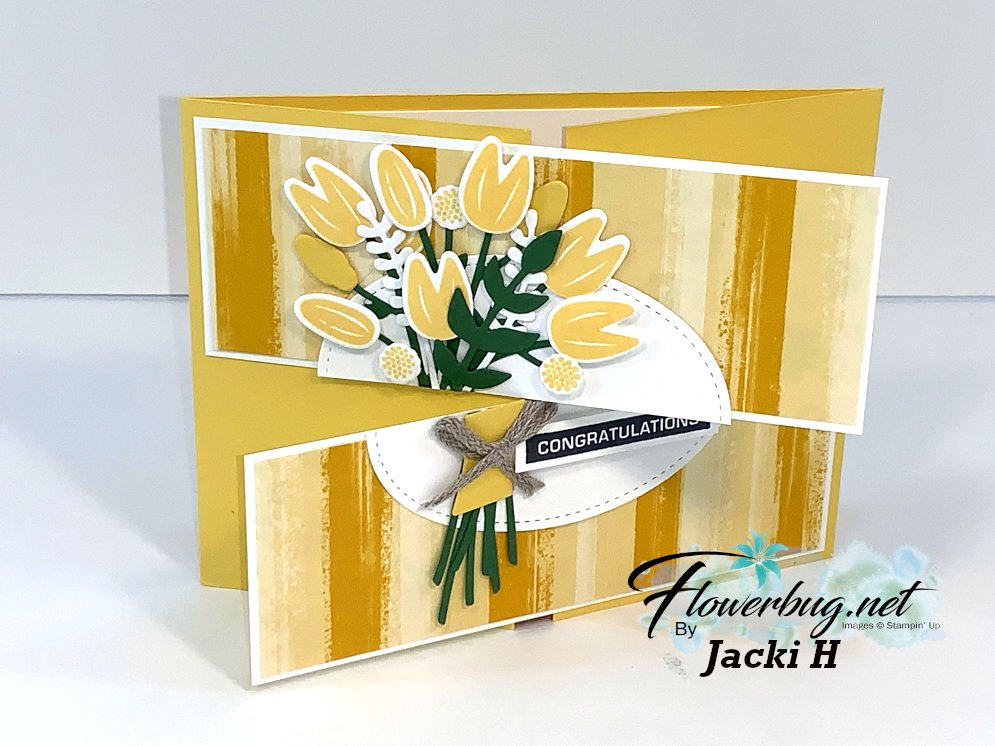
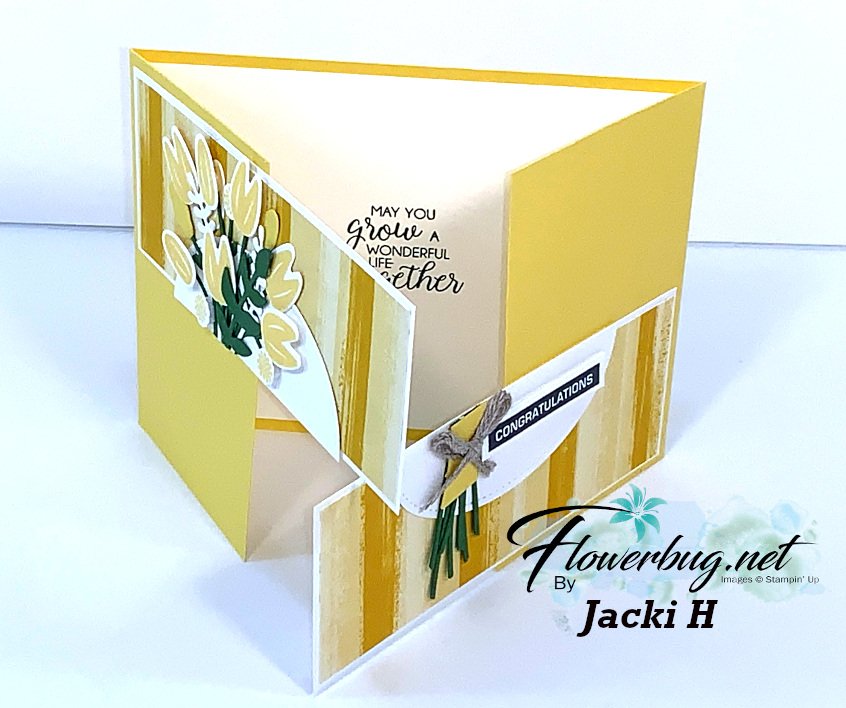
    First up is Jacki's striking split fold card.   Look at all of the dies she cut out!  

    Measurements & Products used: 

    • The Daffodil Delight main card is 4 1/4" X 11" and scored at 2 3/4" and 8 1/4"
    • White pieces are 2" X 5 1/4"
    • Follow Your Art DSP is 1 7/8" X 5 1/8"
    • Stamps – Beautiful Bouquet, Label Me Bold (Mini catalog)
    • Dies – Bouquet Bunch

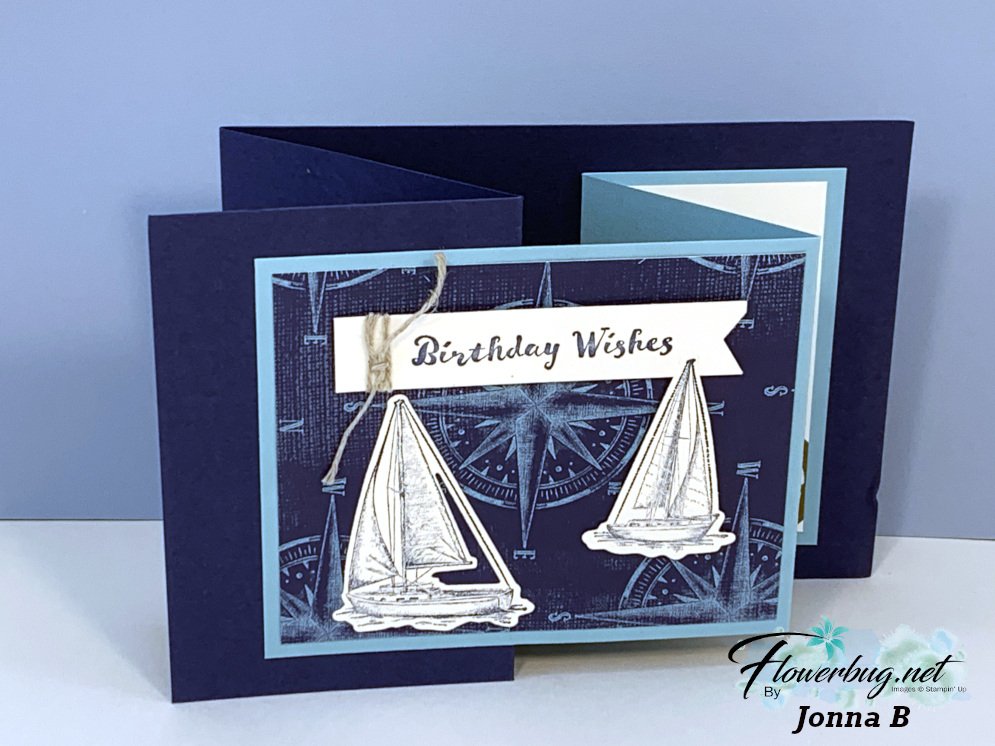
    Jonna made this amazing double Z fold card with the Sailing Home stamp set, Smooth Sailing Dies and Come Sail Away designer paper.

    This Come Sail Away paper is on the retiring list right now while supplies last; it coordinates so beautifully with these products!   The Sailing Home stamp set and Smooth Sailing dies are in the next catalog but the paper is not. 

    Measurements:

    • Navy card base is 4 1/4" X 11" scored at 2 3/4" and 5 1/2"
    • Balmy Blue is 3 1/2" X 8 1/2" scored at 4 1/4" and 6 3/8"
    • Designer paper – left is 3 1/4" X 4", middle is 3 1/4" X 1 7/8", white on right is also 3 1/4" X 1 7/8"


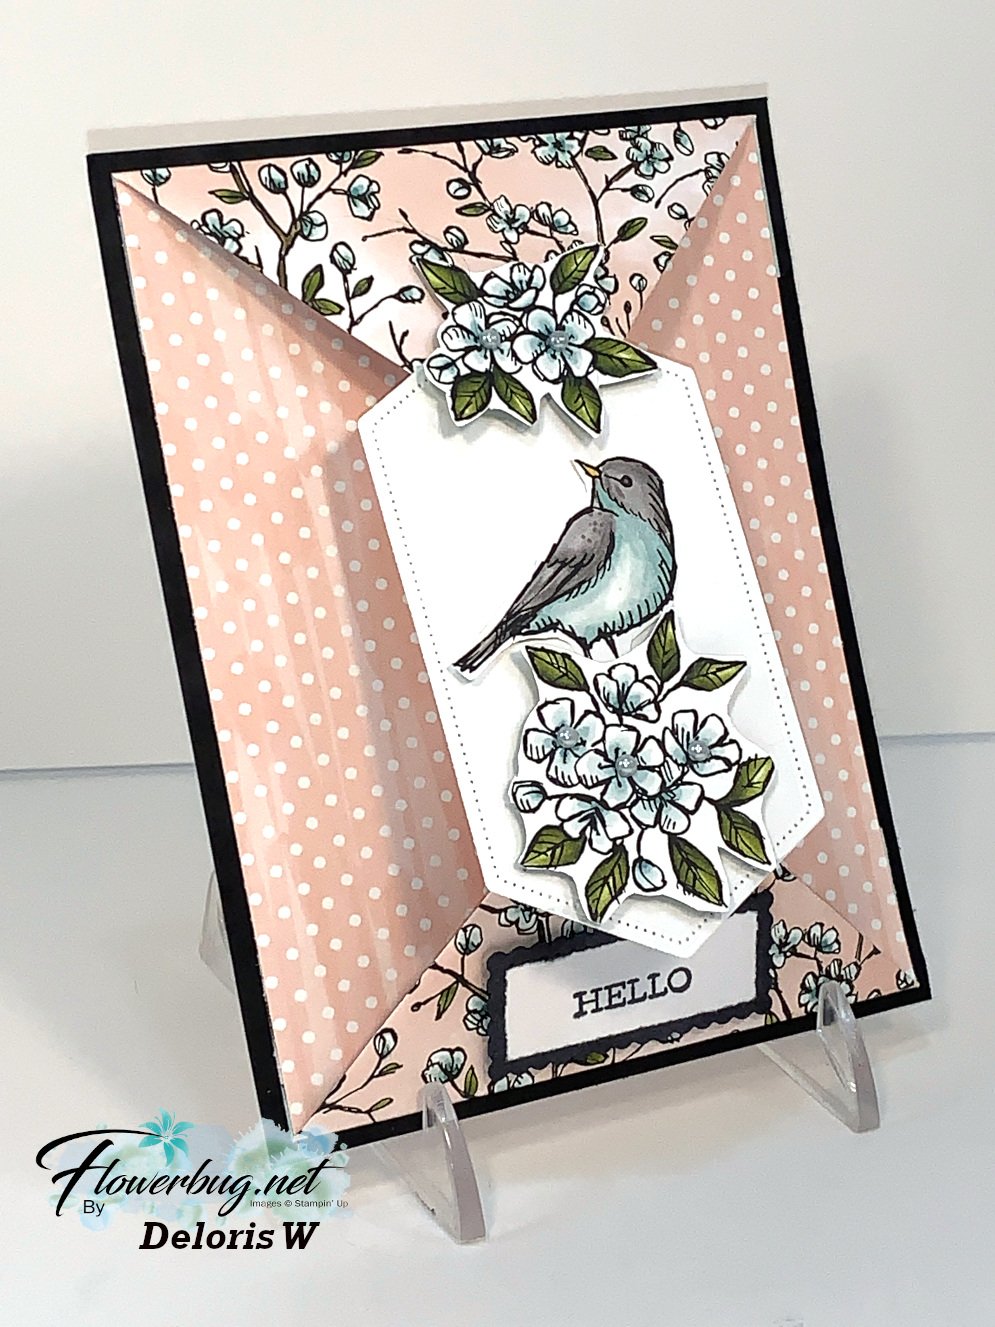
    Deloris made this beautiful Double Point card using the retiring Bird Ballad designer paper. This paper is on sale on the Last Chance list here.  It's just $8.05 right now!

    One of my Club cards this month features this unique fold so there will be a video on it next week. 

    Measurements:

    • Black base is 5 1/2" X 4 1/4"
    • the dotted Designer Paper is 5 1/4" X 4 1/4"
    • the two folded DSP points are 3" X 4", scored at 1" on the long side, with the tips folded to the score line.  
    • She fussy cut the flowers and bird from the Bird Ballad designer series paper. See it here. 
    • The White die is the Stitched Nested Label dies seen here.

    ~~~

    May Specials


    Get my 'ALL Fun Fold cards tutorial' free with any online order.

    It includes directions, photos and measurements for 18 fancy card folds!


    May Host code is EYDJ4MQN

    Get a free pkg. of Noble Peacock rhinestones from me if your order is over $55. 

    Order online here

    Leave a Reply

    Your email address will not be published. Required fields are marked *

  • 3 quick cards from a 6 X 6″ template! Video too!


    In case you missed it I've uploaded the video for my easy template for 6 X 6" designer paper to make three cards quickly! I also have a project sheet that includes the template, directions, additional measurements and more.  

    You can use any piece of 6 X 6" designer paper you'd like!  Let the colors in your paper help you decide on the card bases and accent colors and embellishments.  It's really fun to make cards when you have this easy guide.


    As you can see, depending on your designer paper, colors and orientation the cards don't look the same!

     6 X 6 Quick cards template – download it here

    ~~~

    May Specials


    Get my 'ALL Fun Fold cards tutorial' free with any online order.

    It includes directions, photos and measurements for 18 fancy card folds!


    May Host code is EYDJ4MQN

    Get a free pkg. of Noble Peacock rhinestones from me if your order is over $55. 

    Order online here

    Leave a Reply

    Your email address will not be published. Required fields are marked *


Notice: LeeAnn Greff, Independent Stampin’ Up! Demonstrator, Manager. The content of this website is my sole responsibility as an independent Stampin’ Up! demonstrator and the use of, and content of, the classes, services, or products offered on this website is not endorsed by Stampin’ Up! Copyright 2025