/


Latest Post

Cool technique with the Wink of Stella pen!


There are times I like to color and others that I don't. I came up with this cool technique using the Wink of Stella pen and White Craft ink to highlight my main image. 

I pressed a clear block directly onto my White Craft ink pad and used that to pick up the ink with my Wink of Stella pen. You sure don't have to use a clear block but I didn't want to get Wink of Stella in my ink pad. You could use a paper plate or any other non porous surface.   

I used Purple Posy, Pool Party and Seaside Spray on the cards below. 
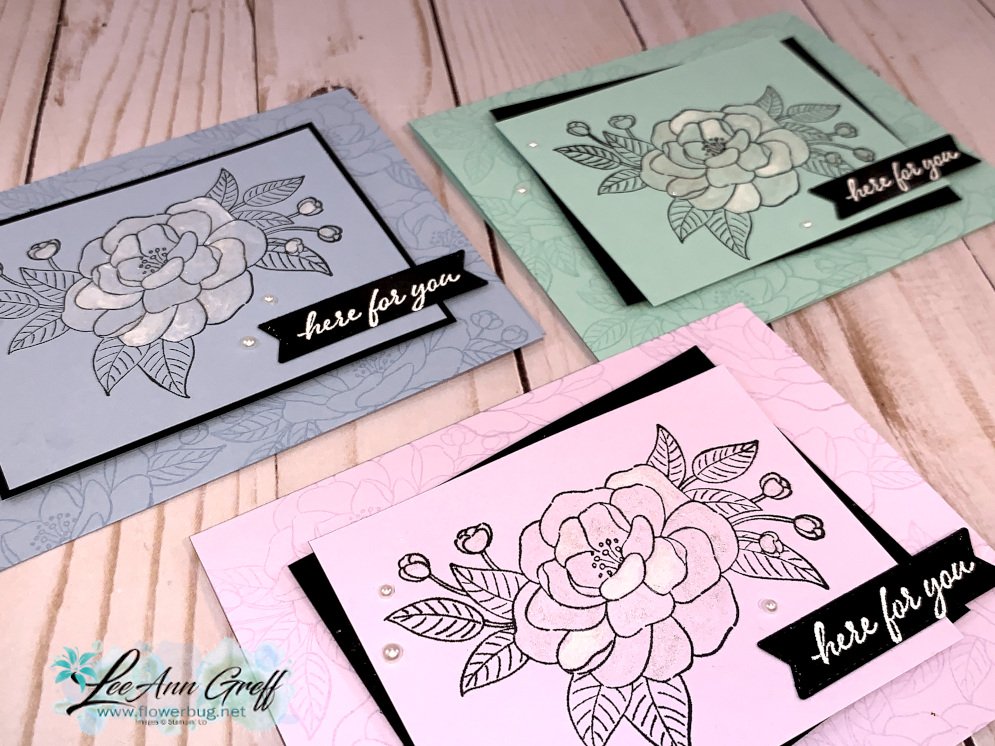
Technique tips:

  • Light colored card stock works best here; the White ink can obscure the stamped image on dark card stock.
  • Squeeze out a bit of the Wink of Stella liquid to make a small puddle to mix with the White ink for easier painting. 
  • Paint the image once and go back and highlight parts of it if you want more 'lightness'. 
  • Black Memento ink works fine to stamp your image
  • This should work nicely on a heat embossed image! 
  • You can use the White Craft ink refill instead of an ink pad but a little drop goes a long way! 

I also used Versamark to create a background effect on the card base, stamping the main image multiple times. I love how soft a Versamark background is and I don't use it near enough.  This repetitive stamping could be very busy if done in black or a darker color.  

Here's the video with 3 different coloring techniques! 

Click on the photo below to get this stamp set and the Queen Anne's Lace set and an 8 cards pre-cut kit for each one; free! 
~~~

Current Host code is 7VPEDARH

Get a free package of All the Trimming embellishments in September with an

online order over $55. 

*Remember that if your order is over $150 do not use the host code above.  You'll get your own host benefits!  

And if it is over $99 I recommend you choose the Starter kit instead!  It just makes sense! 

Order online here

 Get my Beautiful Autumn pdf tutorial free with any online order in September!


It includes directions, photos and measurements for 13 cards!

All Posts

  • Last Chance Products; Retiring List is here!


    Here's the list of items going away!  Get your order in ASAP if you want something really bad; things go so fast!

    Annual Catalog Retiring List

    Mini Catalog Retiring List

    Or click here to see them in my online store; easier to see!

    Update on some products:

    1. There are many popular items on sale! See them all here. 
    2. Stampin' Blends are not retiring; they will only be available in combo packs though.
    3. Snail is retiring!  Get it while you can.  But the next tape runner is supposed to be better!
    4. Some of the bundles on the retiring list are returning separately; not in a bundle. 
    5. All Glimmer paper is retiring!
    6. The embossing buddy is on the list!  Yikes!  It's a must have for heat embossing. Get yours now! 


    ~~~

    Orders between $55 and up will receive a free Simple Shammy! 

    Use this host code for April: RBXHNWMV (unless you're order is over $150; then don't use the code. You'll receive your own host benefits). 

    Leave a Reply

    Your email address will not be published. Required fields are marked *

  • Dressed to Impress Best Dressed Triple Fold card


    The retired list will be out this afternoon.

    Stop back in to see it or click here to see it all in my store.

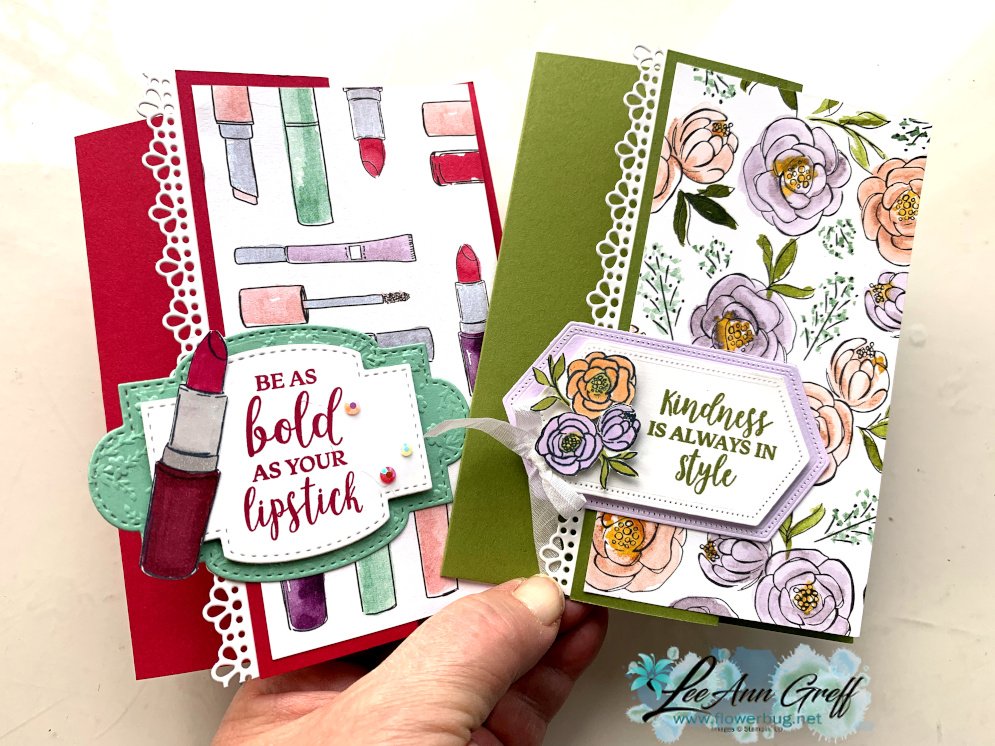
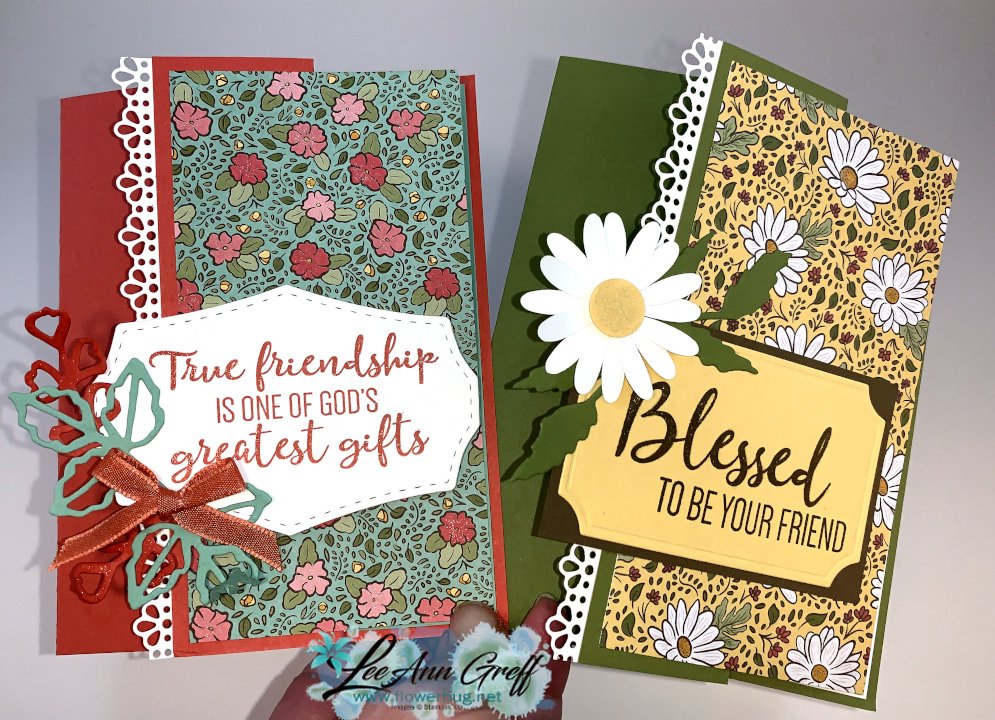
    Here's the Best Dressed fun fold card I promised you yesterday.  (See the Ornate Garden cards here.) 

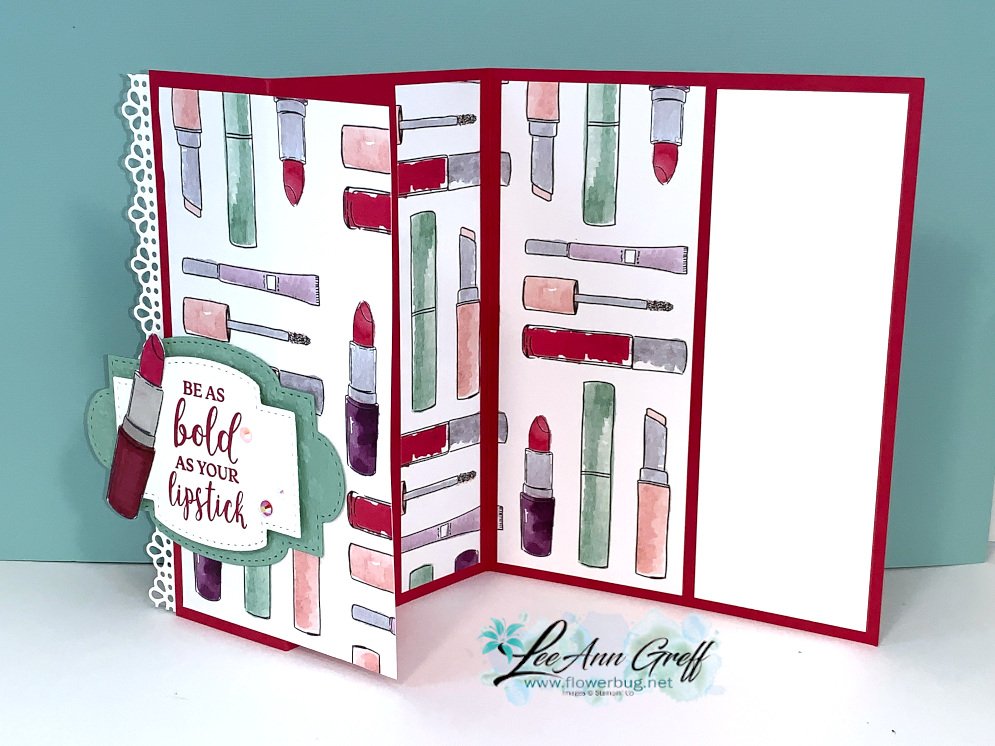
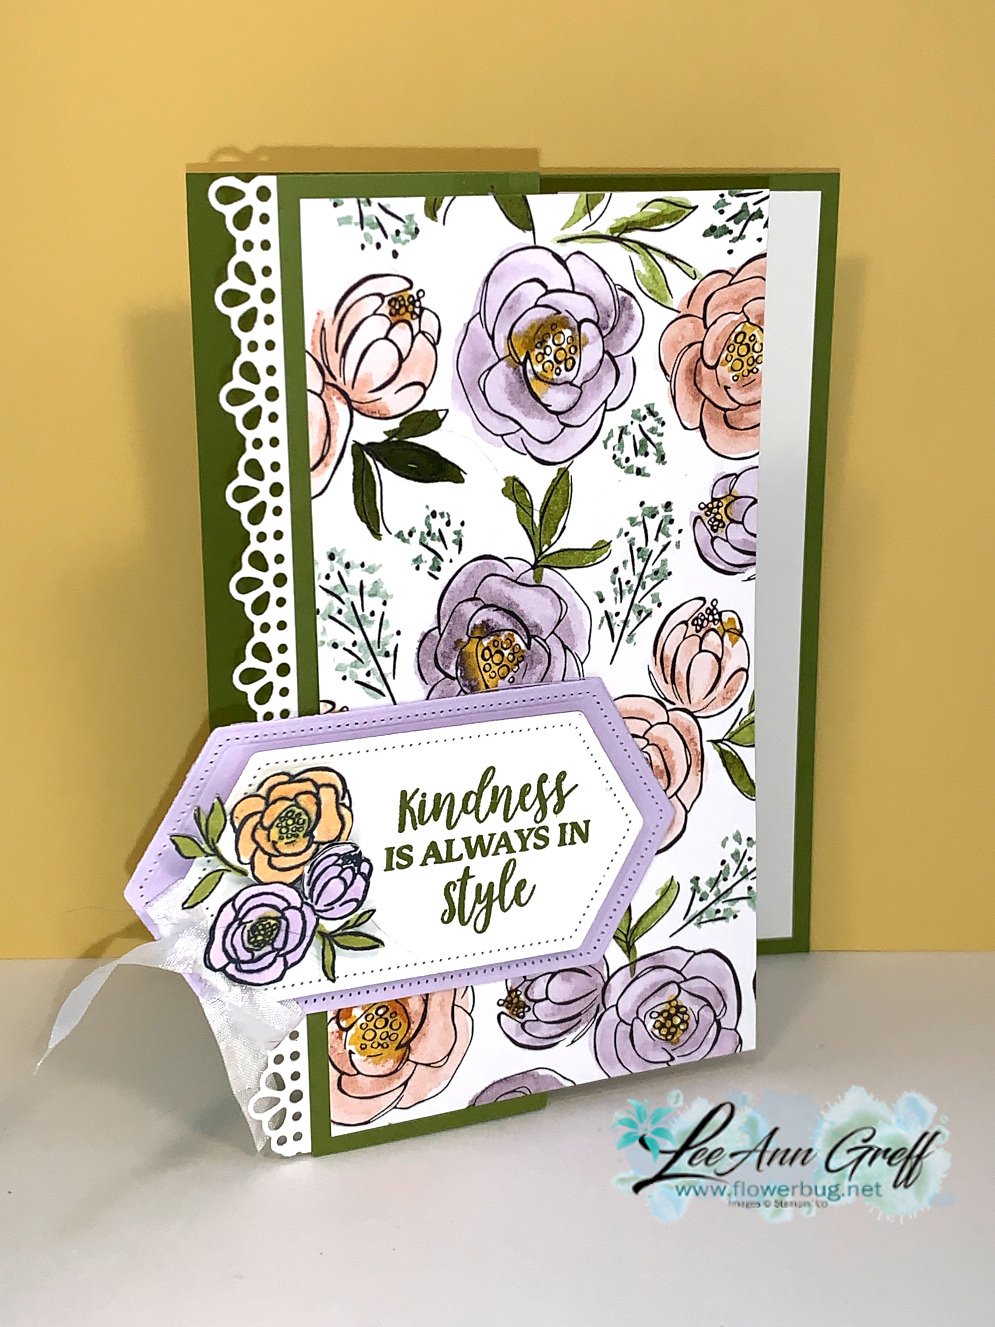
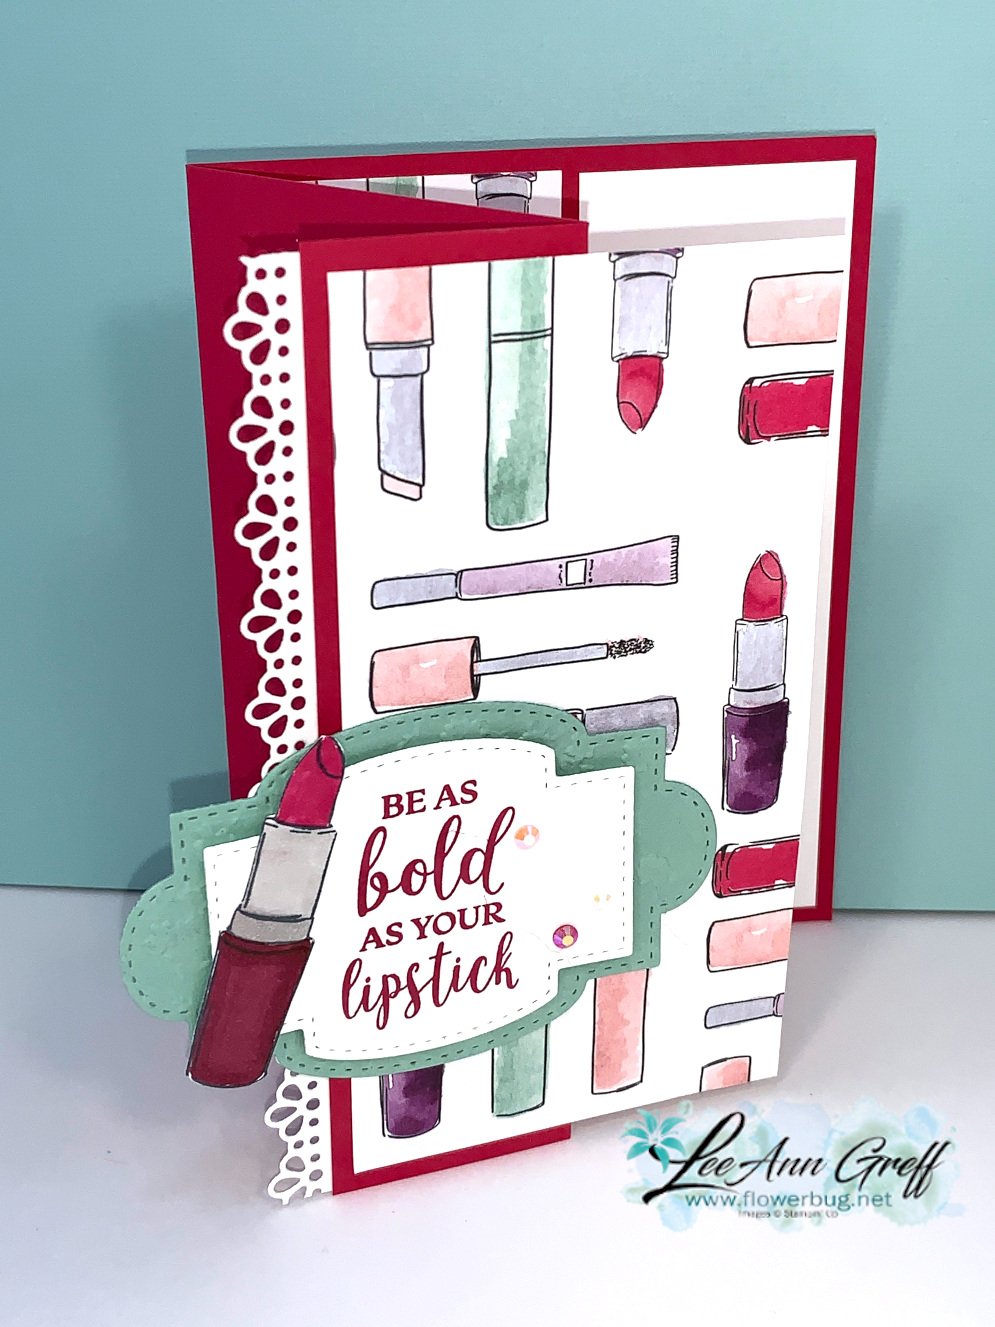
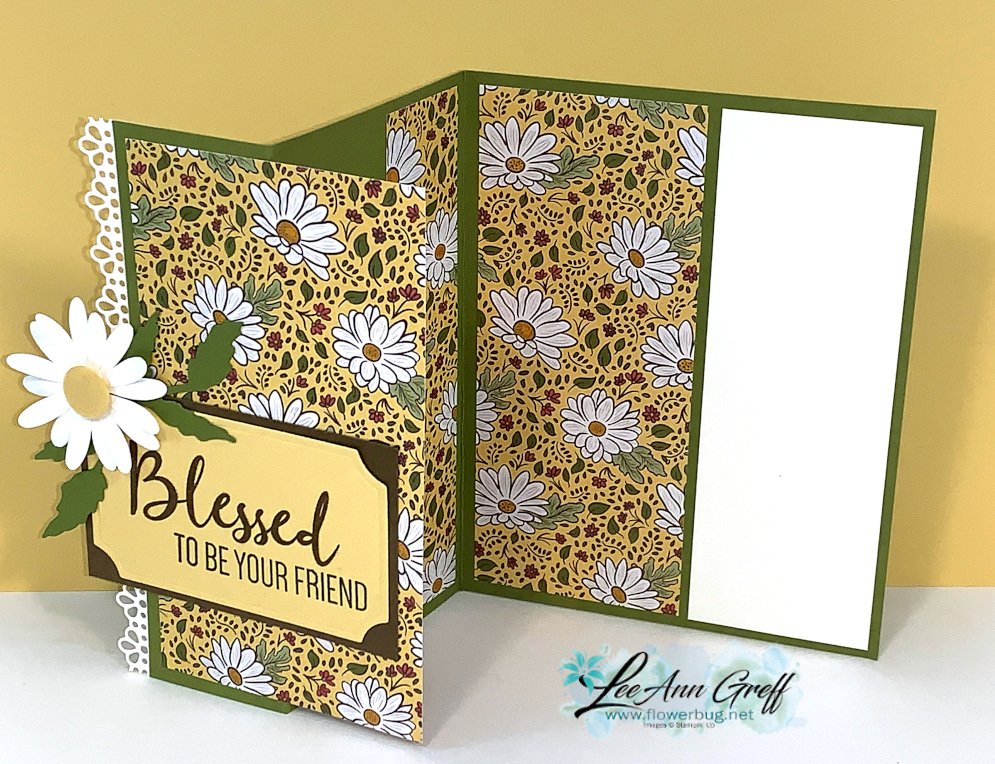
    Look at this cute fun fold card!  See how the paper matches up across the three panels?  So clever! **Watch the video here on Facebook. 

    This card is standard 5 1/2" X 8 1/2" but you score it at 1 1/2" and 4 1/4" to get the triple fold. 


    The best part of this fun fold card is how it makes the most of your designer paper!  Each card uses one piece measuring 5 1/4" X 6".  Cut the Best Dressed paper into three pieces; the first (left) piece at 2 3/4" wide X 5 1/4" tall, the middle piece at 1 1/8" wide and the right (inside) piece at 2 1/8" X 5 1/4".

    Those three pieces add up to 6" across!  What a great way to use your designer paper! You can make 4 cards from a 12" sheet! The white layer inside the card (for writing or stamping onto) is 5 1/4" X 1 3/4". 

    I added a pretty die-cut border cut from the Ornate Borders die; love the eyelet detail on it!  The set of dies are currently unavailable but should be back in stock in early May.
    The greeting layers are cut using the Stitched Nested Labels and the flowers and leaves are stamped and fussy cut. The colors are Old Olive and Purple Posy. 

    The stamps are all from the Dressed to Impress stamp set seen here. 


    The die-cuts here are from the Stitched So Sweetly dies from the mini catalog; also currently out of stock and unavailable.  They should be back in next week. The colors here are Lovely Lipstick and Mint Macaron. 

    See the entire Best Dressed suite of products here. 

    ~~~~

    April ordering specials:

    All online orders in April will receive my tutorial of the month; with 16 cards

    featuring the Ornate Garden products seen here.

    **Order either Ornate bundle from me and get a free 3 cards pre-cut kit! Order both and get a 6 cards kit with pdf tutorial! 

    Orders between $55 and up will receive a free Simple Shammy! 

    Use this host code for April: MMM4SXSB  (unless you're order is over $150; then don't use the code. You'll receive your own host benefits). 

    Leave a Reply

    Your email address will not be published. Required fields are marked *

  • Ornate Thanks & Ornate Borders with a clever fun fold idea


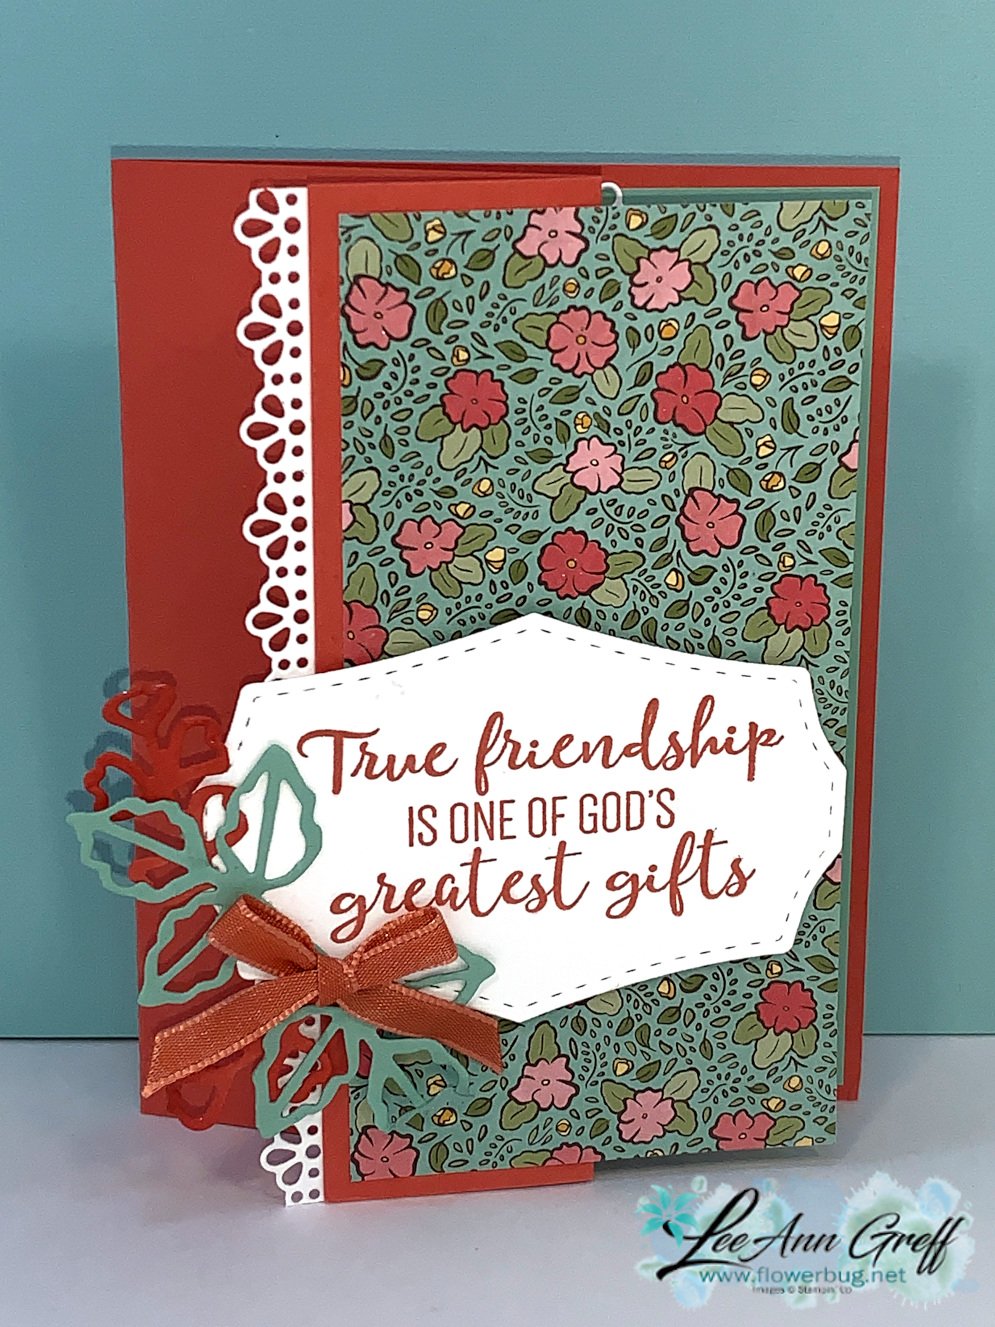
    I shared these two pretty cards on my Facebook Live last Tuesday. (Click here to see my page.)  I made another version using the Best Dressed designer paper.  I'll share those tomorrow. 

    They are made from a standard 5 1/2" X 8 1/2" piece of card stock but you add a second score to it.  It's scored on the long side at 1 1/2" and 4 1/4".

    The best part of this fun fold card is how it makes the most of your designer paper!  Each card uses one piece measuring 5 1/4" X 6".  Cut it into three pieces; the first (left) piece at 2 3/4" wide X 5 1/4" tall, the middle piece at 1 1/8" wide and the right (inside) piece at 2 1/8" X 5 1/4".

    Those three pieces add up to 6" across!  What a great way to use your designer paper! You can make 4 cards from a 12" sheet! 

    The white layer inside the card (for writing or stamping onto) is 5 1/4" X 1 3/4".  I used the To a Wild Rose stamp set for the greeting. The leaves and greeting die-cut are from the popular Painted Labels dies (now available again!!!) 

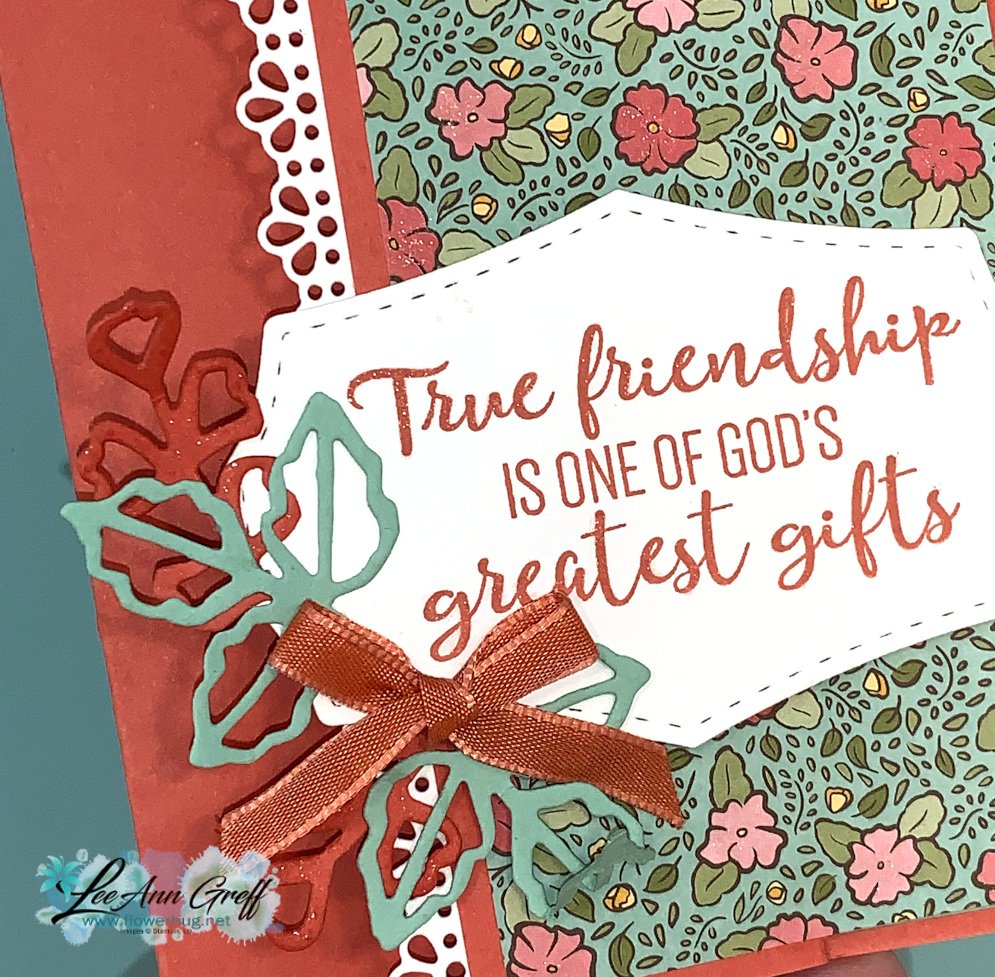
    Here's a close up view of the greeting.  It looks like I heat embossed it right?  

    I didn't but it is sparkly!  I used the Wink of Stella pen!  It's fun to trace the stamped greeting; it's large enough that it was easy to do. 

    You can find this pretty Ornate Garden specialty paper and the entire Ornate Garden suite of products here.  

    This card base is Terracotta Tile; one of our 2019-21 In Colors.  I paired it with Mint Macaron card stock.  

    I added an extra Ornate Border trim on the inside of the card too.  You might be able to spot more Wink of Stella on the designer paper and I added it to the die-cuts too.  See that pretty Terracotta Tile ribbon?  It's part of the Ornate Garden ribbon combo pack with Old Olive.  Gorgeous soft 1/4" ribbons! 

    The label and leafy die-cuts here are from the To a Wild Rose bundle seen here. 

    ~~~~

    April ordering specials:

    All online orders in April will receive my tutorial of the month; with 16 cards

    featuring the Ornate Garden products seen here.

    **Order either Ornate bundle from me and get a free 3 cards pre-cut kit! Order both and get a 6 cards kit with pdf tutorial! 

    Orders between $55 and $99 will receive a free Simple Shammy! If your order is over $150 please don't use the host code; you'll earn your own host benefits but still get a free Shammy. 

    Use this host code for April: MMM4SXSB  

    Leave a Reply

    Your email address will not be published. Required fields are marked *


Notice: LeeAnn Greff, Independent Stampin’ Up! Demonstrator, Manager. The content of this website is my sole responsibility as an independent Stampin’ Up! demonstrator and the use of, and content of, the classes, services, or products offered on this website is not endorsed by Stampin’ Up! Copyright 2025