/


Latest Post

Cool technique with the Wink of Stella pen!


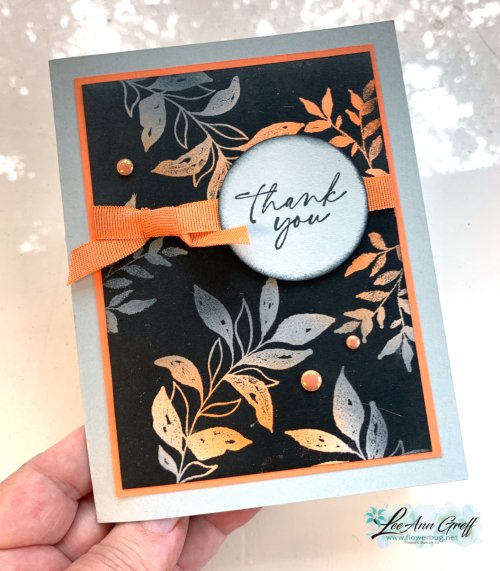
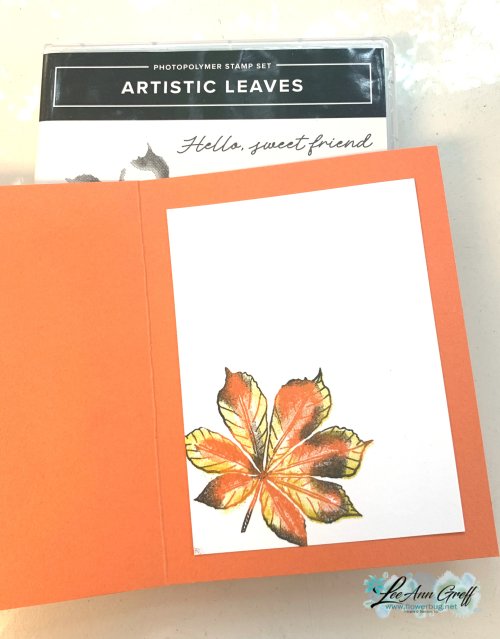
There are times I like to color and others that I don't. I came up with this cool technique using the Wink of Stella pen and White Craft ink to highlight my main image. 

I pressed a clear block directly onto my White Craft ink pad and used that to pick up the ink with my Wink of Stella pen. You sure don't have to use a clear block but I didn't want to get Wink of Stella in my ink pad. You could use a paper plate or any other non porous surface.   

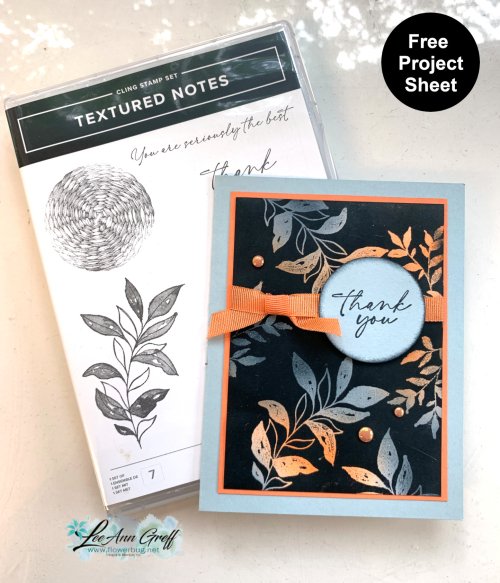
I used Purple Posy, Pool Party and Seaside Spray on the cards below. 

Technique tips:

  • Light colored card stock works best here; the White ink can obscure the stamped image on dark card stock.
  • Squeeze out a bit of the Wink of Stella liquid to make a small puddle to mix with the White ink for easier painting. 
  • Paint the image once and go back and highlight parts of it if you want more 'lightness'. 
  • Black Memento ink works fine to stamp your image
  • This should work nicely on a heat embossed image! 
  • You can use the White Craft ink refill instead of an ink pad but a little drop goes a long way! 

I also used Versamark to create a background effect on the card base, stamping the main image multiple times. I love how soft a Versamark background is and I don't use it near enough.  This repetitive stamping could be very busy if done in black or a darker color.  

Here's the video with 3 different coloring techniques! 

Click on the photo below to get this stamp set and the Queen Anne's Lace set and an 8 cards pre-cut kit for each one; free! 

~~~

Current Host code is 7VPEDARH

Get a free package of All the Trimming embellishments in September with an

online order over $55. 

*Remember that if your order is over $150 do not use the host code above.  You'll get your own host benefits!  

And if it is over $99 I recommend you choose the Starter kit instead!  It just makes sense! 

Order online here

 Get my Beautiful Autumn pdf tutorial free with any online order in September!


It includes directions, photos and measurements for 13 cards!

All Posts

  • How to add color to the Peaceful View stamp – video tutorial too!


    Today I'm sharing the second card I made during last week's live video.  Both featured the amazing and beautiful Peaceful View stamp set seen here.  

    I used Balmy Blue, Pecan Pie and White card stock.  Inks include Balmy blue, Old Olive, Granny Apple Green and Pecan Pie. I used a Blending Brush with Balmy Blue ink to lightly color the sky before stamping. 

    Notice the fence. If you look closely you'll see the woodgrain in the fence. This was done by using an Early Espresso Stampin' Write marker to add to the stamped fence directly on the cardstock. It was mostly Pecan Pie colored before.  

    How did I color the image?  I inked the trees with Old Olive ink first using the direct to stamp method. The I used Pecan Pie on the grass and fence.  I used a sponge dauber to remove ink from the plants on the bottom so I could add Green ink to them with a sponge dauber.  I used Pecan Pie ink and a sponge dauber to add color to the trunk as well.  I hope you'll watch the video below to watch this in action. 

    For the greetings I stamped the More Messages stamp a few times and used the coordinating die to cut them all out.  I had lots to choose from this way and can save them to use whenever I need it. Here I added Balmy Blue ink lightly to color the greeting.

    What I love about this new messages bundle is that the greetings and die-cuts are such a nice size; larger than ever before. See the bundle here. 

    Here's the free project sheet with measurements and supplies for you: Download Multi-colored Peaceful View

    Below is the video for this card and another where I show you how to use this stamp on pretty designer paper for a stunning background. I shared that yesterday here. 

    ~~~

    July Specials:

    New Online Exclusives are here!  

    ~~~

    Last Chance List has been updated!  see it all here. Don't miss out on the deals!

    ~~~

    Get my Turtle-y Cute PDF tutorial free with any online order in July!

    Leave a Reply

    Your email address will not be published. Required fields are marked *

  • Beautiful Peaceful View card the easy way with video & free project sheet


    For my June card clubs I knew I wanted to feature the Peaceful View stamp set.  This gorgeous stamp makes it easy to create a stunning card with.  I've asked for this type of stamp for years and finally got one! 


    Could you ask for a more perfect background for this image?  Where did it come from?  It's a piece of designer series paper – from the Thoughtful Journey 6" X 6" DSP seen here.   It's absolutely the perfect choice and much easier than creating a coloreful background with ink. 

    The majority of the papers work well for this stamp so my club members could pick their favorite. 

    We inked the tree scene with Secret Sea ink and stamped on the designer paper.  It's then adhered to a full 4 1/4" X 5 1/2" piece of Balmy Blue CS before it's added to the front flap of the card base (front is folded back once).  

    For the greetings I stamped the More Messages stamp a few times and used the coordinating die to cut them all out.  I had tons of greetings for them to choose from.  They then layered them onto another Balmy Blue strip or die-cut. 

    What I love about this latest messages bundle is that the greetings and die-cuts are larger than ever before. See the bundle here. 

    Here's the free project sheet with measurements and supplies for you: Download Peaceful View June Club

    Below is the video for this card and another where I show you how to add color to the stamp. I'll share details on that project tomorrow.  

    ~~~

    July Specials:

    New Online Exclusives are here!  

    ~~~

    Last Chance List has been updated!  see it all here. Don't miss out on the deals!

    ~~~

    Get my Turtle-y Cute PDF tutorial free with any online order in July!

    Leave a Reply

    Your email address will not be published. Required fields are marked *

  • A gorgeous scene made with Wooded Acres; on the Last Chance List


    I was playing around with the Wooded Acres stamp set and made a pretty scene by adding a blended background. 

    You may know I love creating pretty scenes with my stamps, ink and blending brushes. 

    Here are the steps:

    1. I stamped this image on a long post-it note and fussy cut the area above the ground off.  I stamped it on my White CS and then added the post-it note to mask the sky. 
    2. Now I added Garden Green ink with a Blending Brush for grass. 
    3. I removed the post it and replaced it with the other half to sponge the sky. I used Timid Tiger, Calypso Coral and Balmy Blue. 
    4. I layered it with Black and White card stock. 
    5. I then stamped the same image on the Balmy Blue card base to extend the trees.  

    What do you think?  

    This stamp set is now on sale on the Last Chance List. You can see the stamp set here. 

    If you'd like to get tips on blending a smooth sky please watch this video. 

    ~~~

    July Specials:

    New Online Exclusives are here!  

    ~~~

    Last Chance List has been updated!  see it all here. Don't miss out on the deals!

    ~~~

    Get my Turtle-y Cute PDF tutorial free with any online order in July!

    Leave a Reply

    Your email address will not be published. Required fields are marked *


Notice: LeeAnn Greff, Independent Stampin’ Up! Demonstrator, Manager. The content of this website is my sole responsibility as an independent Stampin’ Up! demonstrator and the use of, and content of, the classes, services, or products offered on this website is not endorsed by Stampin’ Up! Copyright 2025