/


Latest Post

Control Freaks New Catalog Blog Hop


It's time for our monthly Freak's blog hop!!  Our focus today is the new Annual Catalog.  We have lots of amazing projects to share with you using brand new products. 

You may have arrived from Tami's blog; I'm sure you loved her projects!  Or maybe you just started here.  To see all 12 posts be sure to click on the icon at the bottom of each post. 
It's been so fun to play with exciting new products from the 2020 Annual Catalog!  Are you ready for some glitz & shine?

I chose to play with the Forever Gold Laser-cut Specialty Paper today.  It's part of the Forever Greenery suite of products.  You can see it best on page 152 of your annual catalog. It has 6 sheets; 3 each of 2 single sided designs. One side is gold and the other is white which you can color, spritz or sponge.  I chose to use the gold sides for my projects here.  

You can see the details & measurements for each one under the photo. 

I chose to use jewel toned card stock for each card; I think it looks rich & regal with these colors.  The card above is Blackberry Bliss with Very Vanilla.  The pretty golden leafy medallion is all one piece; just punched out from the pack.  I added a 1" X 4 1/4" strip of Vanilla under it and a stamped die cut above with a few metallic pearls.  The stamped image is from Dandelion Wishes and the die is from the Stitched So Sweetly dies. 
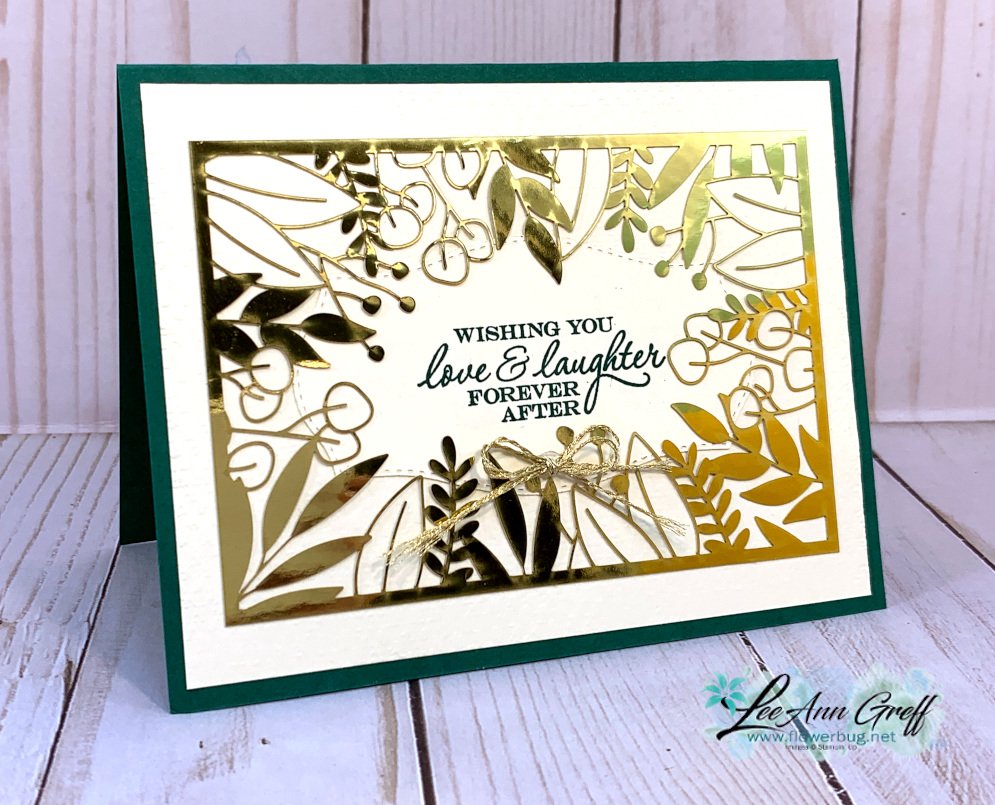
This card is Shaded Spruce with Vanilla.  It's hard to see but the large 4" X 5 1/4" vanilla is textured with our Tasteful Textile embossing folder. The greeting is stamped on a die from Tasteful Labels using the Heart to Heart stamp set.

Once I had these pieces adhered I could add the laser cut piece on top. I added a bit of liquid multipurpose adhesive to the edges and a few leaves and it's done!

The laser cut card front pops out so easily from the rest in the sheet. No fussy cutting or die-cutting with these! 

This is probably my favorite one of the three. This laser-cut piece is delicate and leafy; it leaves a perfect area for a greeting in the stitched center. The card is Night of Navy with a 2" strip of the World of Good designer paper across the middle. 

I stamped the 'Always' greeting (Field of Flowers set) on a 1 1/2" X 2 1/4" piece of Very Vanilla card stock and sponged the edge with Misty Moonlight ink.  The 'In My Heart' greeting is embossed with Gold embossing powder on Misty Moonlight card stock and punched out with the Classic Label punch. 

Did you spy the cute little flowers on this card?  They're from the new Confetti Flowers Border punch. Each one has a Metallic pearl on it.  

I hope you enjoyed seeing these pretty cards with the beautiful Forever Gold Laser-cut Specialty Paper.  If you like shine and glitz you'll love it! 

~~~

Thanks for stopping in to see my projects.  Now you're off to see what Cindy has to share.  I know you'll love it; I always do.
 

All Posts

  • Nature’s Prints 5 sheet wonder; these 5 templates make creating so easy!


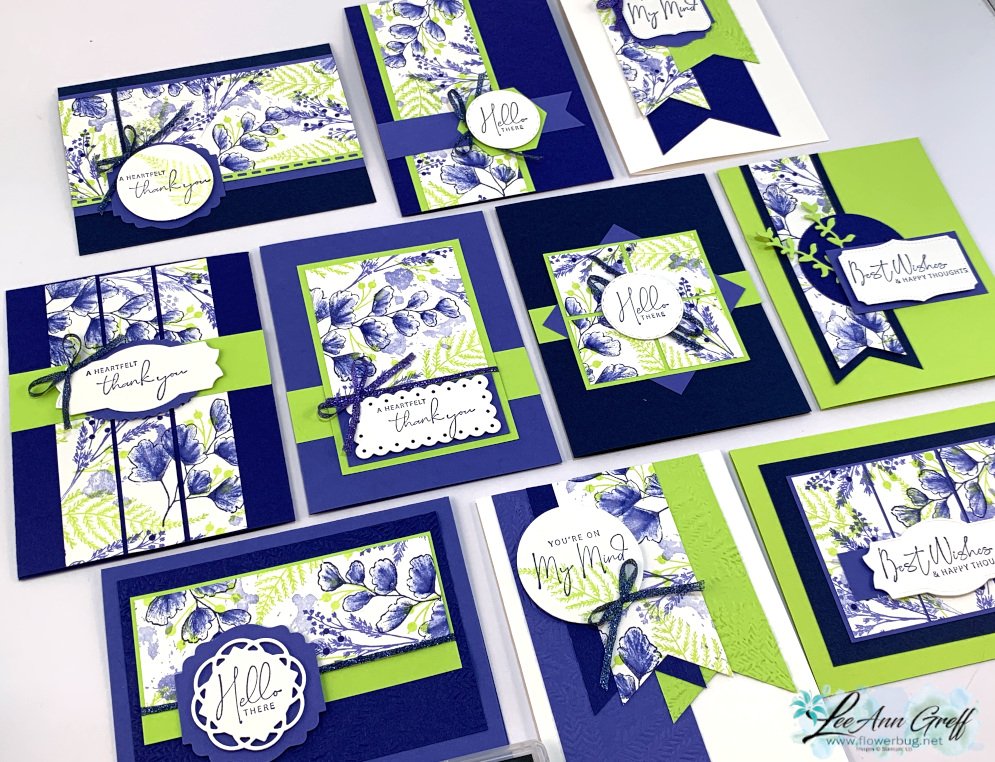
    It's been awhile since I made a group of cards with my 5 sheet wonder templates.  The Nature's Prints stamp set was a perfect choice for it.  

    And playing with three of our newest In Colors paired with Navy & White helped create these beautiful cards. 

    I'm holding a class on Wednesday, May 25th at 6 pm here in Minot, ND for my local customers. RSVP to attend by May 22nd. You can see my PDF tutorial on my shop here.  I am not offering it as a kit to go at this time. 

    I chose the new colors of Starry Sky, Parakeet Party & Orchid Oasis to start with.  I needed a 4th color and wanted to stick with the blues and greens so I added Navy to the mix.  

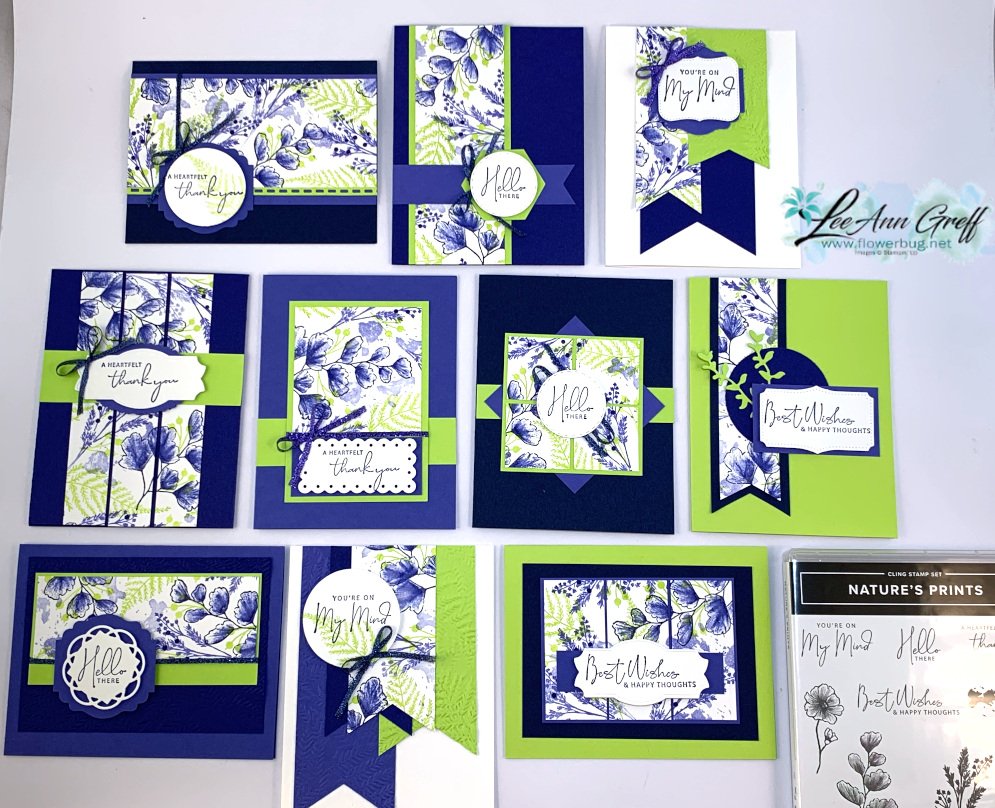
    My greetings and images are all from the Nature's Prints stamp set seen here.  

    How do my 5 sheet wonder templates work?  Here are the steps:

    1. Choose at least 4 colors of ink and card stock for your cards.  
    2. Choose a stamp set that has a variety of images, from large to small. It helps if they are non directional (okay stamped in different directions). 
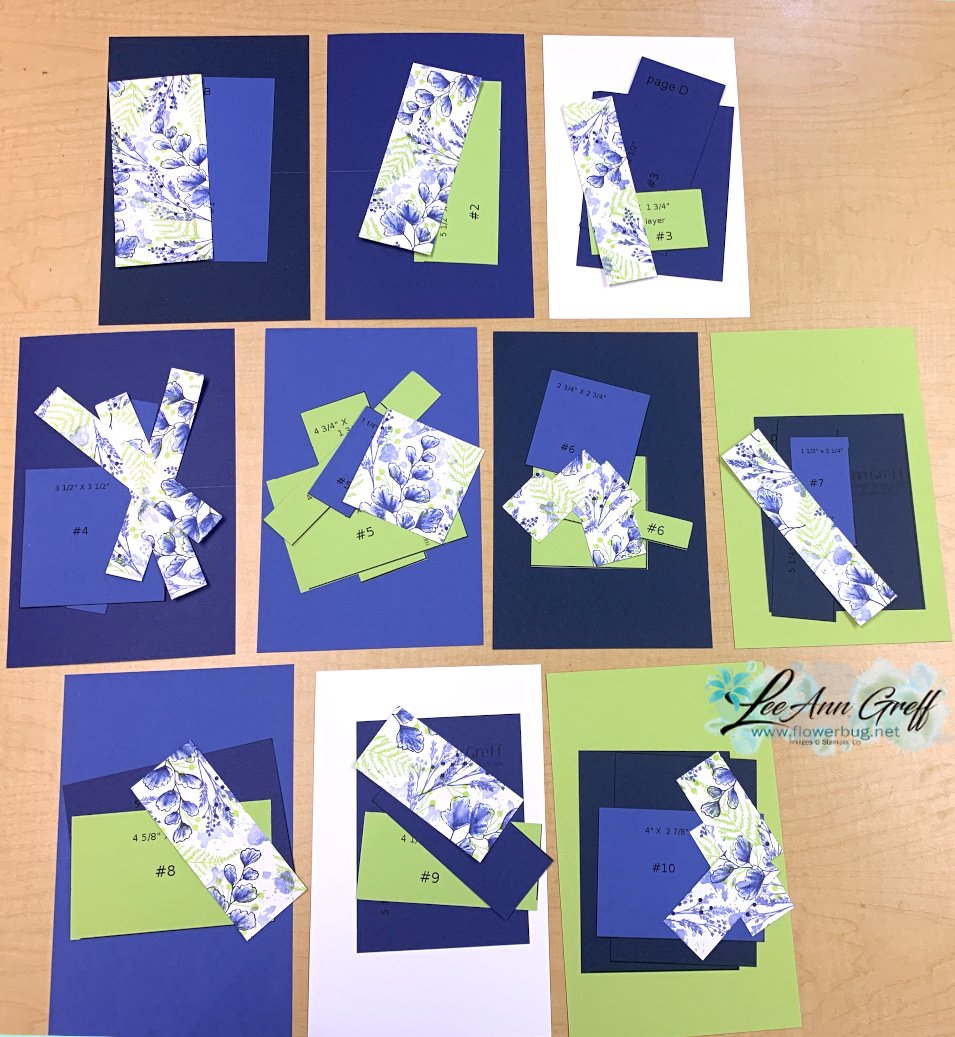
    3. Print out Template A on White CS and stamp the non printed side with the images and inks you chose creating your own paper. *You could use DSP but you'll want to print on the reverse side. Here is mine below: 

    3. Turn the stamped piece over and cut on the printed lines.  (I print my card stock with a printer but if your printer will not work with card stock you can have a copy place print them for you.  Or just use the template measurements as a guide. 

    4. You'll also print templates B-E on four other colors of card stock.  Cut on the printed lines (you'll use the reverse side for your cards).  

    5. You'll need 10 card bases in the colors you chose.  Place them on the table and add all of the cut pieces over each card base.  Tip; Use contrasting colors.  If there are many dark pieces I use a light card base and if there are mostly light pieces like the examples below, I'll use a dark card base.  

    6.  Now you'll assemble the cards using my finished samples as a guide. 

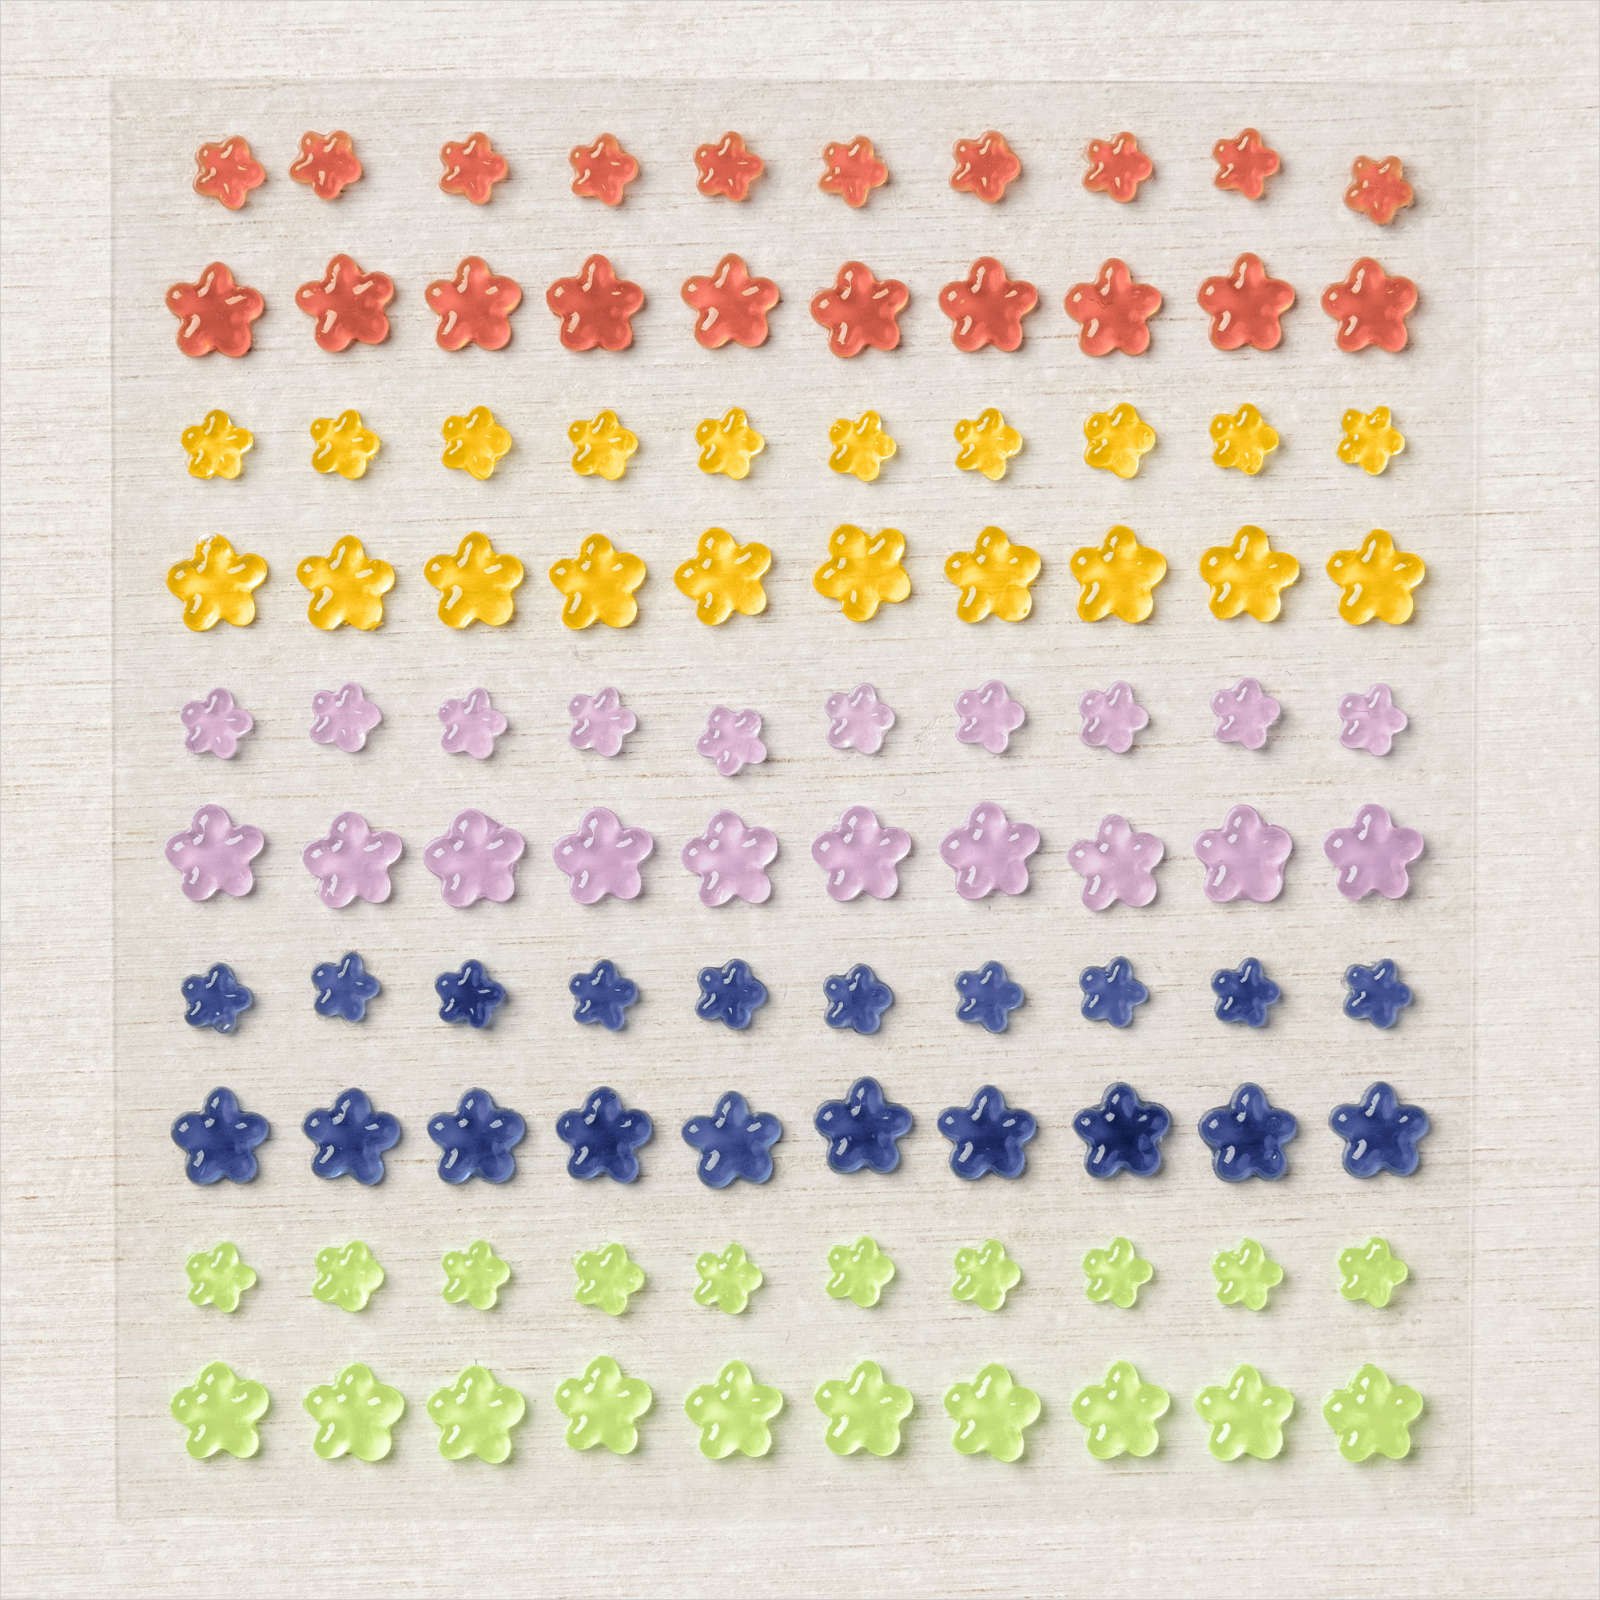
    7.  You'll stamp your greetings using a variety of punched or die-cut pieces and finish your cards, adding ribbon or gems as desired.  

    Easy, no measuring cards that are BEAUTIFUL and multi-layered.  You can see my 5 sheet wonder PDF tutorial here on my Shop site.  The PDF tutorial includes multiple card and color examples. 

    ~~~

    Get a bunch of NEW In Color products FREE in your Starter Kit! 

    It's $99 for $213 in products!!!  And Free Shipping! Click here. 


    Host codes: HUNR9DB6

     *click here to order 

    If your order is over $50 you'll receive a set of NEW embellishments from me.

    Don't forget about my loyalty rewards! 

    Click here to download yours and earn a $50 shopping spree!  

    Leave a Reply

    Your email address will not be published. Required fields are marked *

  • An easy double flap fun fold layout with Pretty Prints DSP. A video, measurements and a gift card option!


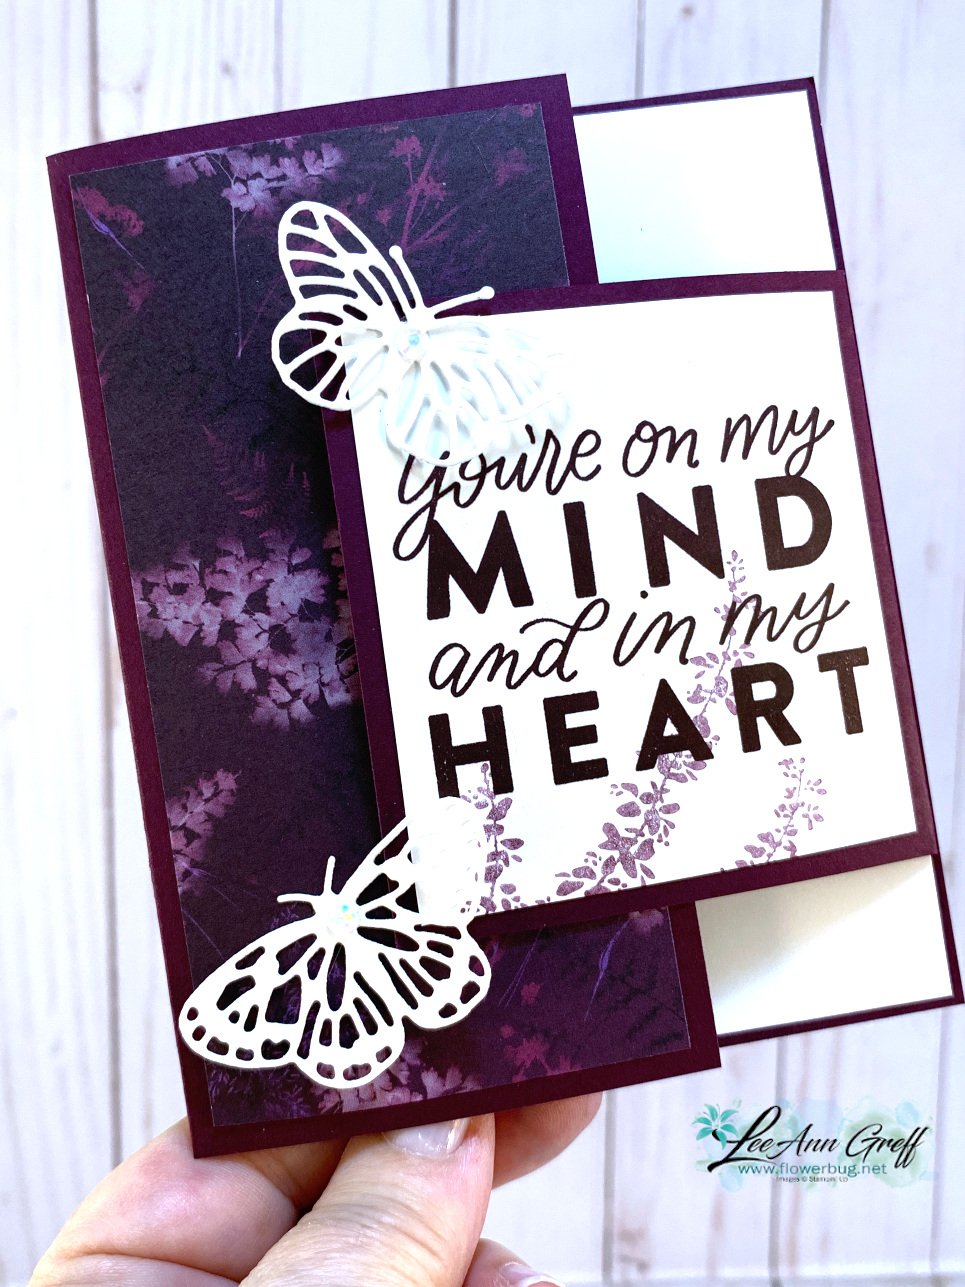
    I love fun fold cards that stay closed AND are easy for the recipient to figure out.  This double flap fancy fold card is just that!

    We made them on Monday night's Stamp with Me Live.  You can watch the video here. 

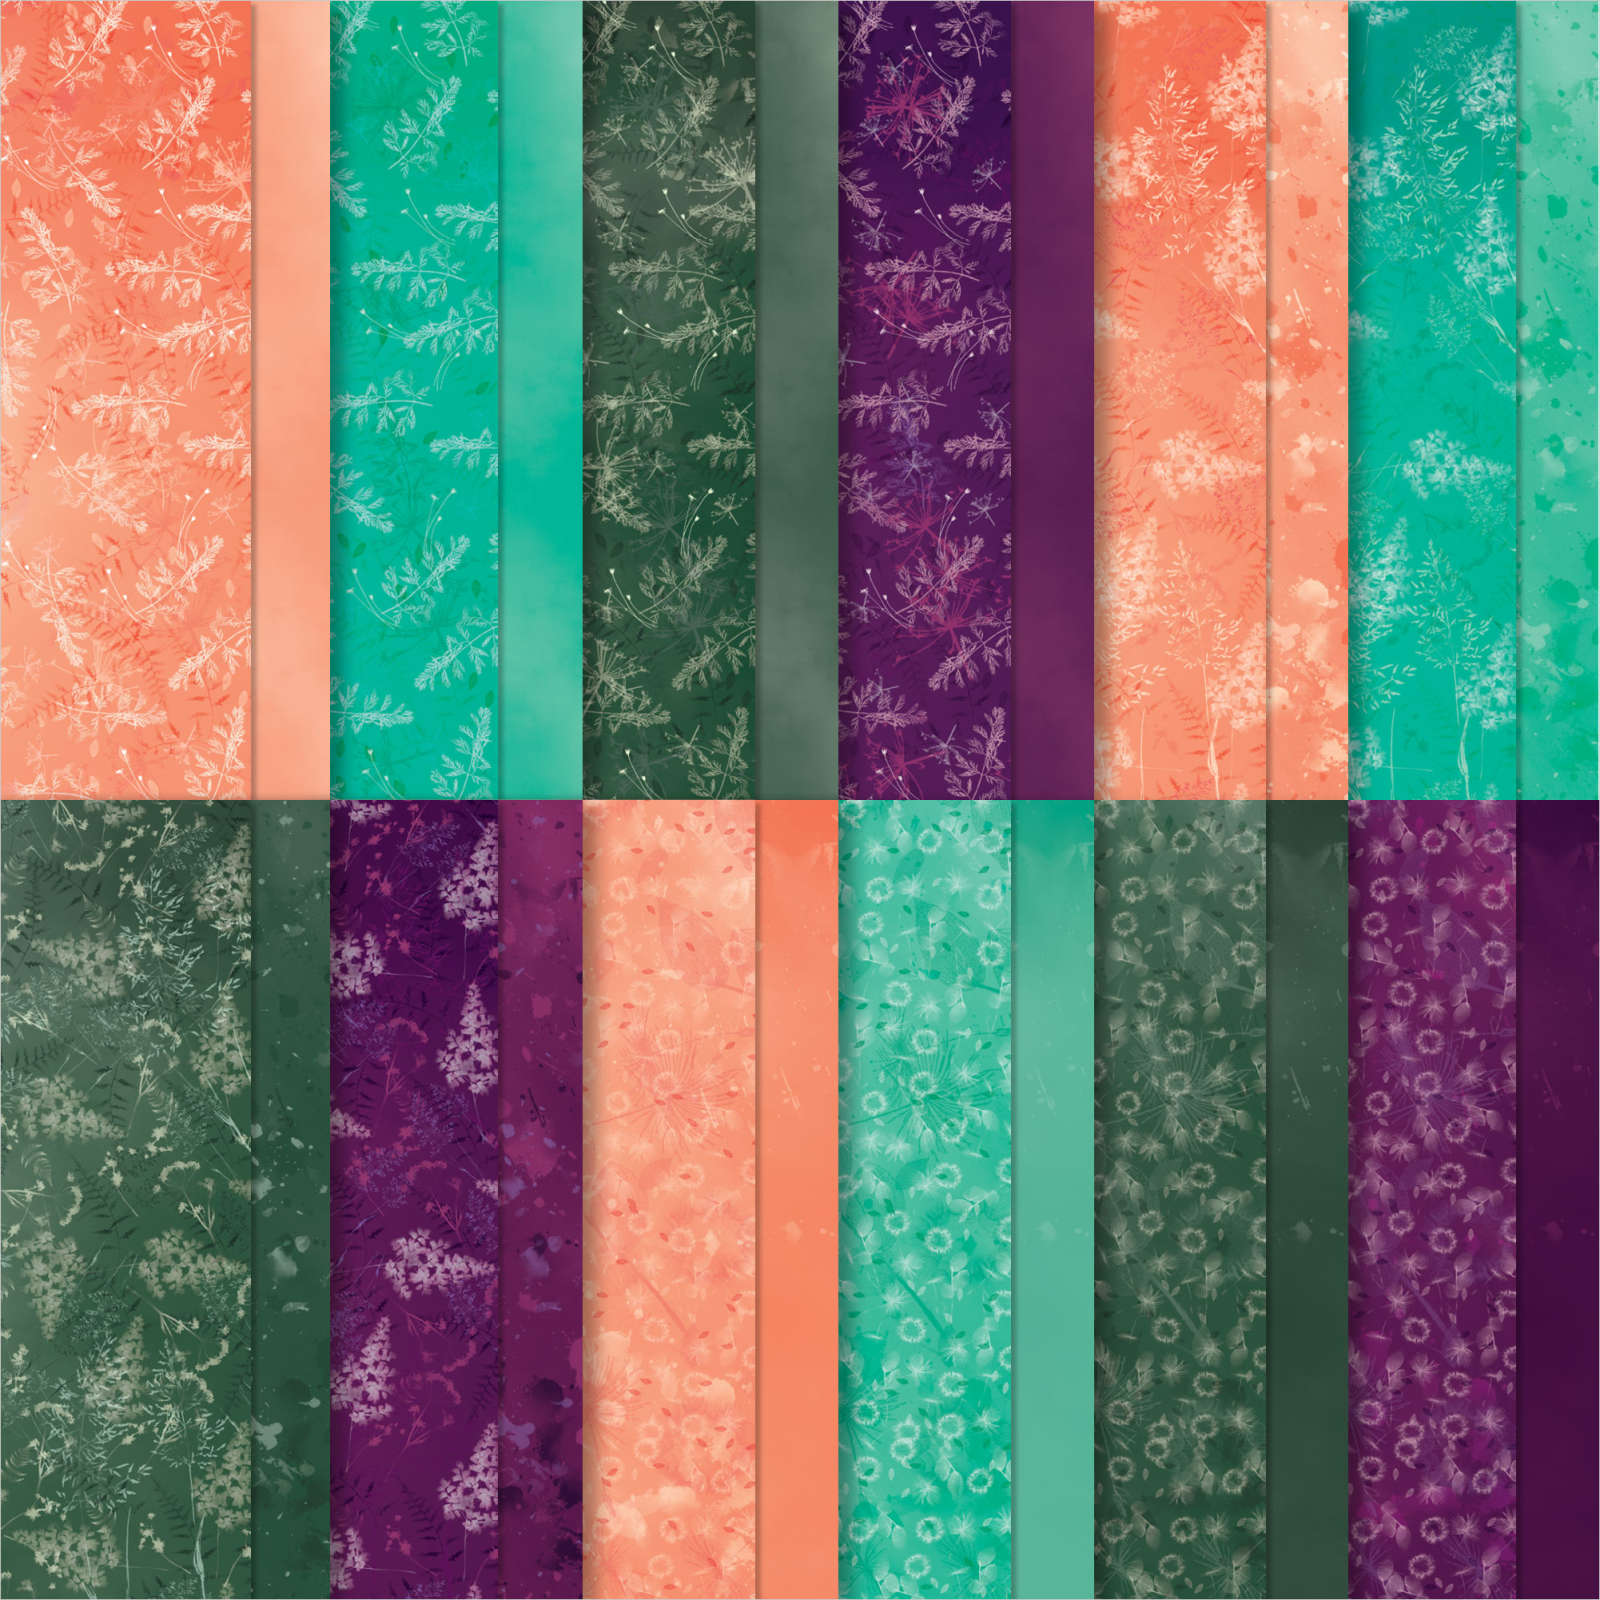
    These cards feature the Pretty Prints designer paper seen here.  It's NEW in the 2022-23 Stampin' Up! Annual catalog.  There are multiple prints all in these 4 colors – Blackberry Bliss, Calypso Coral, Bermuda Bay and Evening Evergreen.  

    I used two stamp sets here; both new in the new Annual catalog.  Good Feelings seen here and Botanical Layers seen here.  

    One of my favorite things about this fun fold layout is that you can choose to fold or trim it off at the 1 1/2" mark.  Folding it inside creates a pocket for a gift card.  Trimming it off shortens it.  Your choice!  Or make a few of each like I did.  

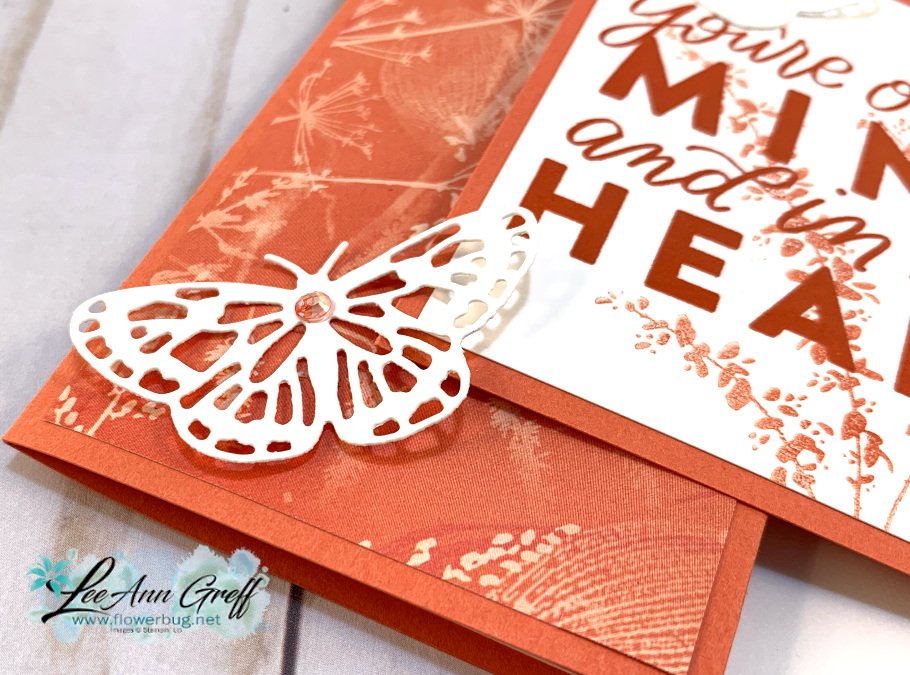
    The die-cut butterflies from Brilliant Wings dies add a pretty touch to these botanical cards. The lower butterfly is added just beyond the outside corner flap to anchor it closed.  So easy and keeps the card laying flat.  

    Here's the video; just click on the photo below to watch it.  

    ~~~

    Get a bunch of NEW In Color products FREE in your Starter Kit! 

    It's $99 for $213 in products!!!  And Free Shipping! Click here. 


    Host codes: HUNR9DB6

     *click here to order 

    If your order is over $50 you'll receive a set of NEW embellishments from me.

    Don't forget about my loyalty rewards! 

    Click here to download yours and earn a $50 shopping spree!  

    Leave a Reply

    Your email address will not be published. Required fields are marked *

  • Colorful Hope Box card kit; limited supply! Opt in ASAP


    I have a 2nd card kit to go during May (see the card kit I posted yesterday here). 

    This kit includes a new Hope Box kit – formerly a beautiful, colorful Paper Pumpkin kit.

    I jazzed up the card designs to include 12 new cards and added extra items too! I have a limited supply of these and expect to sell out quickly. 

    In this kit you'll also receive a new photopolymer stamp set, ink spot, adhesives, spool of ribbon, a clear block and a Wink of Stella.
    • This kit includes all pre-cut pieces for the 12 cards shown plus you'll have 3 extra card bases and kit elements left to make more!
    • The PDF tutorial includes step by step directions, photos, measurements and a supplies list. It is emailed to you immediately upon payment when you purchase it from my Shop here.
    • The kit is mailed out at the end of May via Priority Mail.
    • To finish the cards like mine you'll use the stamps and Blackberry Bliss ink spot from the kit. You'll also need Melon Mambo, Bermuda Bay and Crushed Curry ink pads and sponges or blending brushes.

    Again, be sure to get this kit here ASAP; they are while supplies last.  

    See my other May card kit here; it's includes 10 beautiful floral cards featuring the Hues of Happiness designer paper and Happiness Abounds bundle.  

    ~~~

    Get a bunch of NEW In Color products FREE in your Starter Kit! 

    It's $99 for $213 in products!!!  And Free Shipping! Click here. 


    Host codes: HUNR9DB6

     *click here to order 

    If your order is over $50 you'll receive a set of NEW embellishments from me.

    Don't forget about my loyalty rewards! 

    Click here to download yours and earn a $50 shopping spree!  

    Leave a Reply

    Your email address will not be published. Required fields are marked *


Notice: LeeAnn Greff, Independent Stampin’ Up! Demonstrator, Manager. The content of this website is my sole responsibility as an independent Stampin’ Up! demonstrator and the use of, and content of, the classes, services, or products offered on this website is not endorsed by Stampin’ Up! Copyright 2025