/


Latest Post

Control Freaks New Catalog Blog Hop


It's time for our monthly Freak's blog hop!!  Our focus today is the new Annual Catalog.  We have lots of amazing projects to share with you using brand new products. 

You may have arrived from Tami's blog; I'm sure you loved her projects!  Or maybe you just started here.  To see all 12 posts be sure to click on the icon at the bottom of each post. 
It's been so fun to play with exciting new products from the 2020 Annual Catalog!  Are you ready for some glitz & shine?

I chose to play with the Forever Gold Laser-cut Specialty Paper today.  It's part of the Forever Greenery suite of products.  You can see it best on page 152 of your annual catalog. It has 6 sheets; 3 each of 2 single sided designs. One side is gold and the other is white which you can color, spritz or sponge.  I chose to use the gold sides for my projects here.  

You can see the details & measurements for each one under the photo. 

I chose to use jewel toned card stock for each card; I think it looks rich & regal with these colors.  The card above is Blackberry Bliss with Very Vanilla.  The pretty golden leafy medallion is all one piece; just punched out from the pack.  I added a 1" X 4 1/4" strip of Vanilla under it and a stamped die cut above with a few metallic pearls.  The stamped image is from Dandelion Wishes and the die is from the Stitched So Sweetly dies. 
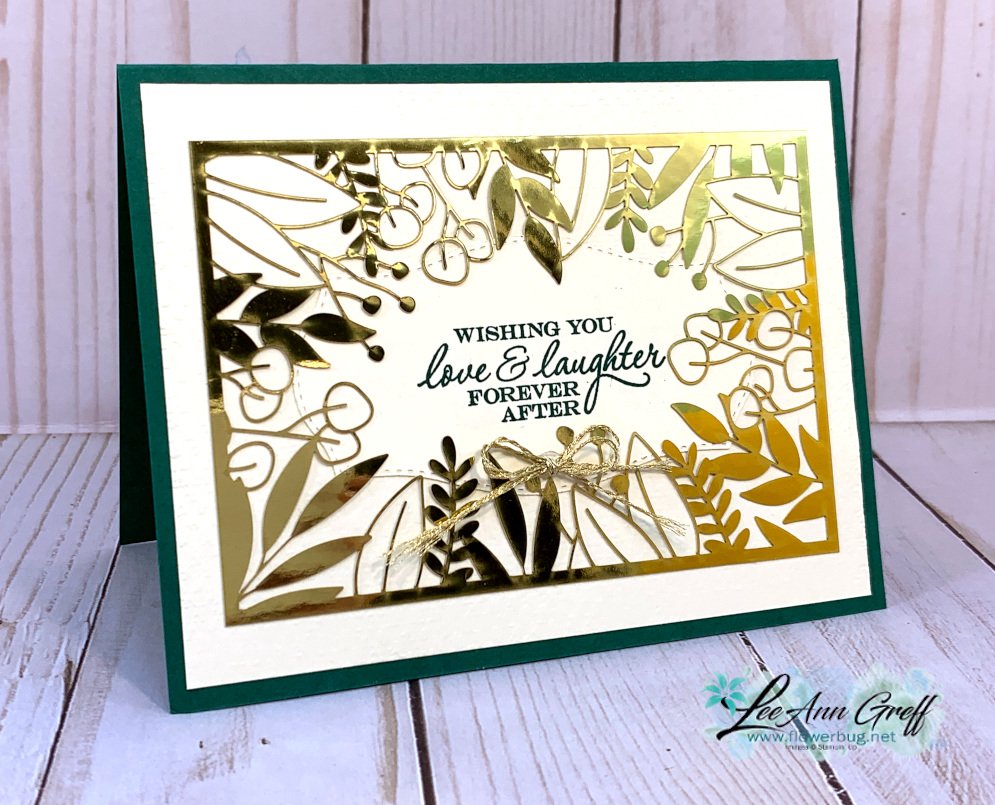
This card is Shaded Spruce with Vanilla.  It's hard to see but the large 4" X 5 1/4" vanilla is textured with our Tasteful Textile embossing folder. The greeting is stamped on a die from Tasteful Labels using the Heart to Heart stamp set.

Once I had these pieces adhered I could add the laser cut piece on top. I added a bit of liquid multipurpose adhesive to the edges and a few leaves and it's done!

The laser cut card front pops out so easily from the rest in the sheet. No fussy cutting or die-cutting with these! 

This is probably my favorite one of the three. This laser-cut piece is delicate and leafy; it leaves a perfect area for a greeting in the stitched center. The card is Night of Navy with a 2" strip of the World of Good designer paper across the middle. 

I stamped the 'Always' greeting (Field of Flowers set) on a 1 1/2" X 2 1/4" piece of Very Vanilla card stock and sponged the edge with Misty Moonlight ink.  The 'In My Heart' greeting is embossed with Gold embossing powder on Misty Moonlight card stock and punched out with the Classic Label punch. 

Did you spy the cute little flowers on this card?  They're from the new Confetti Flowers Border punch. Each one has a Metallic pearl on it.  

I hope you enjoyed seeing these pretty cards with the beautiful Forever Gold Laser-cut Specialty Paper.  If you like shine and glitz you'll love it! 

~~~

Thanks for stopping in to see my projects.  Now you're off to see what Cindy has to share.  I know you'll love it; I always do.
 

All Posts

  • Look at these amazing WOW Christmas swaps!


    You'll be amazed by the talent in these Christmas swap cards by my Flowerbug's Team.  They knocked it out of the park this month!  

    Each day this week I'll be sharing their swap cards; be sure to subscribe to my blog (or Facebook page) so you don't miss a thing!  

    Sharon featured the Sweetest Christmas suite on her beautiful card.  I love the clean white background that shows off the gorgeous die-cuts!

    Click here to see all of the products in the Sweetest Christmas suite.  There are two stamp & die bundles, ribbon, Glimmer paper and the fun Designer Paper.  

    The peek of Red glimmer paper adds a perfect sparkle to her card.  Here's the inside view: 

    Adding a strip of designer paper to the inside of your card is a simple way to embellish it to match. 

    Next is a gorgeous card by Karen featuring the Decorating with Happiness bundle seen here: 

    Her card is mostly White with Cherry Cobbler, Evergreen & Gold accents. 

    Details:

    • She cut the large pine die from both Evergreen & Gold glimmer paper and added them off set from each other.  
    • The greeting die is from the Stylish Shapes dies and the embossing folder is Timber 3D.
    • The pretty DSP is the Lights Aglow specialty DSP seen here.  
    • Elegant Metallic cord and Festive Pearls are the additional embellishments.  

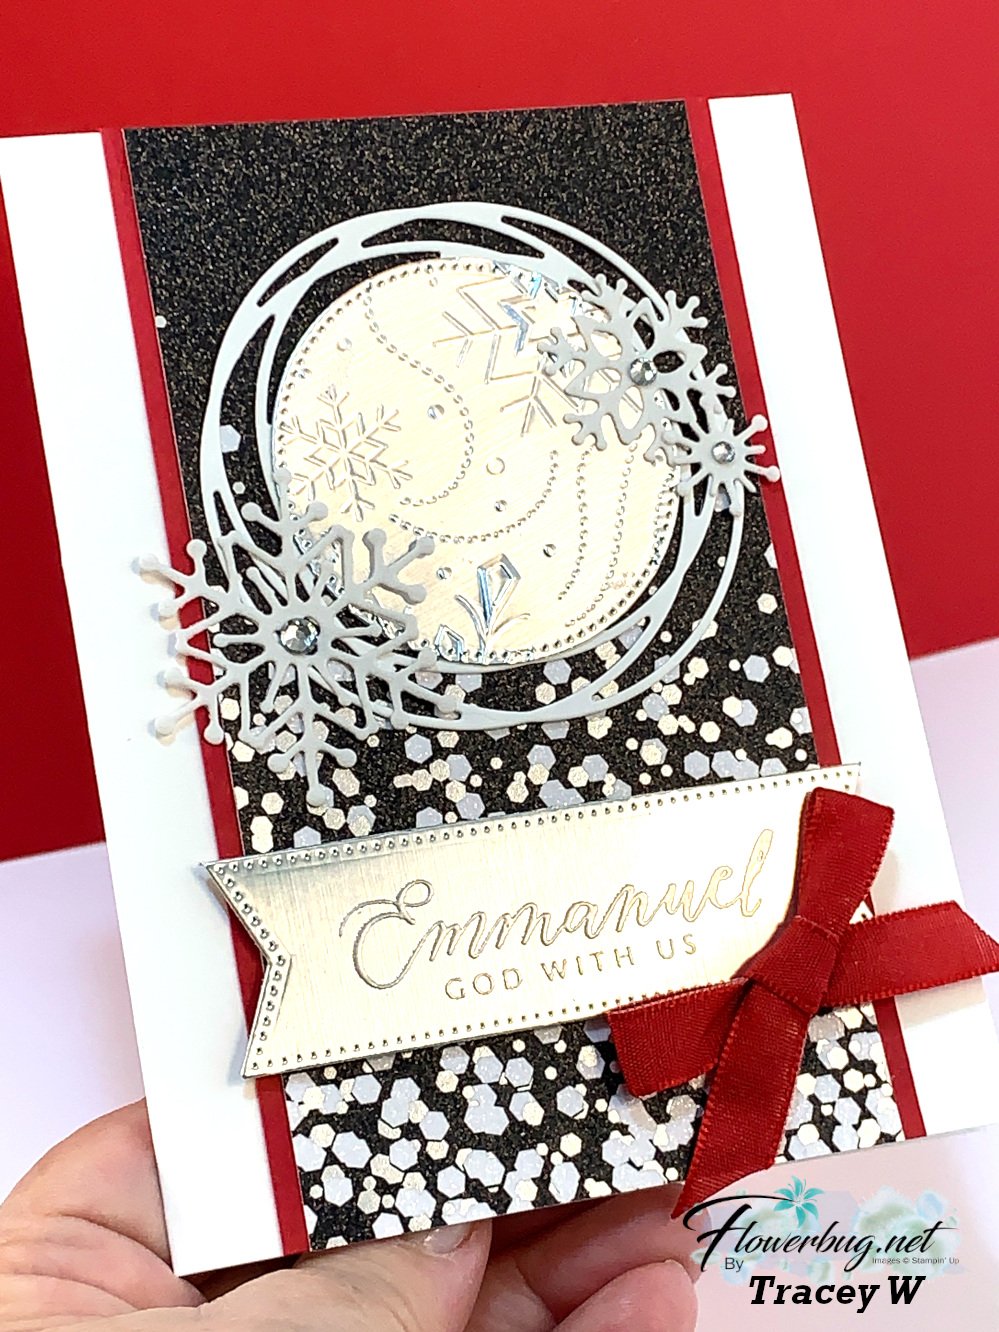
    And next is another stunning card made by Tracey; this time with Silver accents.  She used White, Real Red and Black as her elegant color combination. 

    Details:

    • the White layers are from the Chic and Painted Label dies; the Silver is the Stylish Shapes die, embossed with the Wintry 3D folder. 
    • The gorgeous specialty black & Silver paper is called Metallic & Shimmer specialty paper; see it here.
    • She embossed the greeting in clear (or silver?) embossing powder on Silver paper!  

    Stay tuned for more amazing swap cards by my Team. 

    *Love swapping?  Or maybe you like discounted products?  Consider joining my Flowerbug's Team!  The Starter Kit has bonus free dollars this month!  Check it out below:   

    ~~~

    October Specials

    Starter Kit special! Get $155 in product for just $99

    click here

    ~~~

    Order online here

    Host code link:  SVBHWRCY

    Get a free embellishment from me with online orders over $50!


    Earn free products with my loyalty rewards! 

    Click here to download yours and earn a $50 shopping spree!

    Leave a Reply

    Your email address will not be published. Required fields are marked *

  • Check out these fabulous Christmas scene cards by the Flowerbug’s!


    I love seeing what my Flowerbug's make for our Team swaps.  Everyone has their own style and I'm proud to share them with you this week. 

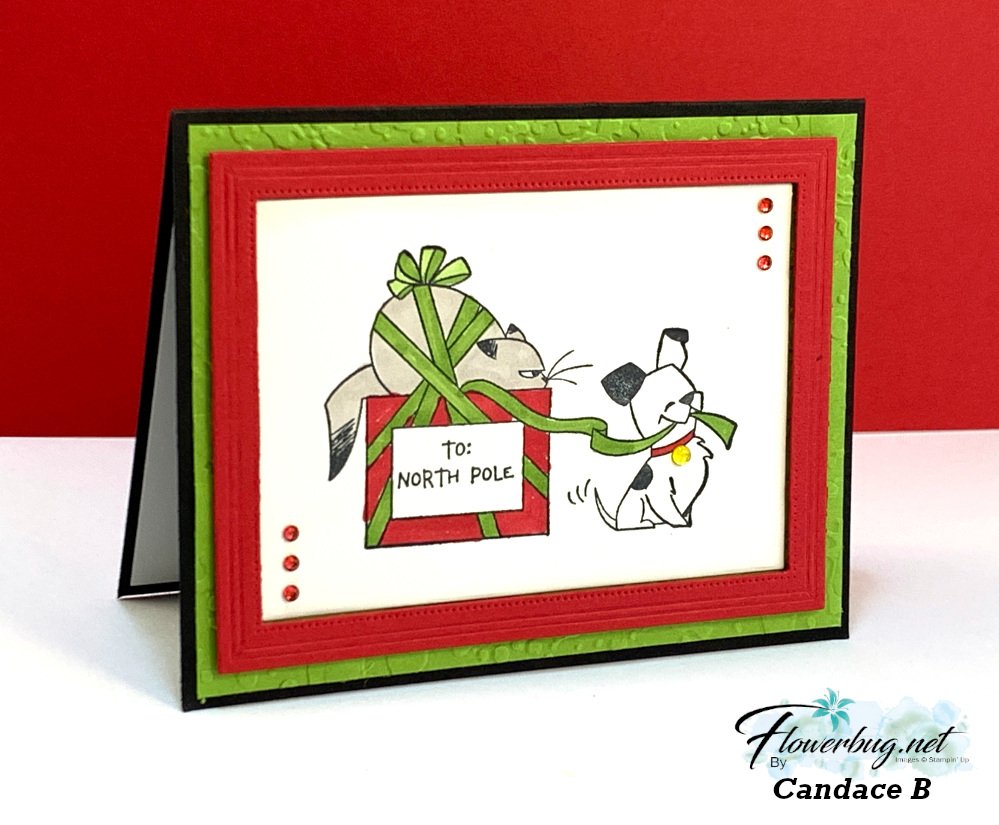
    First is a sweet card by Candace who featured the North Pole Mischief stamp set. 

    I love the Red frame she added to the card; it's from the Fabulous Frames dies seen here.  She used Blends markers to color the images and added Red Rhinestones to set off the scene.  

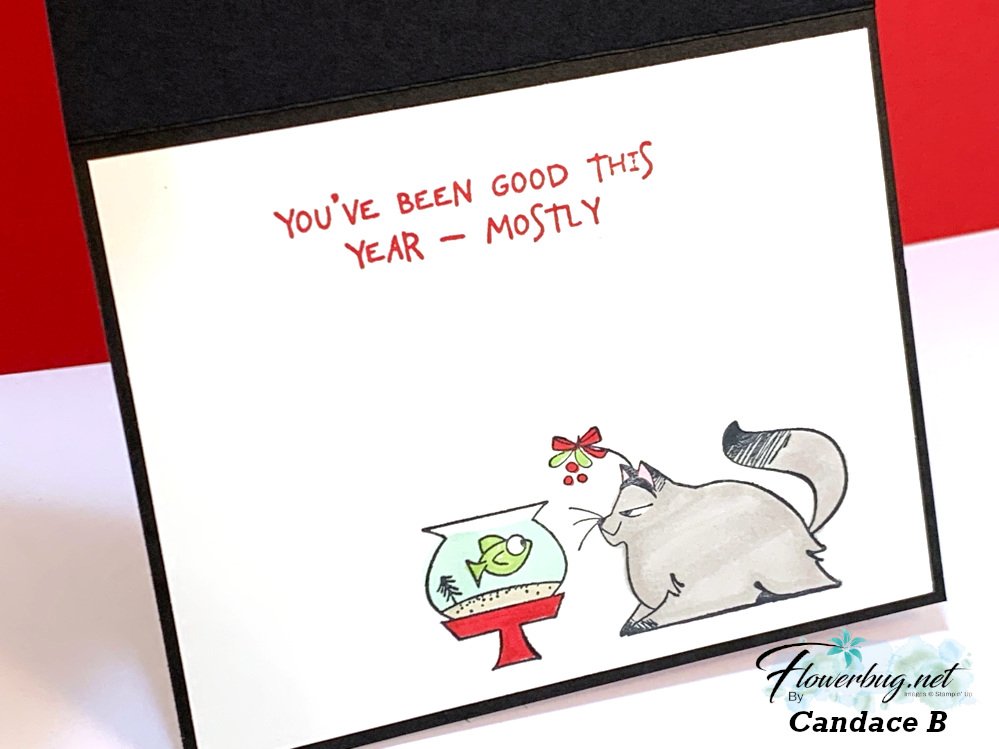
    Here's the inside view; so cute! 

    Next is a fun card made by Annette who featured the Penguin Place stamp set & Penguin Builder punch. These products are returning favorites from last year and many were super happy about it since the punch ran out of stock last year before some could grab it. 

    I absolutely love the scene she achieved using the Layering Diorama dies seen here!  She used Starry Sky CS on the back, stamping the stars using White Craft ink.  Then she added a layer of Orchid Oasis behind the penguin that looks like water.  So smart!  

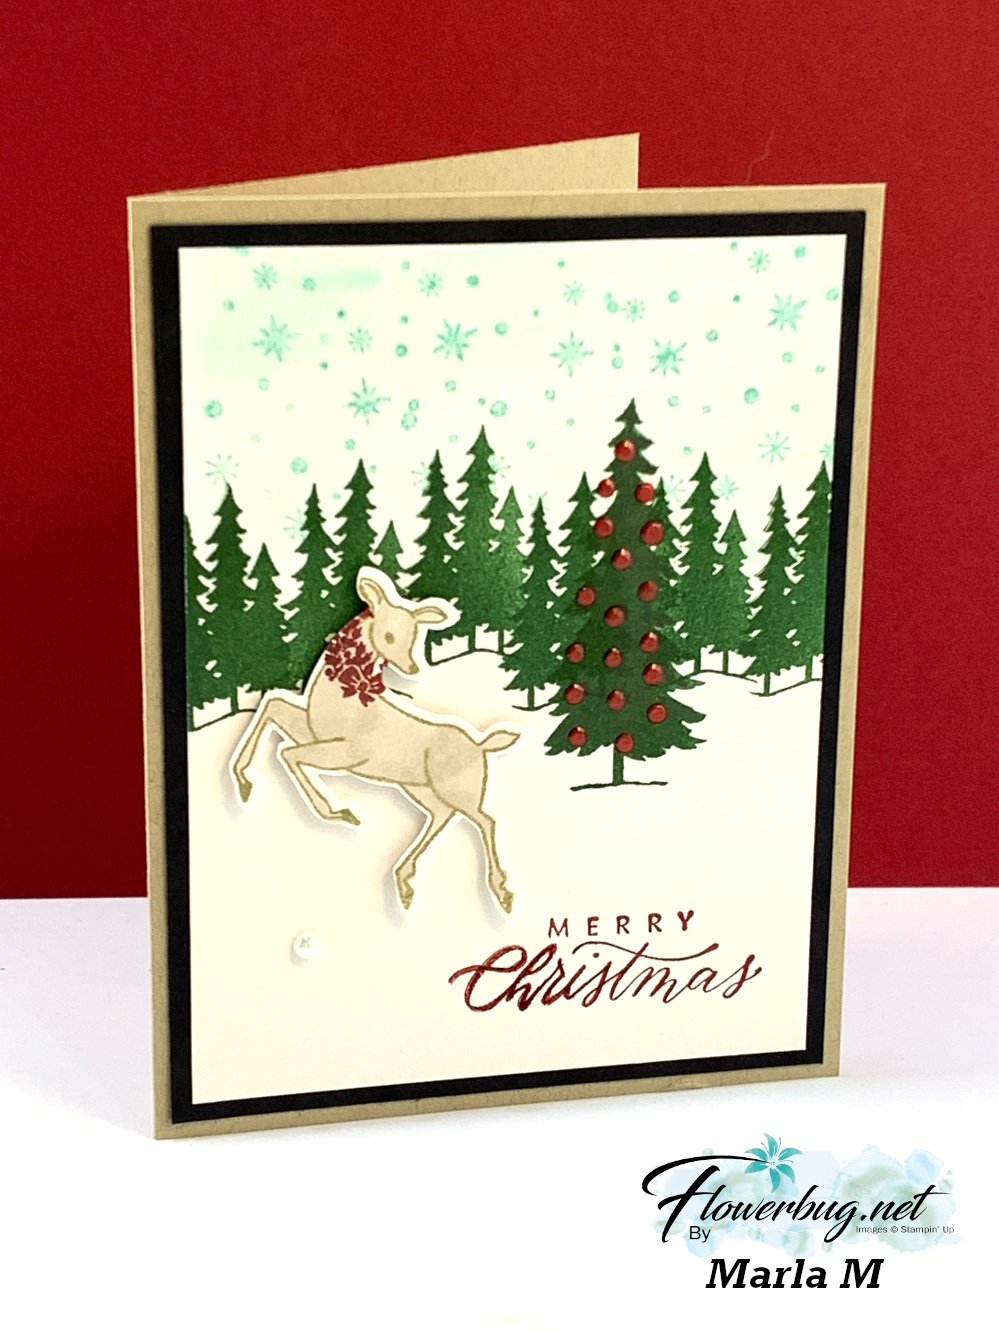
    Lastly is a pretty card made by Marla.  She used the Peaceful Deer stamp set and Deer Builder punch.  

    She stamped the trio of trees across the background and then one large tree in the foreground. It gives such depth to the scene.   

    I also like the way she used the Pearlized Enamel effects basics for her tree ornaments.  The stamped blue snowflakes in the sky finish the scene off perfectly!

    Stay tuned for more amazing swap cards by my Team. 

    *Love swapping?  Or maybe you like discounted products?  Consider joining my Flowerbug's Team!  The Starter Kit has bonus free dollars this month!  Check it out below:   

    ~~~

    October Specials

    Starter Kit special! Get $155 in product for just $99

    click here

    ~~~

    Order online here

    Host code links: GDCBRHF7 or SVBHWRCY

    Get a free embellishment from me with online orders over $50!


    Earn free products with my loyalty rewards! 

    Click here to download yours and earn a $50 shopping spree!

    Leave a Reply

    Your email address will not be published. Required fields are marked *

  • Use your scraps with the Double Twisted Ribbon technique; live class tonight!


    If you like using up those paper scraps I have a fun technique to share.  It's called the Double Twisted Ribbon technique. 

    I'll be demonstrating it on tonight's Stamp with Me Live on Facebook.  It's at 7:30 pm Central time on the last Monday of the month and it's a free class!  See the replay here

    I chose to use the Lights Aglow specialty designer paper seen here for my card samples.  It's so pretty with the gold foil accents and fine patterns.  

    Tips:

    • You'll need 6 strips of two different patterns; you can also use card stock for them.  I cut them into 1/2" X 4" strips.  
    • The strips are adhered to a White piece measuring 2 1/2" X 5 1/4".  This is scored every 1" from the top down.  These score lines help you when adhering your strips. 
    • Once your strips are adhered you will add it to a layer measuring 2 3/4" X 5 1/2".  I recommend you use a color that coordinates with a color in your DSP.  

    For this card I chose to use the Holly Berry dies for the leaves & berries.  The greeting die-cut is from the All That dies.  

    My card base is Evening Evergreen.  The greeting is from the upcoming Framed & Festive stamp set.  It's new and available to Demonstrators in October, but will be out for customers in November.  

    For this next card I stamped the greeting (also from the Framed & Festive stamp set) onto a die-cut circle from the Stylish Shapes dies.

    That pretty gold leaf die-cut is from the upcoming Framed Floret dies – also coming out in November for customers.  I added a few Festive Pearls for berries.  

    Click on the photo below to watch the video: 

    Which one is your favorite? 

    ~~~

    October Specials

    Starter Kit special! Get $155 in product for just $99

    click here

    ~~~

    Order online here

    Host code links: GDCBRHF7 or SVBHWRCY

    Get a free embellishment from me with online orders over $50!


    Earn free products with my loyalty rewards! 

    Click here to download yours and earn a $50 shopping spree!

    Leave a Reply

    Your email address will not be published. Required fields are marked *


Notice: LeeAnn Greff, Independent Stampin’ Up! Demonstrator, Manager. The content of this website is my sole responsibility as an independent Stampin’ Up! demonstrator and the use of, and content of, the classes, services, or products offered on this website is not endorsed by Stampin’ Up! Copyright 2025