/


Latest Post

Lots to see in this month’s Control Freak’s Blog hop!


The theme for February's Blog Hop is projects for our friends! 

There's a lot of talent in the Control Freaks group; be sure to click on each icon at the end of each post to see it all.   
If you just stopped in from Bree's blog I'm sure you enjoyed her projects. She is uber creative!

My first card features the Floating Technique. It gives the illusion that your paper is floating on the card.  
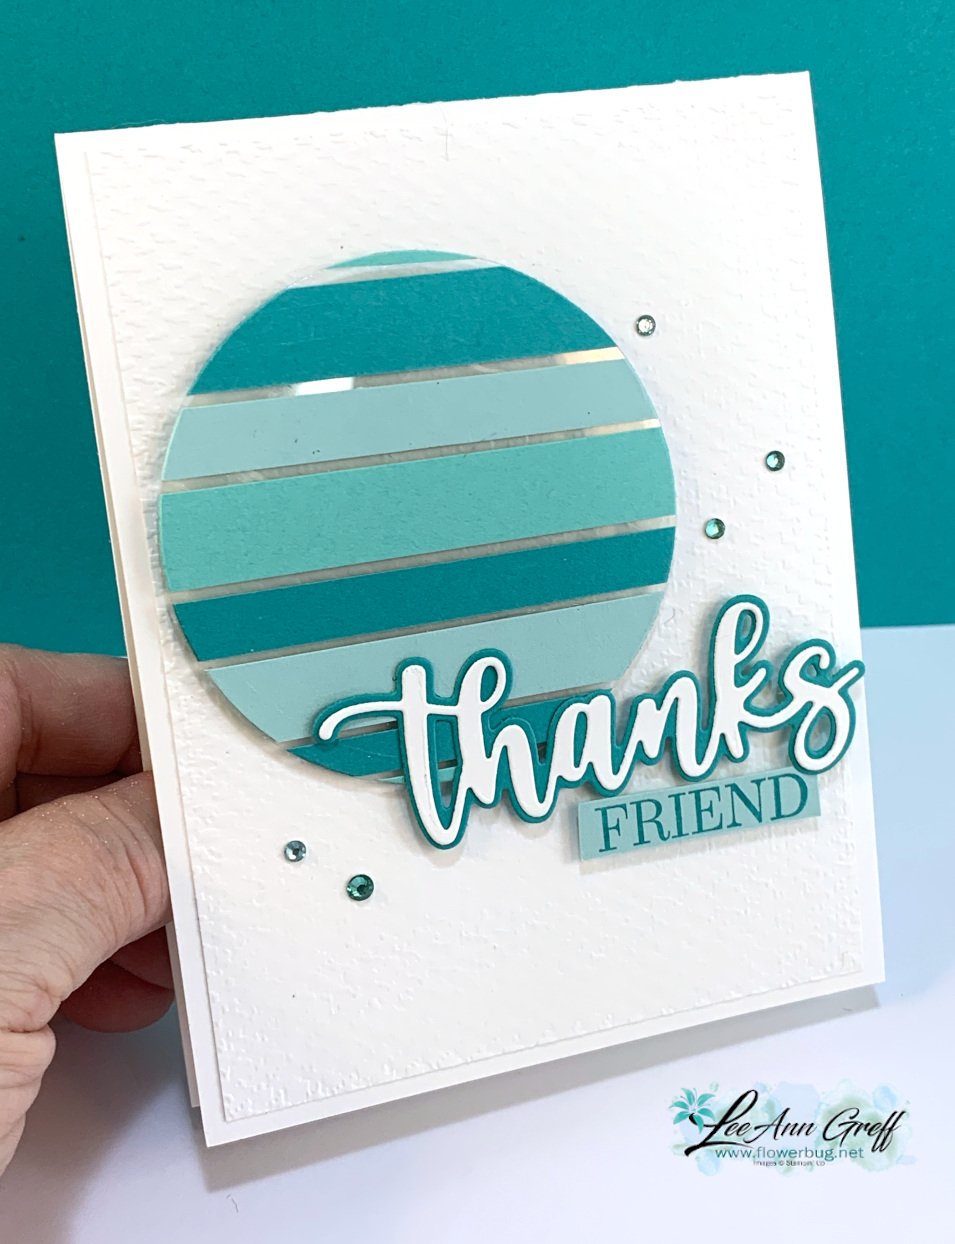
I adhered random sizes of card stock strips onto a piece of Window Sheet and used our largest circle in the Layering Circles dies  to die-cut it out.  I've been making monochromatic cards lately and chose my favorite blue/green hues of Bermuda Bay, Pool Party & Coastal Cabana.  

Details:

  • This circle is added with Stampin' Dimensionals onto White CS that's been embossed with the Tasteful Textile embossing folder. 
  • The 'Thanks' is made with our Amazing Thanks dies from the January-June catalog. 
  • The 'Friend' greeting was fussy cut from the Special Moments stamp set.
  • Those pretty rhinestones are from a new release coming out in March called the Wave Collection.  Rhinestones in blues & greens!! 

~~~

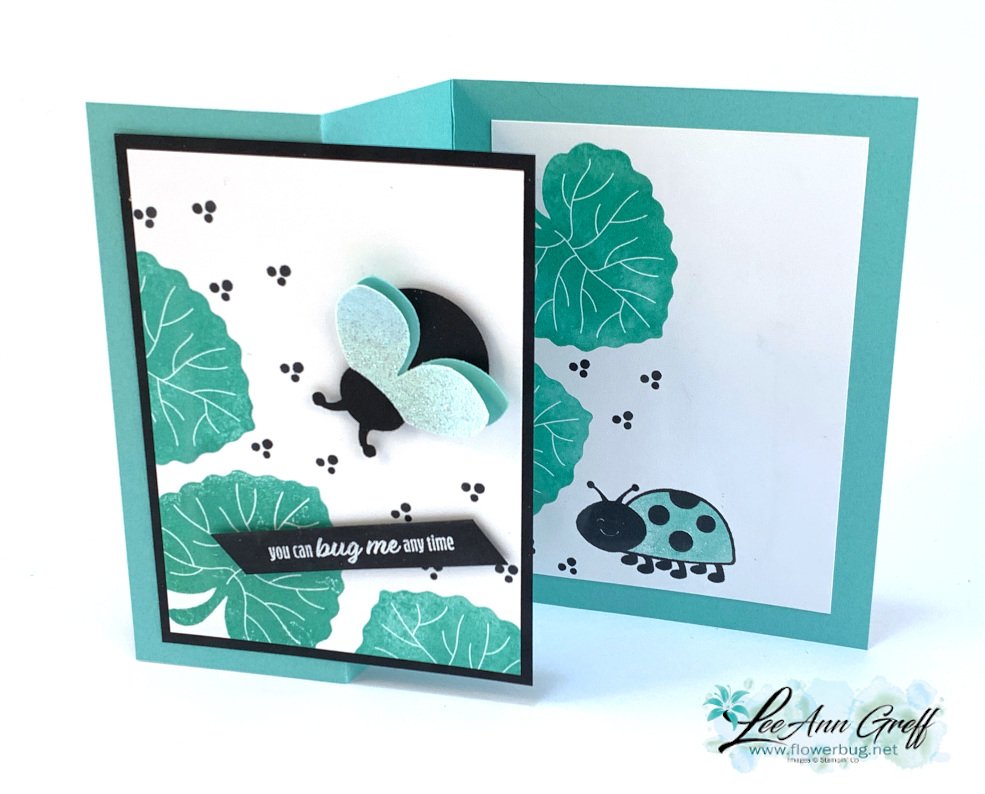
I recently made a card with the Hello Ladybug using Magenta Madness with Black and wanted to try it out with Coastal Cabana too. I found out that our new Supple Shimmer specialty paper works great for wings! It's pretty & iridescent.
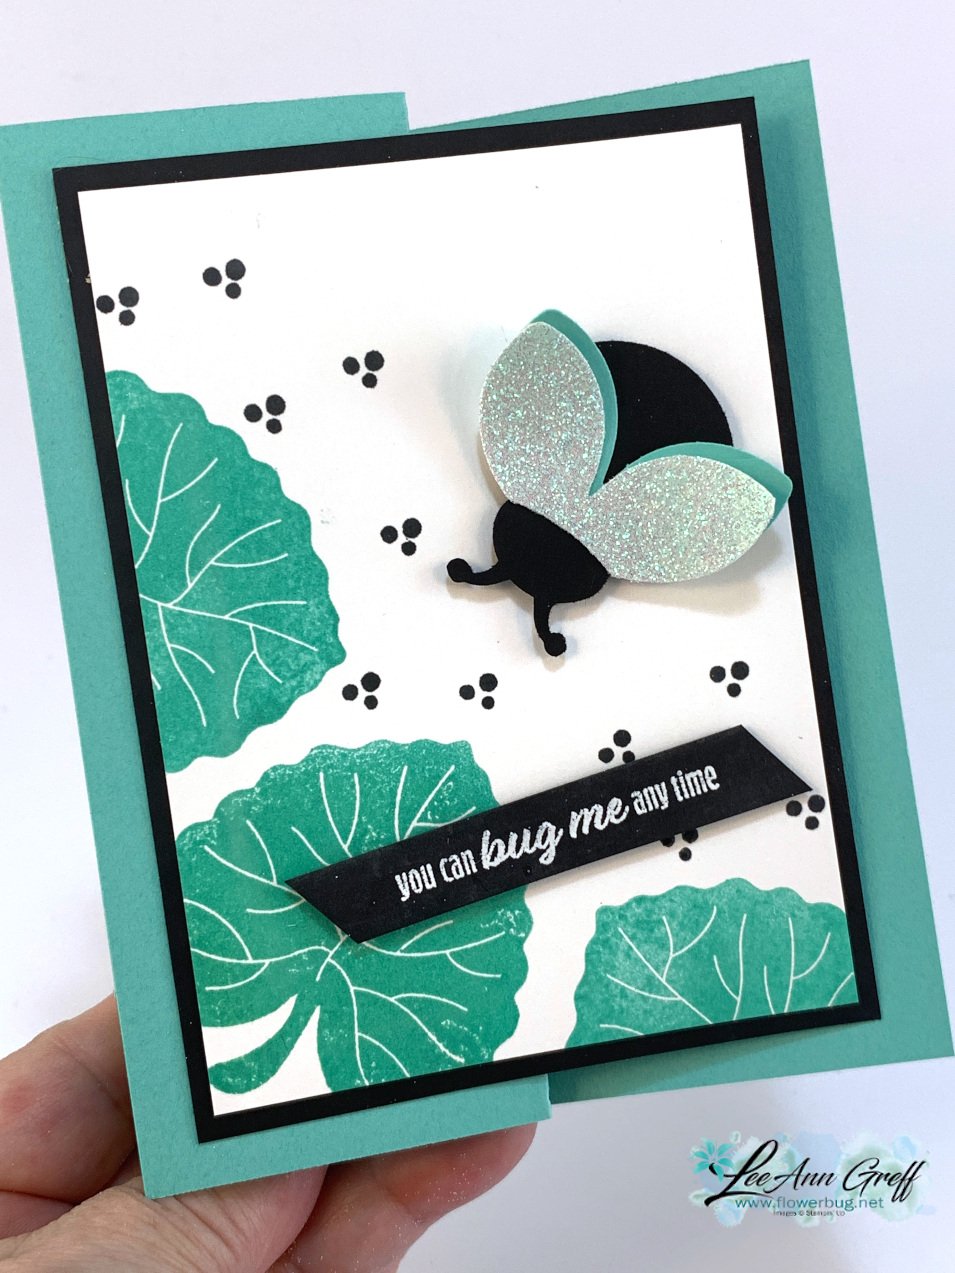

It's also what I like to call Black & White with a 'pop' of color.  A bit of black on a card makes other colors 'show up' and be noticed. 

This card is an easy fun fold.  Turn any basic card into a fun fold with these measurements: 

  • Card base 5 ½” X 8 ½”, score at 2 1/8” & 4 ¼”
  • White (X 2) 3 ½” X 4 ¾”
  • 3 ¾” X 5” Black


The stamped images are all from the Hello Ladybug stamp set.  It's in a bundle with the punch at 10% off when purchased together.  


Thanks so much for stopping in today. Click on the icon below to see what Cindy has created for you. You won't want to miss it! 

All Posts

  • Cute ideas for Santa Express bonus cards; included in the Kit to Go


    Before we get to today's cards; I have to make sure you know about the Clearance Rack refresh. So many great deals; but they're while supplies last.  Click here to see them. 


    ~~~

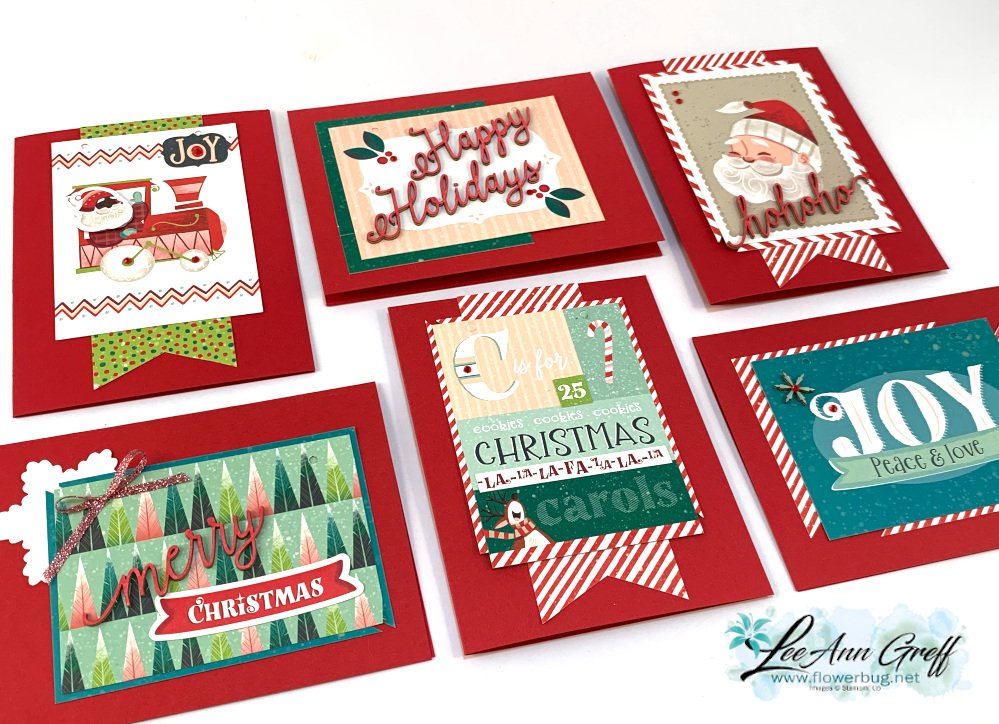
    This month one of my kits to go features the Santa Express Memories & More cards seen here.  I sincerely enjoy playing with these cards & the many extra elements included in them.  

    Besides the 10 cards & envelopes they'll make with the kit and PDF tutorial I've created some bonus cards they can make as well.  Here's a peek at them: 

    There's no stamping on any of these; all greetings and layered pieces are from the kit itself.  

    Notice the cursive words and the stars?  These are wooden elements included in the kit!  I colored them with Blends markers.  They're actually nice and thin; maybe around 1/16" in height.  

    Here's a link to this kit to go. It's while supplies last; so opt in soon! 

    ~~~

    October Specials

    Starter Kit special! Get $155 in product for just $99

    click here

    ~~~

    Order online here

    Host code links: GDCBRHF7 or SVBHWRCY

    Get a free embellishment from me with online orders over $50!


    Earn free products with my loyalty rewards! 

    Click here to download yours and earn a $50 shopping spree!

    Leave a Reply

    Your email address will not be published. Required fields are marked *

  • Scary Cute ‘side step’ fun fold card by Sharon!


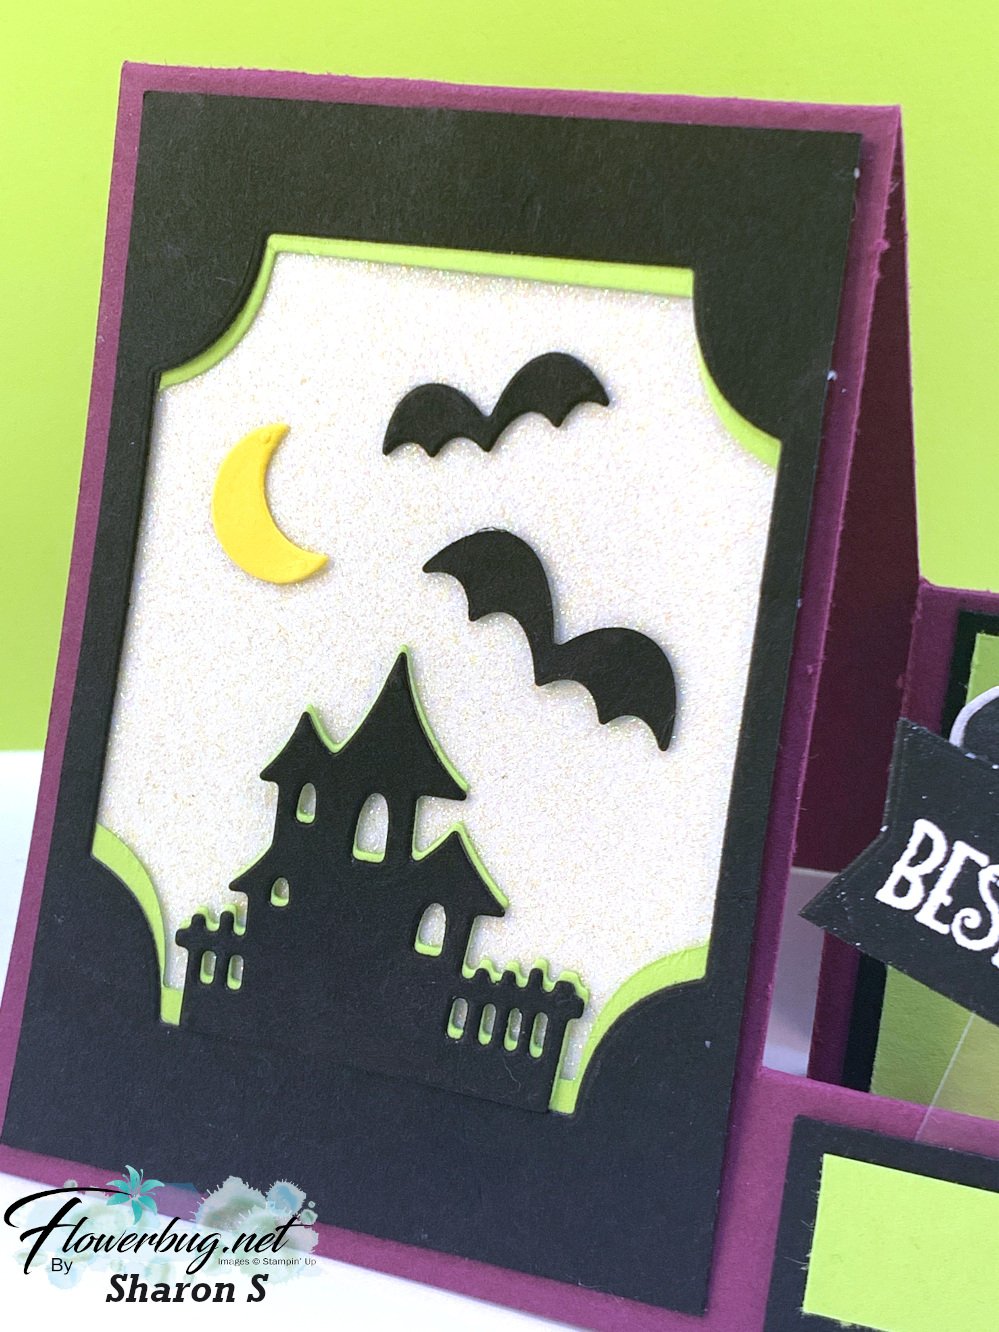
    Sharon shared this card with us at our last Team Meeting.  It's adorable!!

    Her colors are Rich Razzleberry, Black & Granny Apple Green.  

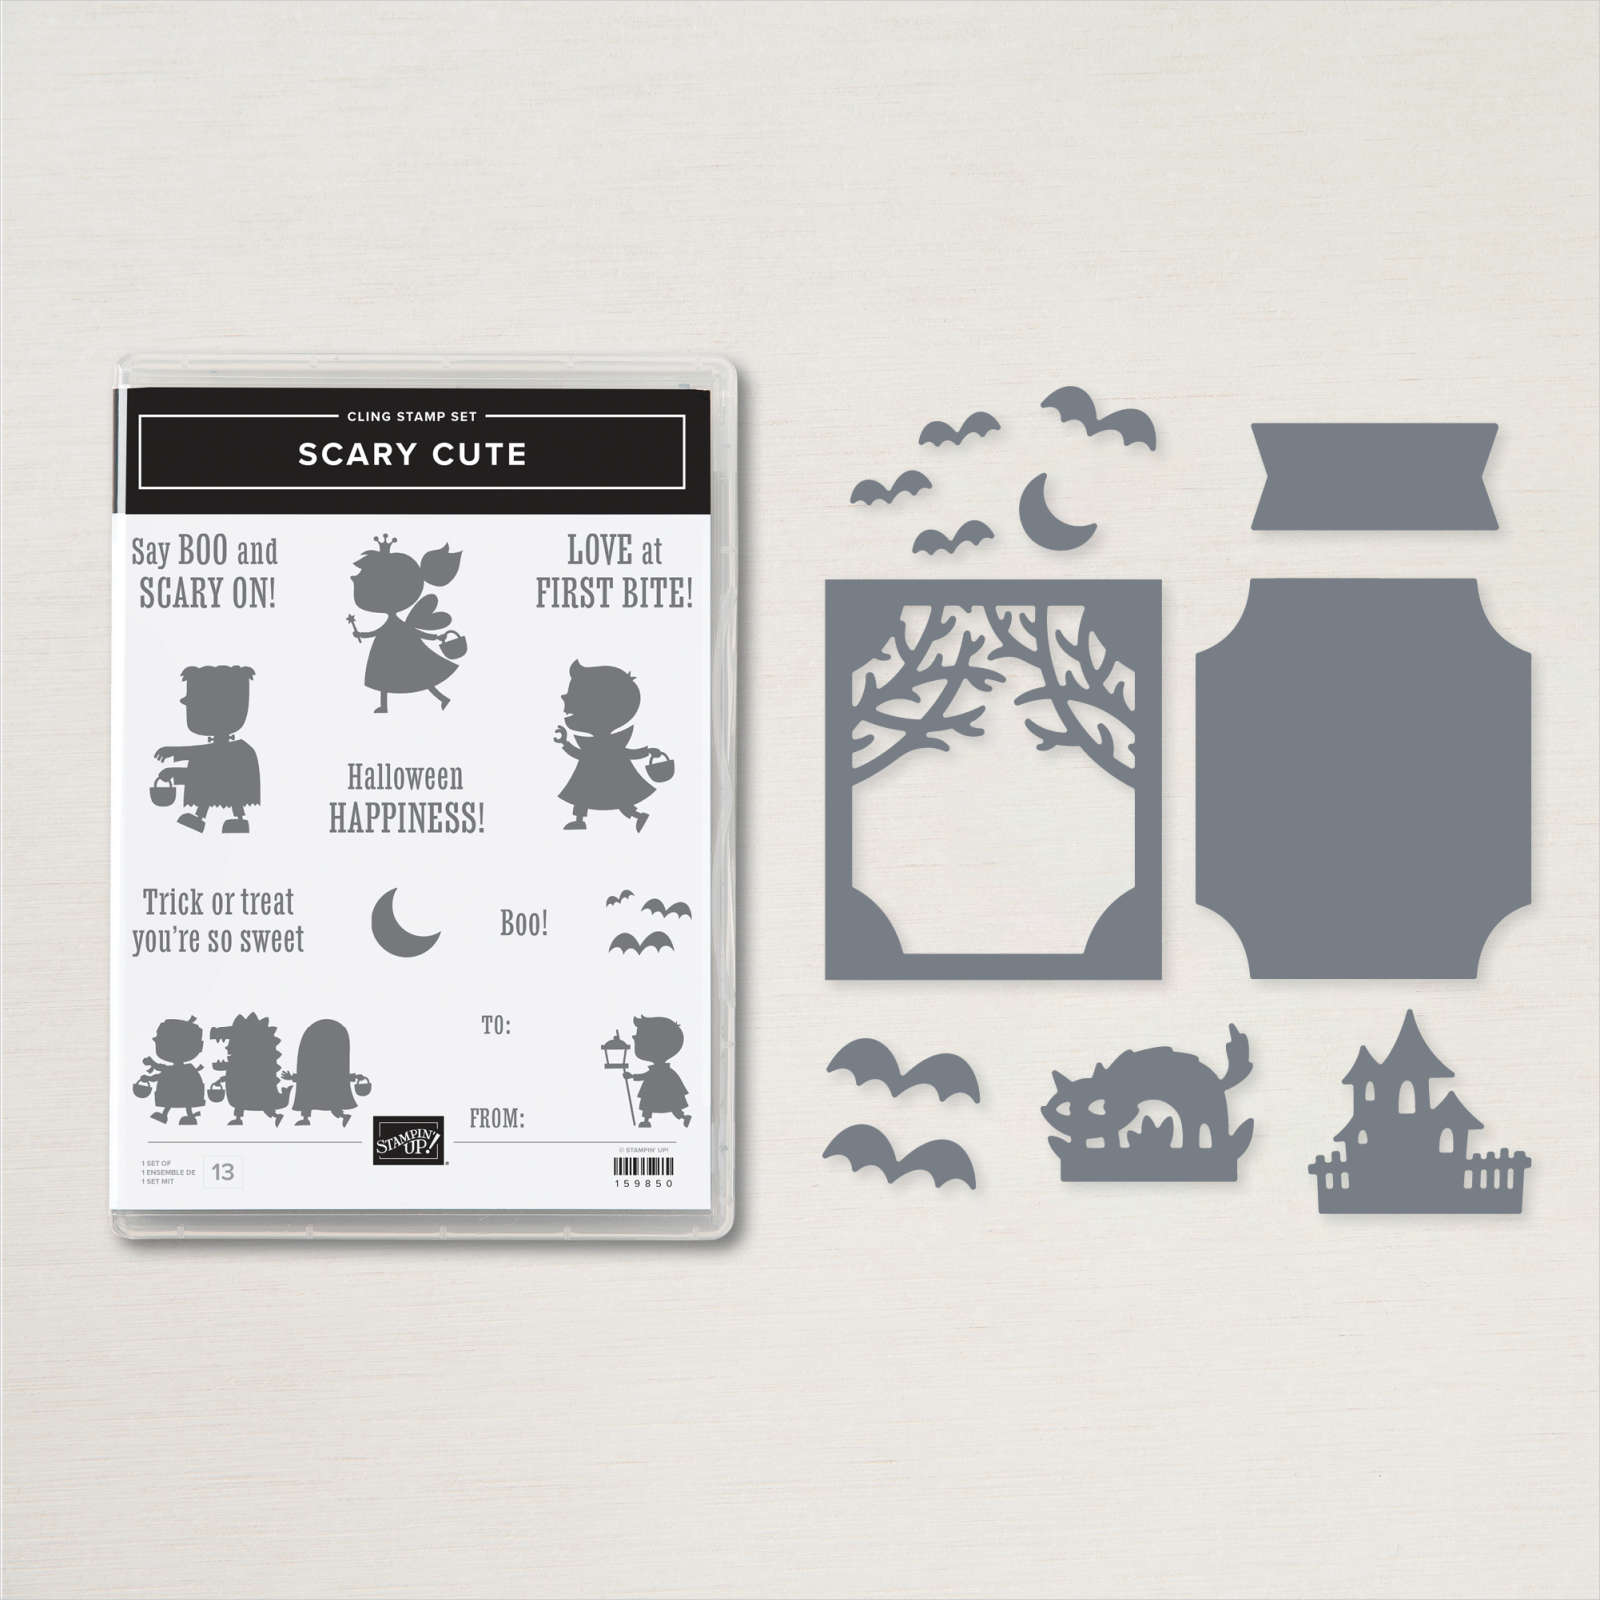
    She said she cased it from Tammy White.  The card base is all one piece.  It's called a side-step card and here is a link to a tutorial I wrote years ago.  She used the Scary Silhouette dies for the left side and the Bewitching stamp set for the hat & boots on the right.  

    The hat & boots are popped up on the steps with thin strips of window sheets.  There is white glimmer paper behind the die-cuts on the front.  I love the say she achieved the silhouette under the Black layer.  She did this by snipping the green die-cut in half on the sides and moving it down from the top and up from the bottom.  

    You can see this Scary Cute bundle here.  And it's in stock! 

    ~~~

    October Specials

    Starter Kit special! Get $155 in product for just $99

    click here

    ~~~

    Order online here

    Host code links: GDCBRHF7 or SVBHWRCY

    Get a free embellishment from me with online orders over $50!


    Earn free products with my loyalty rewards! 

    Click here to download yours and earn a $50 shopping spree!

    Leave a Reply

    Your email address will not be published. Required fields are marked *

  • EASY 5 at a time cards with Leaves of Holly


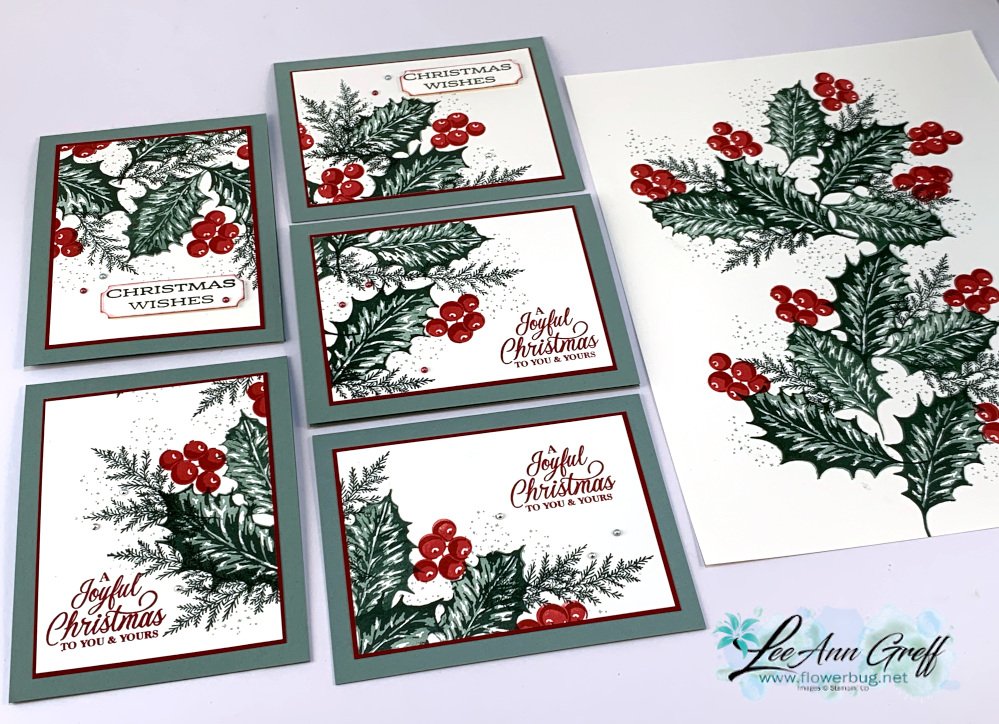
    I created a set of gorgeous Christmas cards on last week's FB Live video using my two templates.  

    I used the Leaves of Holly bundle seen here and these colors – Soft Succulent, Evening Evergreen, Real Red & Cherry Cobbler.  My Soft Succulent card bases are either 5 1/2" X 8 1/2" or 4 1/4" X 11".  

    I did use a few images from Merriest Moments stamp set as well.  

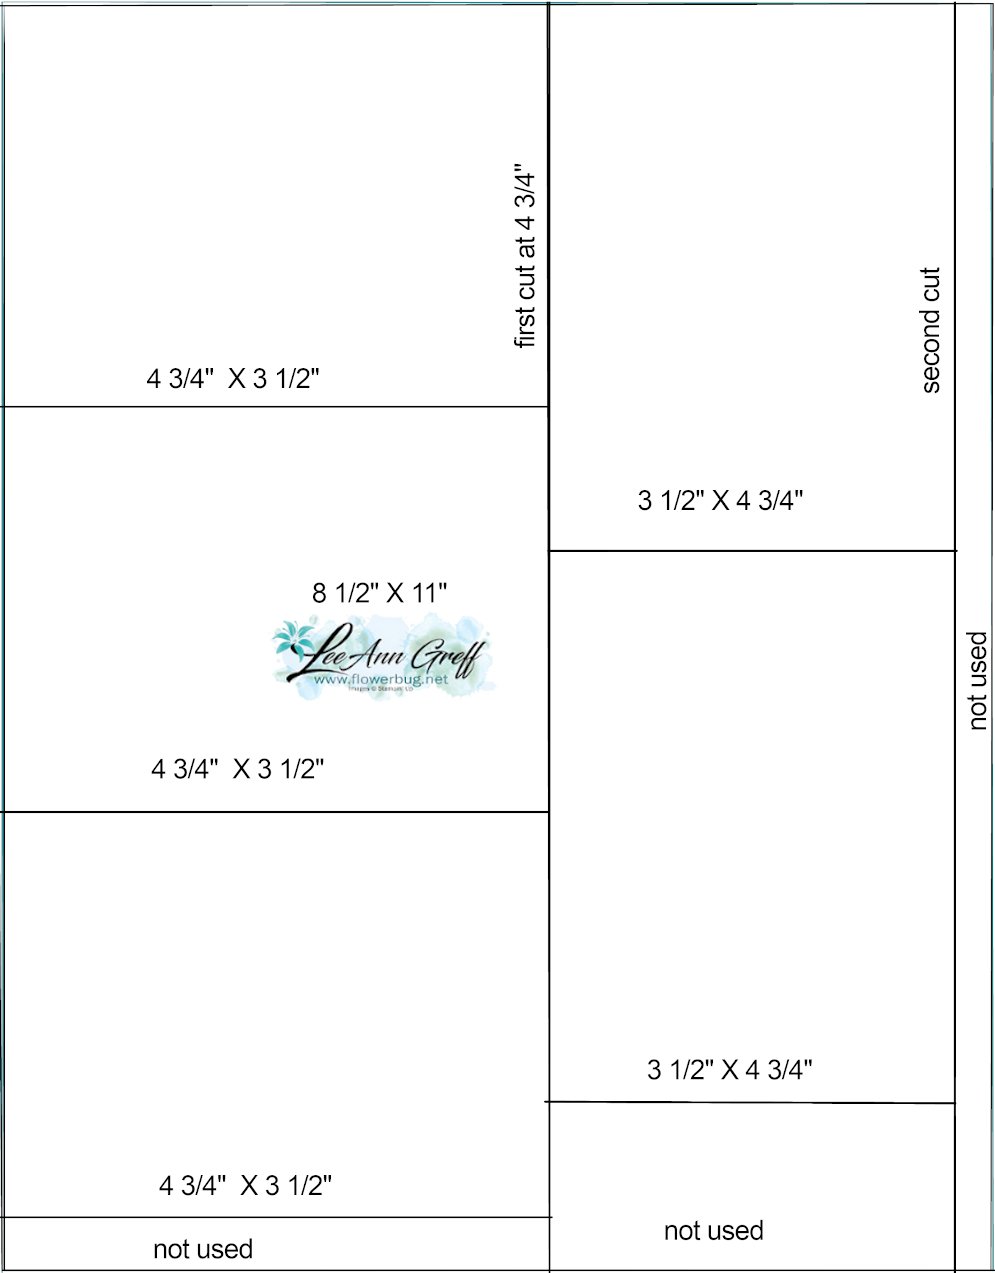
    Here is the main template that you stamp on.  It shows the cutting measurements that give you 5 pieces for your card fronts.  I frequently use these measurements for the inside of cards; especially when I make a bunch at a time.  Instead of just 4 layers you get 5 from one piece of 8 1/2" X 11" card stock. 

    Each piece measures 4 3/4" X 3 1/2" 

    In the photo below I stamped on the Basic White card stock (shown on the right) and then cut that into 5 pieces using the template above.  I stamped down the center mostly, leaving open areas in each section so I could stamp a greeting.  If it didn't work out (or I just want to), I add a die-cut or punched greeting. 

    To see how I did this the link for the video is here.


    Here's the other template for the colored layer under the stamped White piece.  In my case it's Cherry Cobbler. Each piece measures 4 7/8" X 3 5/8" giving you a narrow edge, but all 5 from one sheet with very little waste!  Love that! 

    What do you think?  Are you going to try the 5 at a time templates?  

    Click here or on the photo below to watch the video; it really is super easy. 

    ~~~

    October Specials

    Starter Kit special! Get $155 in product for just $99

    click here

    ~~~

    Order online here

    Host code links: GDCBRHF7 or SVBHWRCY

    Get a free embellishment from me with online orders over $50!


    Earn free products with my loyalty rewards! 

    Click here to download yours and earn a $50 shopping spree!

    Leave a Reply

    Your email address will not be published. Required fields are marked *


Notice: LeeAnn Greff, Independent Stampin’ Up! Demonstrator, Manager. The content of this website is my sole responsibility as an independent Stampin’ Up! demonstrator and the use of, and content of, the classes, services, or products offered on this website is not endorsed by Stampin’ Up! Copyright 2025