/


Latest Post

Christmas card swaps!


I love sharing the cards my Flowerbug's make for our Team swaps.  We had a great turnout for the October meeting and swap. 

Marilyn made this first card using the Welcoming Woods stamp set.  Her colors are Soft Succulent, White & Evening Evergreen.

Products used are all from the 2021-22 Annual Stampin' Up! catalog:

  • Wintry 3D embossing pair seen here
  • Hippo & Basic Border dies
  • Tidings of Christmas 6 X 6" DSP 
  • 2021-23 In Color Shimmer Vellum
  • Soft Succulent ribbon

And here's the inside. She punched a strip of Evening Evergreen CS with the Evergreen Border punch and then textured it with the Evergreen Forest 3D embossing folder! 

Next is a card made by Paula featuring the Tidings & Trimmings bundle in the Annual catalog.  

Her colors include Real Red, Evening Evergreen & White. The star is cut from the Be Dazzling specialty paper in the previous Sale-a-Bration catalog. 

I love how she wove the ribbon through the scalloped openings in the die-cut.  This die is from the Scalloped Contour dies seen here. 

~~~

Next is a pretty card made by Mary featuring the Evergreen Elegance stamp set; also in the Annual Catalog.  

It's a fun fold card where you fold back the front flap of the card.  

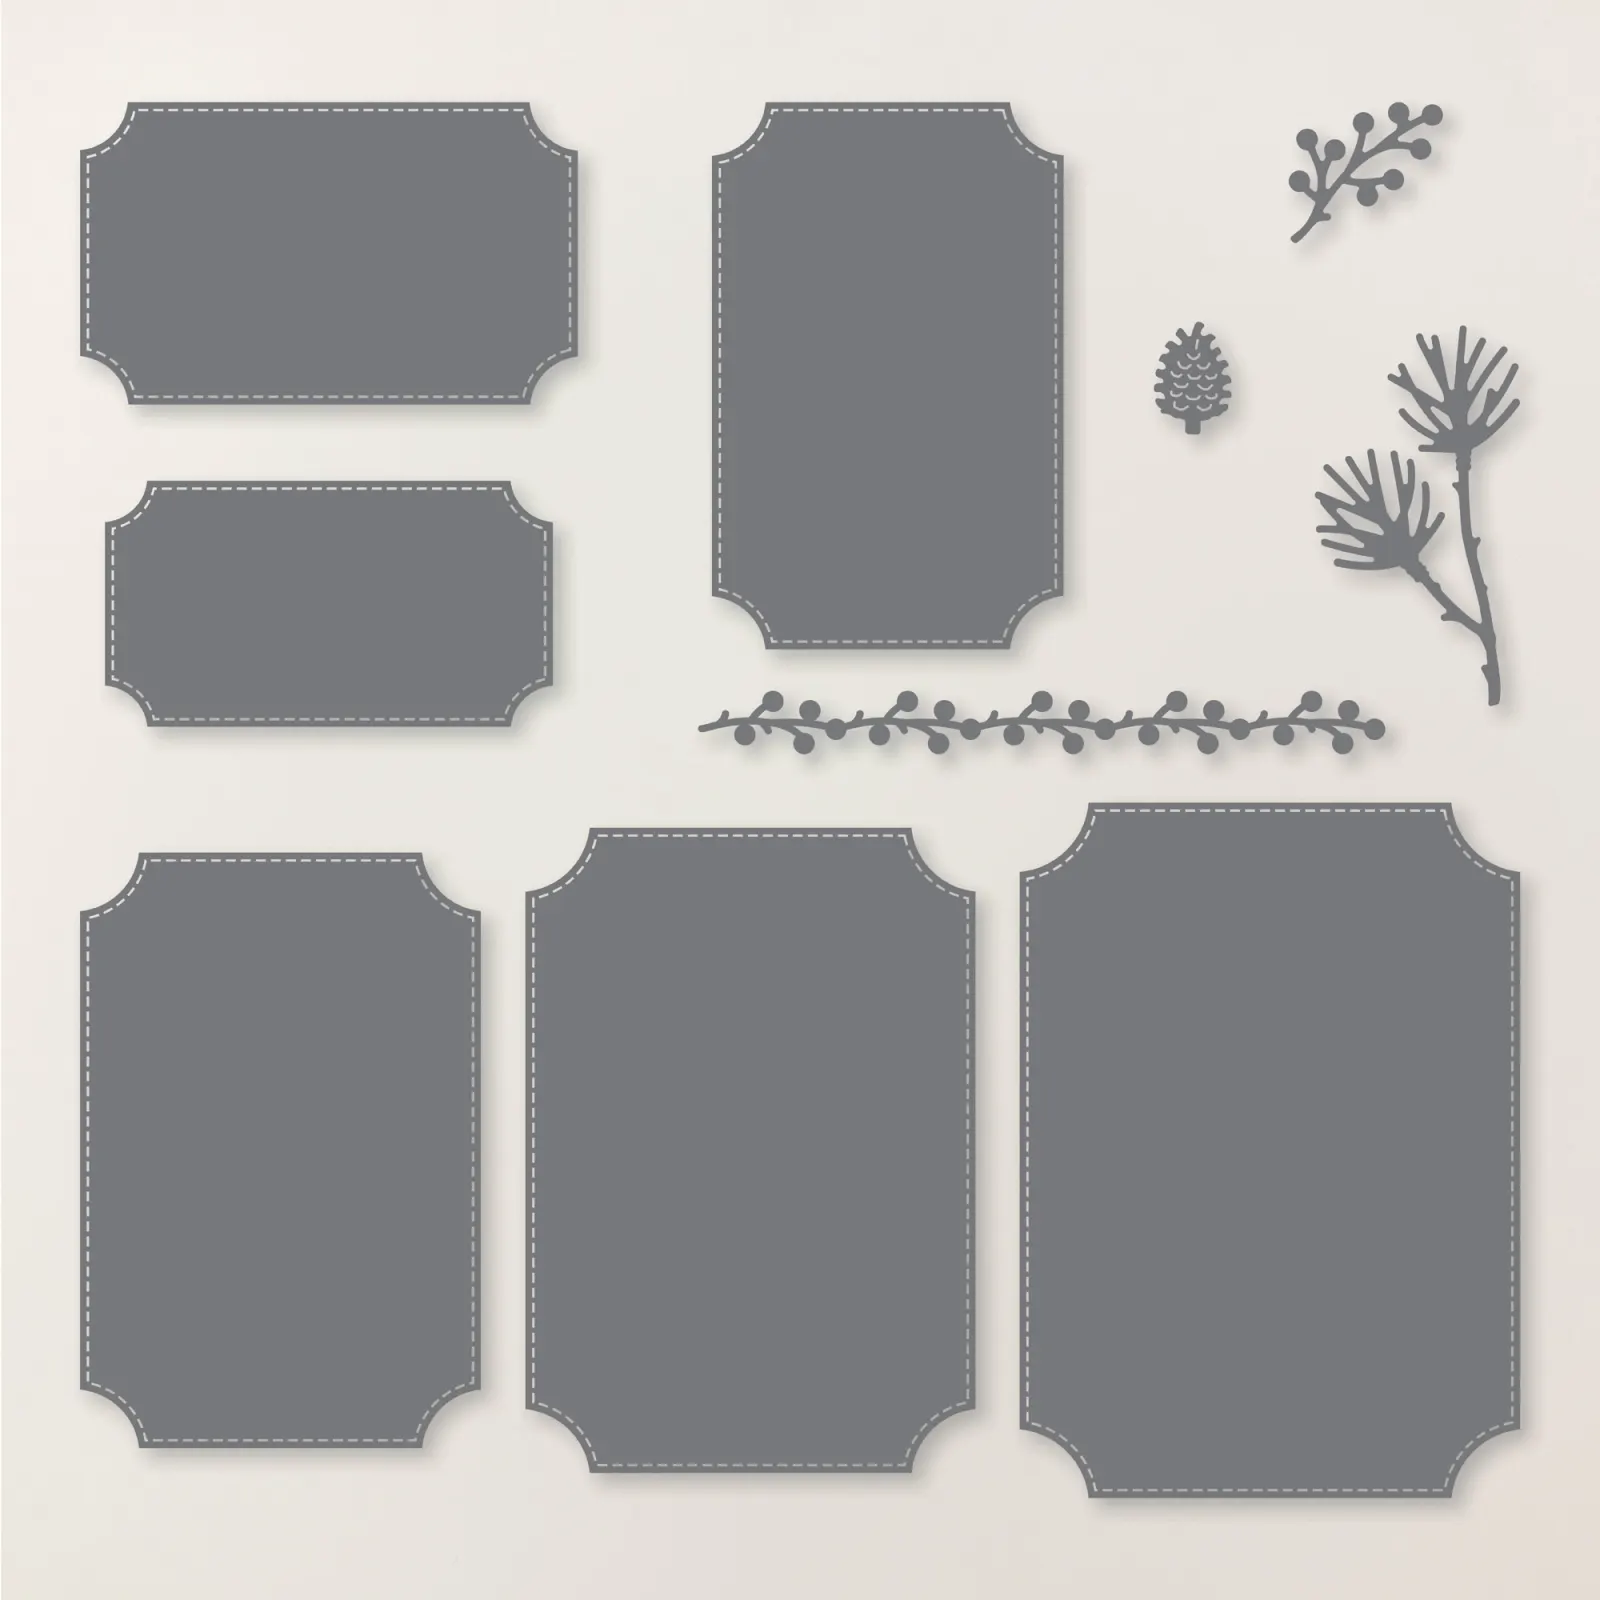
The designer paper is also the Tidings of Christmas and that nice large White die-cut is from the Seasonal Labels dies seen here.  They coordinate with the wonderful Christmas Season stamp set. 

~~~

October Specials

Host code: EXBDBRGY

*click here to order

Get a free package of Gold & Rose Gold Metallic specialty paper from me with a $50 online order in October! 

All online orders will receive my October Gingerbread & Peppermint PDF tutorial free! 


All Posts

  • Lovely Blossoms card kit to go or PDF tutorial; reserve yours now!


    Here’s the second card kit I created for February. I’m showcasing the Lovely Blossoms designer paper with these pretty cards:

    4 of the 5 layouts are fun folds. Each one shows you a special way to use this pretty designer paper. With it’s pretty color combinations they’re sure winners!

    You can choose from the pre-cut kit to go or the PDF tutorial. Both include the exclusive ‘how to’ video link.

    The pre-cut kit includes the 10 pre-cut cards, a half package (6″ X 12″) of the designer paper, a share of Moody dots and Secret Sea ribbon. It also includes the PDF tutorial with exclusive, private video link. Everything is cut for you except the designer paper in your kit. It’s $31 and can be reserved here. You’ll receive the tutorial immediately in an email. The kit will ship out at the end of the month, barring any supply issues.

    The PDF tutorial is just $16 and can be purchased here. The tutorial will be emailed to you immediately after purchase.

    I have two more NEW kits to go added this month. Save on shipping costs and grab more than one. See them all here.

    ~~~

    February Specials

    Product of the Month is the new Painted Illusions 12 X 12″ designer paper

    Get the NEW Stampin’ Positioner FREE when you choose the Starter Kit in February! Click here

    Bonus Days – Redeem your coupons in February!

    February’s PDF of the Month!

    Two NEW kits just released here:

    Check out the Last Chance List; new items are added and available

    while supplies last

    Leave a Reply

    Your email address will not be published. Required fields are marked *

  • Nature Walk card kit to go or choose the PDF tutorial option. Both include the exclusive video!


    I had to feature the Nature Walk designer paper for a card kit & tutorial. It’s just gorgeous with deep, rich prints.

    I paired it with the new Covered in Flowers Accents from the Spring catalog, the retiring butterflies and White Baker’s Twine. See those pretty floral & botanical die-cuts on the cards? That’s the Flower Accents! They come in a large single sheet of thick pre-cut pieces. They’re white but can be colored or textured. They were so fun to use on these cards!

    3 of the 5 designs are fun fold layouts. The kit & tutorial include 2 of each. You can choose from the PDF tutorial for $16 or the pre-cut card kit which includes up to $20 in Stampin’ Up! product for just $31.

    Everything is cut for you in this kit except for your new 1/2 package of the designer paper. You will need your own greeting images, inks, adhesives and paper trimmer.

    Reserve your kit here. Purchase the PDF tutorial here. It includes step by step directions, photos, a supply list and measurements.

    The tutorial with exclusive video link is sent via email immediately after purchase. The kit is sent at the end of February.

    See all of my kits here! There are TWO more added to the Shop this month!

    ~~~

    February Specials

    Product of the Month is the new Painted Illusions 12 X 12″ designer paper

    Get the NEW Stampin’ Positioner FREE when you choose the Starter Kit in February! Click here

    Bonus Days – Redeem your coupons in February!

    February’s PDF of the Month!

    Two NEW kits just released here:

    Check out the Last Chance List; new items are added and available

    while supplies last

    Leave a Reply

    Your email address will not be published. Required fields are marked *

  • Neat fun fold card 3 ways! With free tutorial & video


    We made this special card at my January card clubs. They could choose between 3 colors and themes too!

    I featured the Addressed to You stamp set for all three cards. See the cute ovals & rectangle with the ‘filled in’ images on the right? Those are all part of this unique stamp set! See it here.

    I used the retiring Textured Notes dies seen here. They’re the stitched edge rectangle dies used twice on this card. They are on the last chance list right now and reduced in price too!

    This card opens with a type of flip/flap feel. Here’s how we cut off the tabs on the card base. Once you score your card you’ll make a pencil mark from the top and bottom at 1″. Then trim off the corners.

    My colors include Pool Party, White and either Pretty in Pink, Fresh Freesia or Peach Pie.

    I created a free project sheet for this card with measurements, supplies and step by step directions. Click here to print or download it.

    More details:

    • I used the images that finished the lined oval & rectangle to decorate the inside ‘left’ edge on the cards.
    • We used Blends markers to color in the small images.
    • The DSP is the Beach Boardwalk designer paper for the left edge.
    • The greetings are from the stamp set called ‘The Right Words’ seen here. It’s one of my favorite greeting sets.

    I was in the middle of the video tutorial for this card but the video failed right before I started the project. And I made my last packet. So I do not have a video for it. But hopefully the project sheet above helps you out.

    ~~~

    February Specials

    Product of the Month is the new Painted Illusions 12 X 12″ designer paper

    Get the NEW Stampin’ Positioner FREE when you choose the Starter Kit in February! Click here

    Bonus Days – Redeem your coupons in February!

    February’s PDF of the Month!

    Two NEW kits just released here:

    Check out the Last Chance List; new items are added and available

    while supplies last

    Leave a Reply

    Your email address will not be published. Required fields are marked *


Notice: LeeAnn Greff, Independent Stampin’ Up! Demonstrator, Manager. The content of this website is my sole responsibility as an independent Stampin’ Up! demonstrator and the use of, and content of, the classes, services, or products offered on this website is not endorsed by Stampin’ Up! Copyright 2025