/


Latest Post

Choose to get Stampin’ Up! products at a discount… and help me achieve my goal


Many people love being a Stampin’ Up! customer. And that’s absolutely fine! But did you know you can be a Demonstrator without doing anything more than you do as a customer? Yes, it’s true!

  • Place orders whenever you wish
  • There’s no need to hold classes or events. There’s no need to run a business unless you want to.
  • When you’re done ordering you simply stop; it’s that simple!
  • Enjoy the discount on all future purchases!

I have a personal goal and need 4 more people to join in October. Can you help me out and start saving on each order you place?

Here’s a graphic with the details:
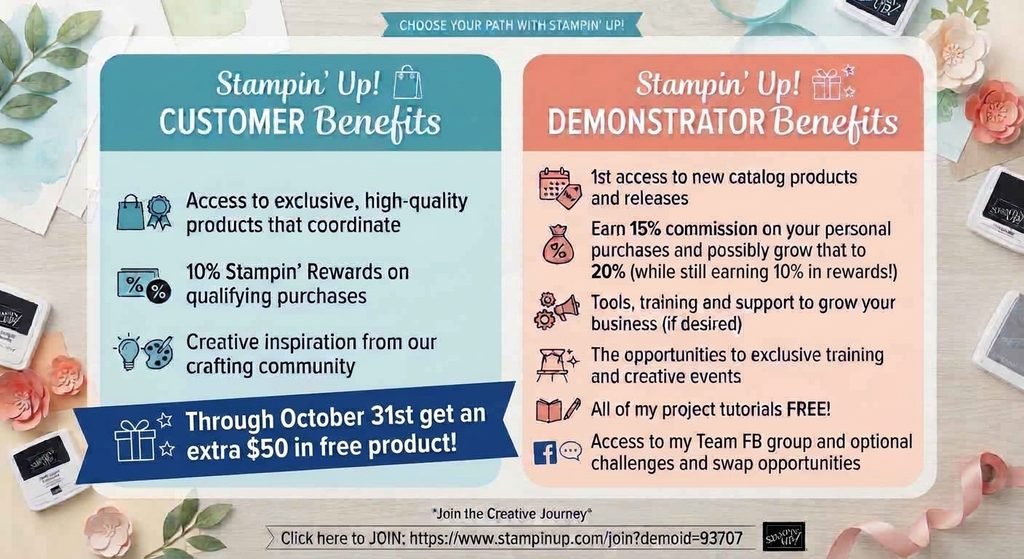
Right now, through October 31st you can grab the starter kit deal and get up to $75 in FREE product of your choice!

The kit costs $100 and you’ll receive a coupon for your starter kit purchase of $125 or less. Then you’ll receive an additional $50 in free product rewards! Click here to get started

Details:

  • You get 15% discount on all products and can increase that to 20%.
  • There’s a minimum purchase of $300 a quarter to stay active. 
  • But your first quarter is waived so you have until March 31st to get that $300 in and each order counts towards that first $300.
  • And, when you order Stampin’ Up! counts your purchase at full price but you only pay at the discounted price.  For example, order $100 and pay just $85.  Tax and shipping is added to the discounted price.
  • In addition to your 15-20% discount you still earn 10% in product rewards; just like customers!  *your customer earned rewards transfers to your demo account.
  • You can stop ordering as a demo at any time.  There’s no pressure to continue.  It’s totally up to you on how long you stay. 
  • Get ALL of my project tutorials in my Team newsletter each month!

I hope you’ll consider getting the Starter kit this month; you will not regret it!

All Posts

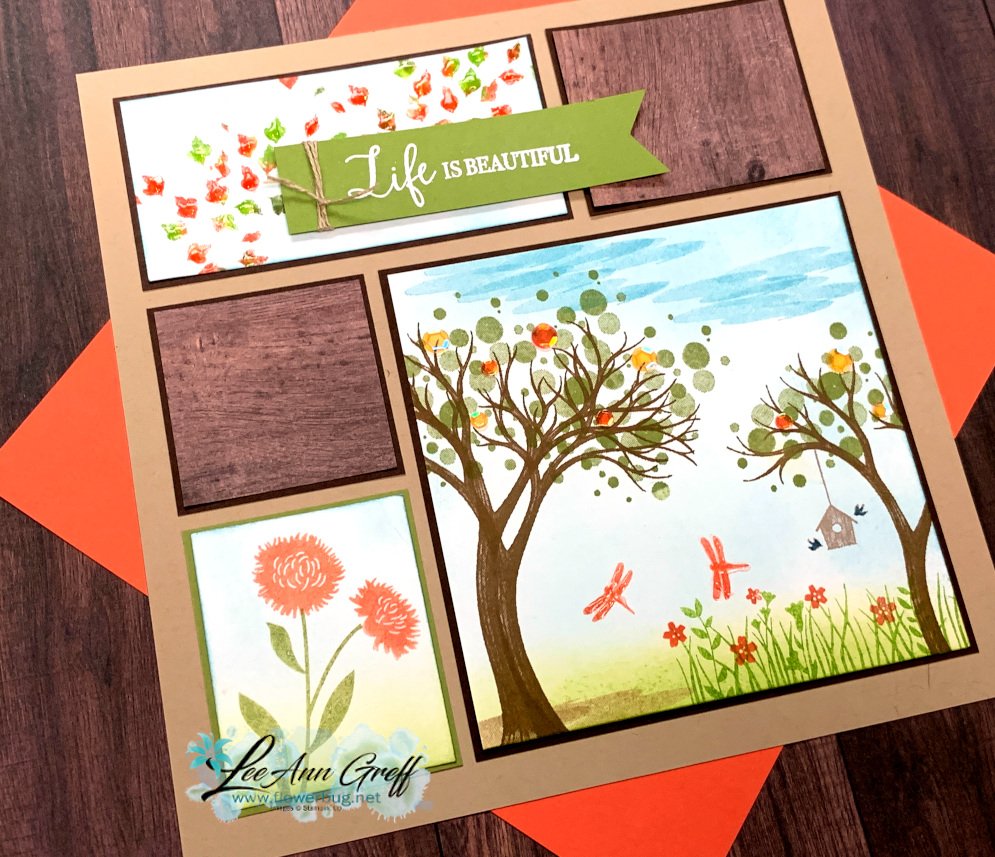
  • A pretty home decor framed sampler with Life is Beautiful!


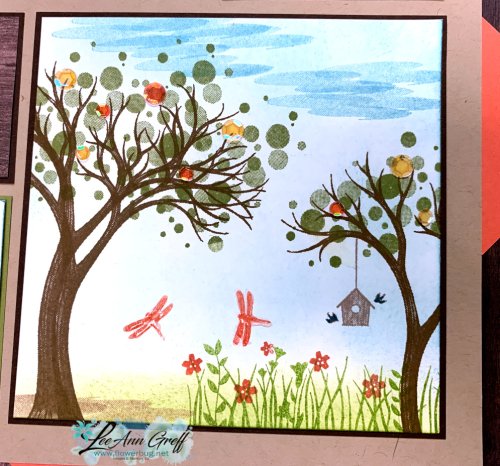
    I made this shadow box home decor piece with my Life is Beautiful stamp set.  It fits in a 12" shadow box frame. 


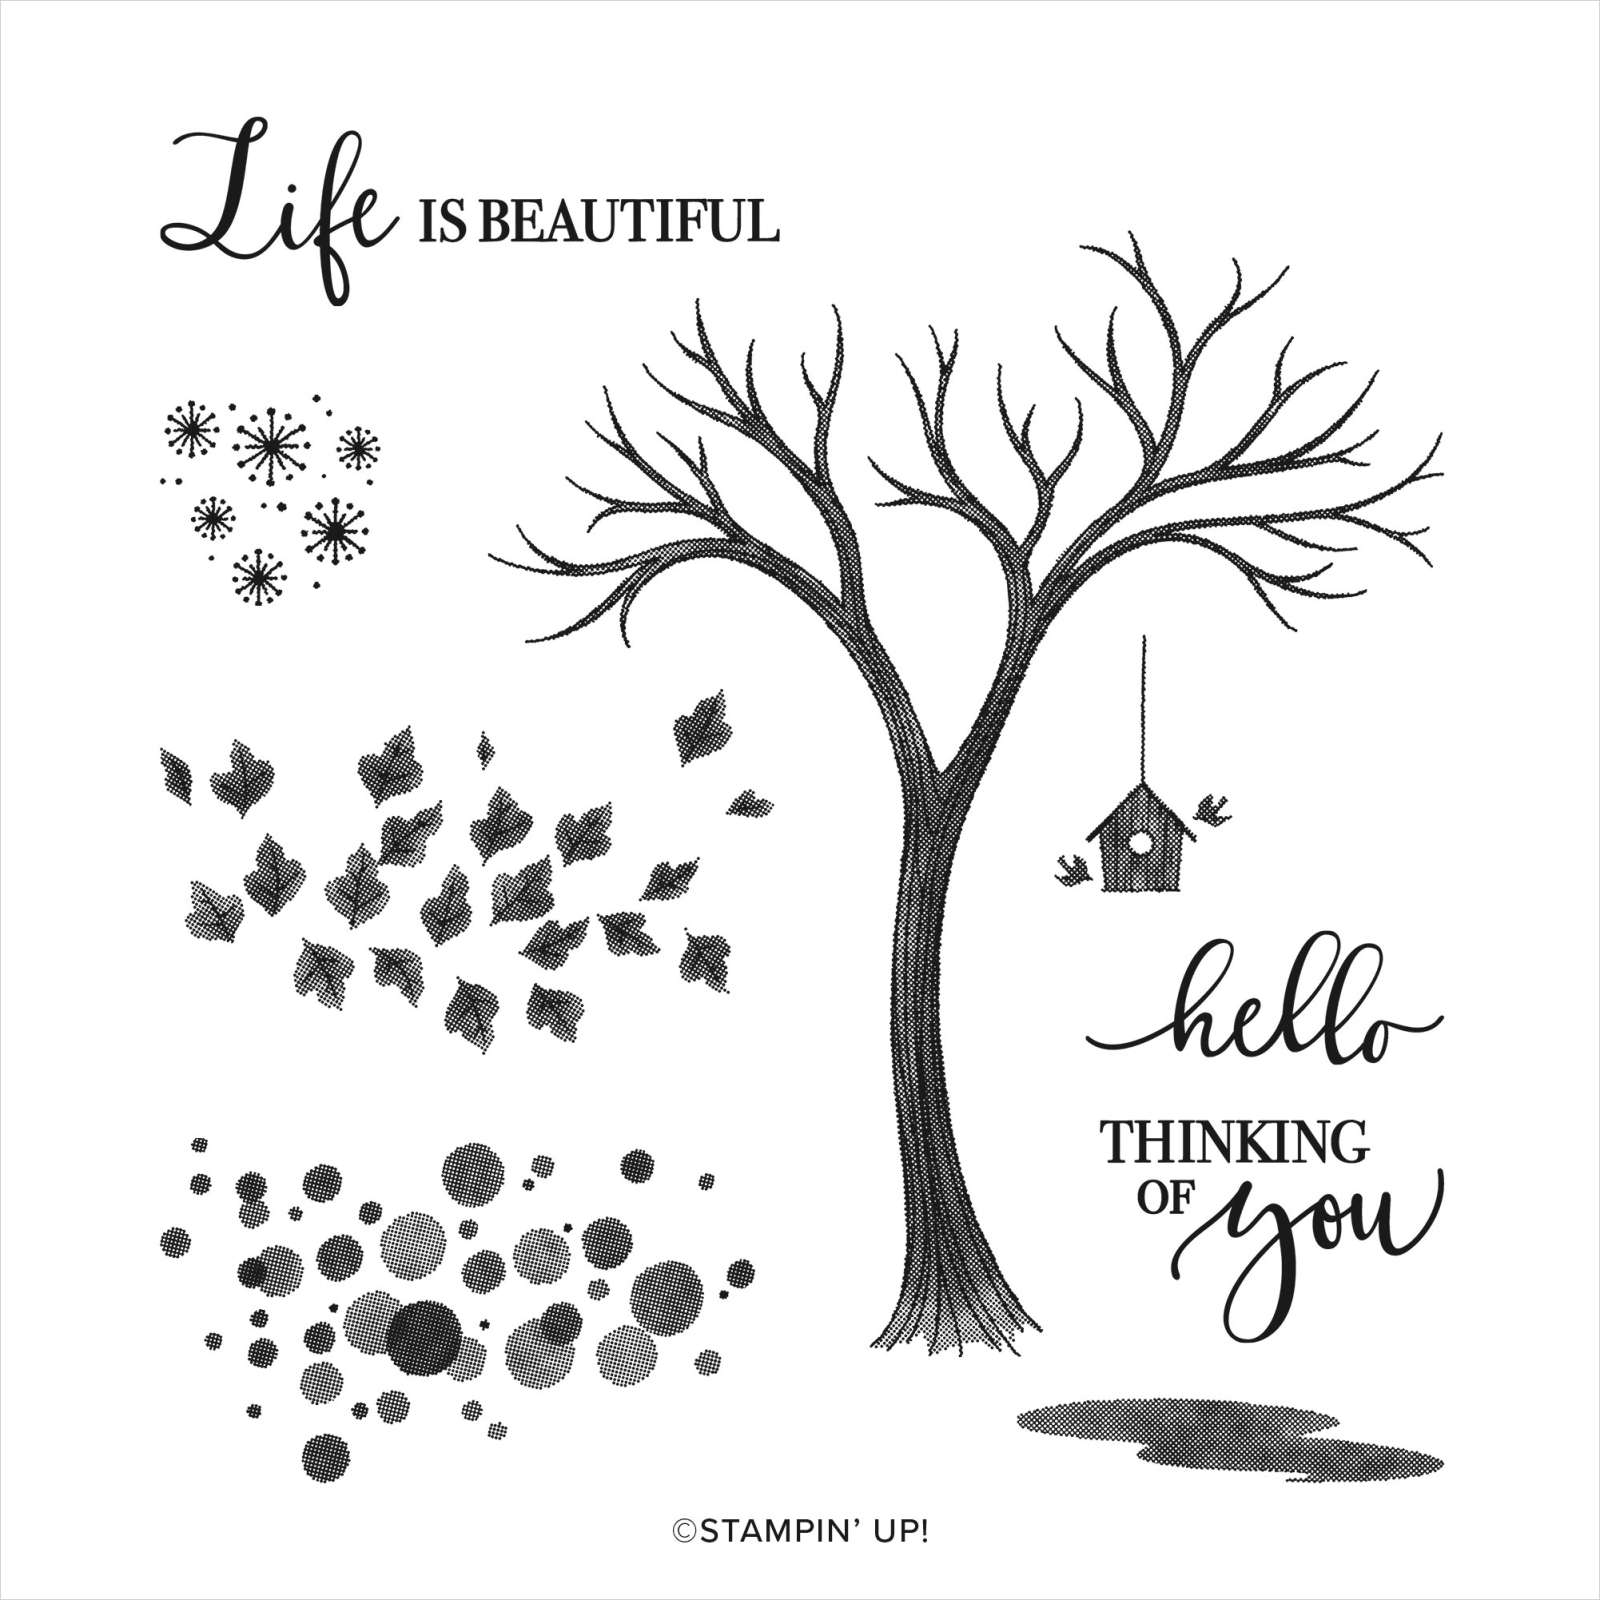
    Here's the Life is Beautiful stamp set I helped design as part of my Million Dollars in sales achievement with Stampin' Up!. You can order it here. 

    Two tips! 

    • The 'ground' image can also be clouds!  Cool, right?
    • And if you stamp the tree twice, you can achieve a 'thicker' trunk and fuller tree.  Just lower the image on the second stamping.  

    I did use the Field of Flowers stamp set for the grass, flowers & dragonflies.  I sponged the white card stock with Balmy Blue to remove the 'white' background.  I added Shimmery Crystal Effects on the dragonflies and leaves on the top greeting piece. 

    Colors used: Soft Suede, Granny Apple Green, Calypso Coral, Old Olive, Balmy Blue

    Products: In Good Taste Designer Paper, sponges, Linen Thread, Heat embossing in White, Shimmery Crystal Effects, Artistry Blooms adhesive backed sequins, 2 shades of Brown markers for bird house, 


    I hope you like it! Thanks for stopping in today!  
     

    ~~~

    Current Host code is 7VPEDARH

    Get a free package of new Iridescent Pearls in August with an online order over $55. 

    Order online here

     Get my Flowers for Every Season pdf tutorial free with all online order in August!

    It includes directions, photos and measurements for 12 cards!
    Redeem your $5 coupons now!  

    Leave a Reply

    Your email address will not be published. Required fields are marked *

  • Beautiful Autumn paired with Plaid Tidings


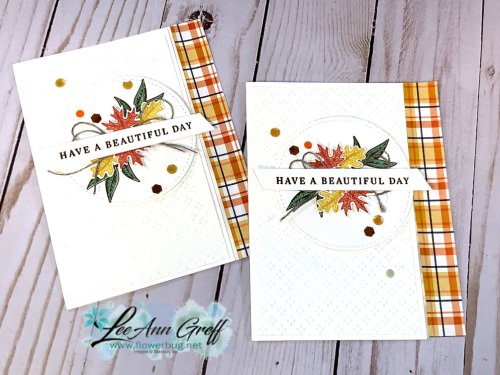
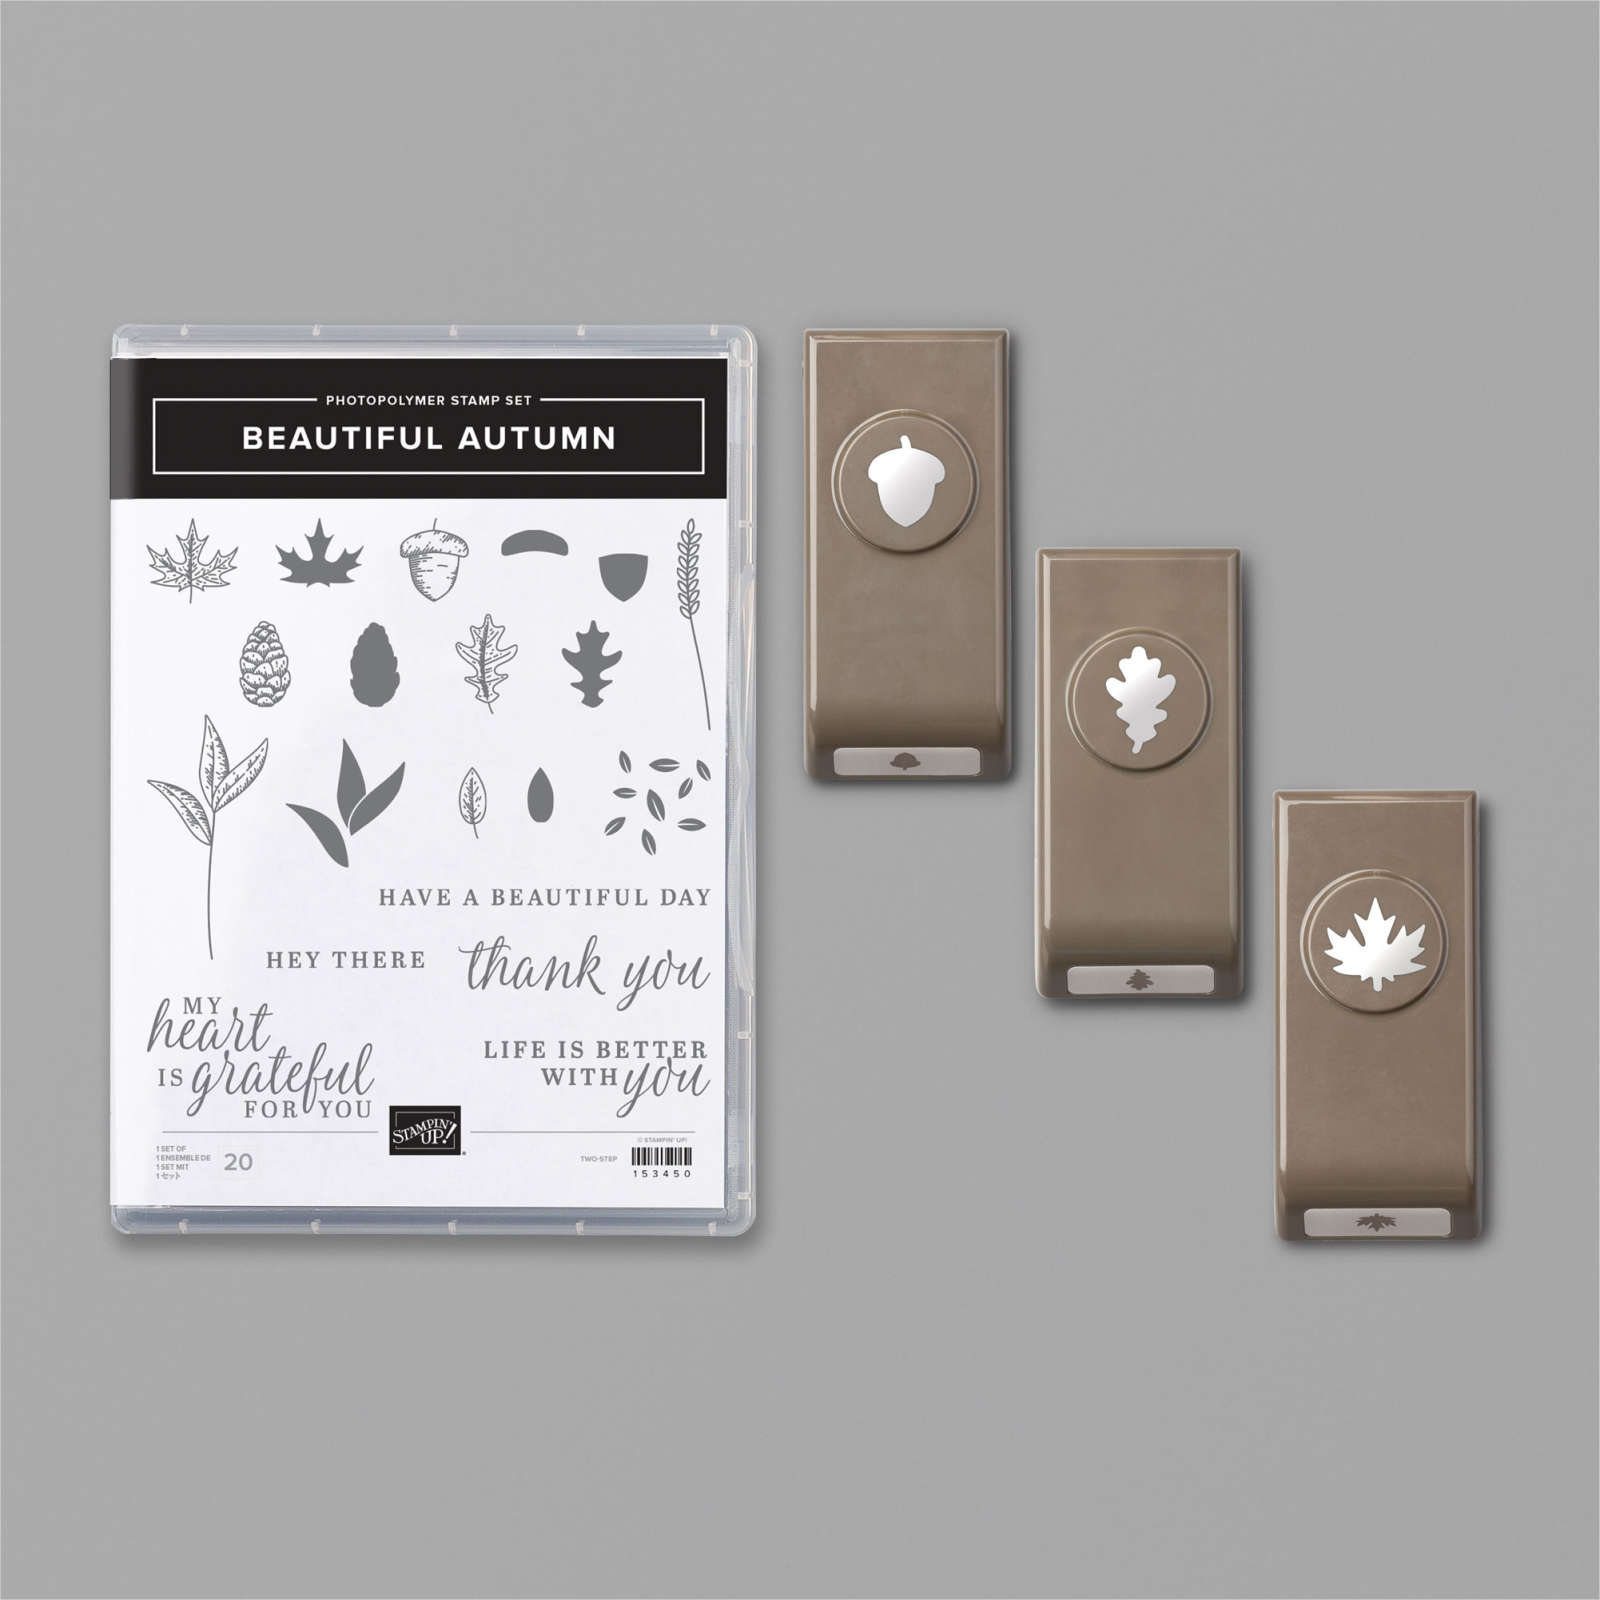
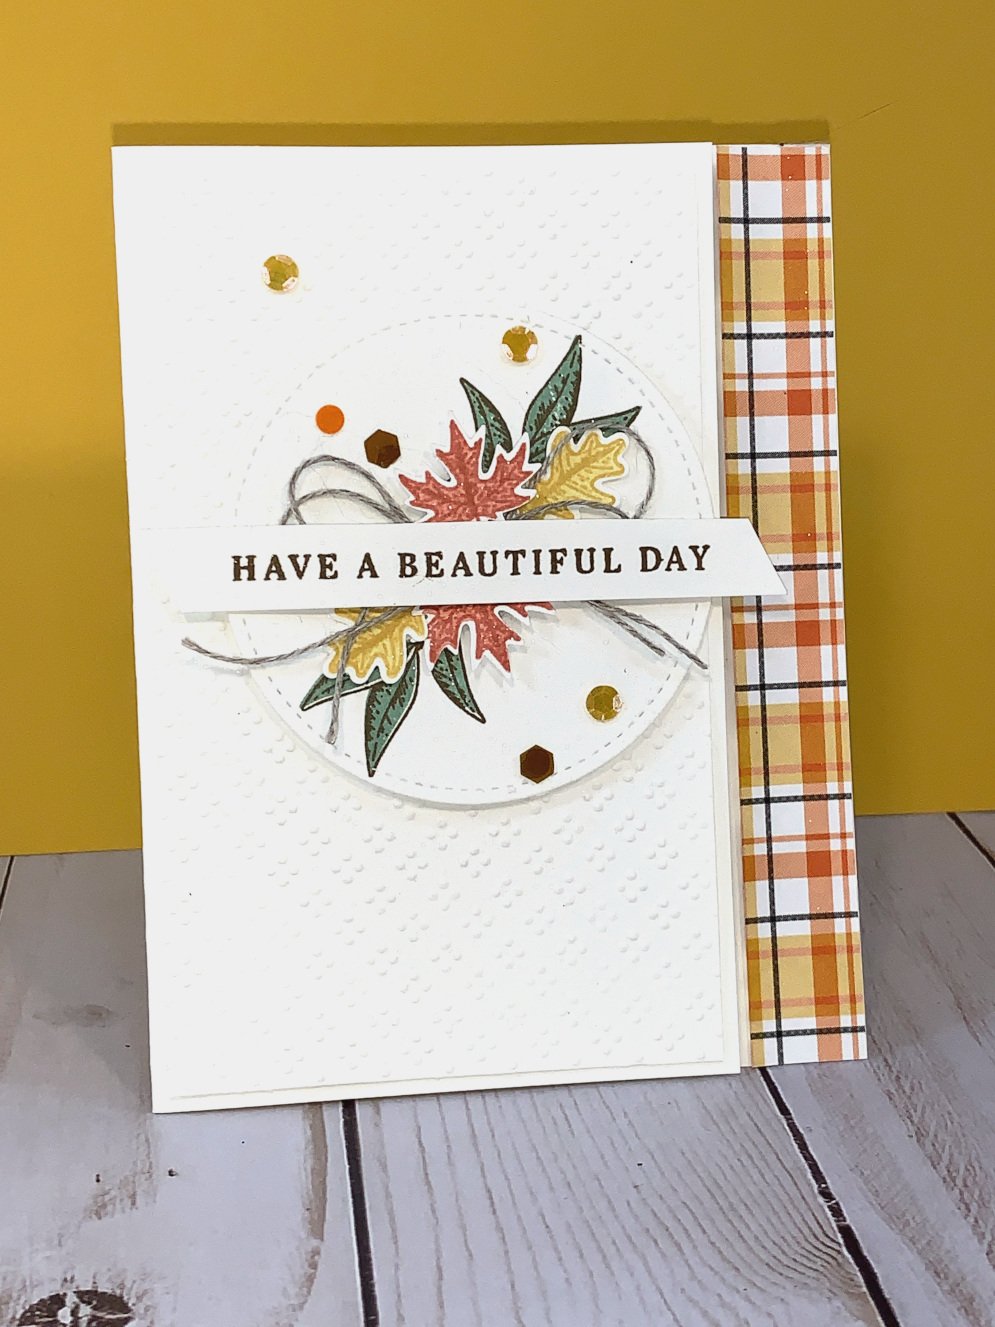
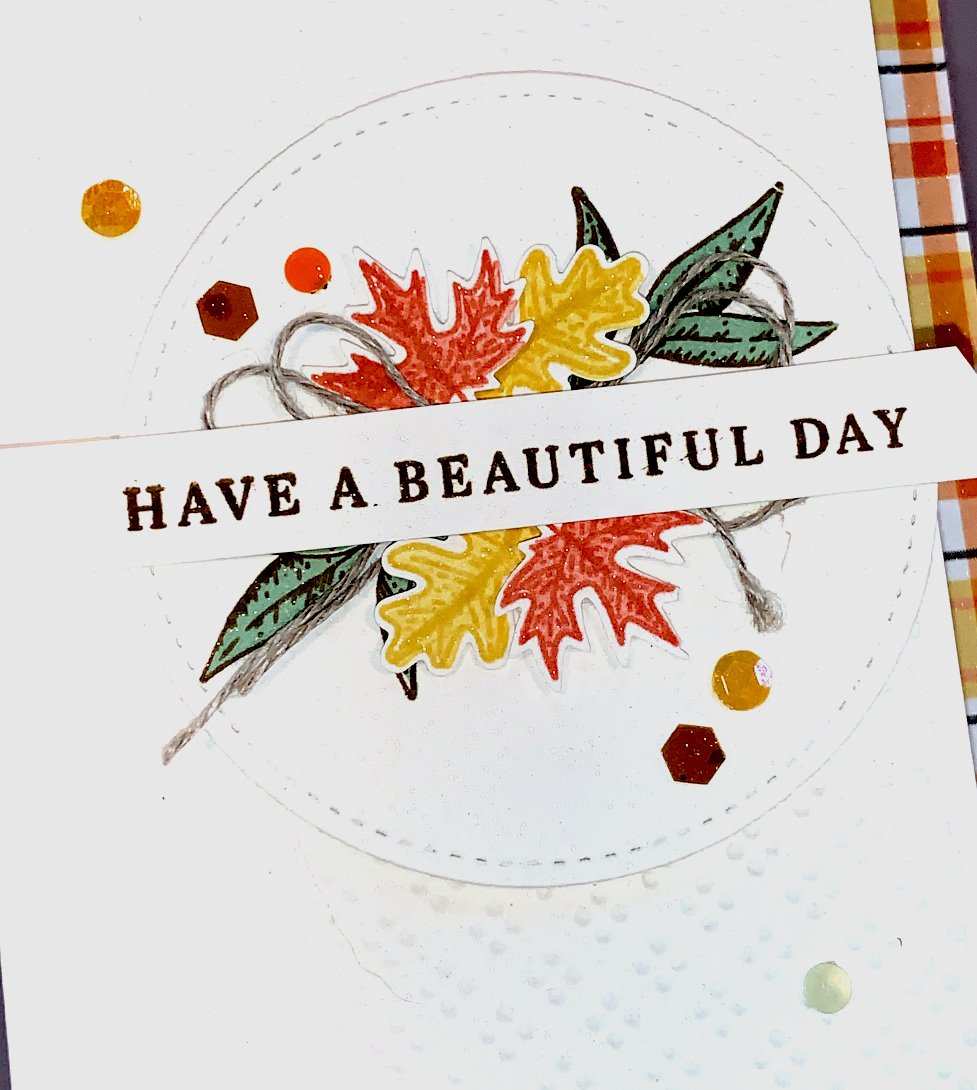
    There are lots of gorgeous Fall products in the 2020 Holiday catalog.  I paired a few of my favorites to create this card; the Beautiful Autumn punch bundle and Plaid Tidings 6 X 6" designer paper pack. 

    I trimmed off 3/4" from the front flap to reveal the strip of pretty Plaid Tidings designer paper.  I chose to use Bumblebee, Mint Macaron, Early Espresso and Terracotta Tile inks here.  

    The Beautiful Autumn bundle includes the stamp set and the three leaf punches; all for 10% off.  Click here to see it online. 

    I also used the Wrapped in Texture embossing folder for the front layer, which is 5 1/4" X 3". See them here. 

    Look at the detailed punched images here!   You might also notice the Sequins for Everything.  Love the variety of shapes and colors in these.  

    Here's a Facebook Live video where I shared three pretty fall cards using the Beautiful Autumn bundle.  Join me each Tuesday at 11 am  CT for my weekly Live videos here: https://bit.ly/FlowerbugFB

    ~~~

    Current Host code is QW7SUYVX

    Get a free package of new Iridescent Pearls in August with an online order over $55. 

    Order online here

     Get my Flowers for Every Season pdf tutorial free with all online order in August!


    It includes directions, photos and measurements for 12 cards!

    Redeem your $5 coupons now!  

    Leave a Reply

    Your email address will not be published. Required fields are marked *

  • Gather Together card with a cool punch trick!!


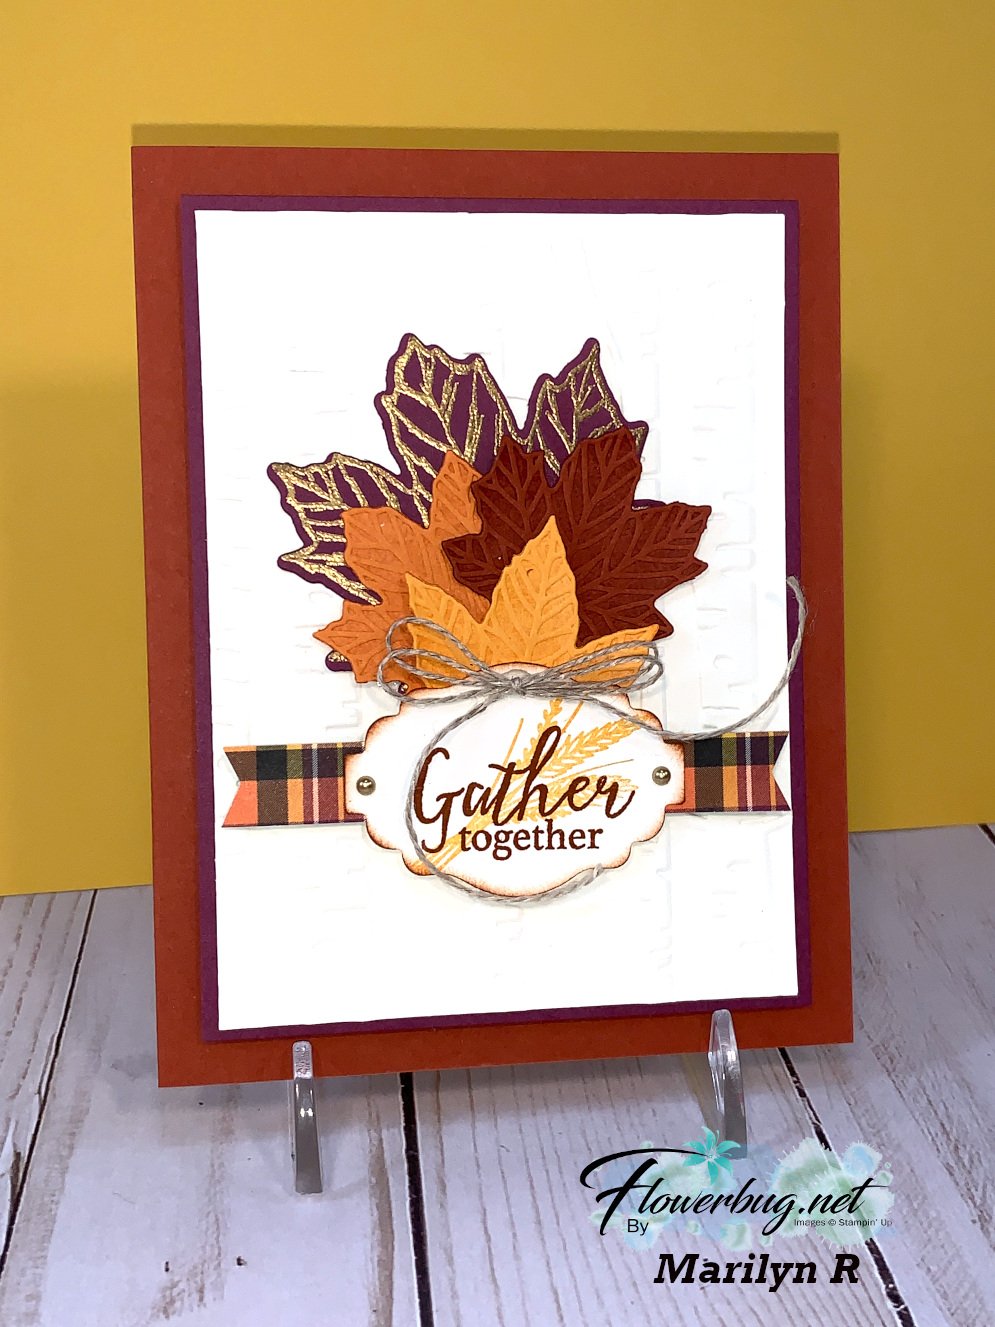
    Marilyn made this pretty card for our Team swap.  She used the Gather Together bundle in the 2020 Stampin' Up! Holiday catalog.  There are two really neat tricks you might not notice at first glance.  

    Can you spy the two special techniques here?  Keep reading and I'll share them below.

    Measurements:

    • Cajun Craze 5 1/2" X 8 1/2"
    • Very Vanilla 4 3/4" X 3 1/2"
    • Rich Razzleberry 5" X 3 3/4"
    • Plaid Tidings 1/2" X 3 3/4"

    Products Used:

    Okay, now I'll reveal her two tricks!  

    1. Can you see the changes in colors on the textured leaves?  The bottom three leaves were die-cut & embossed (done all at once!) and then spritzed with water.  The water changes the color on the leaves!  I cannot believe it's just water and no ink to get this effect.  Super cool!!
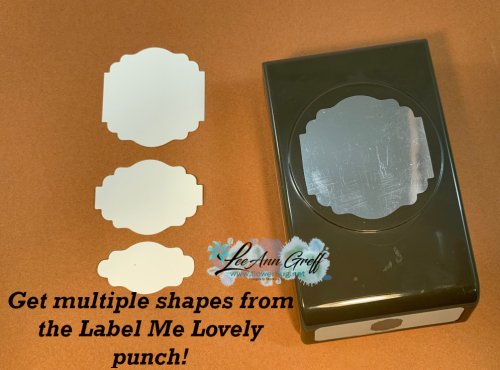
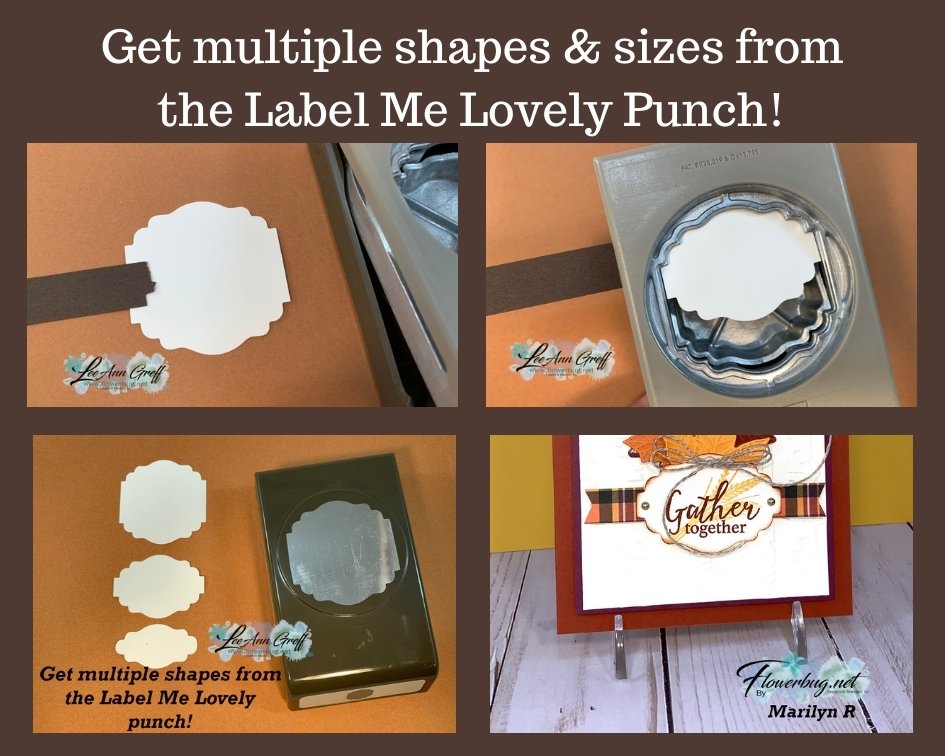
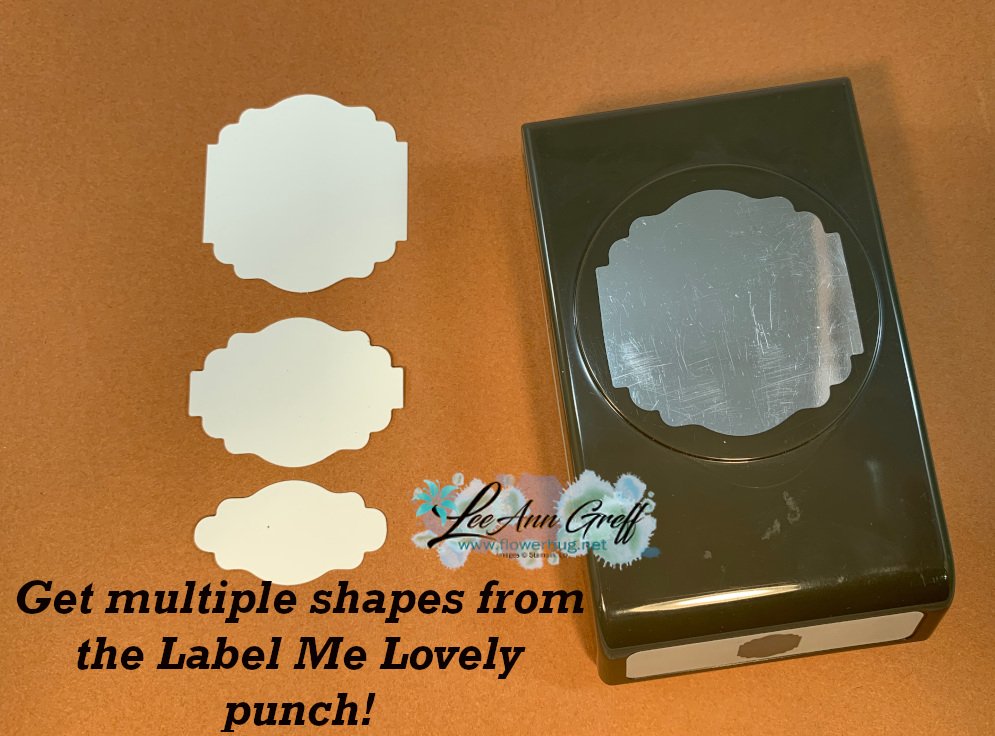
    2. Next is the greeting shape.  It's made with the Label me Lovely punch.  You can get multiple shapes from this punch.  Here's how:
    • Punch one piece out.  
    • Add a bit of adhesive to the end of a thin piece of card stock and adhere it to the punched piece. 
    • Insert the piece back into your punch and adjust it to get whatever size shape you want!  

    Here are three shapes I made with this punch.  Super neat and so versatile!  See the punch here. 

    ~~~

    Current Host code is QW7SUYVX

    Get a free package of new Iridescent Pearls in August with an online order over $55. 

    Order online here

     Get my Flowers for Every Season pdf tutorial free with all online order in August!


    It includes directions, photos and measurements for 12 cards!

    Redeem your $5 coupons now!  

    Leave a Reply

    Your email address will not be published. Required fields are marked *


Notice: LeeAnn Greff, Independent Stampin’ Up! Demonstrator, Manager. The content of this website is my sole responsibility as an independent Stampin’ Up! demonstrator and the use of, and content of, the classes, services, or products offered on this website is not endorsed by Stampin’ Up! Copyright 2025