/


Latest Post

Check out this ‘Tackle box’ with the Gone Fishing bundle! Amazing!!


Today I'm sharing the last projects Candace made with the Gone Fishing and Let's Go Fishing designer paper.  She was our Artist of the Month for June and created some incredible projects!  

I was blown away by this 'tackle box' full of candy.  She told me she made it up herself!  AMAZING!! 
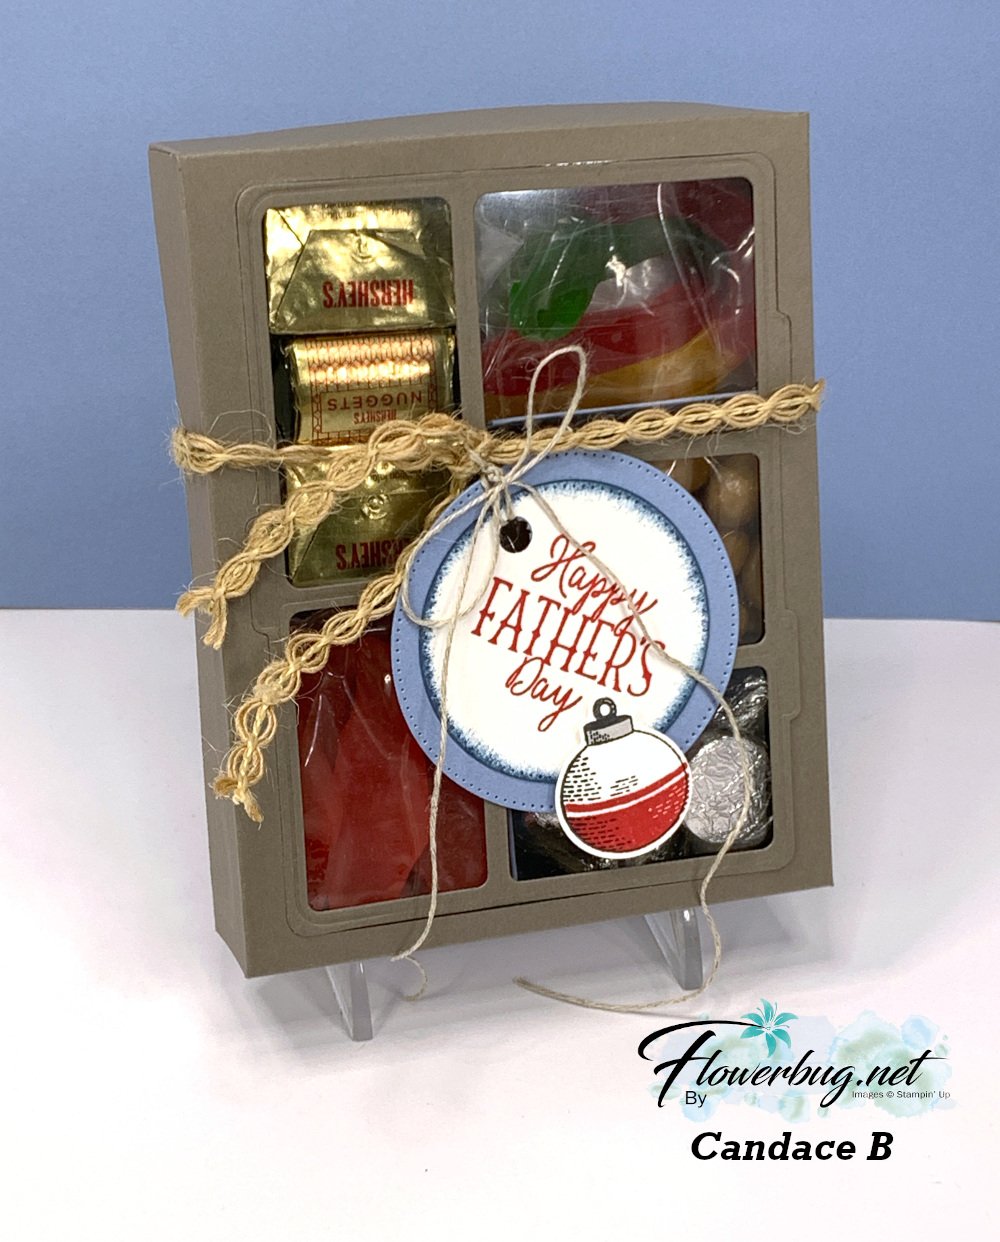
She added gummy fish & worms, kisses, candy 'rocks' and nuggets inside.  I believe she first scored her box front then used the Gone Fishing large die to cut the windows for the front panel. Scoring first would help you center the die. Then she added the window sheet to the underside.  The window sheet holds the die-cut frame and the box front in place. 

Measurements for the box: *corrected

  • top of box 6 1/4 X 7 1/2" score 1" on all sides
  • bottom of box 6 1/8" X 7 3/8" score at 1" on all sides
  • window sheet 4 1/8" X 5 1/4" 
  • left inside divider (two compartments) is 1 7/8" X 6 3/4" score at 2 3/4", 3 1/2" & 4 1/4" 
  • right inside divider (three compartments) is 2 1/8" X  8 1/4" scored at 2", 2 3/4", 3 1/2", 5 1/8", 5 7/8" & 6 5/8" 
  • inside bottom (under the two divided sections) 5 1/4" X 5 5/8" score at 1 7/8", 2 5/8" & 3 3/8"

To assemble this you'd add the long vertical divided piece first and then the two scored strips after that.  

I made a birthday version of this box. You can watch the video here.  

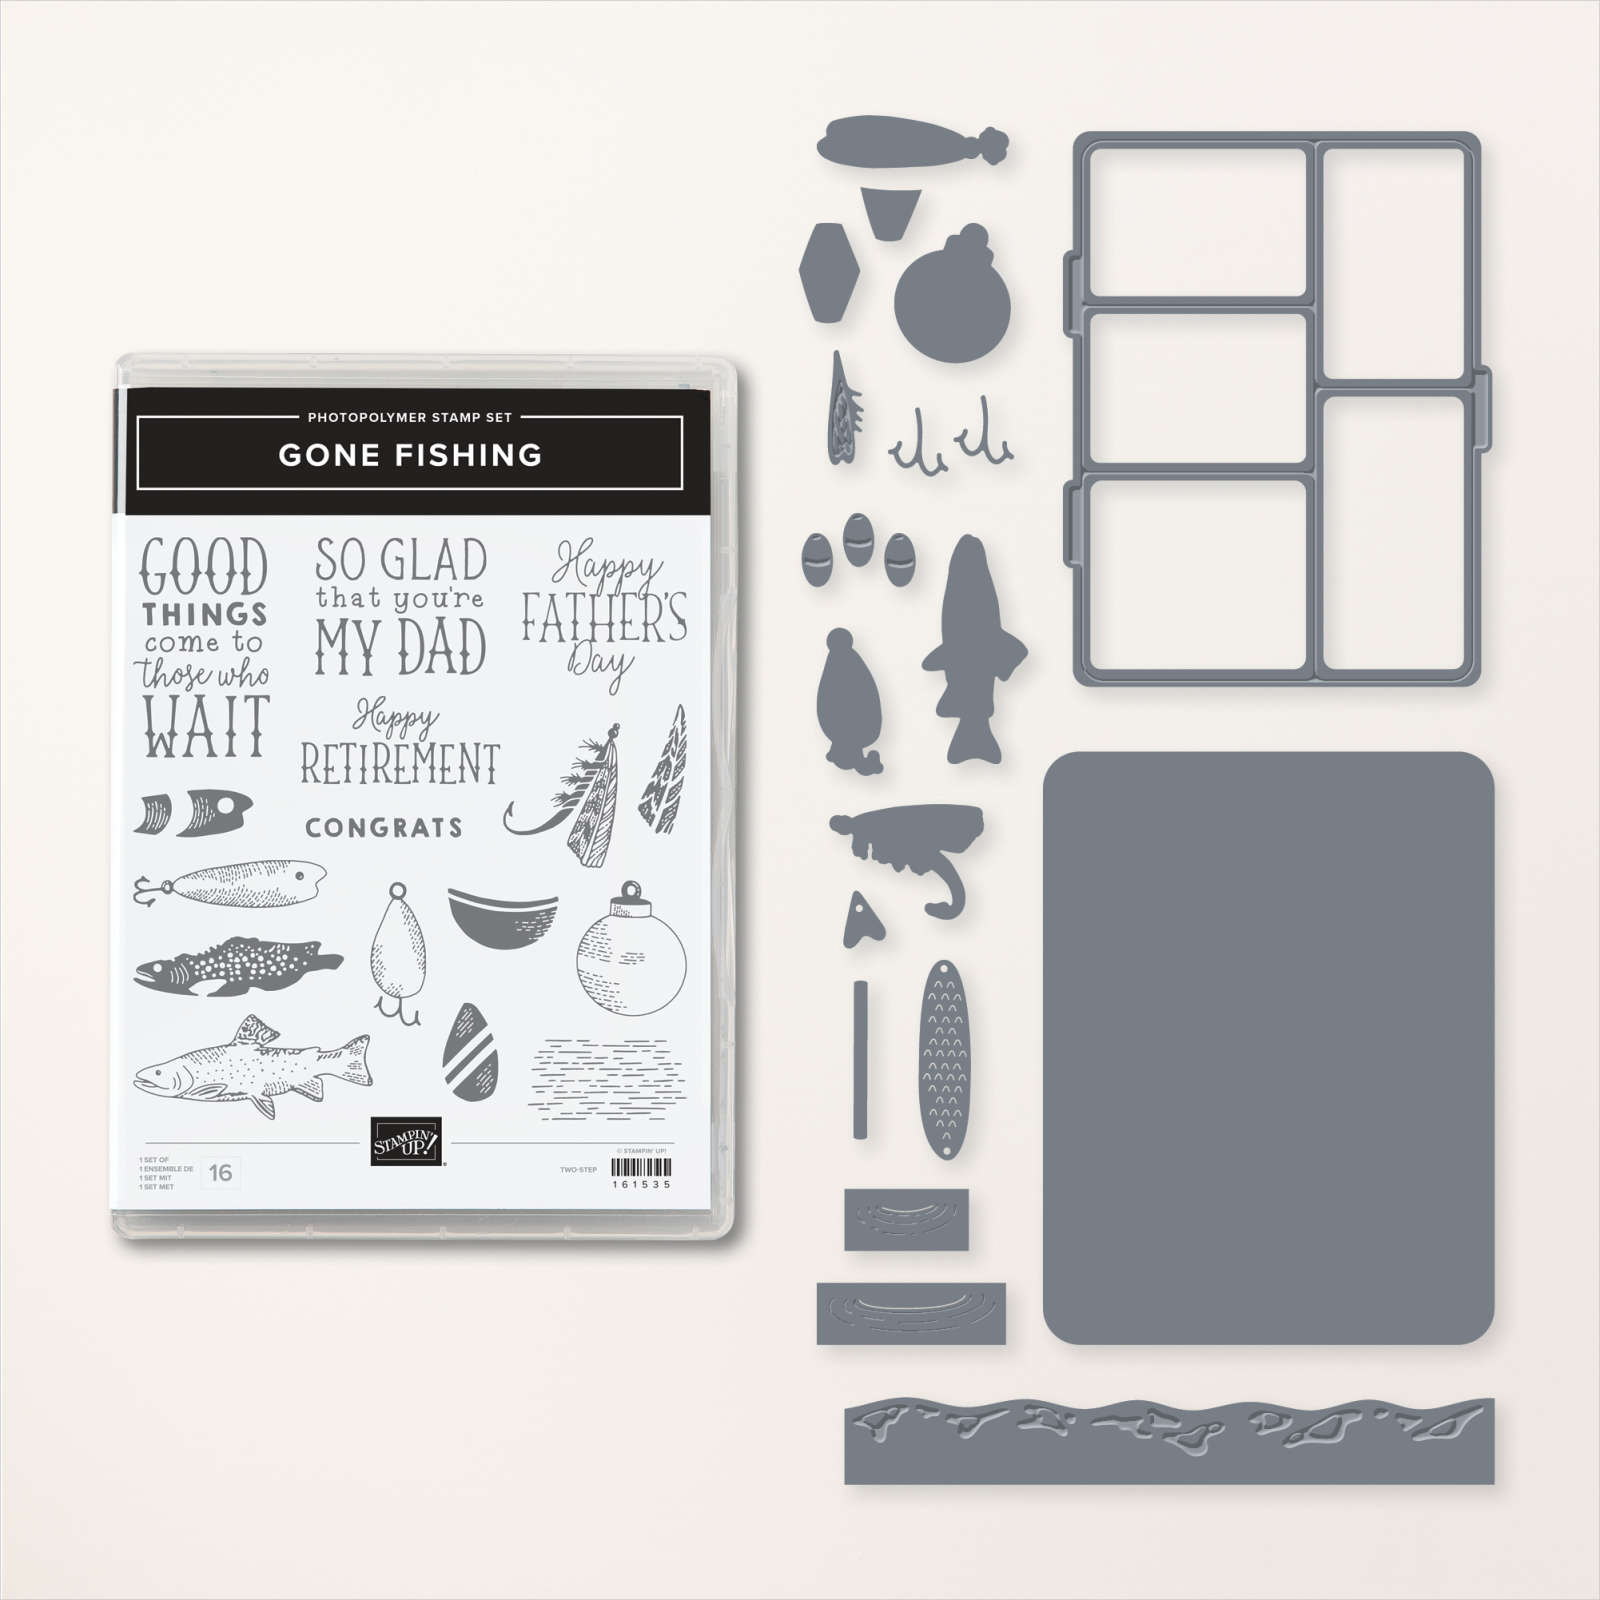
You can see the Gone Fishing bundle here. 
This last card is another fun fold; she made lots of them in her array of cards.  

It's a pocket card that could also include a gift card inside it. Be sure to note the rhinestone 'fish bubbles' on the sentiment.  


I love the wavy detail she added to the inside piece; it's from the Gone Fishing dies.

Measurements:

  • Misty Moonlight card base 5 1/2" X 8 1/2" scored at 2 3/4" & 6 3/4"
  • DSP 5 1/4" X 2 1/2" for front, bottom layer is 5 1/4" X 1"
  • Vanilla inside pull-out is 4 1/2" X 3 1/2"

And last but certainly not least is this fabulous shaker card:
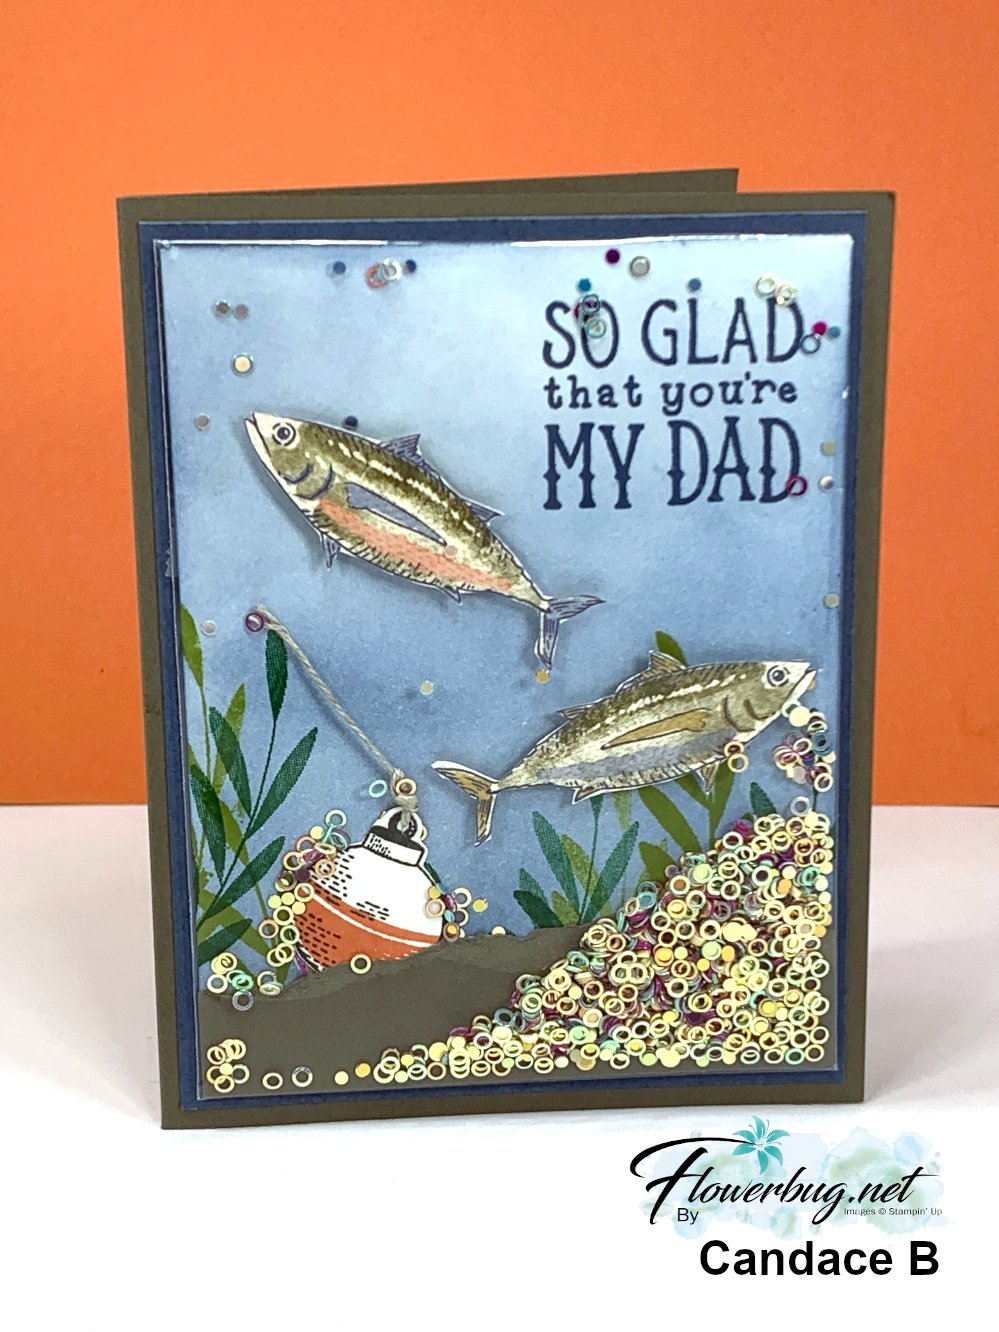

It's hard to tell but the colored and stamped panel is placed in one of our clear envelopes so she could add the new Iridescent shaker circles seen here. She added Boho Blue ink to the neutral card front using a Blending Brush, then stamped the greeting and leaves. She also fussy cut the fish from the Let's Go Fishing designer series paper and added them with Dimensionals. Then came the torn card stock layer and the bobbin and linen thread. 

Now she placed the entire piece inside a clear envelope, folded over the excess and secured it with adhesive. Now she added the shaker circles from the top open edge before closing it off to seal.  Add it to your card base layers and you're done! 

You can see these clear envelopes here.  I use them for card swaps, storing & protecting my finished cards and of course for easy shaker cards. They're $7 for 50 envelopes! 

This is such a fun card to make AND receive! It's hard to stop shaking it! 

~~~

July Specials: 

Bonus Days!

Get a $5 coupon for each $50 order you place in July.  Use the coupon in August!

2. PAPER PUMPKIN 48-HOUR SALE!

3. Next is a Clearance Rack update!

See all items available here

4. NEW Online Exclusives will be available

See them all here

~~~

Plus my monthly special for online orders:

Get a free card kit & a new Beautifully Happy stamp set 

with online orders over $65; must use a host code.

*current host codes: BKEARDMW or GGDRKFQR

All Posts

  • Woo hoo! Free Shipping Thursday only! Don’t miss out on the savings.


    Exciting news!  Tomorrow Stampin' Up! is offering FREE SHIPPING! 

    For one day only, all orders over $75 will receive free shipping!

    Get your list started today so you're ready to place it tomorrow.  If you're local, send me your list by Thursday evening and I'll order it for you.  If you do not live in Minot, ND you can order online here!  Don't miss the savings!  

    Unfortunately the new Annual Catalog brings a few cost increases on card stock, ink, envelopes and a few adhesives. 

    Take advantage of this promotion to save now. 

    *You'll also receive extra gifts from me as a thank you! 

    Click here to shop. 

    ~~~

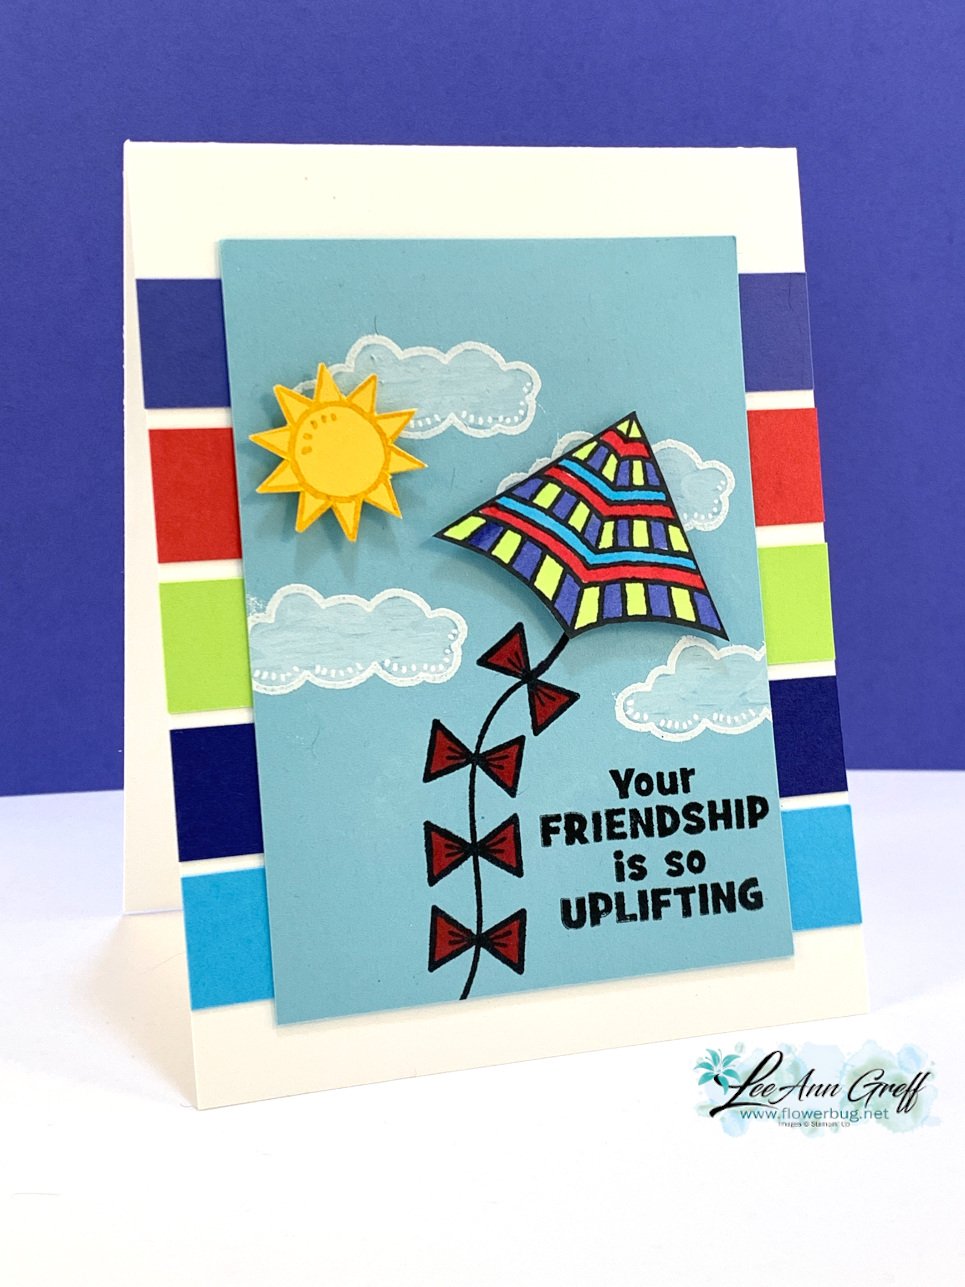
    Yesterday was my weekly Facebook Live where I shared 3 projects featuring the Kite Delight stamp set in the 2022 January-June mini catalog. This cute stamp set is NOT coming back in the new Stampin' Up! Annual catalog.  See it here. 

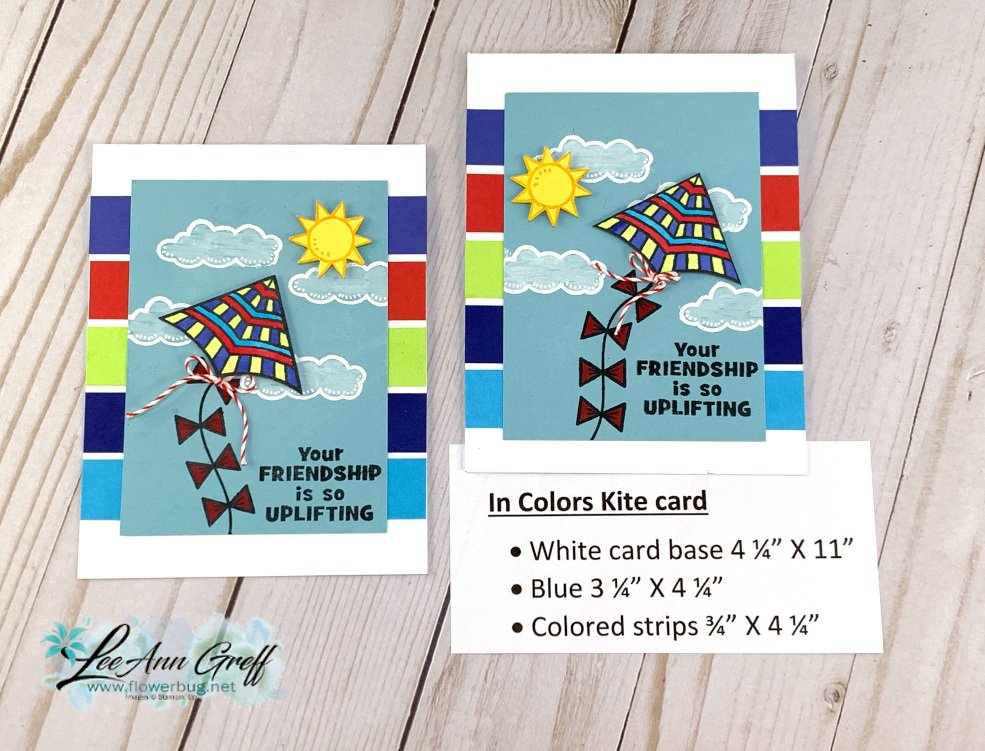
    I added all of the upcoming new In Colors to this card! 

    The clouds are heat embossed on the Balmy Blue CS using White embossing powder.  The clouds are an outline stamp but I wanted to fill them in to look 'white'.  So I used my Chalk Marker to color them in and love the effect!  I am so sad to report that this neat Chalk Marker was on the retiring list and is already sold out.  You could use White craft ink or White chalk pastels and color it in too. 

    The kite is stamped on White CS using Black Memento ink and colored in with the NEW In Color Blends markers. I fussy cut it and added to the card with Stampin' Dimensionals. 

    I stamped the sun image on a scrap of Daffodil Delight CS using Daffodil Delight ink and fussy cut it.  There is not a punch or dies to coordinate with this stamp set, but I didn't mind fussy cutting the kites or sun.  Easy to do! 

    Here's a link to the video.  Or click on the photo below to watch how to make this card and two more using the Kite Delight stamp set! 

    ~~~

    The Last Chance list is out!
    Tons of items from the 2021-22 Annual Catalog are retiring and many are deeply discounted from 20-50% off.
     
    Remember that these items are while supplies last and may run out. 
    Click here to see it all online along with the discounts.

    Host codes: E7S6DEAP

     *click here to order 

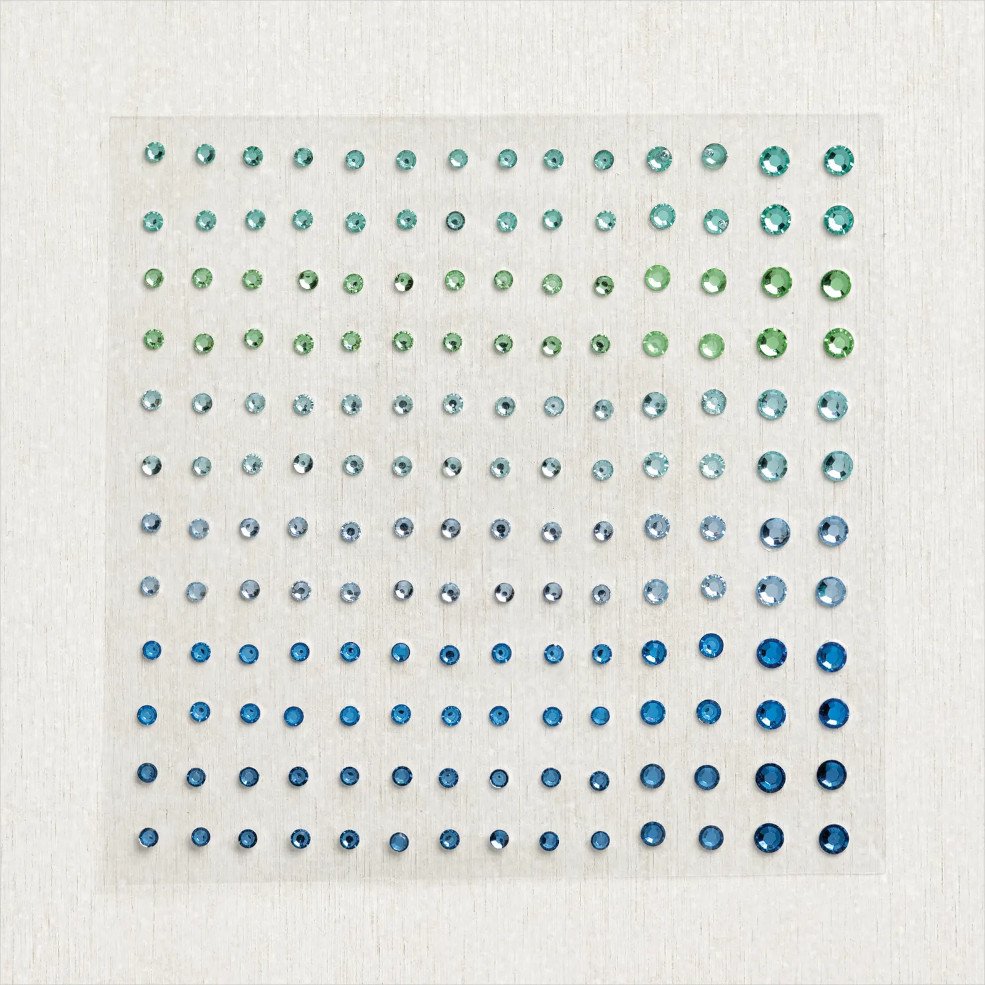
    If your order is over $50 you'll receive free Polished Dots or In Color jewels and 3 hand made cards from me.


    Don't forget about my loyalty rewards! 

    Click here to download yours and earn a $50 shopping spree!  

    Leave a Reply

    Your email address will not be published. Required fields are marked *

  • Control Freaks Blog Hop; ‘Can’t Live Without’ theme


    This month the Control Freaks are sharing their favorite retiring products in a 'Can't Live Without' theme.  There are so many wonderful items on the Last Chance list this year!  Be sure to really look at it so you have no regrets when they're no longer available.

    If you just arrived here be sure to click on the icon at the end of each post to see it all.  Or maybe you just arrived from Melissa's blog.  I love her style! 

    I'm focusing on the Garden Wishes stamp set & Dandy Wishes dies today. Both are marked down 40-50% right now!  

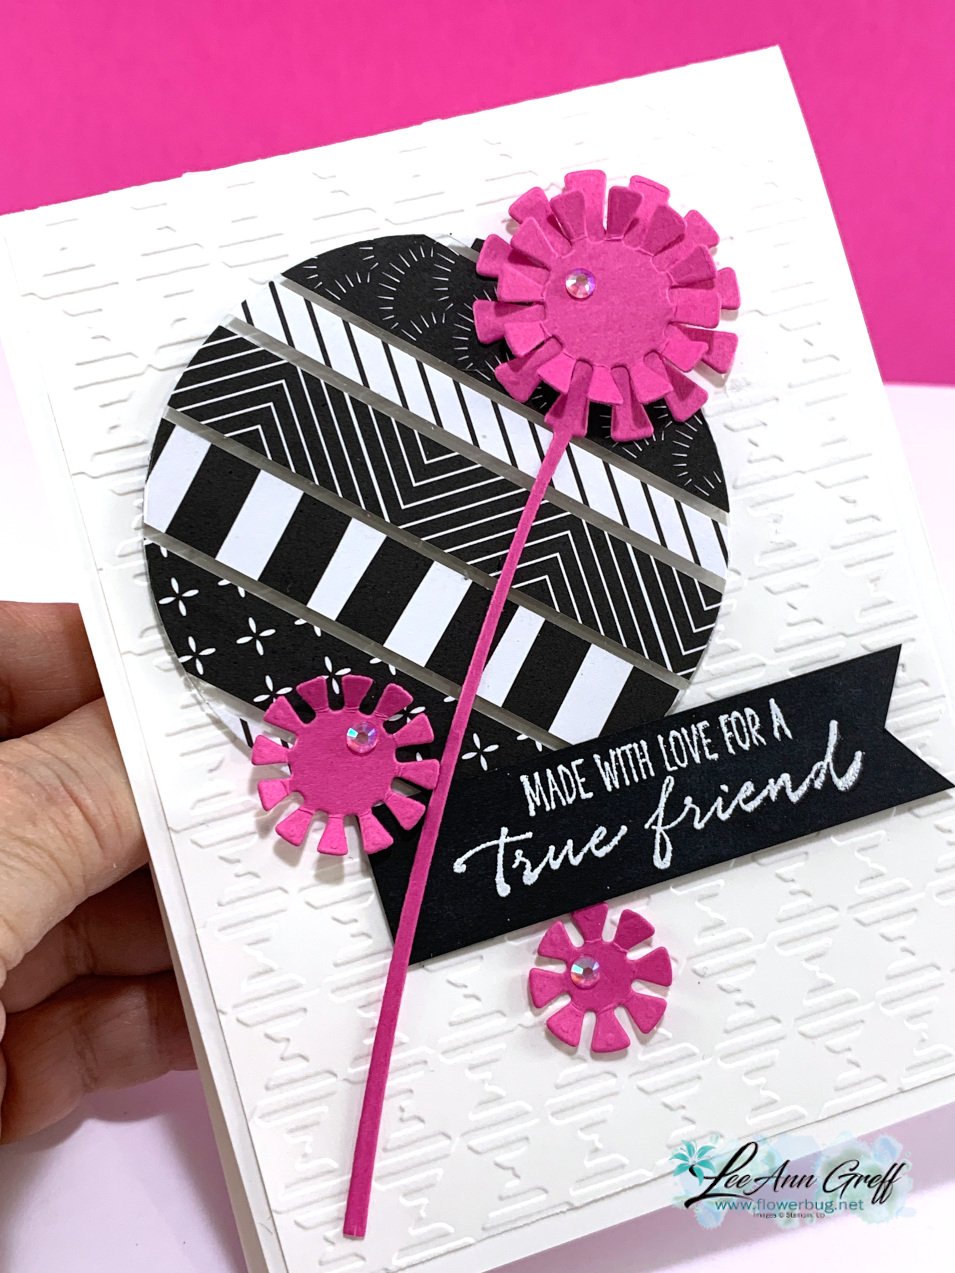
    This first card is bright & colorful in Magenta Madness, Black & White.  I love a black & white card with a pop of color.  

    The Designer Paper is the All Together 6 X 6" DSP; it's a special collection ending in May. 

    I used the 'Floating' technique here.  I adhered strips of various widths of Designer Series Paper to a piece of Window Sheet and die-cut it out with the largest circle in our Layering Circle dies.  Then I added dimensionals to the back and adhered it to a 4 X 5 1/4" White card stock that's been textured with the Gingham embossing folder. 

    Products retiring:

    • Dandy Wishes dies
    • Garden Wishes stamp set
    • All Together 6 X 6" DSP

    I just love these Dandy Wishes die-cuts!  They are unique. fun and give lots of texture to our projects.

    ~~~

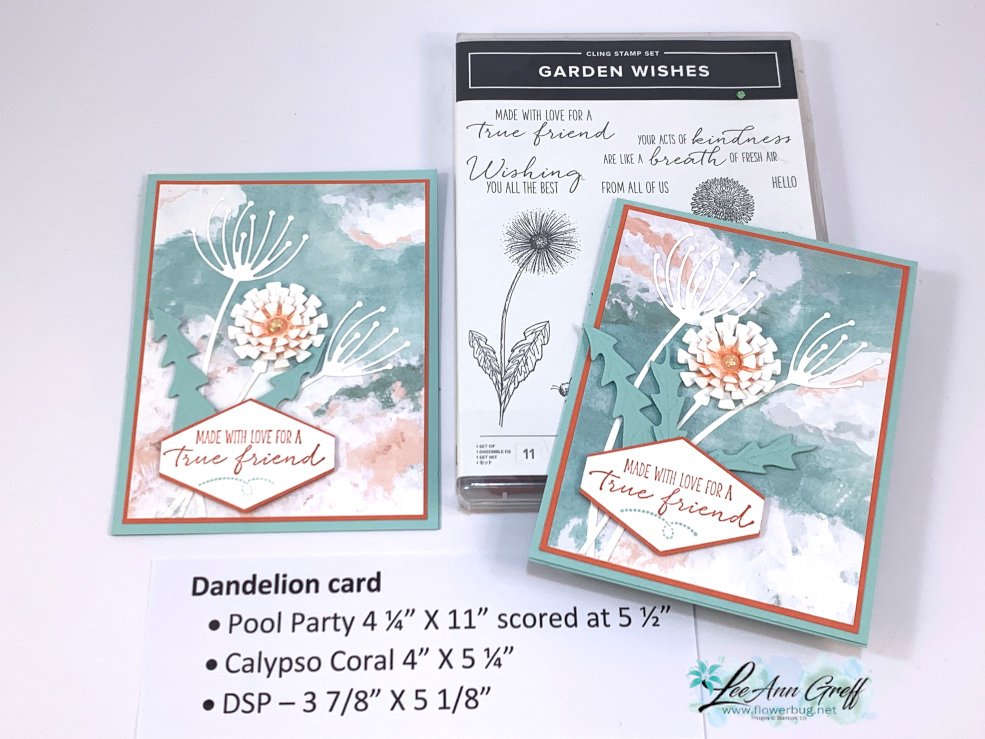
    Next is a pretty card that's soft and almost ethereal instead of bright & bold.  The colors include Pool Party, White & Calypso Coral.  

    I used the same greeting from the Garden Wishes stamp set and the same round 'Dandy Wishes' dies but also added more die-cuts in the set. I also sponged the center of the round die-cuts with Calypso Coral ink.  

    Notice the two sizes of the White 'dandelions'? I trimmed off a few of the thin, outer petals on one for a smaller flower. The Designer Paper background is from the Flowering Fields DSP in the 2022 January-June catalog. 

    I am SUPER SAD that the Tailored Tag punch is retiring.  It's so easy to layer this one! Just cut a second one in half horizontally. It's my 'go to' punch for greetings. If you don't have this punch, get it now; it's on sale! 

    Retiring items:

    • Dandy Wishes dies
    • Garden Wishes stamp set
    • Flowering Fields DSP
    • Tailored Tag punch

    *Remember the Last Chance products are while supplies last and many are already gone. 

    Be sure to check out what Wendy has to share; she's super creative and crafts 'outside the box'!  

    ~~~

    The Last Chance list is out!
    Tons of items from the 2021-22 Annual Catalog are retiring and many are deeply discounted from 20-50% off.
     
    Remember that these items are while supplies last and may run out. 
    Click here to see it all online along with the discounts.

    Host codes: E7S6DEAP

     *click here to order 

    If your order is over $50 you'll receive free Polished Dots or In Color jewels and 3 hand made cards from me.


    Don't forget about my loyalty rewards! 

    Click here to download yours and earn a $50 shopping spree!  

    Leave a Reply

    Your email address will not be published. Required fields are marked *

  • A simple trick makes this Floating Pop-Up card work; with measurements & video!


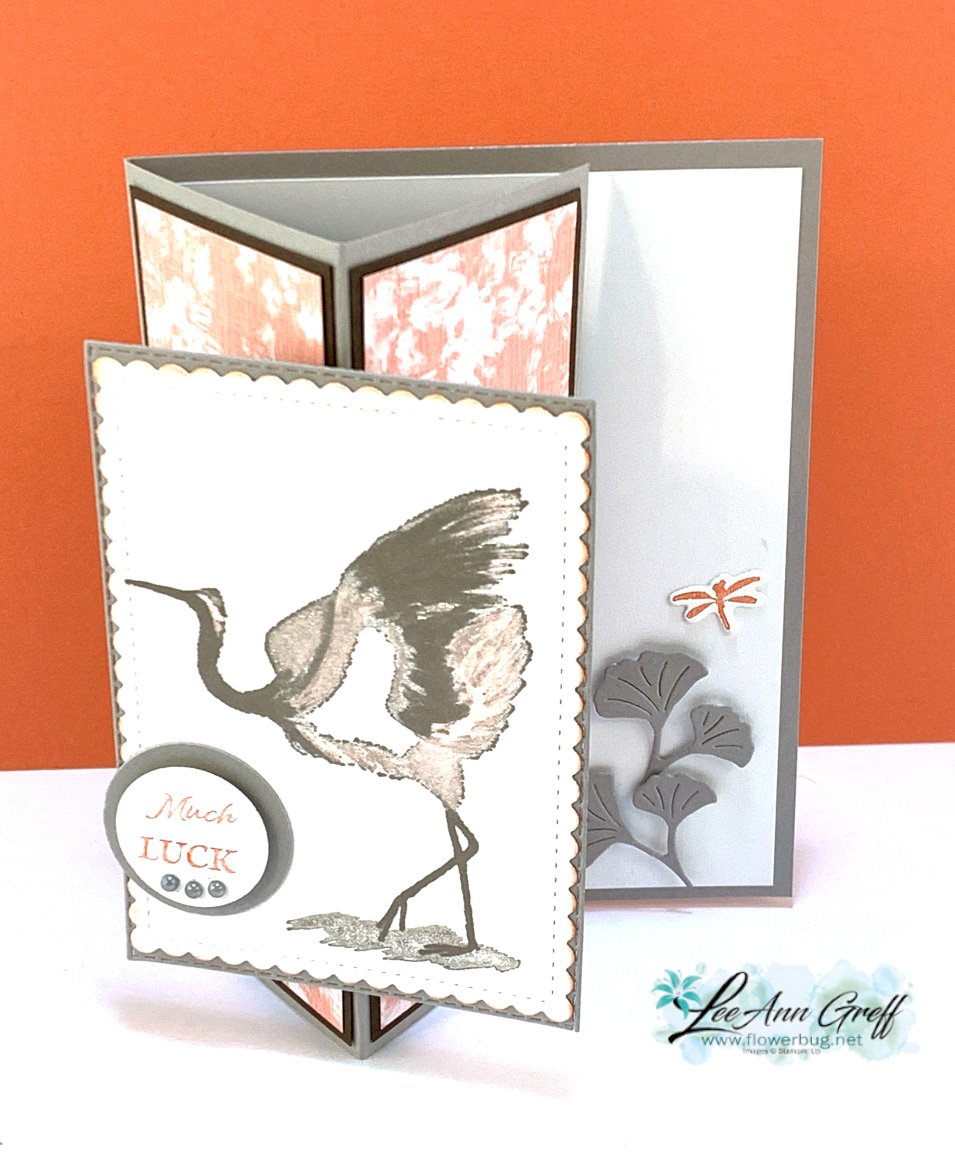
    This special fancy fold card is super unique and makes you wonder just how it's sort of floating!  You will be shocked at what it takes to make it work.  

    I used the Crane of Fortune bundle to create this card. The colors are so soft & pretty – Gray Granite, Calypso Coral, White & Early Espresso. 

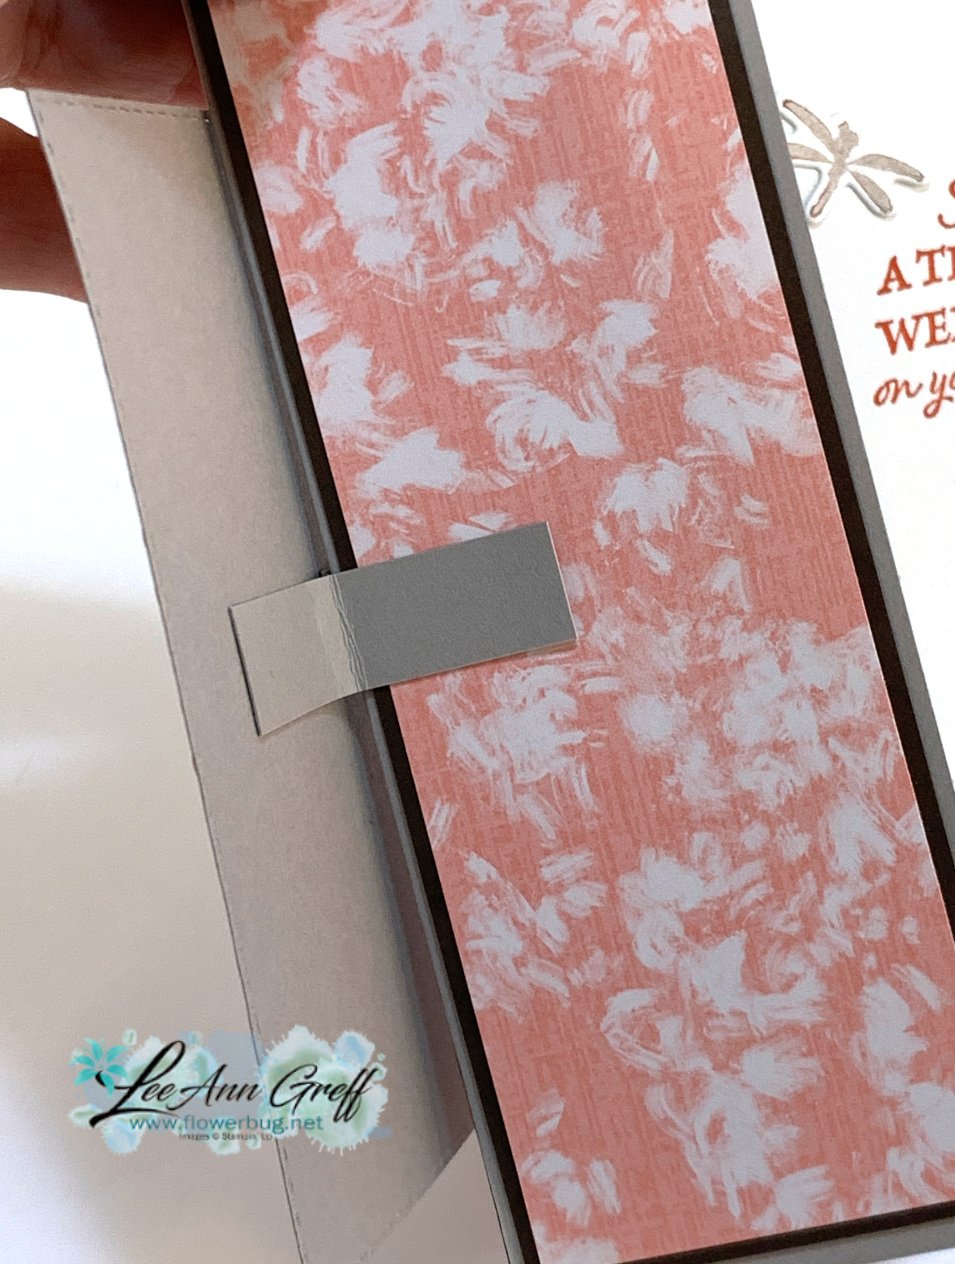
    The front panel flips up as you open the card and it even wobbles a bit.  You can see how it works in the video, or scroll down to the next photo.  

    I stamped the main image on a die-cut from the Stitched So Sweetly dies. They are on the retiring list; so if you don't have them yet you know what you need to do! 

    The Good Fortune dies include the pretty leaves I used to hold my card open. When doing this be sure to add Dimensionals under the image to support the card open.  

    You need two little pieces of card stock under the front layers to make the pop-up work.  Mine are 1/2" X 2 1/2" but size really does not matter here.  Just fold them in half and secure one side to the card base and the other to the top layer. Do this on each side of the front panel. Again, please watch the video here to see how it works.  

    Please follow me on Facebook here to catch my Live videos each week.  I share 6 each month and my focus is to inspire you to stamp by sharing great ways to use Designer Paper, unique fun folds and easy techniques.  


    Click on the photo below to watch the video. 


    ~~~

    The Last Chance list is out!
    Tons of items from the 2021-22 Annual Catalog are retiring and many are deeply discounted from 20-50% off.
     
    Remember that these items are while supplies last and may run out. 
    Click here to see it all online along with the discounts.

    Host codes: E7S6DEAP

     *click here to order 

    If your order is over $50 you'll receive free Polished Dots or In Color jewels and 3 hand made cards from me.


    Don't forget about my loyalty rewards! 

    Click here to download yours and earn a $50 shopping spree!  

    Leave a Reply

    Your email address will not be published. Required fields are marked *


Notice: LeeAnn Greff, Independent Stampin’ Up! Demonstrator, Manager. The content of this website is my sole responsibility as an independent Stampin’ Up! demonstrator and the use of, and content of, the classes, services, or products offered on this website is not endorsed by Stampin’ Up! Copyright 2025